A Guide To Integrating CodePush To Your React Native App: Part 2
Learn how to make changes in your React Native application and ship them instantly to your users’ iPhones.
CodePush is a cloud service that enables Cordova and React Native developers to deploy mobile app updates directly to their users’ devices. With just a few simple steps, you will be able to make changes in your React Native application and ship them instantly to your users’ iPhones. Please refer to Part 1 of the series for integrating CodePush to Android. I will only cover the iOS-specific steps in this sequel as the common steps for both have already been covered in Part 1 .
You can not publish the first version of your app via App Center. The first version must be published through App Store Connect.
1. Create an app on App Center
Step 1. Make sure that the application is already published on App Store.
Step 2. Open appcenter.ms and click on Add New App.
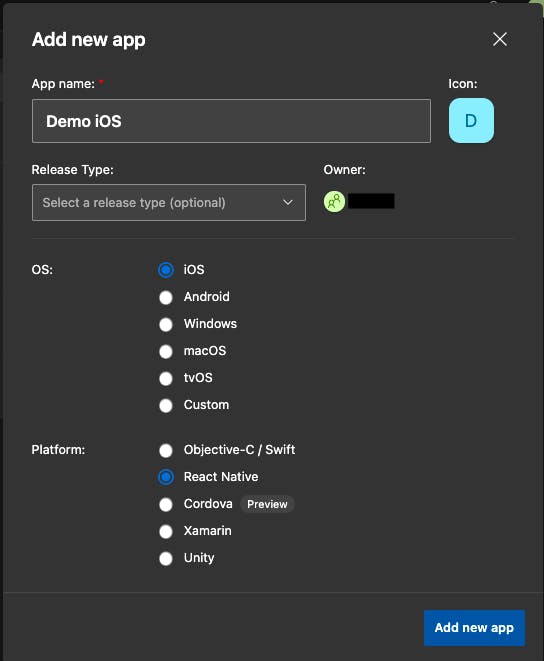
Step 3. Enter your app name and proceed to the OS section. Next, select iOS and then select React Native under Platform. Click on Add New App as is shown in the below image:
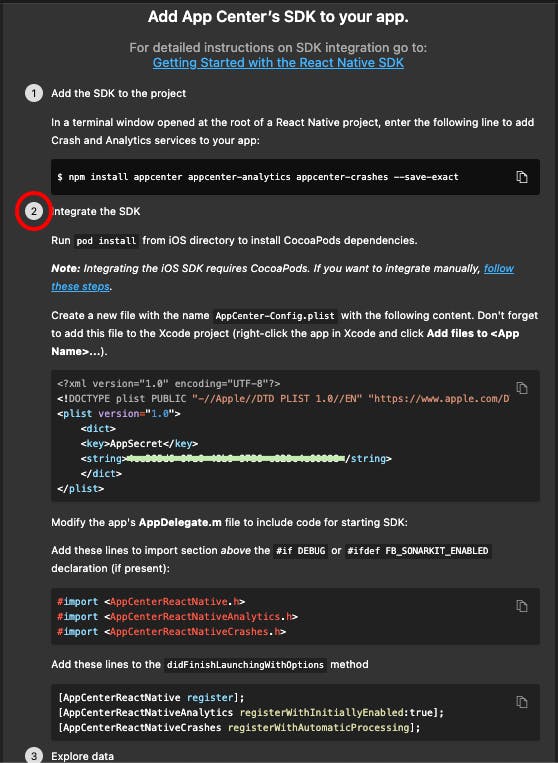
Step 4. As we have already integrated the App Center analytics and crashes in Part 1, we just need to follow Step 2 as shown below:
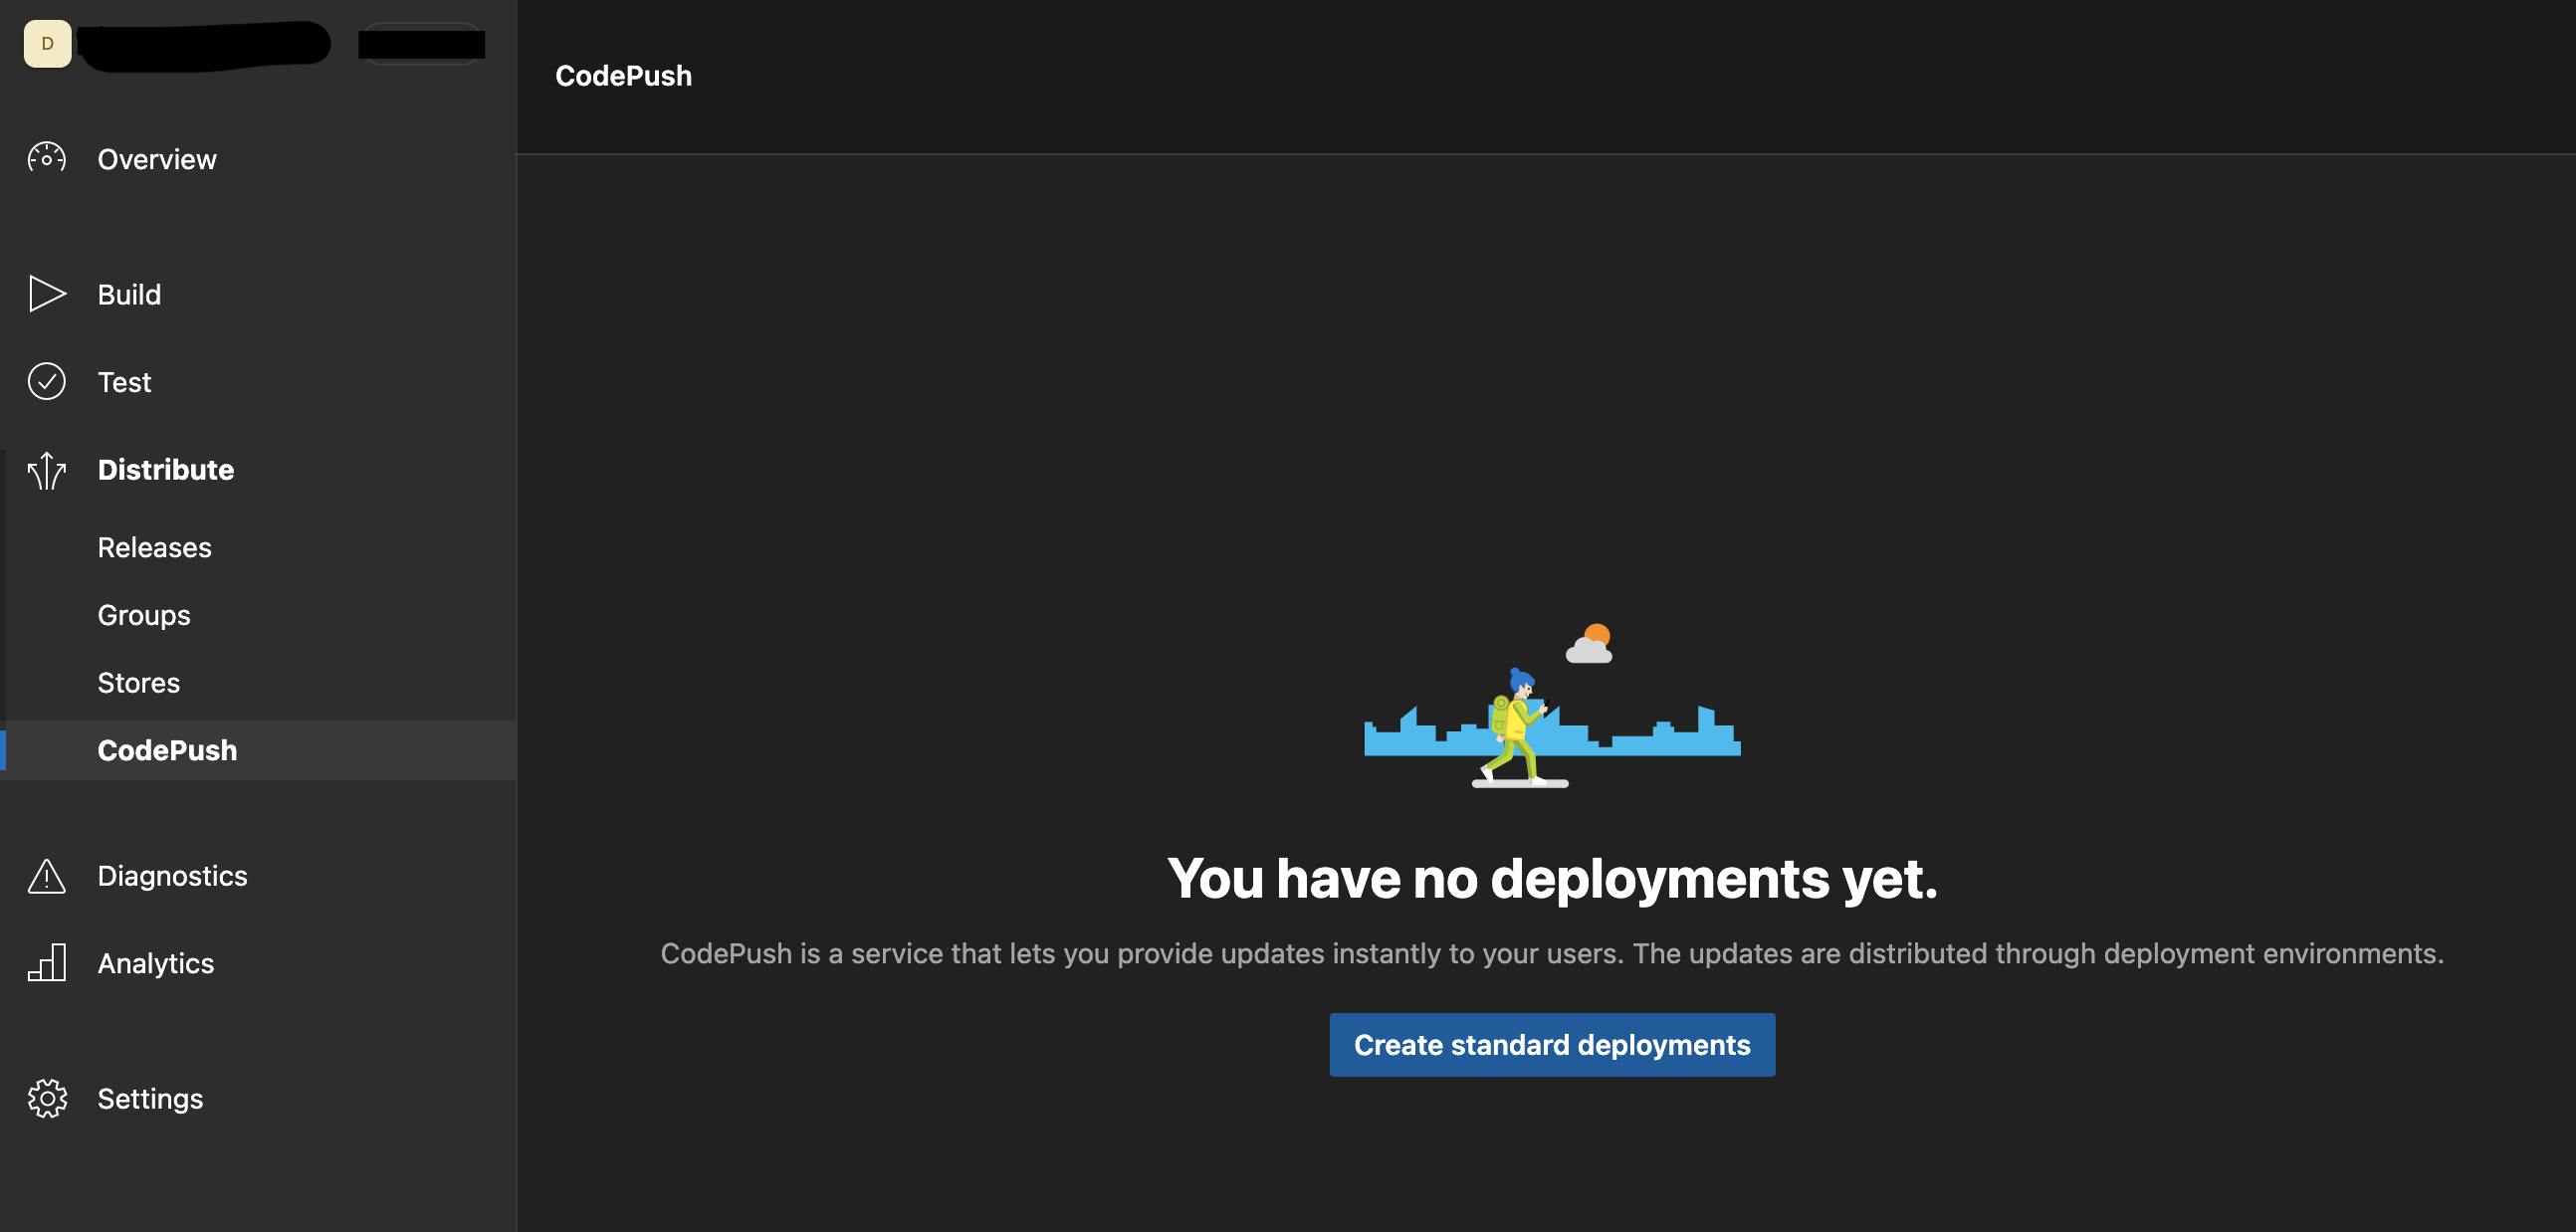
Step 5. Post this, go to Distribute and select CodePush in the left section of the App Center website.
Step 6. Next, click on Create Standard Deployments to see something like this:
Step 7. On the next screen, click on the Settings icon in the top-right corner. You may change the staging environment to Production from this section as shown below:
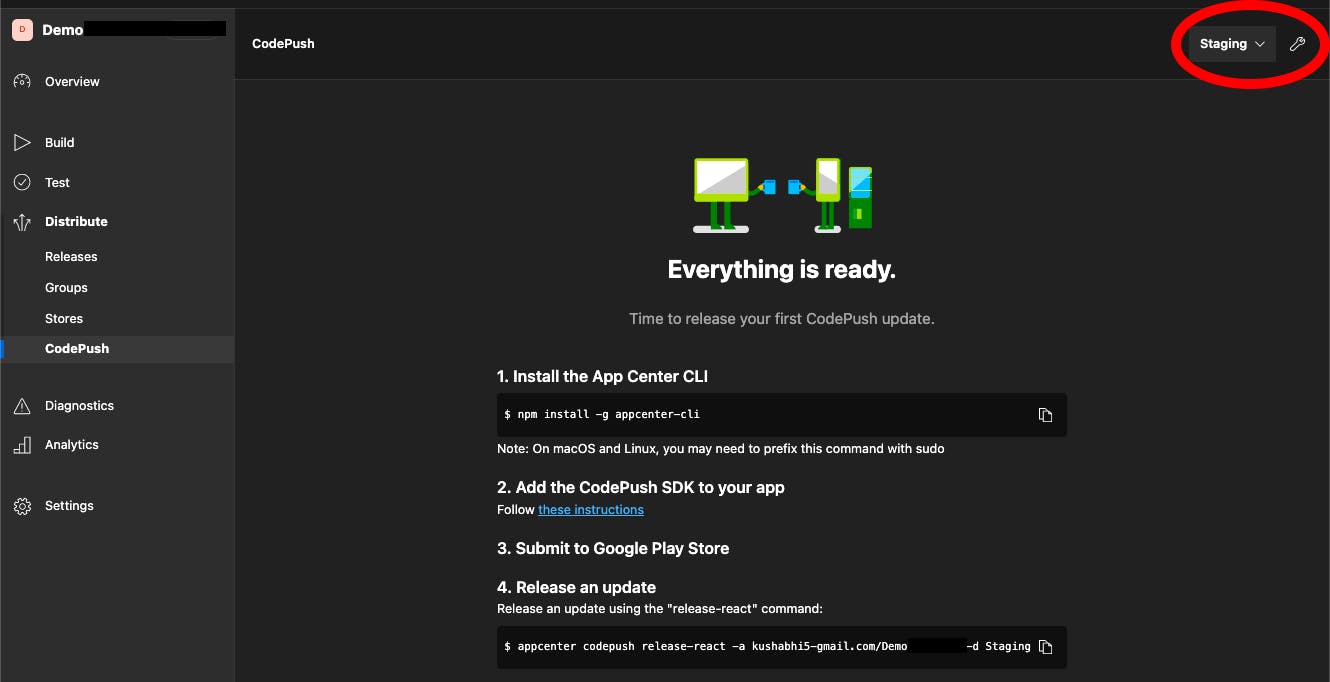
Step 8. The keys for production and staging will be exposed as you click on the settings icon. Copy the desired key as this will be needed to execute Step 12.
2. Install and integrate React Native CodePush
Step 9. I assume react-native-codepush is already installed in your project (as explained in Part 1). If not, you can install it from here .
Step 10. Moving forward, integrate the react-native-codepush package into your iOS app with the steps from this link .
Step 11. In the above link, you will come across something like this:
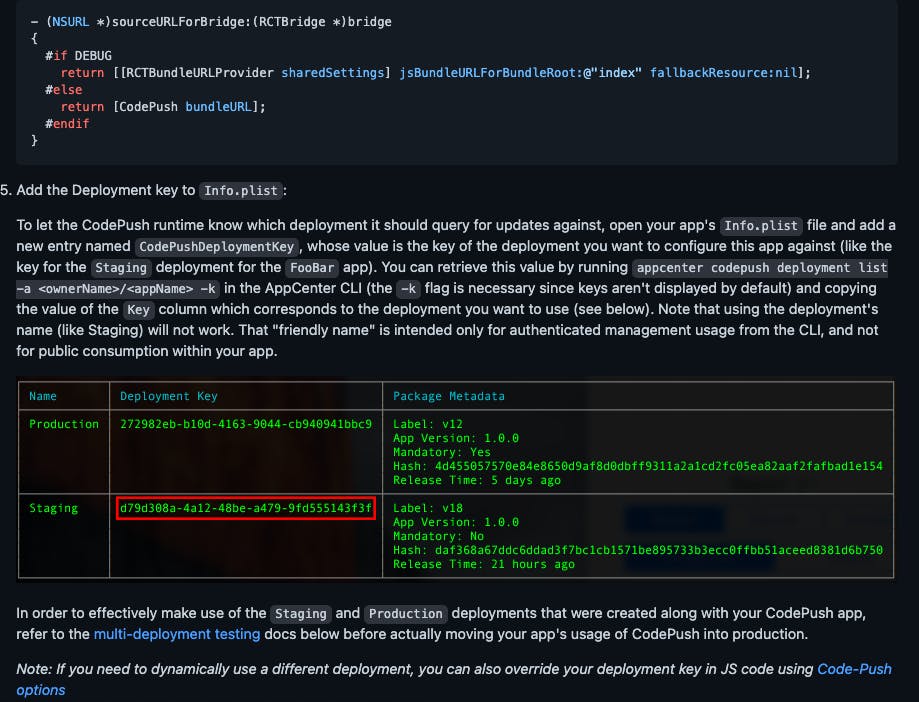
Step 12. Remember the key you copied in Step 8? Yes, you have to use that key here to complete the integration of CodePush!
Step 13. After completion of the aforementioned steps, you can edit the App.js file to the React Native app.
3. Connect App Center to App Store
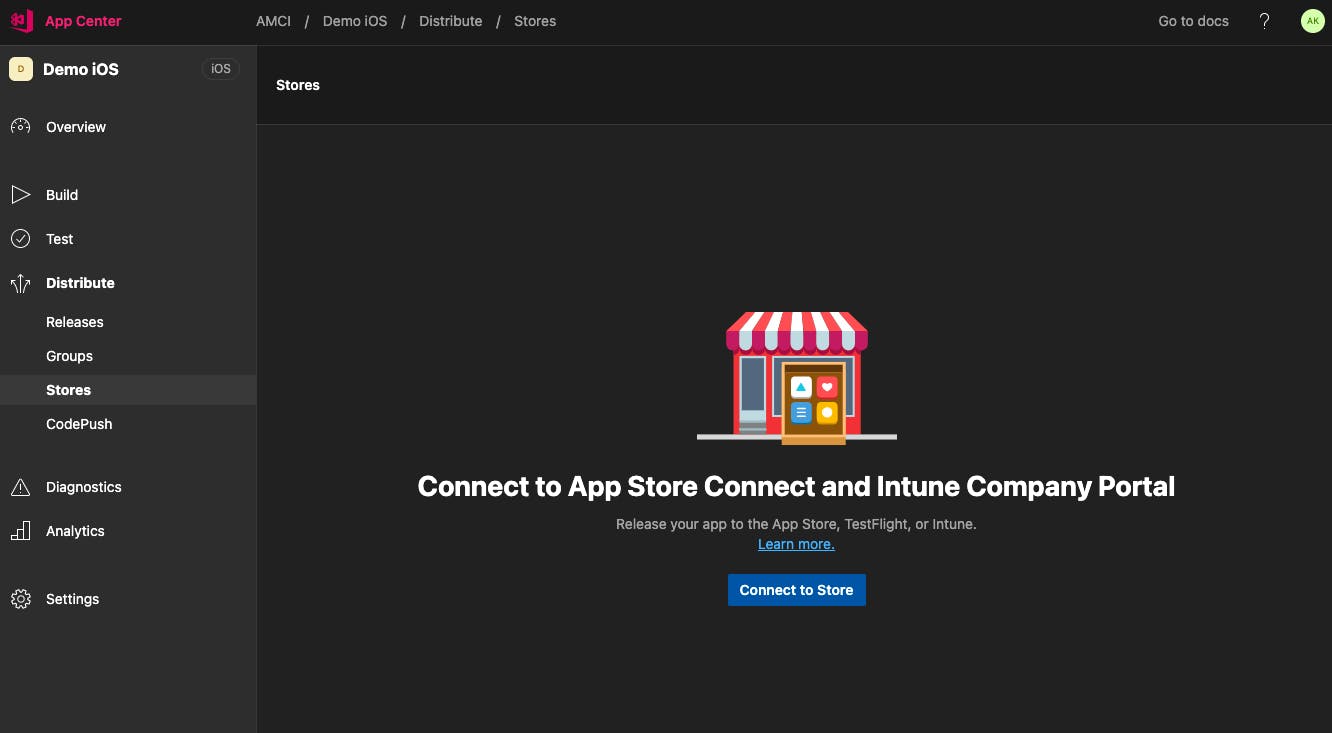
Step 14. In the App Center console, click on Stores under the Distribute section after which you have to click on Connect to Store. This is visually represented for better understanding in the below image:
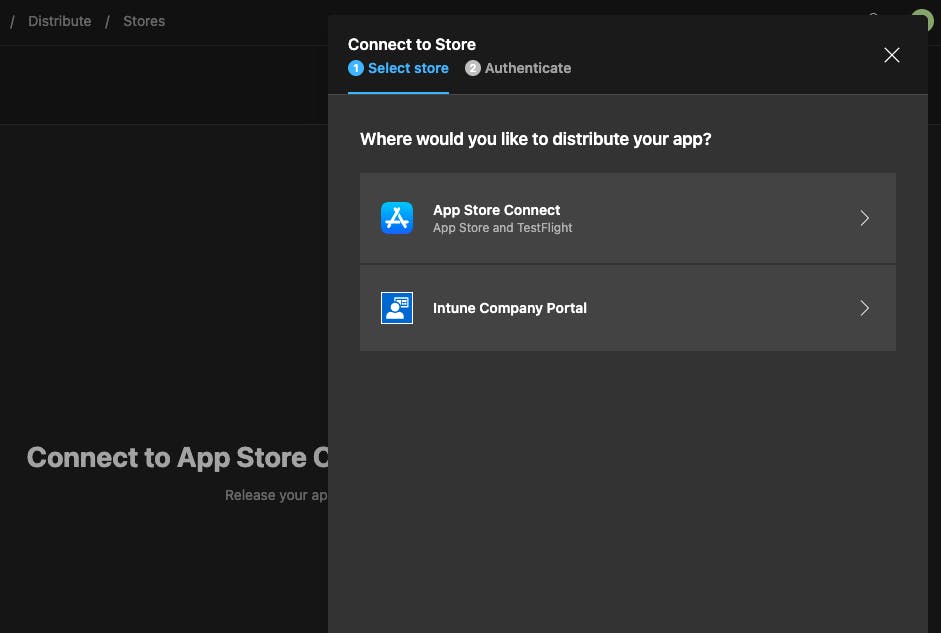
Step 15. Next, select App Store Connect as shown:
Step 16. In the next step, you will see a list of iOS apps associated with your Apple developer account. Choose the required app and assign it to achieve the result shown:
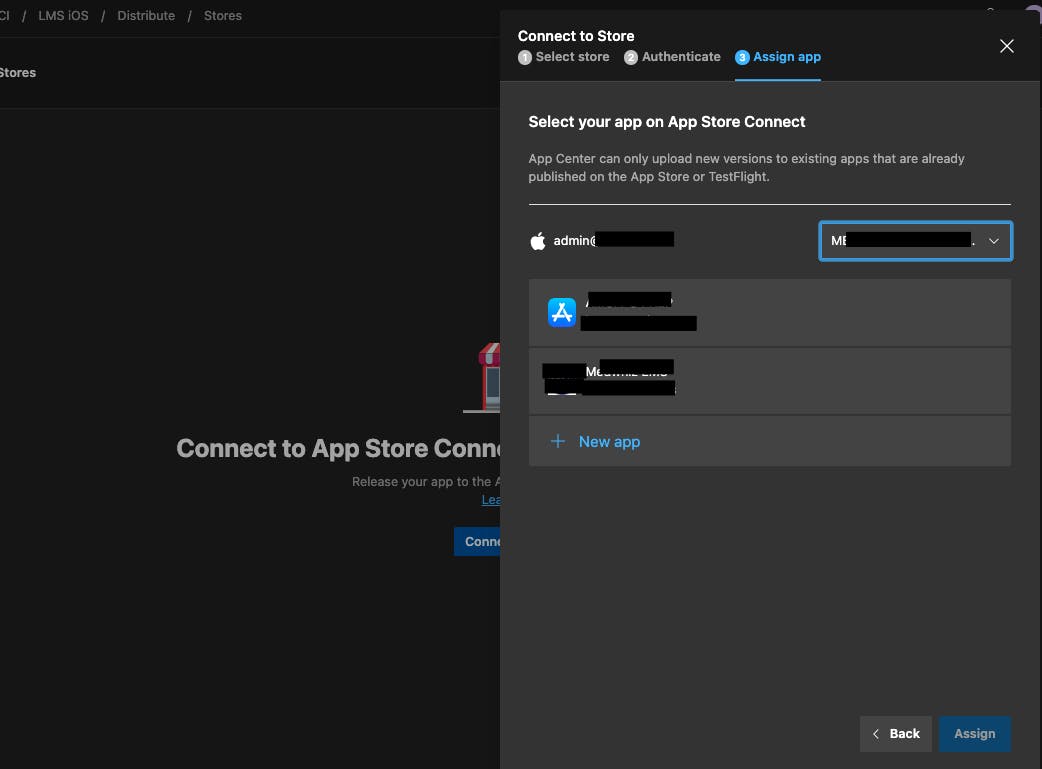
Step 17. As you click on Assign, there is a chance that you may encounter the following error:
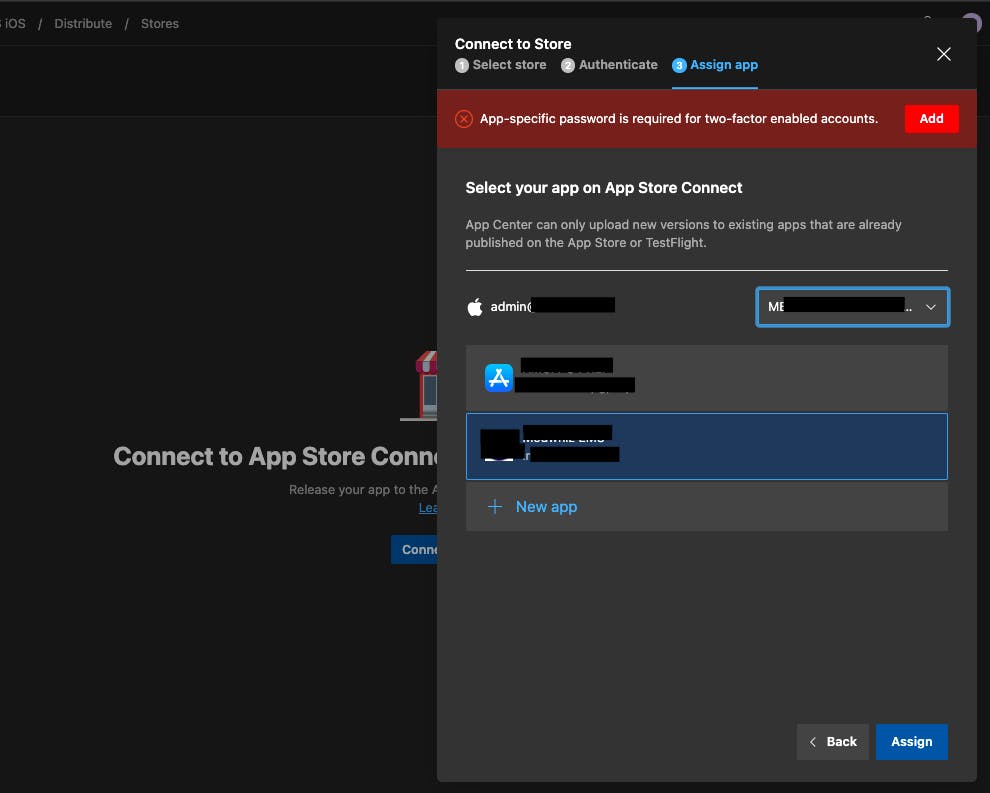
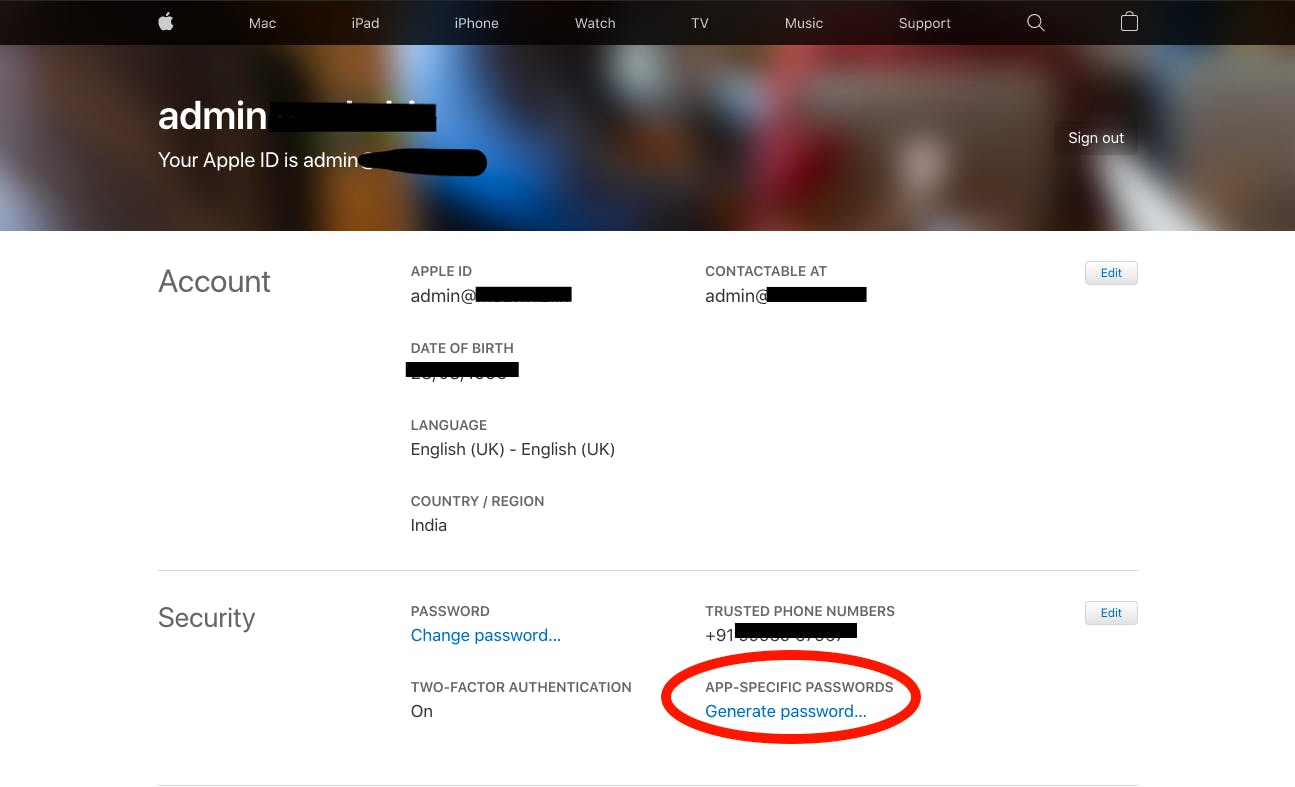
Step 18. To resolve this error, you will need to generate an app-specific password from your Apple developer account as shown in the image below:
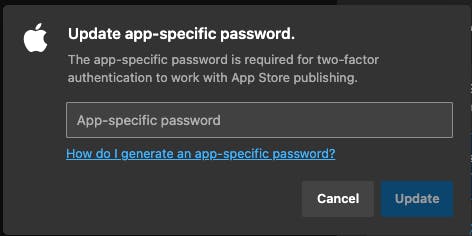
Step 19. Moving forward, copy the app-specific password that you just generated and paste it to the App Center. You can refer to the below image for this:
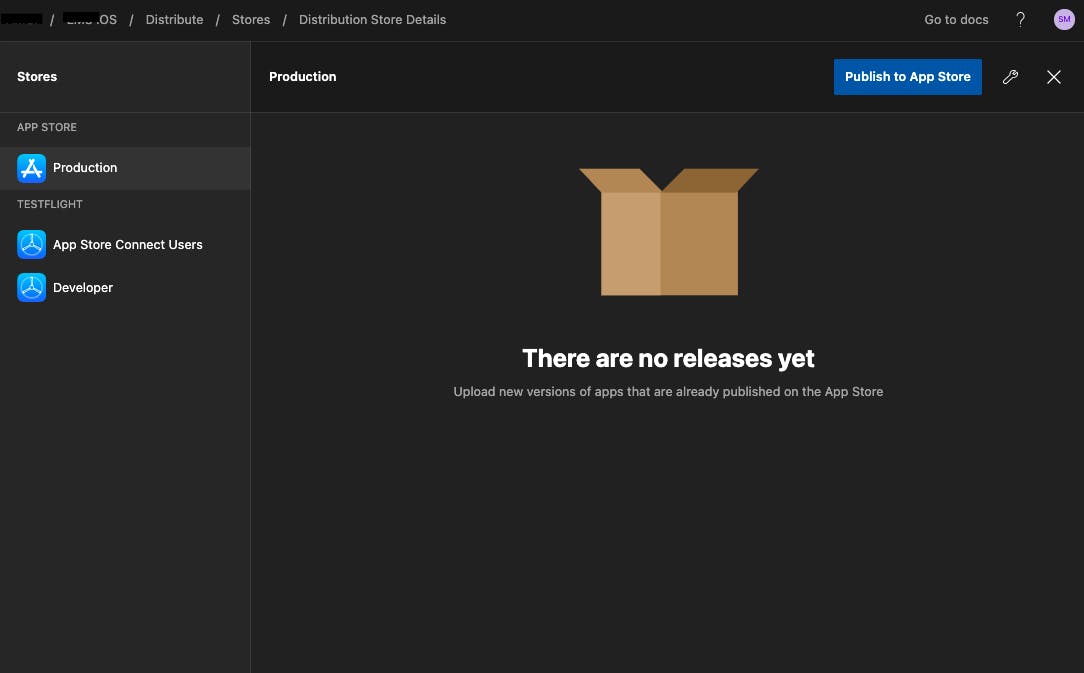
Step 20. Next, click on Stores under the Distribute section and select Production. Click on Publish to App Store to come to the screen shown below:
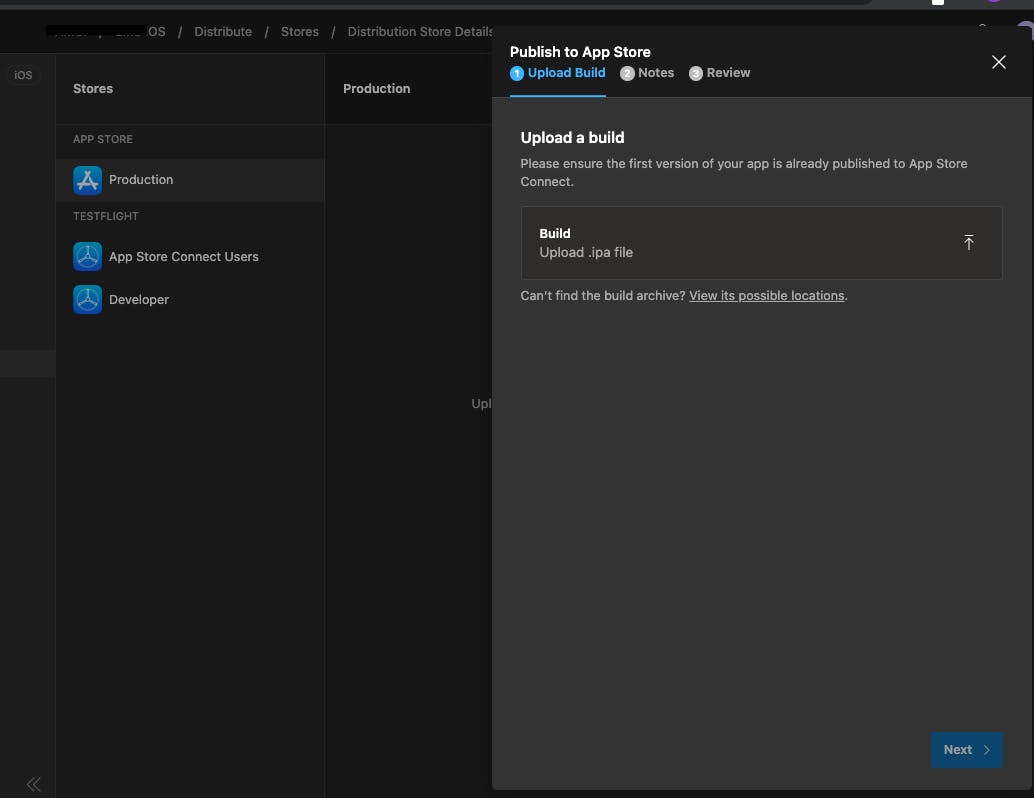
Step 21. As you proceed, you will need to generate an IPA for production from Xcode and upload the IPA file as shown:
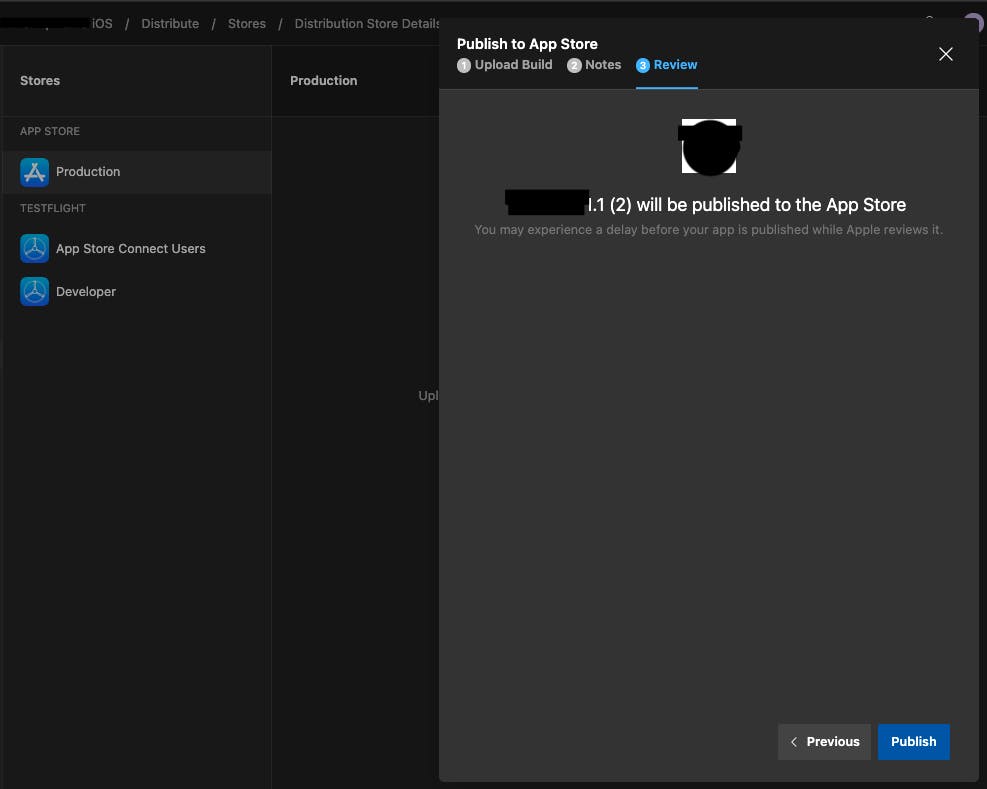
Step 22. In the next step, enter Release Notes. Click Next and finally click Publish to achieve the following result:
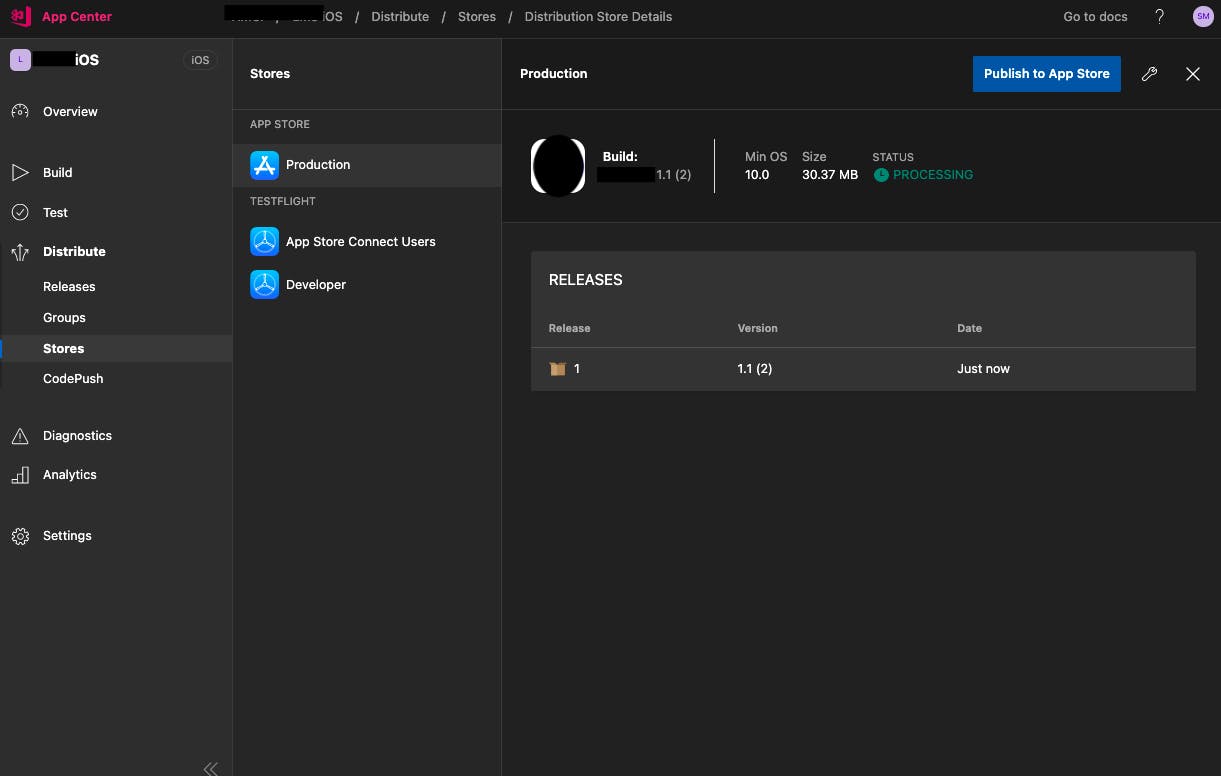
Step 23. Celebrate! You have successfully integrated App Center and CodePush into your iOS application. The screen should now appear like this:
Conclusion
After completion of all the steps given above, Apple will receive permissions to review your app (as an update) and this process generally takes a few hours. Once approved, you can make changes in your app and run the command given in Step 4 below. As you run this command, your changes will be shipped to the end-users within a few minutes!
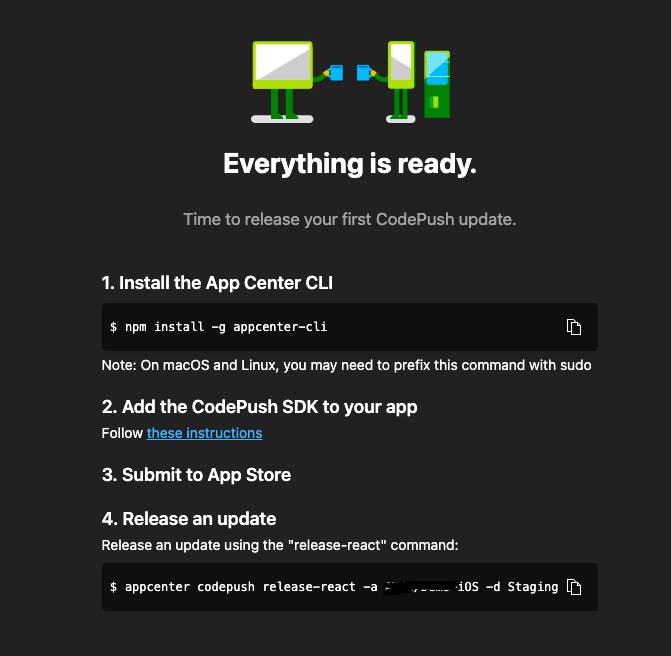
If you are releasing an update through CodePush, don't forget to insert the mandatory flag -m. I was stuck with this problem for 2 days. I released updates but the changes were not reflecting in the users' devices. Then I ran the release command given below, and it worked!
appcenter codepush release-react -a <YourName>/<AppName> -d Production -m --description '<Description>'
Hope you've had an interesting read!

