Adding Custom Fonts (A Complete Guide) - React Native 0.60+
A complete guide to adding custom fonts on React Native and fixing any lags
Font plays a pivotal role when it comes to building an adequate user interface for an application. In this article, we'll be adding custom fonts to our app in easy steps and we'll be discussing some of the issues and challenges that arise during this implementation process and ways to resolve them.
Here are some of the issues that you may face while implementing custom fonts in React Native:
- Fonts are not functional on android.
- Fonts are not functional because of already installed
vector-icons
Note: You can go directly to the Resolving the Issues section if you're facing issues post adding custom fonts.
Creating a new application
To initialize a React Native project, paste the following into your terminal:
npx react-native init myApp
Adding font files to the assets/fonts folder
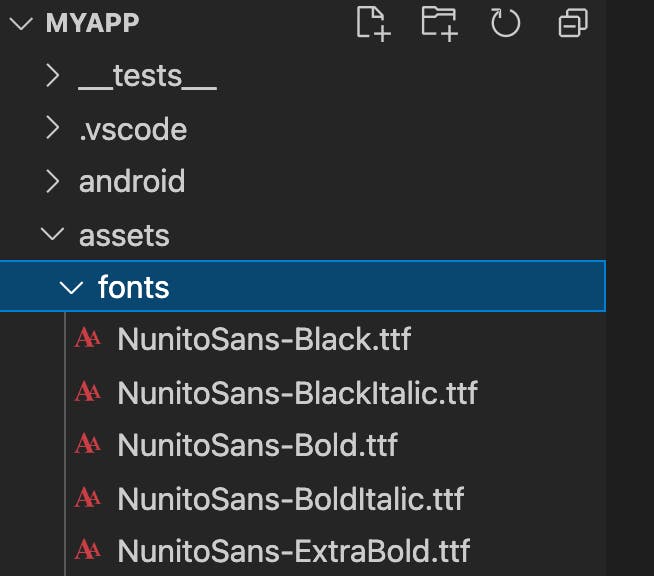
Add a new folder with the name assets at the root of your project and create a sub-directory with the name fonts in it and add all your font files into it as shown below:

Creating a configuration file
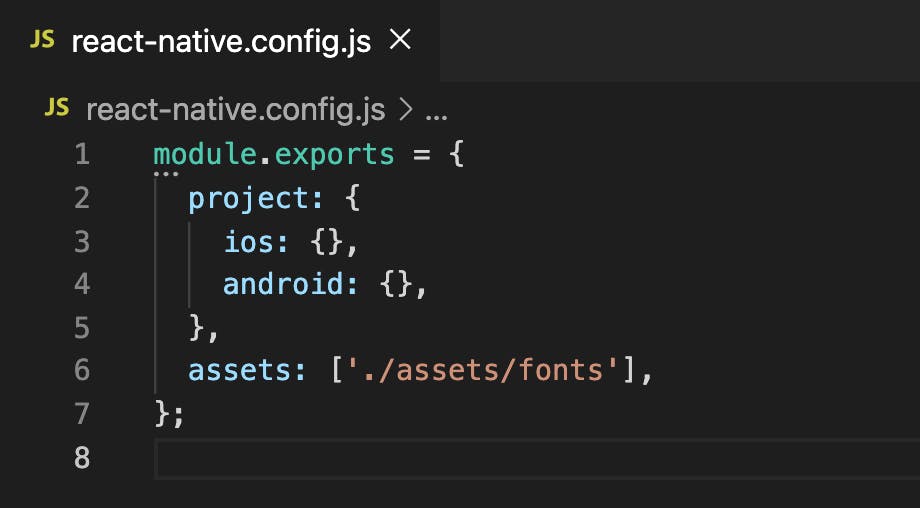
Create a react-native.config.js file in the root of your project and add this code to it:

Linking fonts files to the app
Run this command and you'll be ready to go:
npx react-native link
Re-run your app
To re-run your application, close the metro bundler and re-run your app as shown below:
react-native run-ios or npx react-native run-android
Using fonts
To use the fonts that were created, use the code given below:
<Text style={styles.fontText}>I am a text with a font-family</Text>


const styles = StyleSheet.create({
    fontText: {
      fontFamily: 'NunitoSans-Bold',
      fontSize: 20,
    },
});
Resolving the Issues
We've had a good flow to the above processes till this point. But you might come across lags in the process, which was my reason for writing this article.
Using fonts with already installed vector-icons
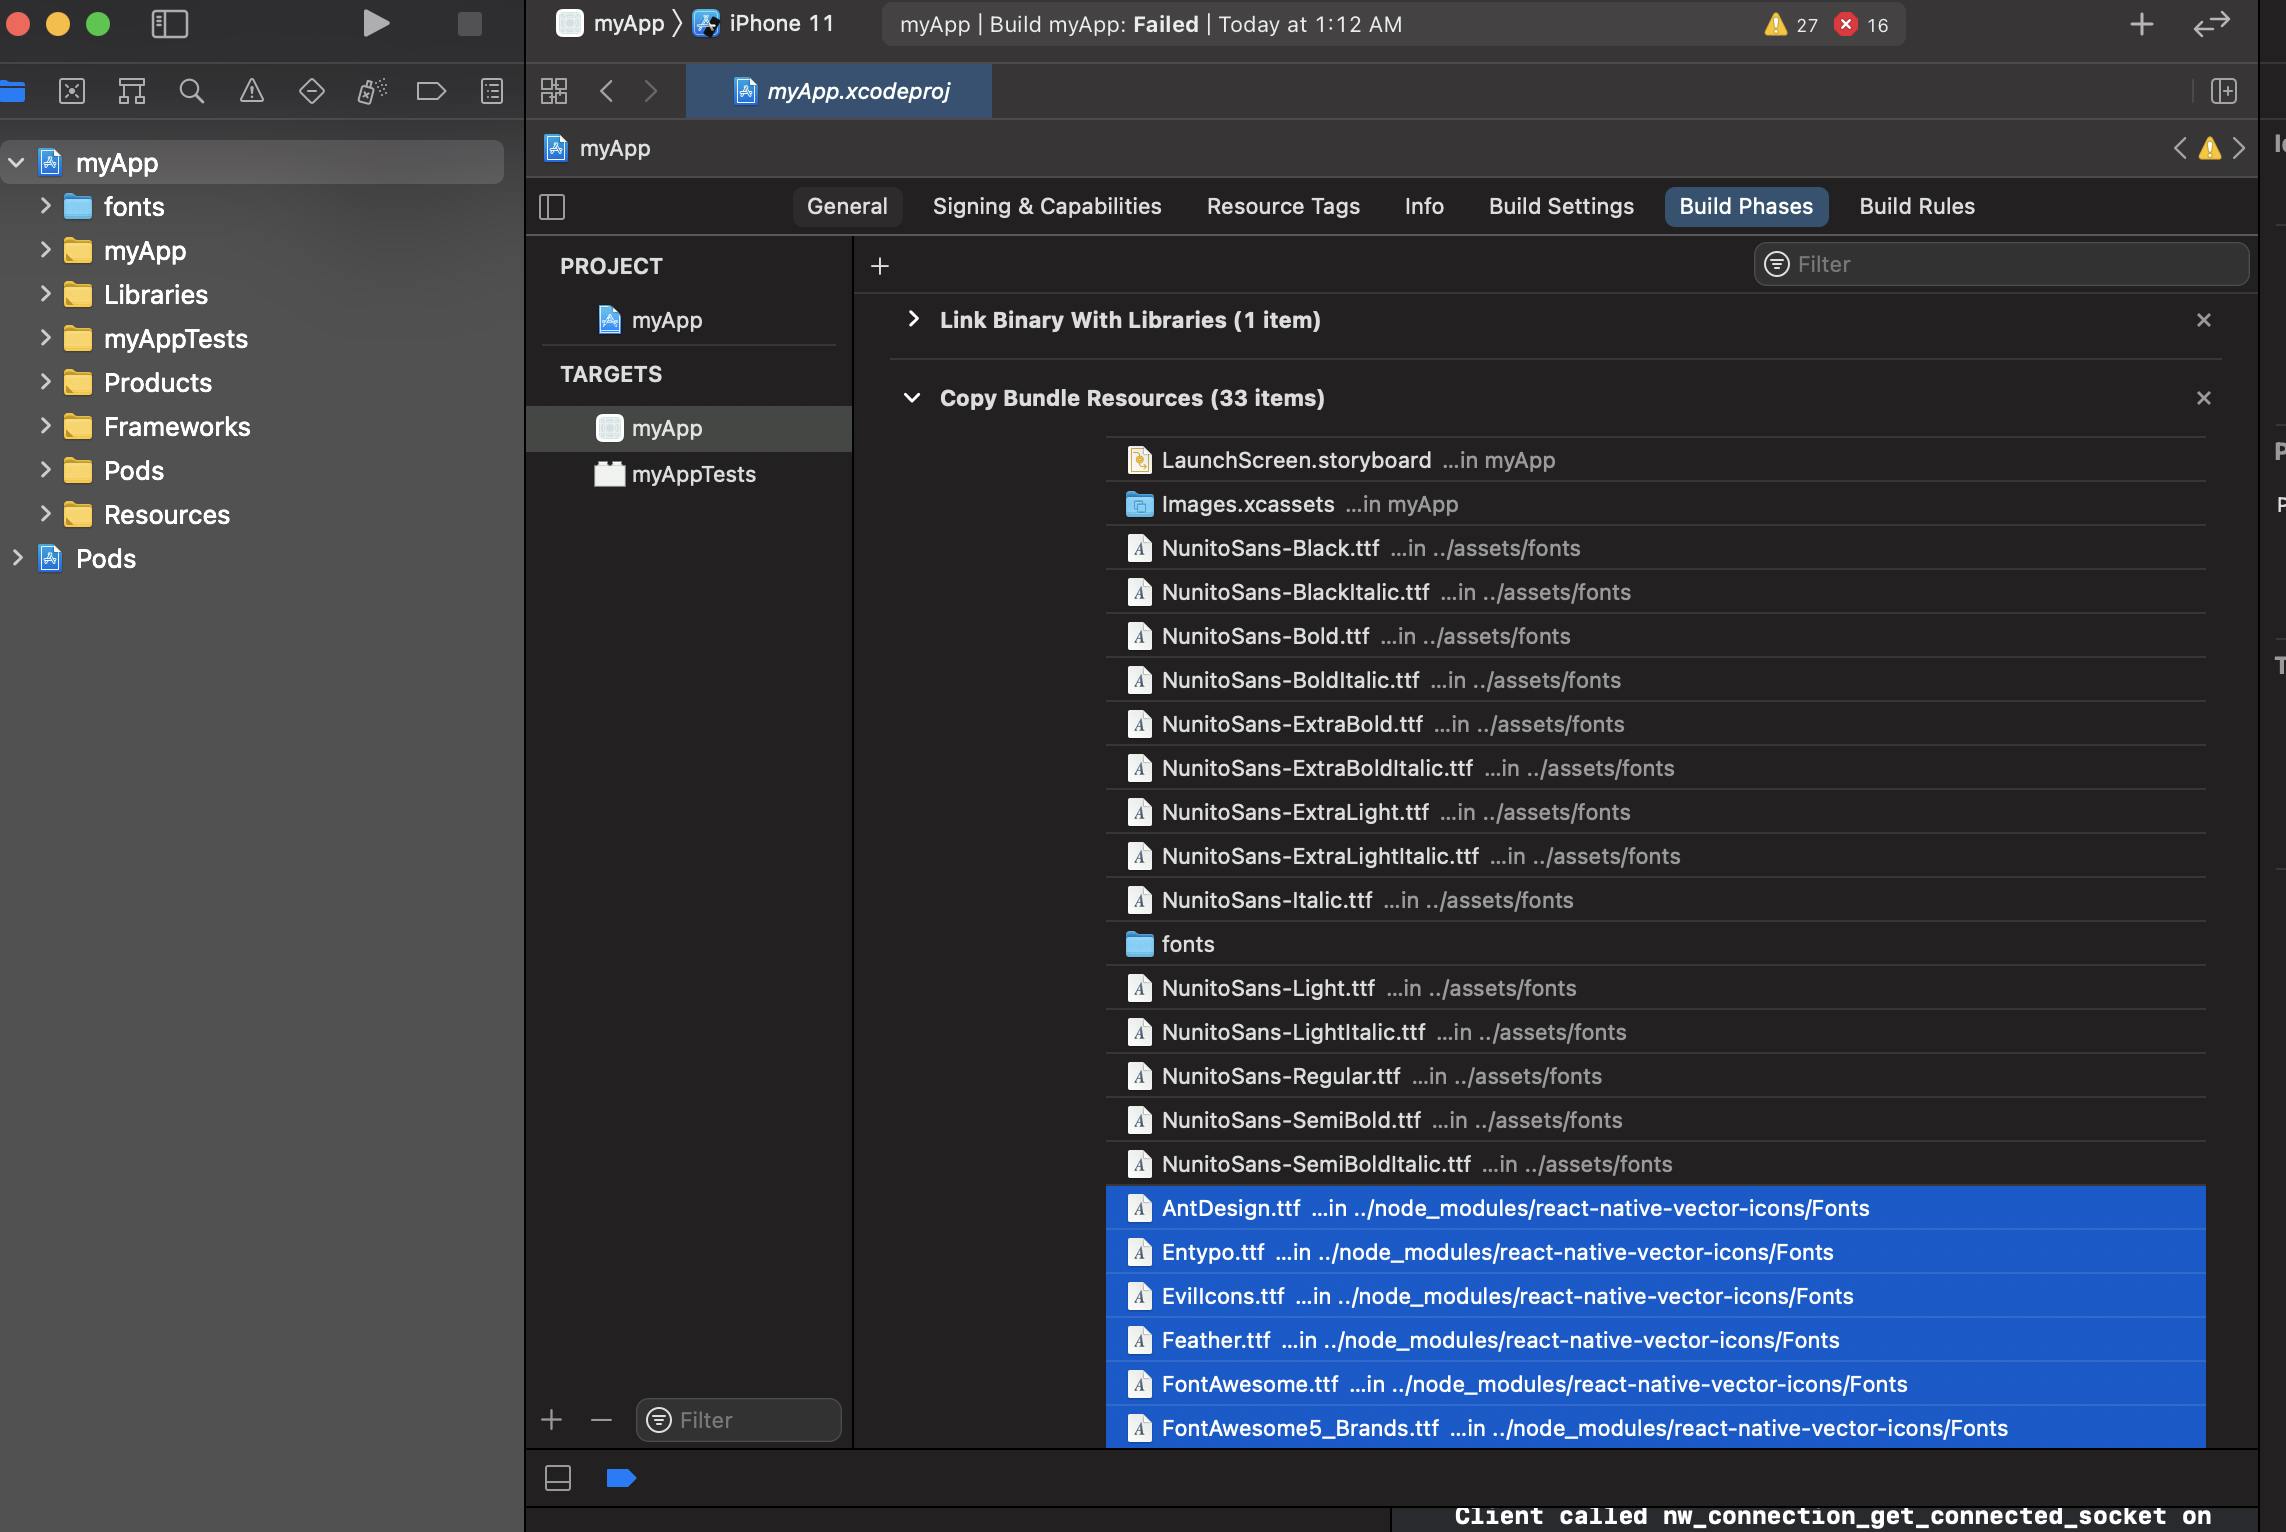
If you are already using React Native vector-icons, you might get an error after running npx react-native link and building the app, which took me hours of research to fix. See how its done in the below image:

Here's how you can fix this one:
Click on Build Phases which will take you to Copy Bundle Resources. You will find a list of vector icons attached. Remove all the vector icon files and re-run your app as shown below:

Fonts not functional on Android
There can be many reasons for your fonts not working on android:
- Some fonts don't work with the same
font-familyname format. Try changing yourfont-familyname fromNutinoSans-Boldtonutinosans_boldon android. You can also define font-family based on thePlatform. Use the following code to achieve this:
fonts: {
  ...Platform.select({
    ios: {
      OGMedium: 'OGBrother-Medium',
      NunitoBold: 'NunitoSans-Bold',
    },
    android: {
     OGMedium: 'ogbrother_medium',
     NunitoBold: 'NunitoSans-Bold',
    },
  }),
},
Note: NutinoSans-Bold works well for both cases, but in the case of some font families it this might not be the same.
- Sometimes fonts don't work on android because of the
font-weight. Try removing that.
If your fonts are still not working, you need to remove the old font files from the
assets/fontsfolder and replace them with the new files with the names insnake_caselikeogbrother_mediumandnutinosans_bold. Try linking the files again after thisSometimes fonts don't work with
font-weight:"bold". Try to replace this with a font value likefont-weight:"700".
Conclusion
Thanks for reading. Hope this article has helped you understand how to add fonts . Do comment! if you have any doubt or query, and feel free to add more issues that you faced while adding custom fonts to your project other than these.

