Hey guys, today we will deploy a NodeJS app on Amazon EKS using the cutting edge Docker & K8s in the DevOps sphere.
What is Docker?
Docker is an open platform for developing, shipping and running applications. It enables you to separate your applications from your infrastructure so you can deliver software quickly. With Docker, you can manage your infrastructure in similar ways with which you manage your applications. By taking advantage of Docker’s methodologies for shipping, testing, and deploying code quickly, you can significantly reduce the delay between writing code and running it in production.
In simple words, Docker is a tool designed to make it easier to create, deploy, and run applications by using containers. Containers allow a developer to wrap an application with all of the parts it needs, such as libraries and other dependencies and ship it all out as one package.
Some Important Terms
Docker Image -> It is the blueprint of the Docker Container. For shipping any application, an image of the application needs to be created. It provides a convenient way to pack up applications and pre-configured server environments.
Docker Container -> It is a running instance of a Docker Image. The Docker image is pulled from a registry and is executed as a container.
Dockerfile -> A
Dockerfileis a text document that contains all the commands a user can use to assemble an image.
What is K8s?
Kubernetes is an open-source container orchestration engine for automating deployment, scaling and management of containerized applications (in this case, the docker containers).
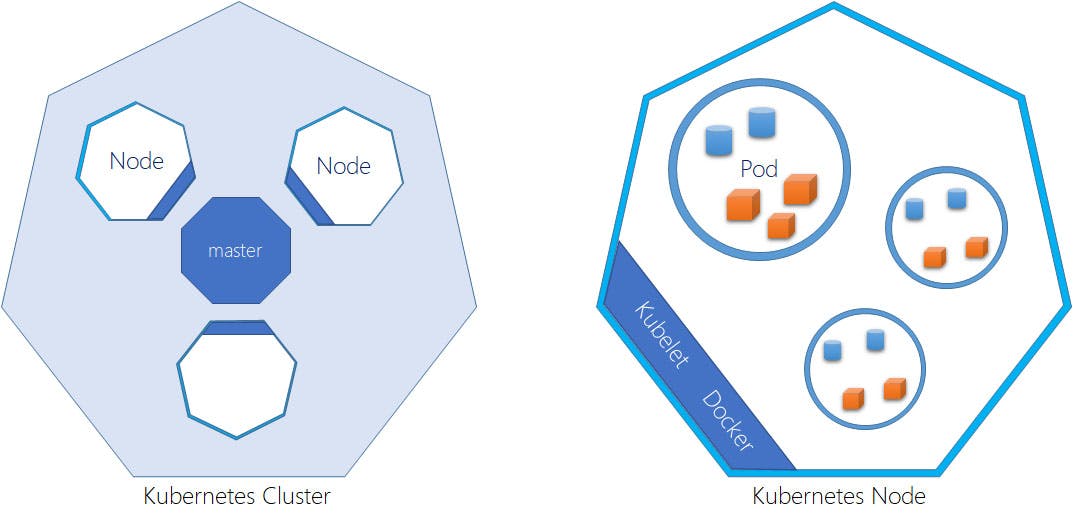
Kubernetes architecture/cluster involves at least one master node (processes that are necessary to manage cluster properly run here) and several worker nodes (where the docker containers run).
Some Important Terms In Kubernetes
kubelet -> Each worker node has a kubelet process running on it. It is the kubelet that allows communication between clusters and also run application processes.
Pod -> The smallest Kubernetes unit that user configures or interact with. A worker node can have many pods inside it and each pod has multiple containers inside it. It is basically a wrapper around the containers.
What is EKS?
Amazon EKS is a managed service that helps make it easier to run Kubernetes on AWS. Through EKS, organizations can run Kubernetes without installing and operating a Kubernetes control plane or worker nodes. It is basically container-as-a-service.
Install Docker
Please follow all the steps to install docker as mentioned here.
Once installed, run the following to ensure that everything works fine:
docker version
You can also verify if Docker is running from here:

Install AWS-CLI
To install the AWS-CLI, the only prerequisite you need is to have an AWS account.
You can install it from here.
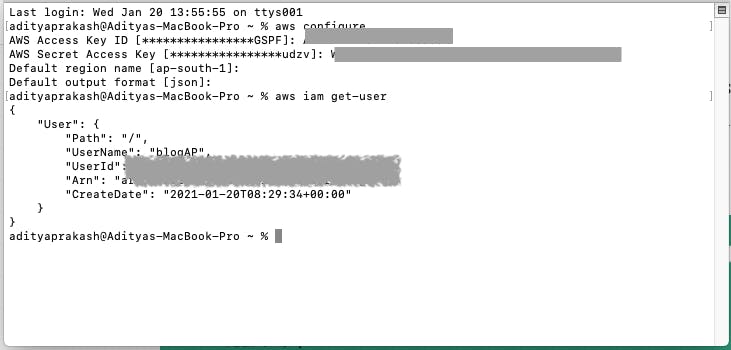
Create an IAM user with Administrator access to login to account from CLI.
Run the following commands to do so:
aws configure
aws iam get-user
Create A Repository In AWS ECR
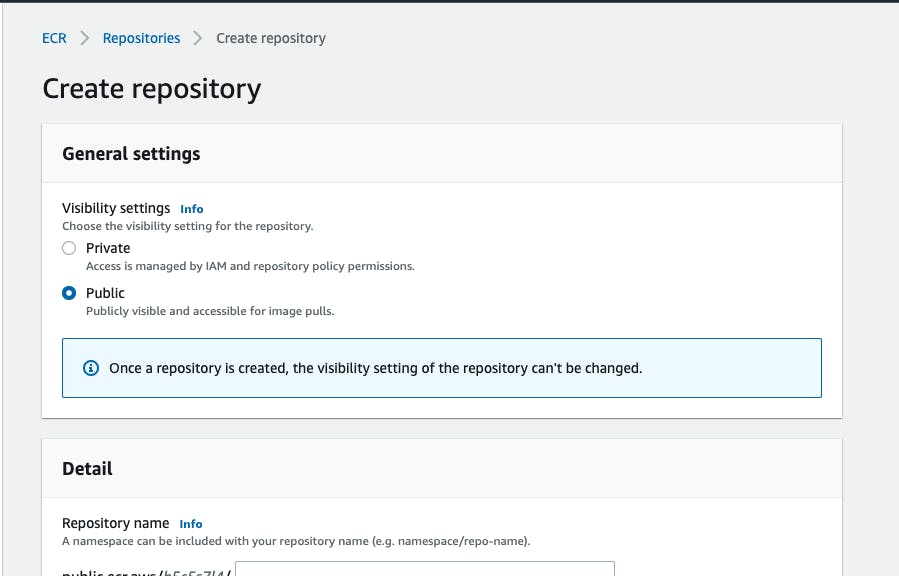
ECR automatically replicates the container software to multiple AWS Regions to reduce download times and improve availability. ECR is very similar to the Docker hub but is only managed by AWS.
Move to Services -> ECR -> Create Repository
Create A Node.js Application
mkdir test
cd test
npm init
npm install express
Create a index.js file:
const express=require('express');

const port=5000
const app=express();

app.get('/',(req,res)=>{
    res.send('Hello!! this is running')
})

app.listen(port,()=>{
    console.log(`App listening at port:${port}`)
})
Create A Docker Image & Push It To ECR
- Creating a Dockerfile:
FROM node:12.4.0-alpine

WORKDIR /work/

COPY ./package.json /work/package.json

RUN npm install

COPY . /work/

CMD node .
FROM -> creates a layer from the node:12.4.0-alpine Docker image.
WORKDIR -> sets the path for working directory.
COPY -> adds files from your Docker client’s current directory.
RUN -> builds your application with make.
CMD ->specifies what command to run within the container.
- Retrieve an authentication token and authenticate your Docker client to your registry:
aws ecr-public get-login-password --region us-east-1 | docker login --username AWS --password-stdin public.ecr.aws/<any_seq_provided>
- Build Docker image
docker build -t adityaprakash2811/nodek8 .
- Tag image so it be can pushed the repository:
docker tag adityaprakash2811/nodek8:latest public.ecr.aws/<any_seq_provided>/adityaprakash2811/nodek8:latest
adityaprakash2811/nodek8is the repo name.latestis the tag.
- Push this image to the newly created AWS repository:
docker push public.ecr.aws/<any_seq_provided>/adityaprakash2811/nodek8:latest
You can find similar commands when you create the repository to help you build the image, tag it and then push it to the repository.
Create a VPC (Stack in CloudFormation)
Virtual Private Cloud is a private subsection of AWS that we can control. We can have our own EC2 instances and databases in the VPC, thus provisioning a logically isolated section of Amazon Web Services Cloud. When we create an AWS account, a 'default' VPC is created.

In the Amazon S3 URL, enter the following:
https://amazon-eks.s3.us-west-2.amazonaws.com/cloudformation/2020-04-21/amazon-eks-vpc-private-subnets.yaml
You may leave the rest of the settings as 'default' and click on Create Stack. It will take some time to be created.
Create A Cluster
A Kubernetes cluster is a set of node machines for running containerized applications. If you’re running Kubernetes, you’re running a cluster.
First create an IAM role with AmazonEKSClusterPolicy.
Now move to Services -> EKS -> Clusters -> Create Cluster
Type a name for the cluster.
Select any Kubernetes version. I chose 1.15 (No specific reason).
In the Service Role, select the IAM Role previously created.
Next, select the VPC created in the previous step.
Create Logging options based on the use case and then Review and create.
Wait until the the cluster state turns Active.

Configure kubectl
The kubectl command line tool lets you control Kubernetes clusters.
Follow these steps will help to configure kubectl.
You may also need aws-iam-authenticator. Read about it here.
If you're finding configuring kubectl to be tough. Don't worry, Docker Dashboard will give an alternative to do so.
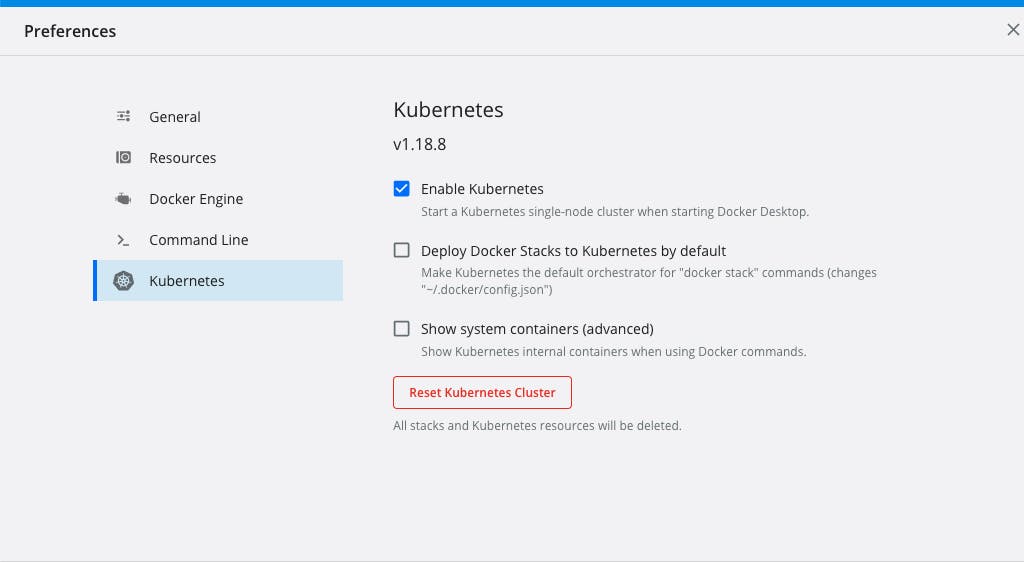
Just Enable Kubernetes from here.
Now run:
aws eks --region <region-code> update-kubeconfig --name <cluster_name>
kubectl get svc

Create Worker Nodes
A Kubernetes cluster consists of a set of worker machines, called nodes, that run containerized applications.
First create an IAM role with AmazonEKSWorkerNodePolicy and AmazonEC2 ContainerReistryReadOnly policies.
Now select the cluster and move to Configuration -> Compute -> Add Node Group
Create a Node group with the IAM role created previously.
In the Specify networking tab, select a SSH key pair so as to be able to SSH into created instances. Also, select security group as the default one.

- Now Review and Create the Node Group and wait for its state to turn to Active.

- Also, verify running EC2 instances as a result of Worker Nodes being created.

Run:
kubectl get nodes --watch

Create Deployment and Services
A Deployment instructs Kubernetes how to create and update instances of your application. Once you've created a Deployment, the Kubernetes master schedules the application instances included in that Deployment to run on individual Nodes in the cluster. You read more about it here. A Service in Kubernetes is an abstraction which defines a logical set of Pods and a policy by which to access them. Services enable a loose coupling between dependent Pods. Gain more insight on it from here.
Here, I have added both deployment and service in a single manifest.yml file:
apiVersion: apps/v1
kind: Deployment
metadata:
  creationTimestamp: null
  labels:
    app: webapp
  name: webapp
spec:
  replicas: 2
  selector:
    matchLabels:
      app: webapp
  strategy: {}
  template:
    metadata:
      creationTimestamp: null
      labels:
        app: webapp
    spec:
      containers:
      - image: public.ecr.aws/b5c5s7l4/adityaprakash2811/nodek8:latest
        name: webapp
        imagePullPolicy: Always
        resources: {}
        ports:
          - containerPort: 3080
status: {}

---

apiVersion: v1
kind: Service
metadata:
  name: webapp
  labels:
    run: webapp
spec:
  ports:
  - port: 3080
    protocol: TCP
  selector:
    app: webapp
  type: NodePort
Now run:
kubectl create -f manifest.yml
Add the services and deployments and run these commands to ensure everything worked fine:
kubectl get svc
kubectl get deploy
kubectl get pods
You will get an output similar to this:

Finally, now you have successfully deployed your Node.js app. on the EKS cluster.
Thank you for reading.😄

