

Apigee - API Management - Part 2.1
Build your first API with Google's Apigee


Introduction
In the last edition of this series, we saw the basics of the API life cycle and API life cycle management. If you missed it, you can read it here.
With that basic knowledge in place, we will start our journey with the API Life Cycle management tools.
Now, there are quite a few offerings that one can choose from, namely WSO2 APIM, Apigee, AWS API Gateway etc. and each of them has their own set of pros and cons, which we will definitely try to cover in a comparison in the future. For now, we will begin by getting to know these tools in detail one after the other.
With that said the tool that we are focusing on in this article is Google's Apigee.
Google Apigee
Apigee is one of the largest API Management platforms out there today. It boasts about the recognition that it got in the recent Gartner report. Gartner is a global research and advisory firm that provides information, advice and tools for leaders in IT, Finance, HR, Customer Service and Support, Communications and other verticals of business. Their research about the market trends that they put out is considered as benchmarks by a lot of big corporations. In simple terms, get Gartner to write about your product/services and see it scale.
Apigee Corp. was an API management and predictive analytics software provider before its merger into Google Cloud. It was founded in 2004 as Sonoa Systems founded by Raj Singh and Ravi Chandra before being rebranded as Apigee in 2010. Apigee was acquired by Google in a deal worth $625 million in 2016.
Fun fact: Apigee also powers Netflix's APIs.
With that context, let's see how Apigee works and how we can use it to manage our own API lifecycles.
Pre-Requisites
1) Basic knowledge of API Management tools.
2) An Apigee account. If you don't have one, please create a trial account at Apigee here.
Setting up API proxies and security
Today, we will be focusing on the very basics of what you can do with the platform. Let's set up a simple API proxy and some basic API security.
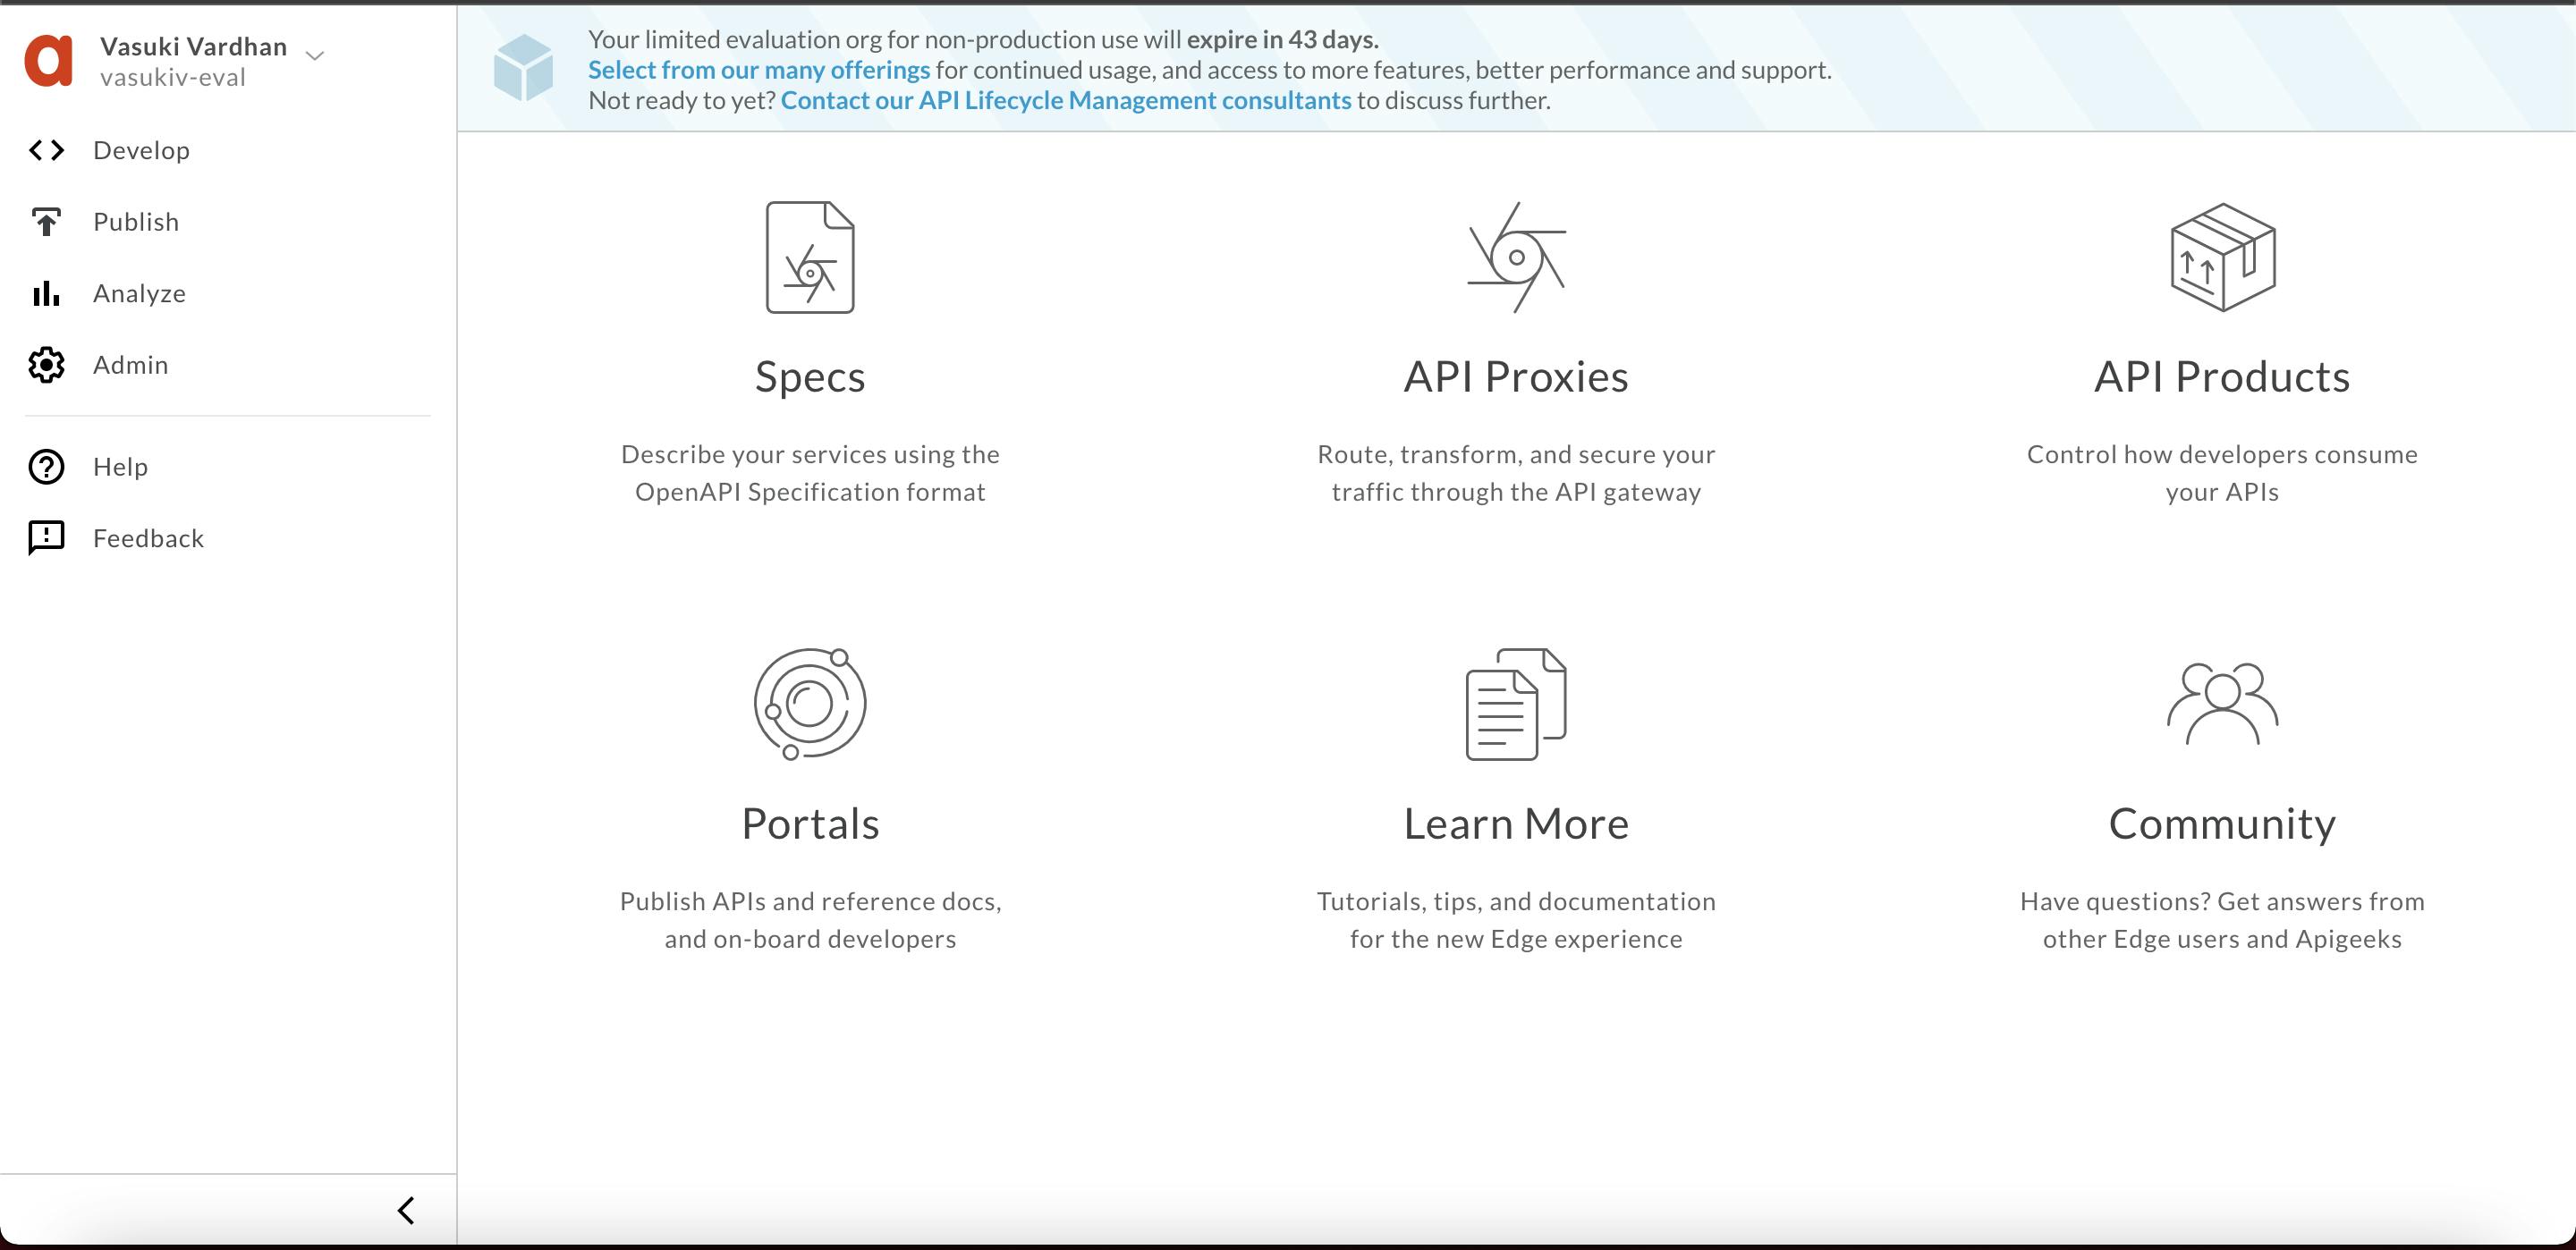
Once you login you will be greeted with this dashboard, which on the top left corner shows the user's display name, the organisation ID, and in the center console, you have some quick launch actions.
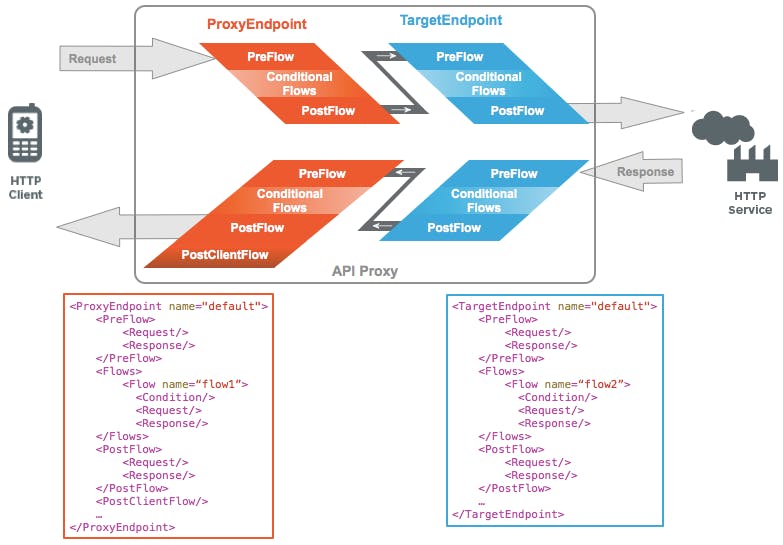
So, a typical API Proxy in Apigee looks something like this:
Now, we will learn how to design an OpenAPI specification for an existing HTTP service and store it within the Apigee platform. Then create an API proxy that routes inbound requests to an existing HTTP service.
Pre-requisites:
1) Basic understanding of OpenAPI Specification (FKA: Swagger).
2) Access to an HTTP client to test the API (eg. cURL, Postman, etc.). If you do not have access to one, you can use the Apigee Trace Tool or the Apigee REST client.
Note: During this run down, as you will be working within an Apigee Organization (
Org) that is shared by multiple users, please prefix all asset names within theOrgwith your initials. For example,Spec name = {your-initials}_{spec name},API proxy name = {your-initials}_{proxy name}etc.
Create an OpenAPI Specification**
During the course of this lab, we will expose as an API endpoint is the Hipster Products service located at http://cloud.hipster.s.apigee.com/products. First, we are going to design and create an OpenAPI specification for the different resource endpoints, i.e. /products and /products/{productId}.
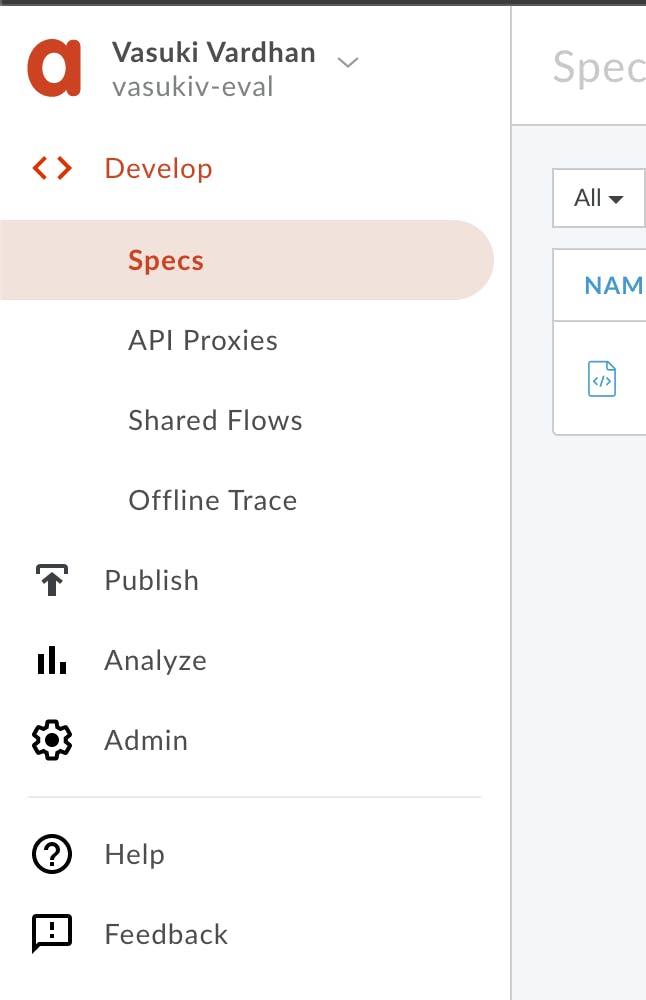
1) Select Develop → Specs in the side navigation menu.
As we have a pre-designed sample of the spec available for this article, we will be importing it into your Apigee Org's Spec Store. Click +Spec, then click on Import URL to add a new spec from an existing source.

Enter spec details & replace {your-initials} with the initials of your name.
File Name: {your-initials}_hipster_products_api_spec
URL: https://imagedeliver.s3.us-east-2.amazonaws.com/Hipster.yaml
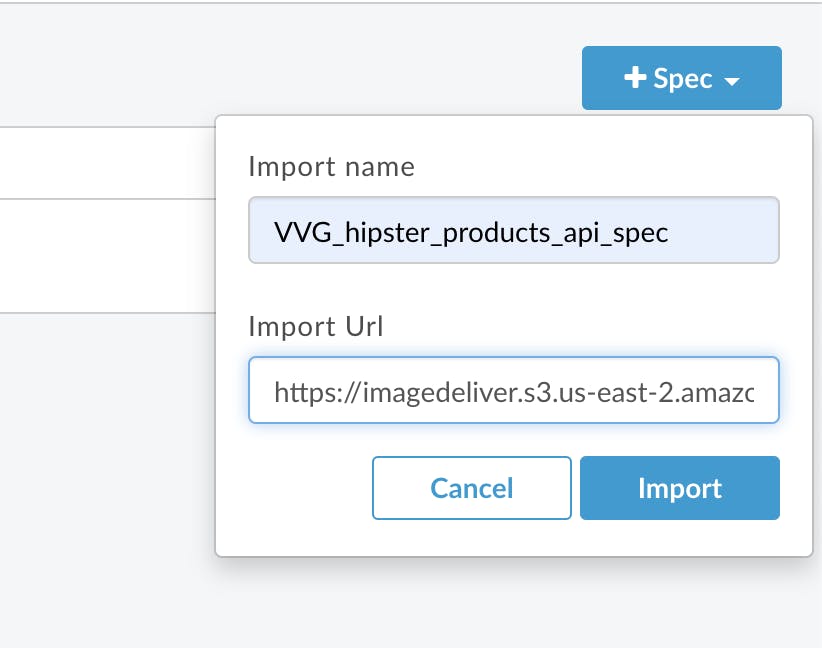
Verify the values and click Import.
Spec has now been imported into Apigee and is ready to use. You should see your spec in the list.
For example:
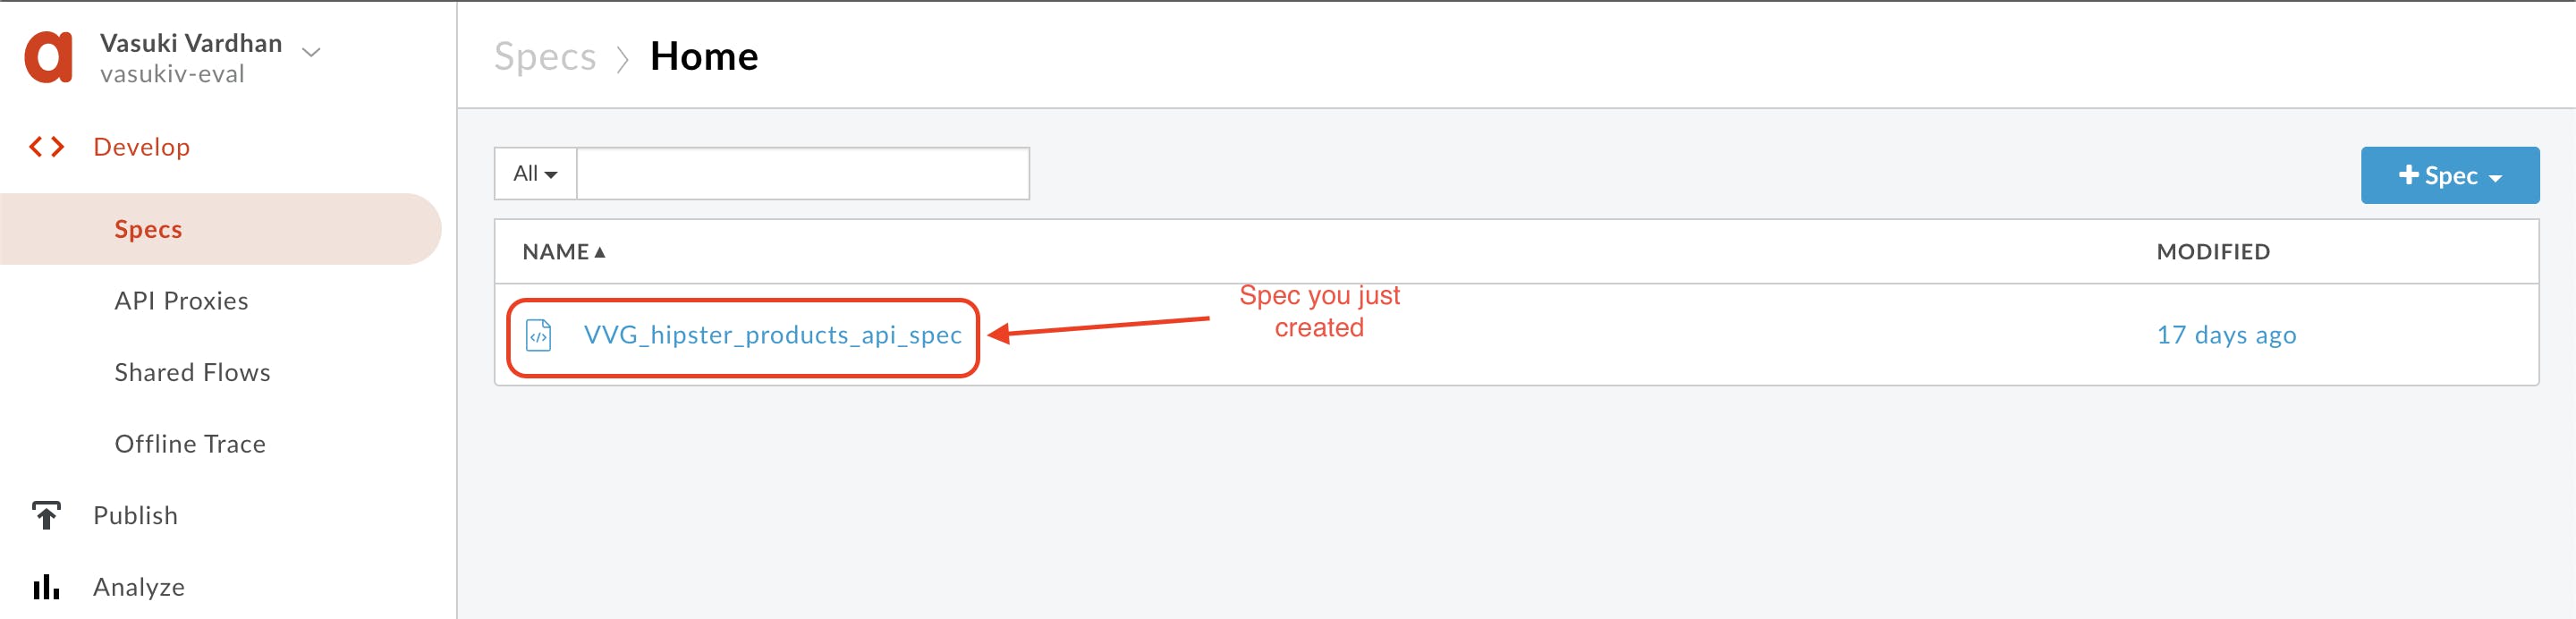
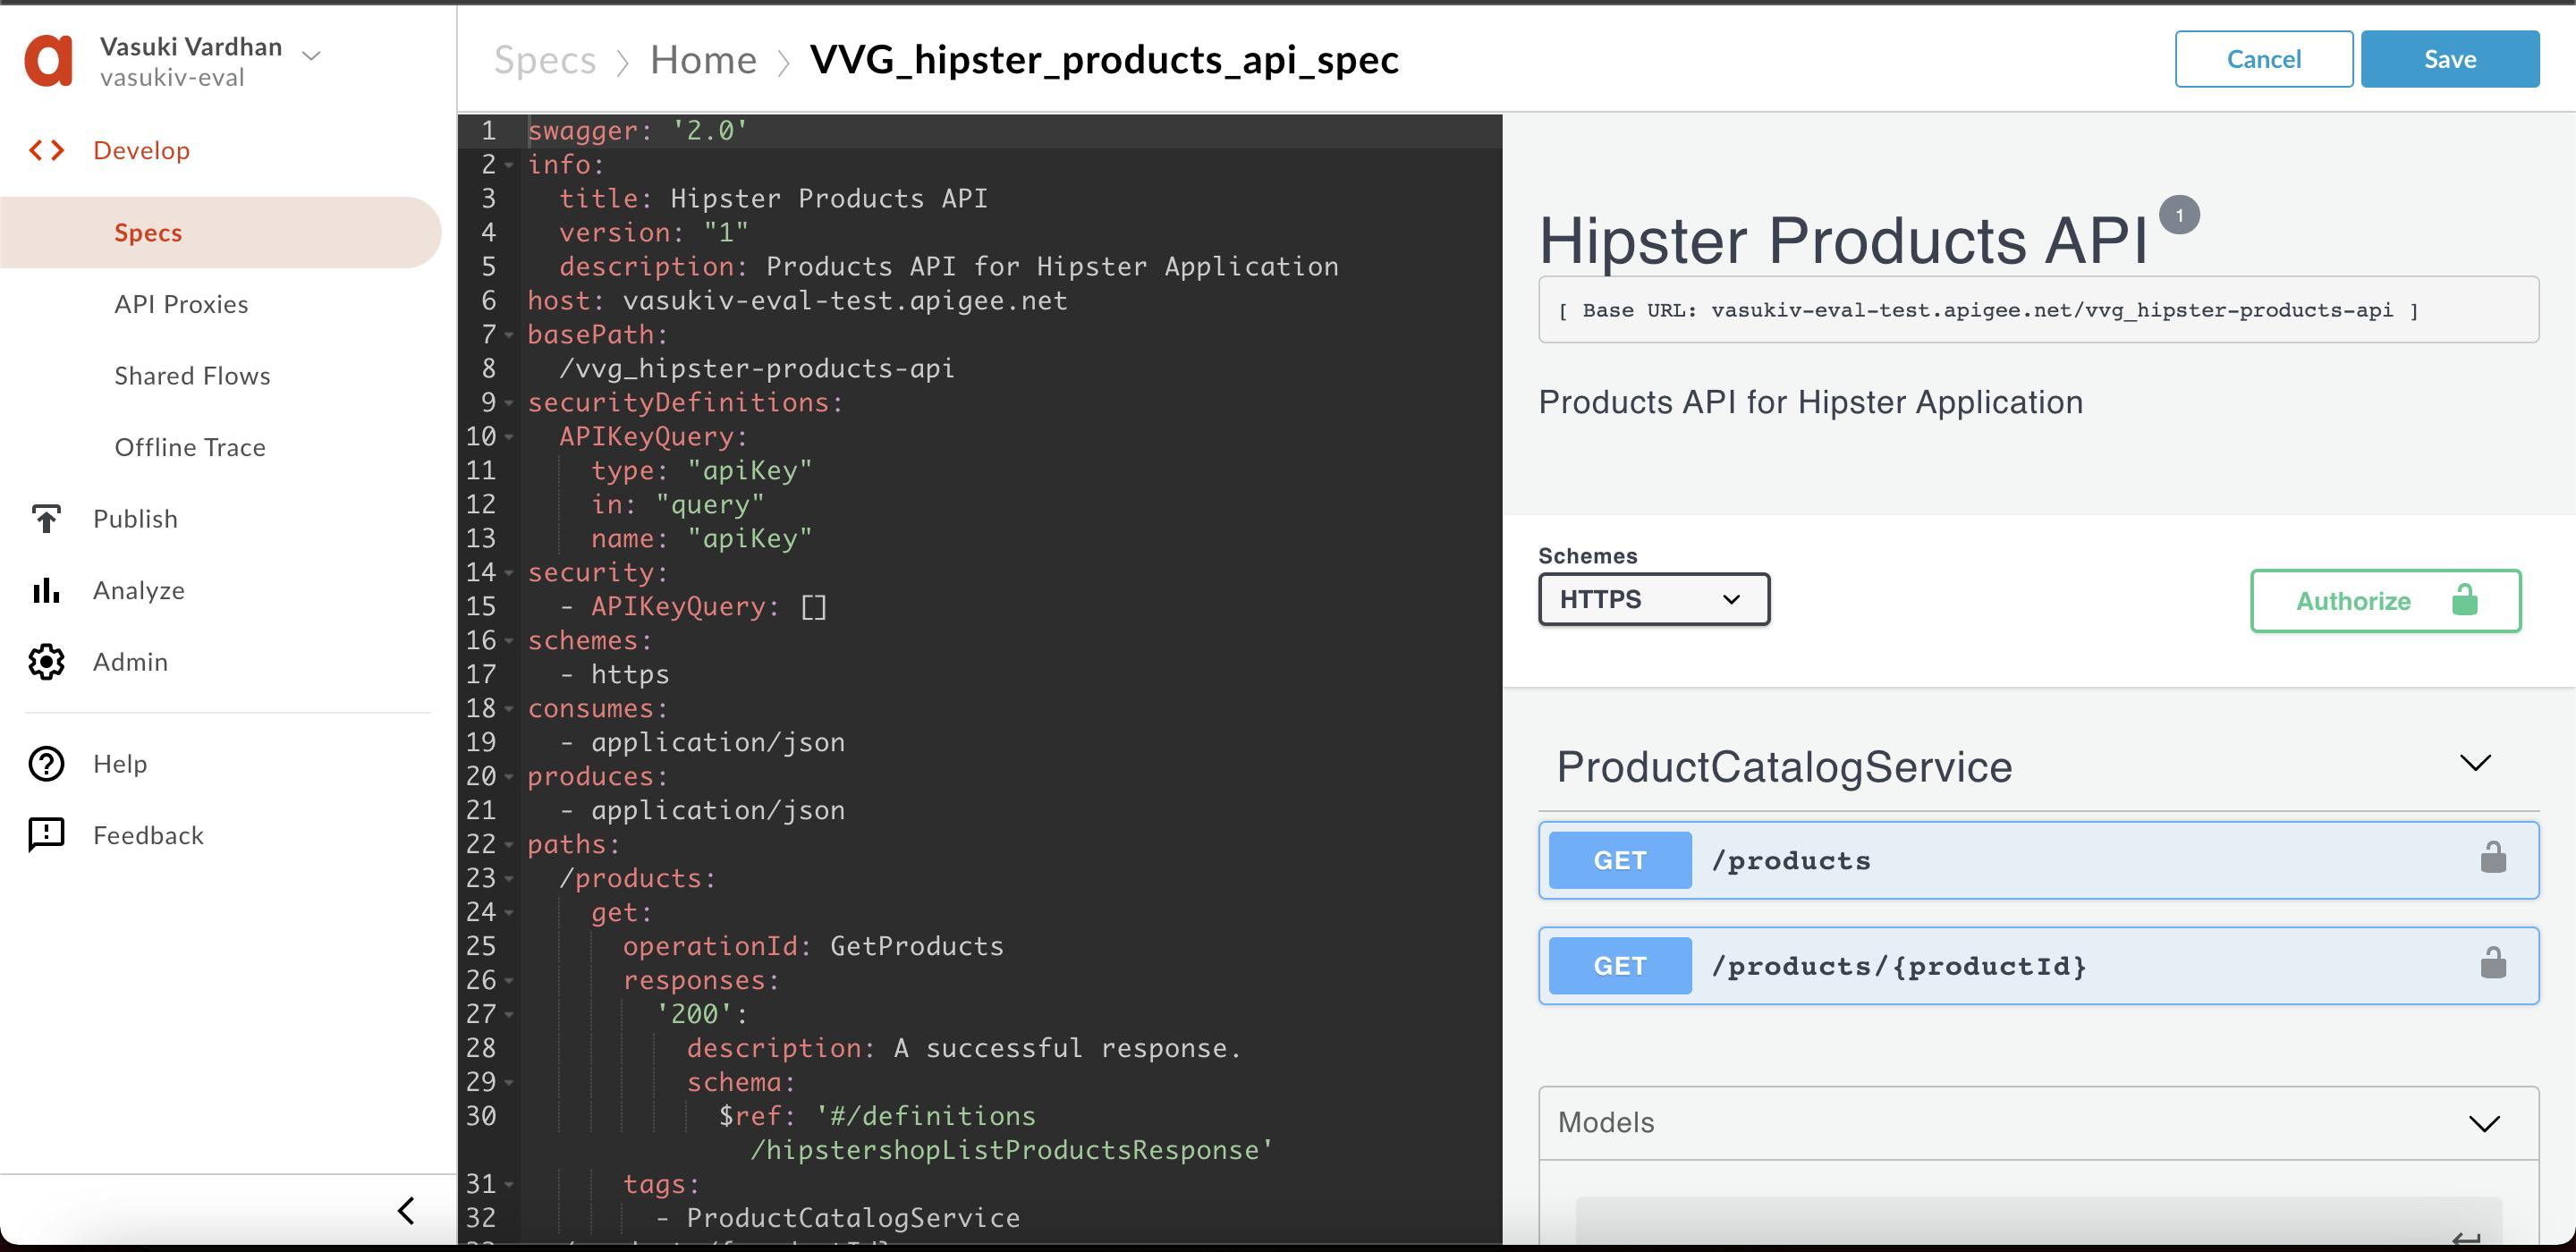
Click on {your-initials}_hipster_products_api_spec from the list to access the OpenAPI spec editor & interactive documentation that lists API details & API Resources.
Create an API Proxy
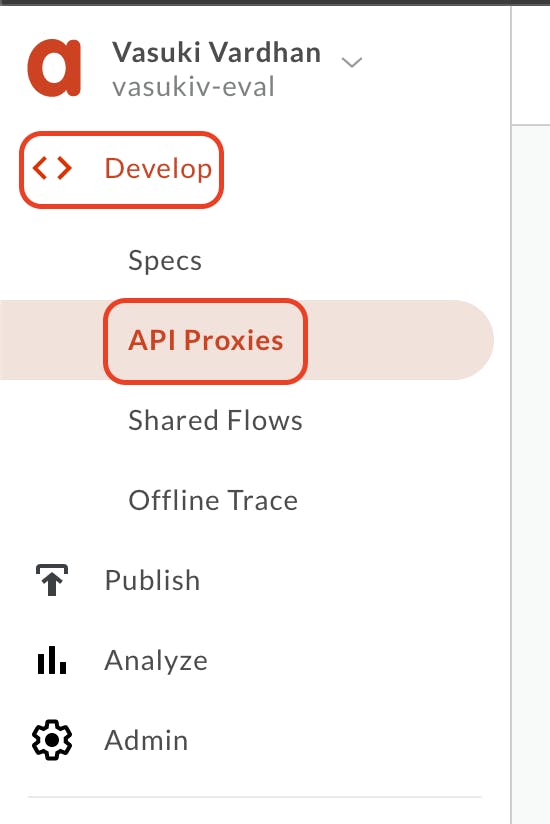
It’s time to create an Apigee API Proxy from an OpenAPI Specification. Click on Develop → API Proxies from the side navigation menu.
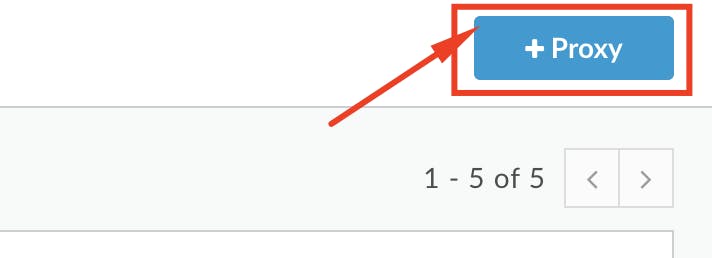
Click +Proxy. The Build a Proxy wizard is invoked.
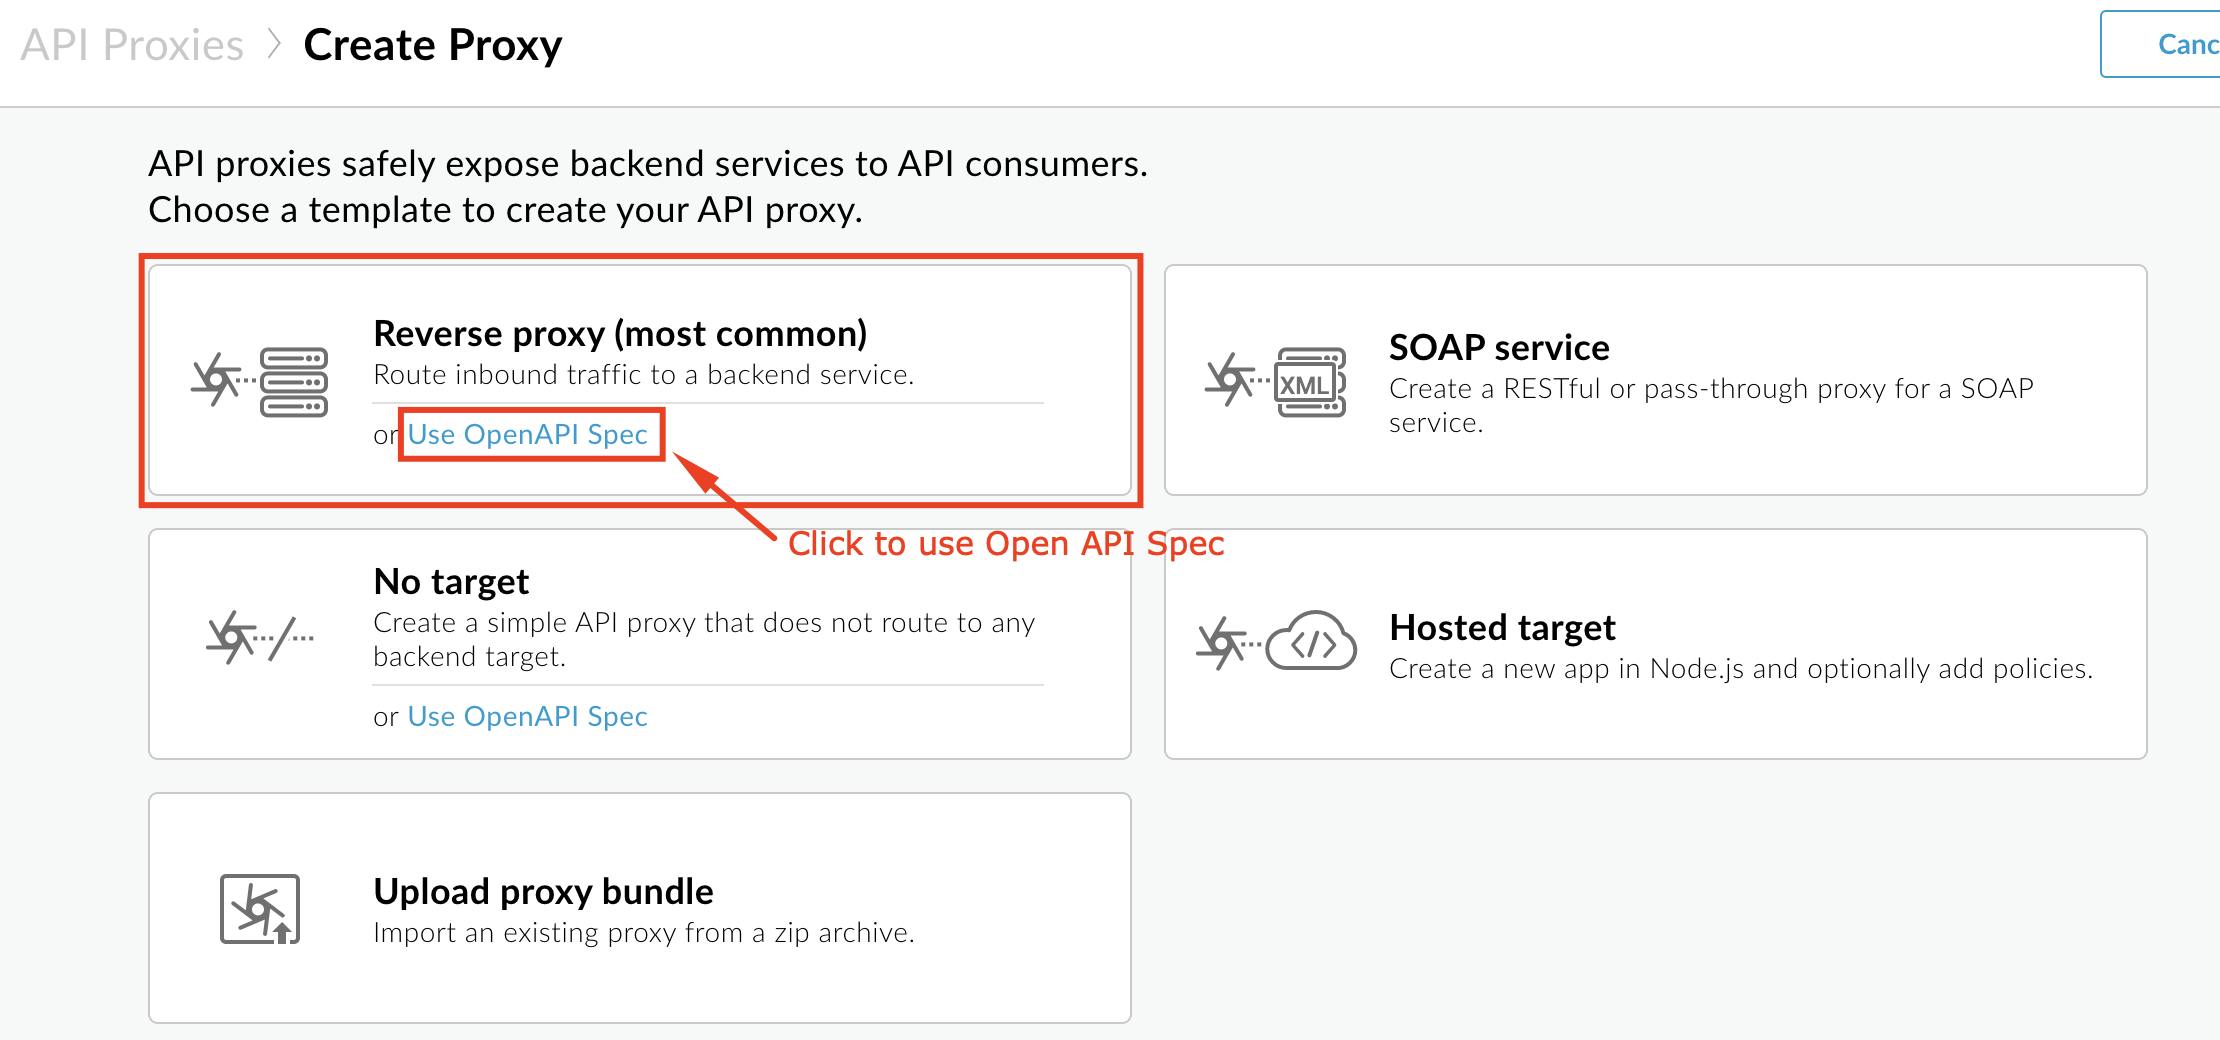
Select Reverse proxy, click on Use OpenAPI below the reverse proxy option.
The following is an image showing the selection of API Proxy type. User has selected Reverse Proxy and clicked Use OpenAPI Spec
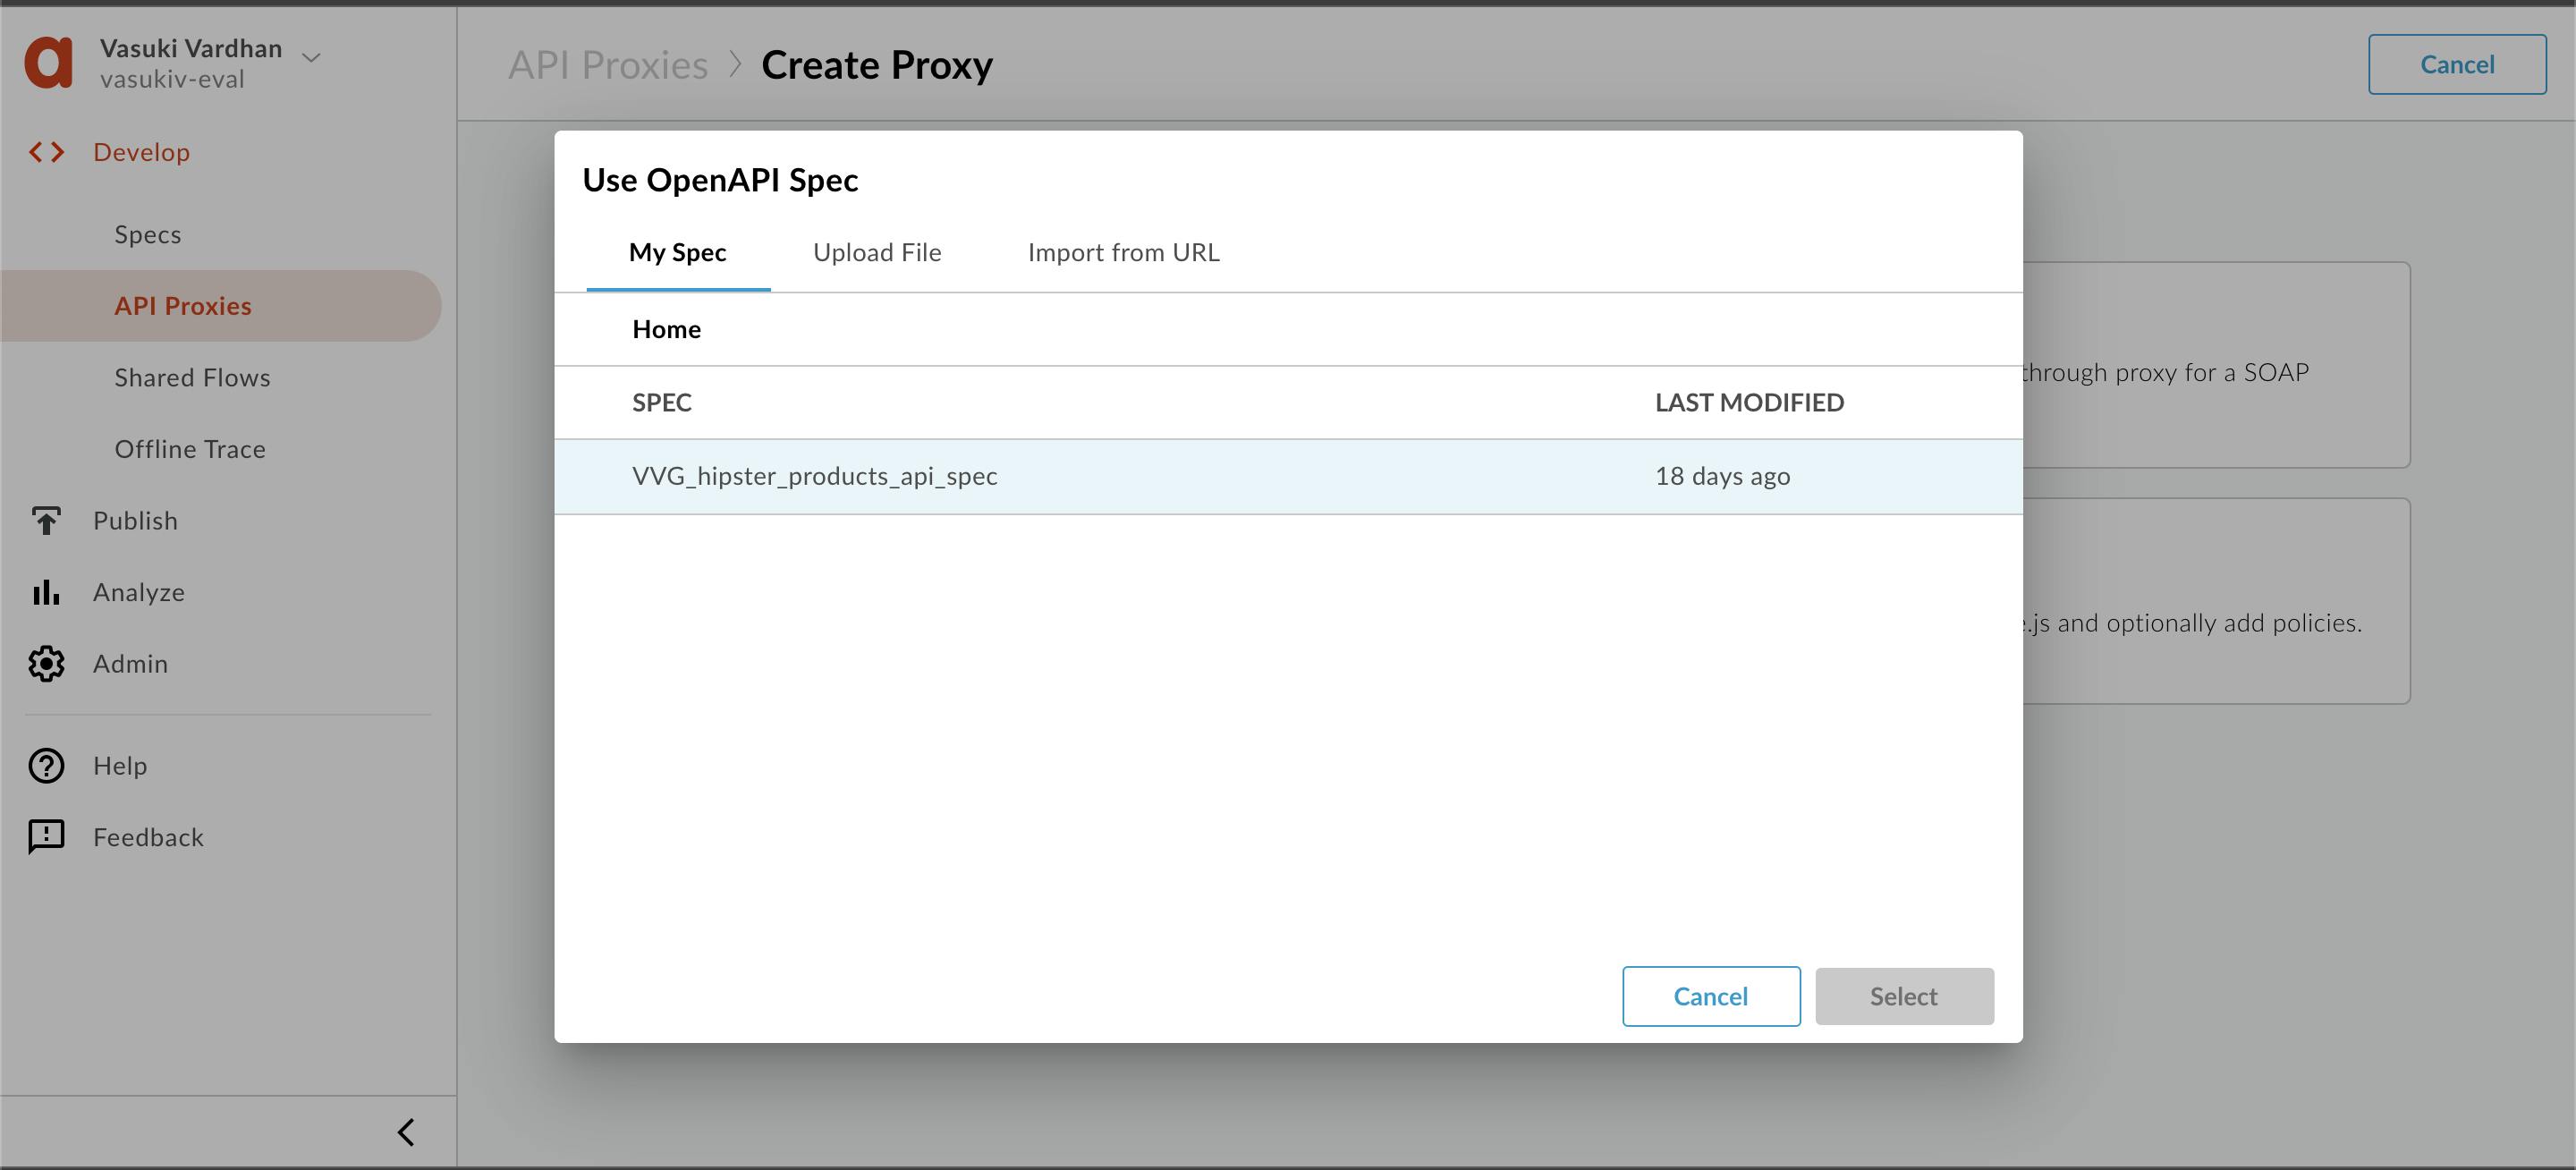
You should see a popup with the list of Specs. Select {yourinitials}_hipster_products_api_spec and click Select.
Enter details in the proxy wizard. Replace {your-initials} with the initials of your name.
1) Proxy Name: {your_initials}_Hipster-Products-API
2) Proxy Base Path: /v1/{your_initials}_hipster-products-api
3) Existing API: Observe the field value which is auto-filled from the OpenAPI Spec.

Verify the values and click Next.
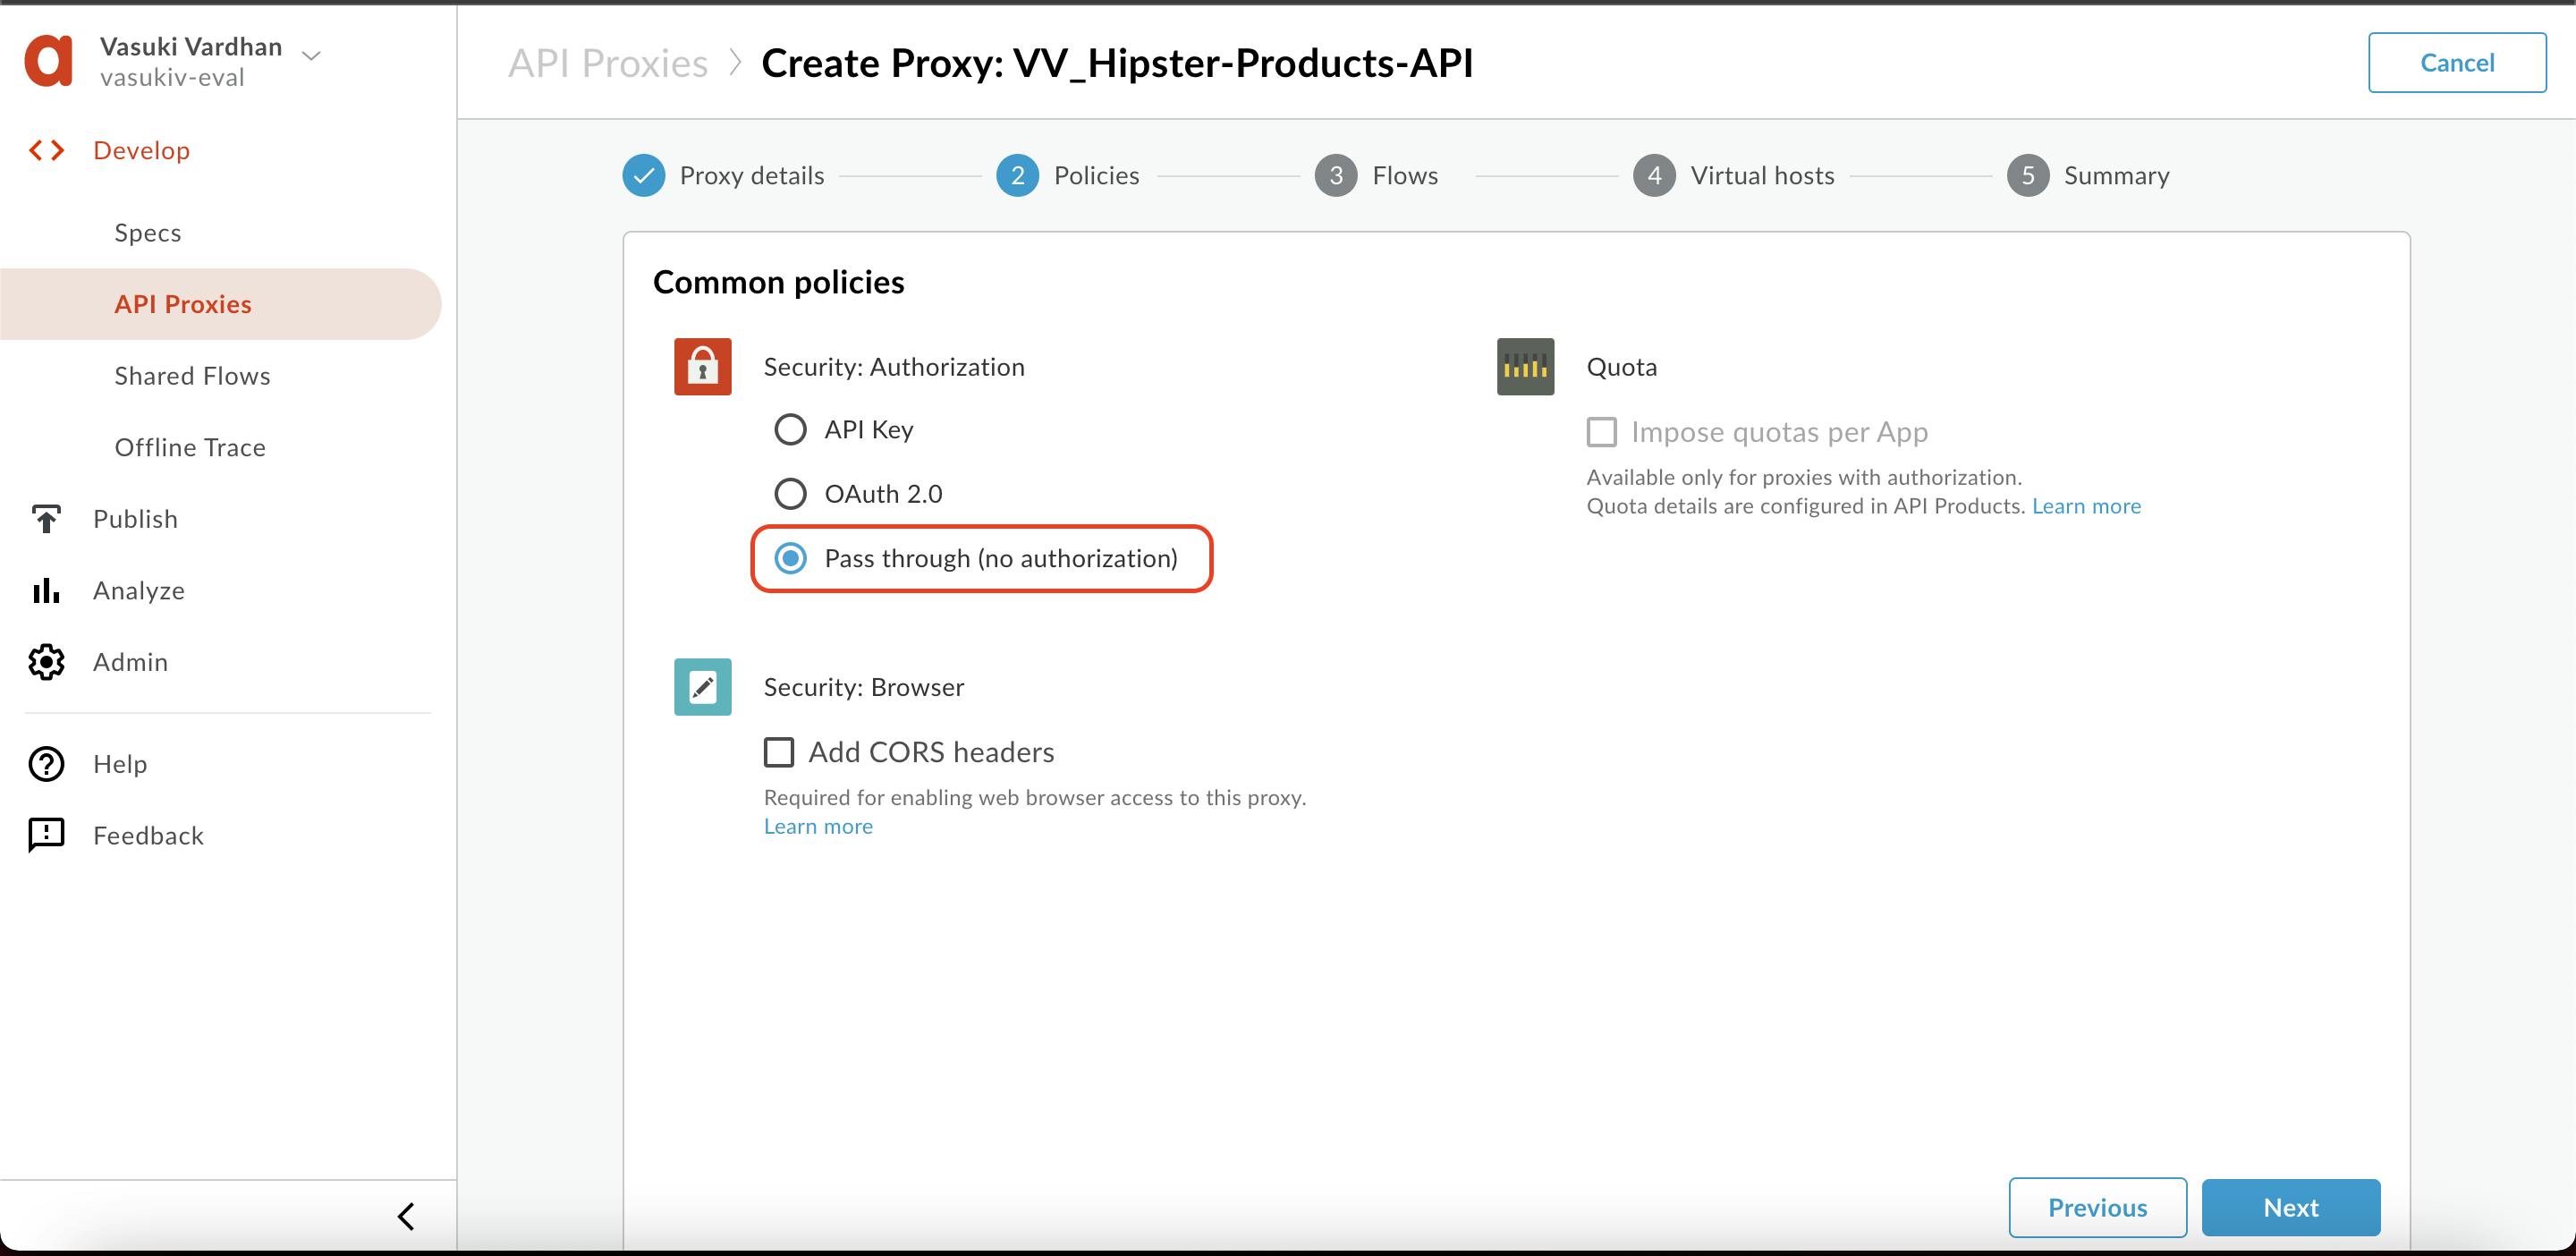
Select Pass-through (none) for the authorization in order to choose not to apply any security policy for the proxy. Click Next.
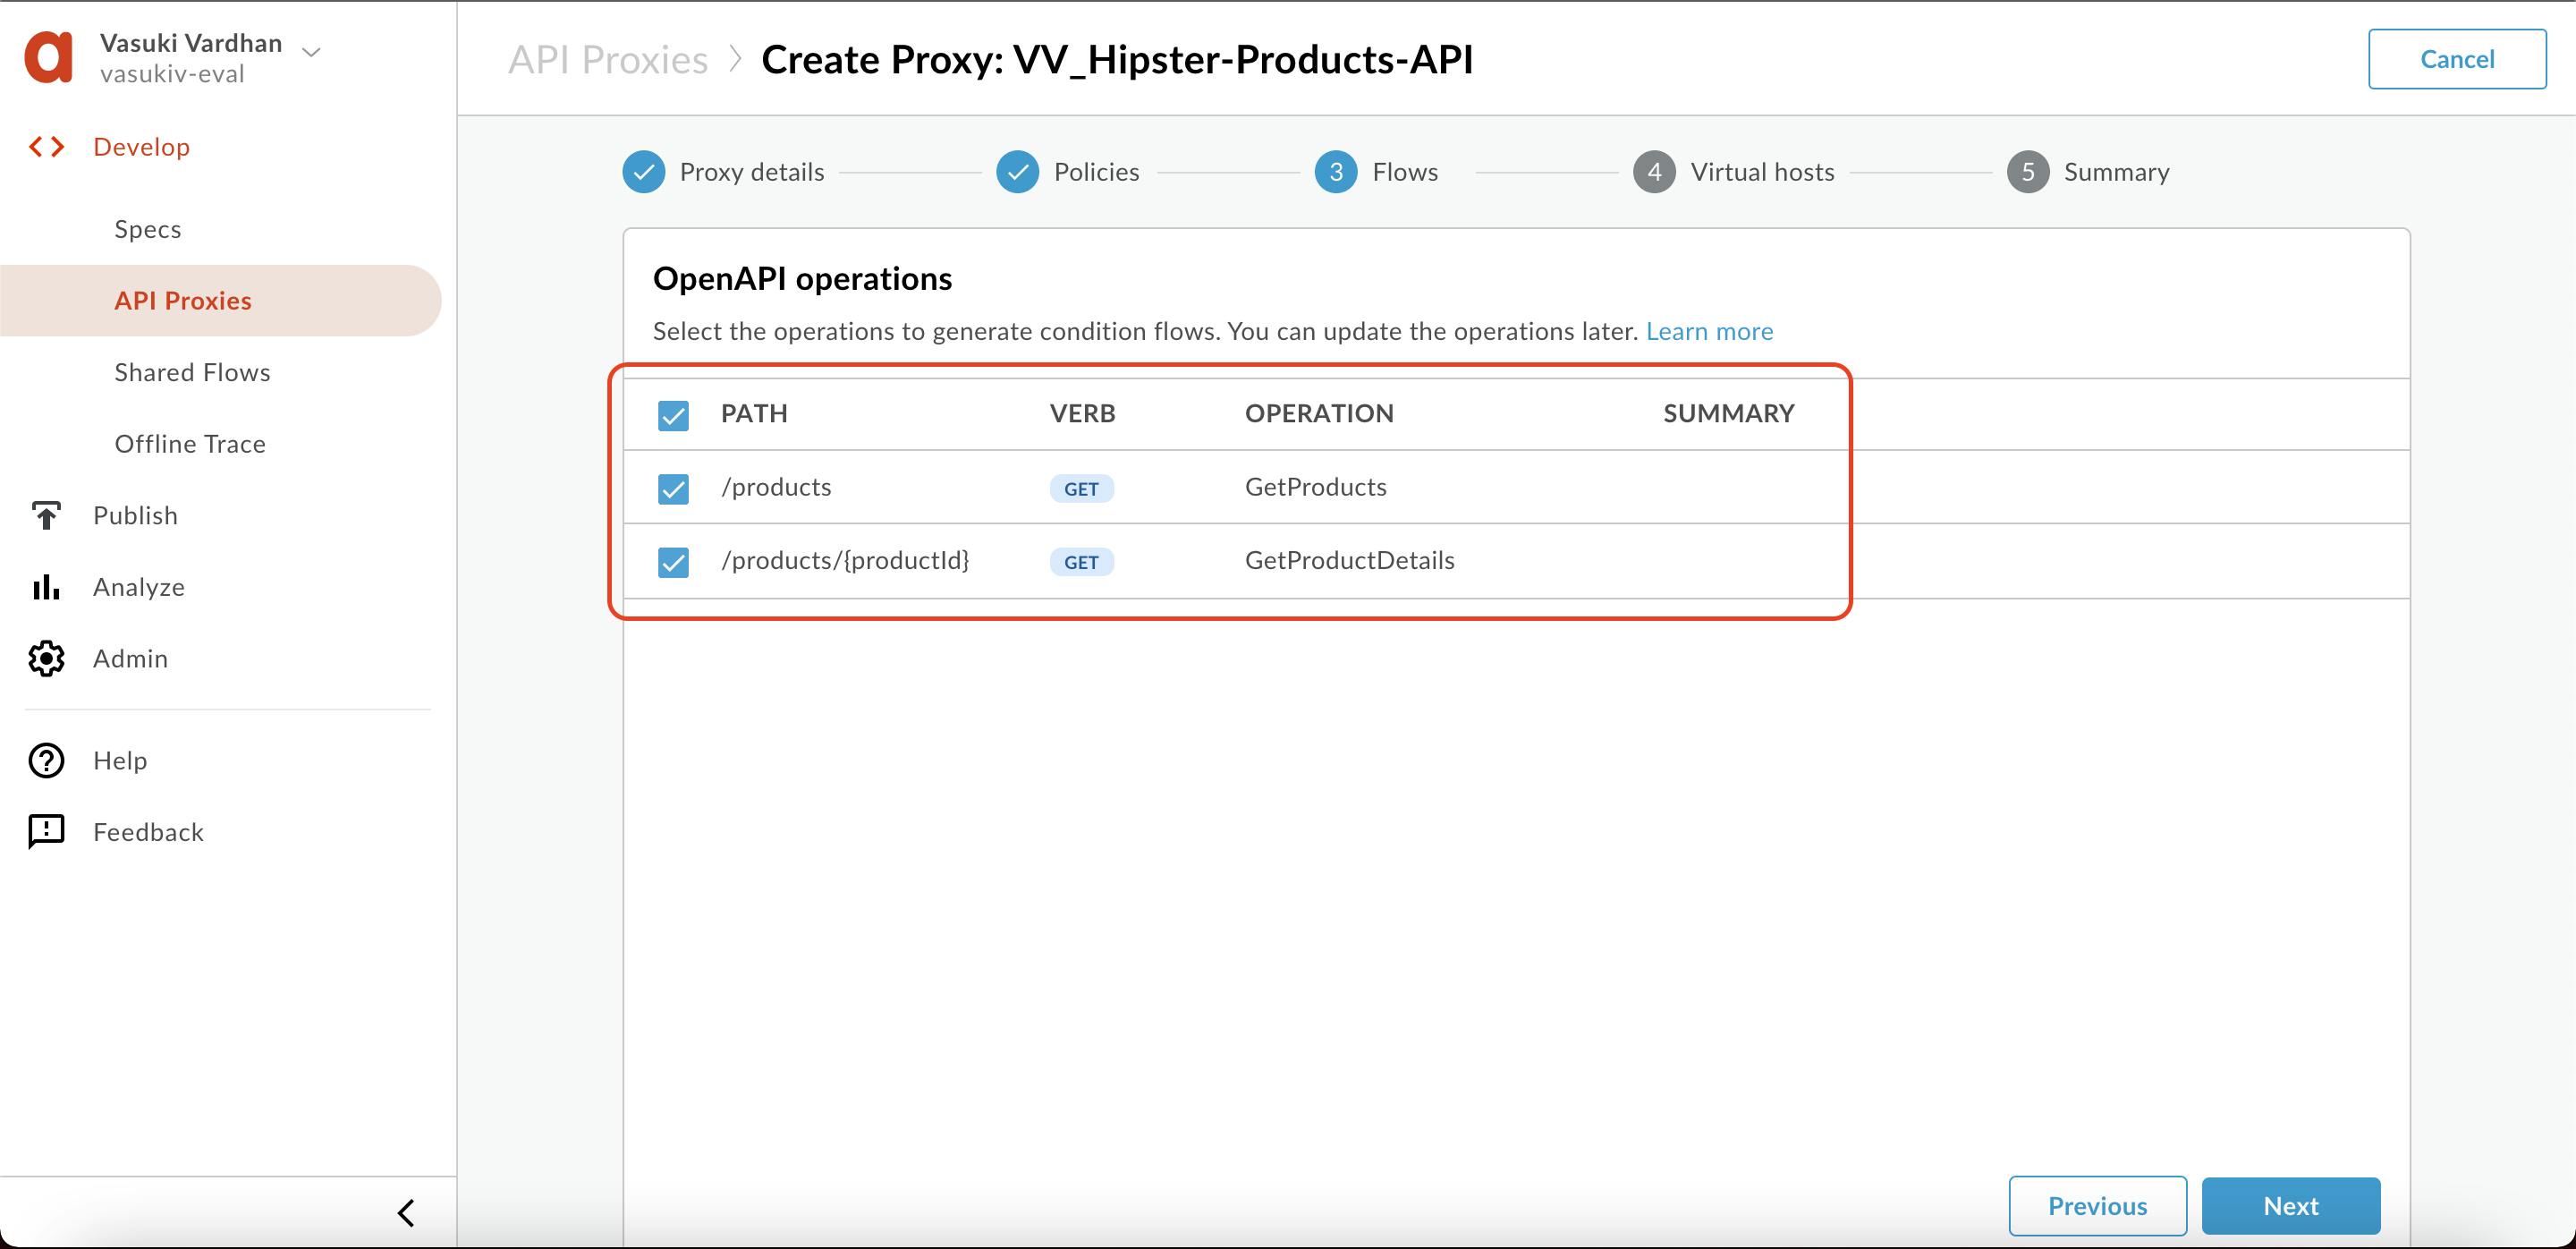
You can select which API resources, from the list configured in the OpenAPI Spec, should be exposed. Select all & Click on Next.
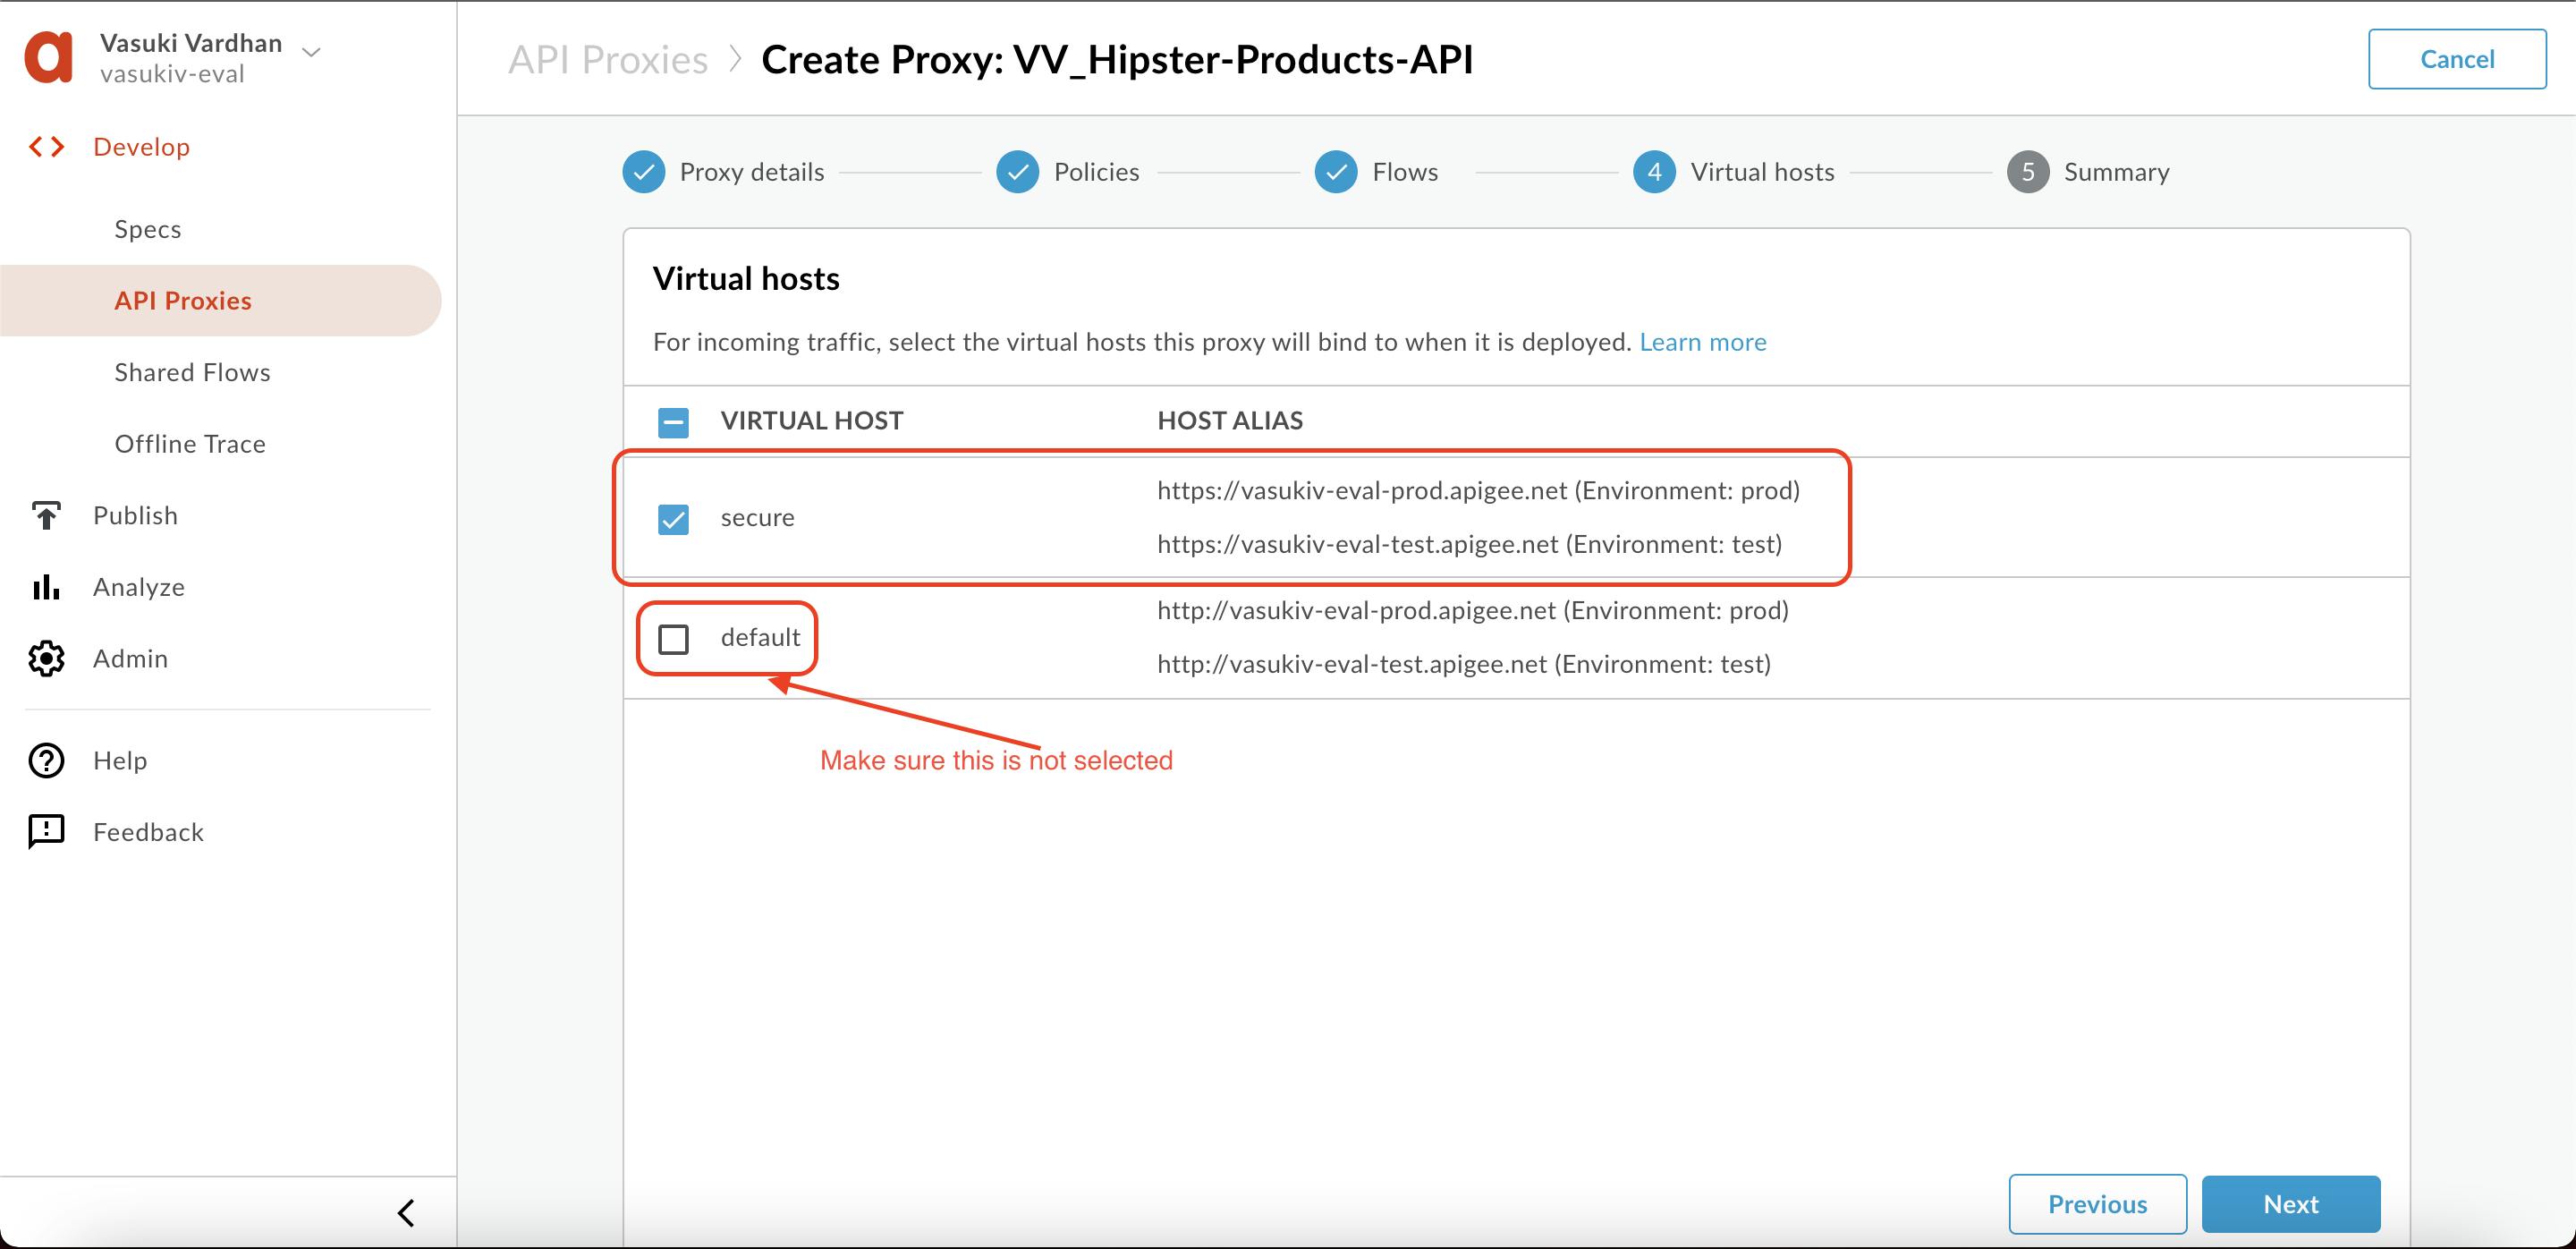
Go with the secure Virtual Host configuration. Ensure that the default one is unchecked.
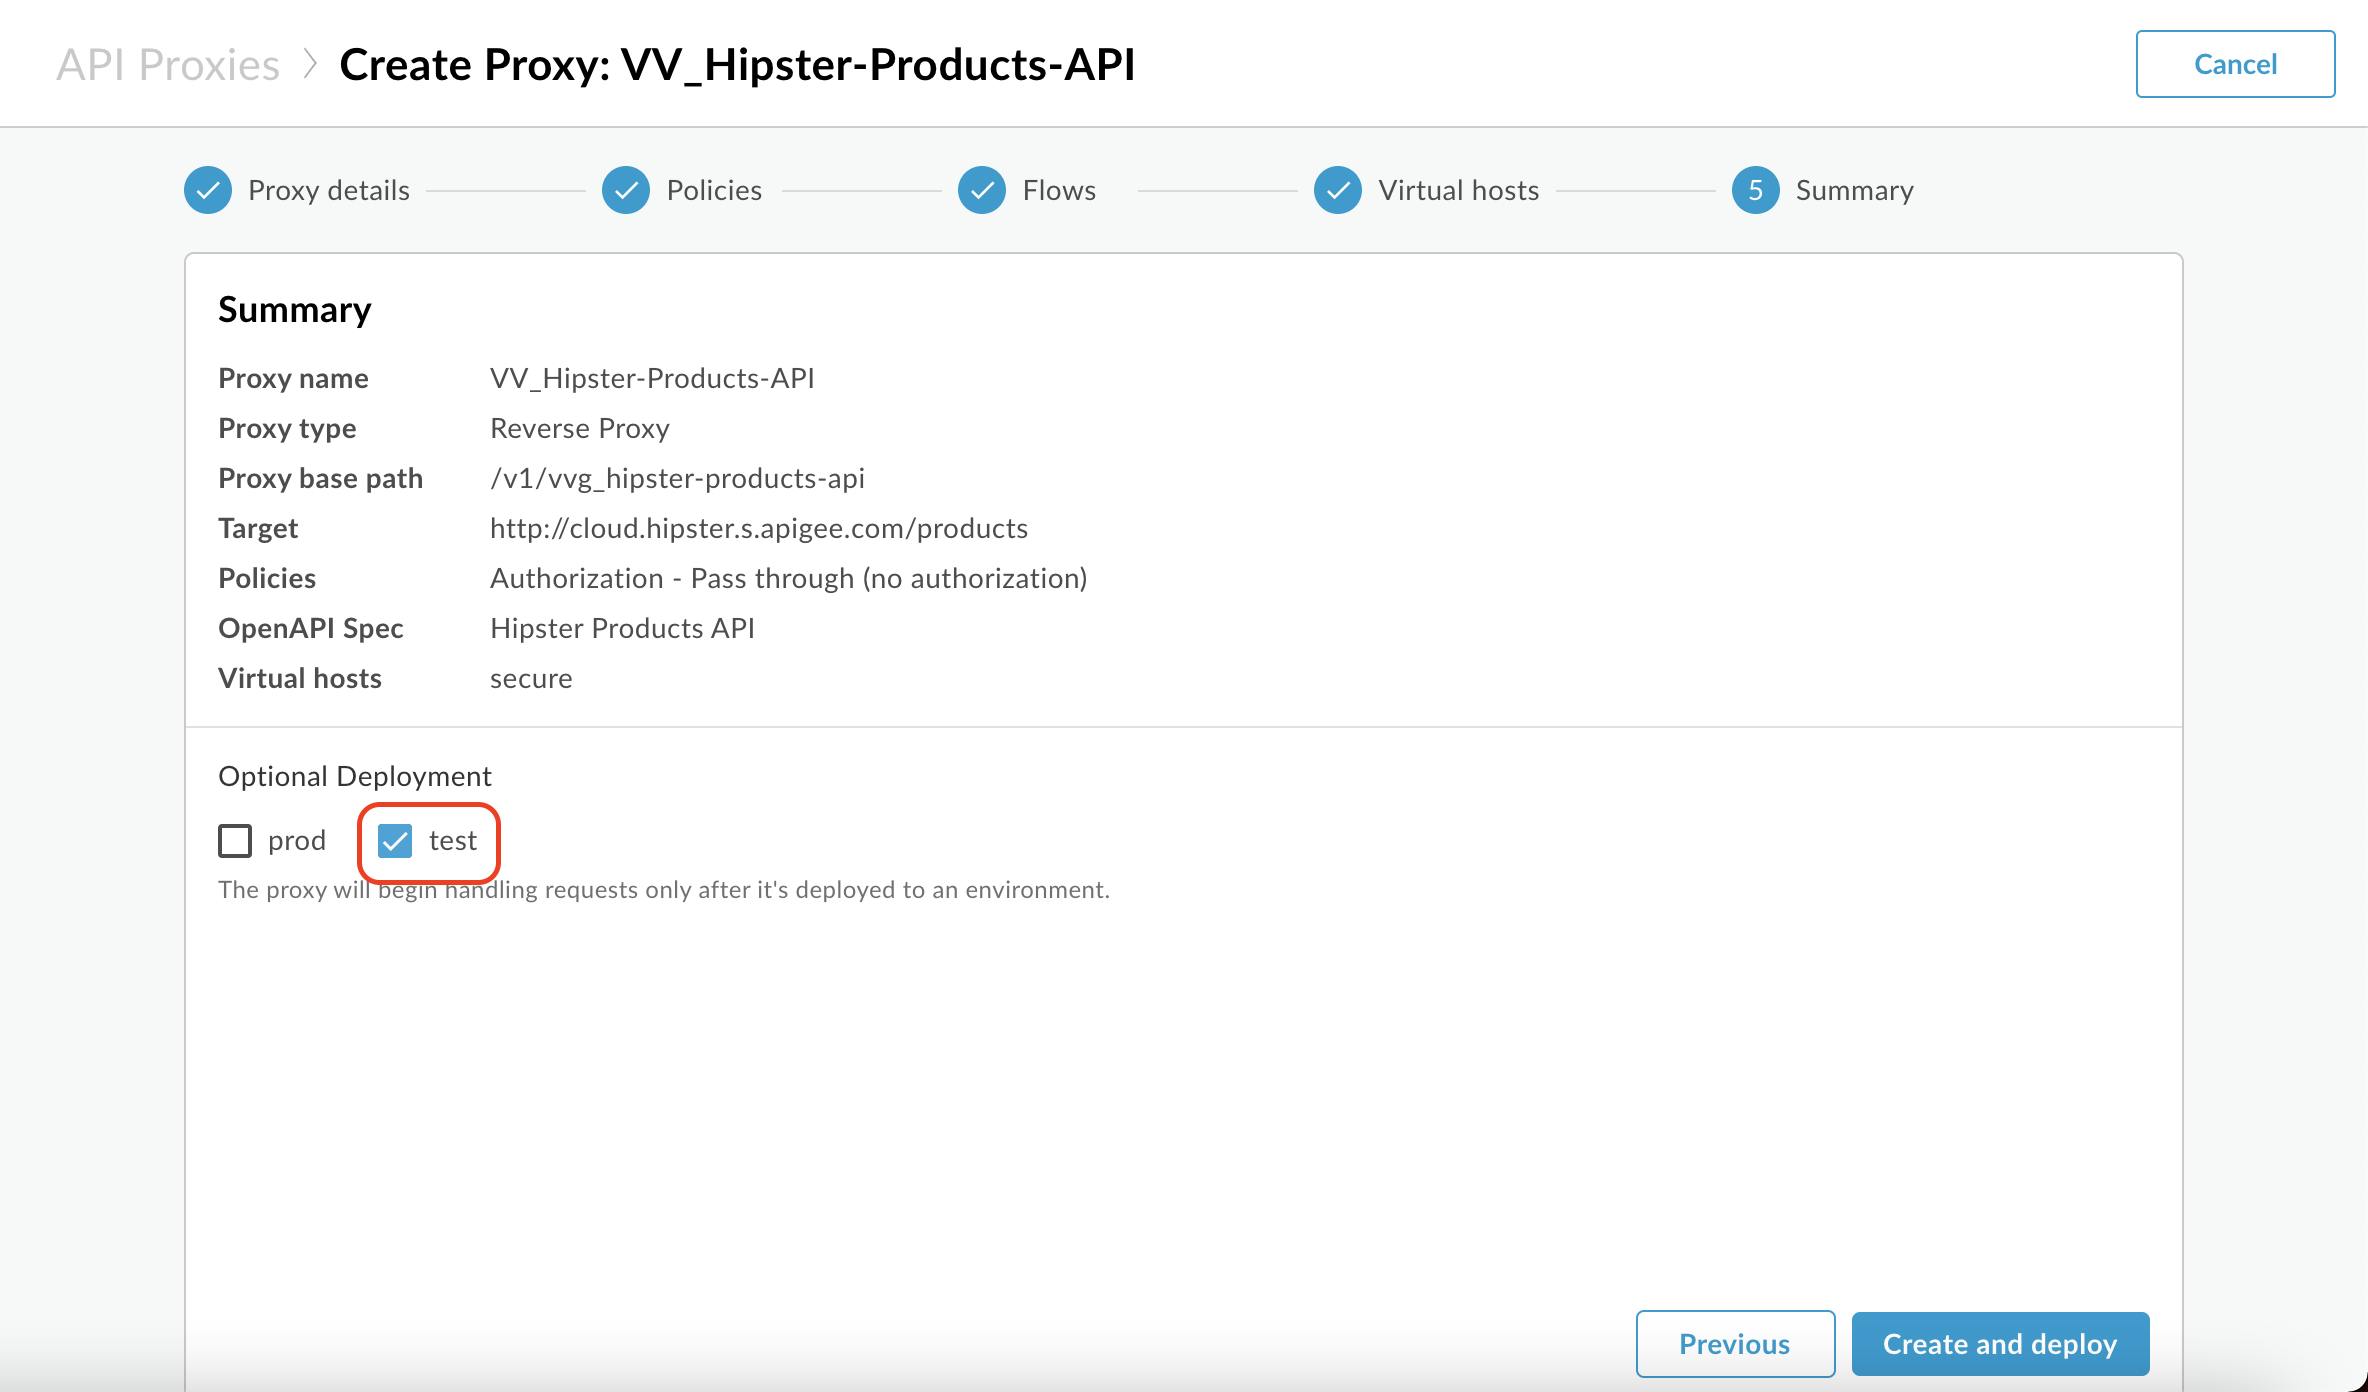
Ensure that only the test environment is selected to deploy to and click Create and Deploy.
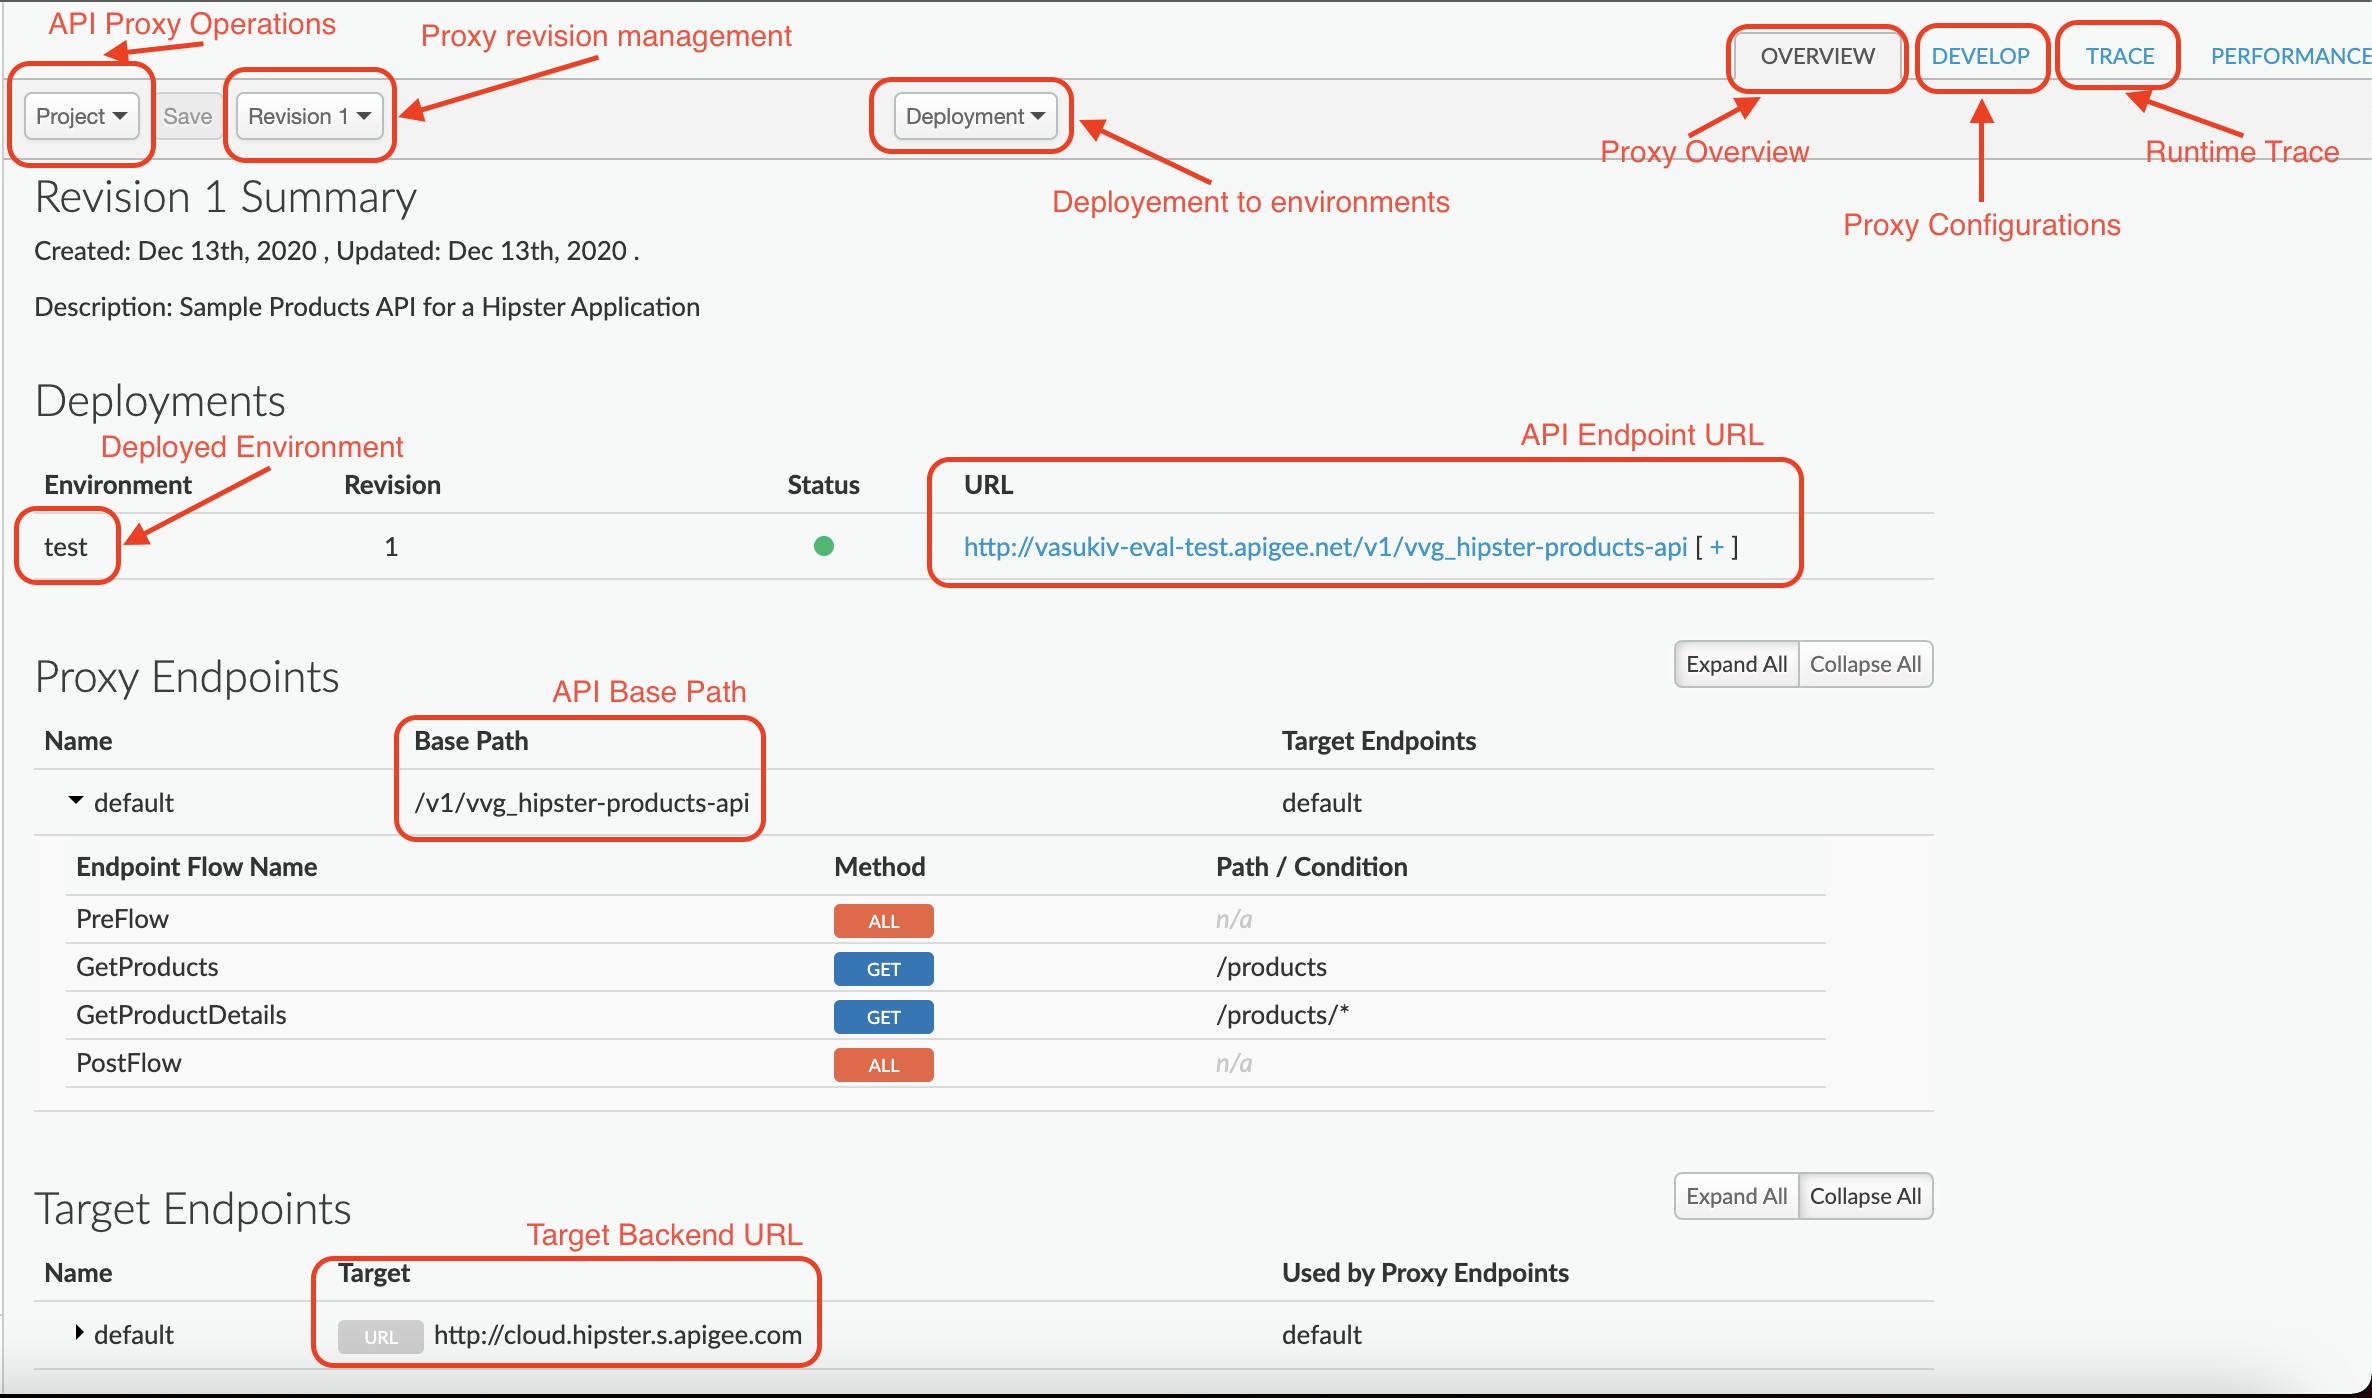
Once the API proxy is created and deployed, click Edit Proxy to view your proxy in the proxy editor.
Congratulations!
You have now built a reverse proxy for an existing backend service. You should see the proxy Overview tab.
Test the API Proxy
Let us test the newly built API proxy. You can use any HTTP client like cURL, Postman or the Apigee Trace Tool.
If you're using cURL:
org = Organization name env = Environment where API is deployed
curl -X GET "https://{{org}}-{{env}}.apigee.net/{{your initials}}_hipster-products-api/products"
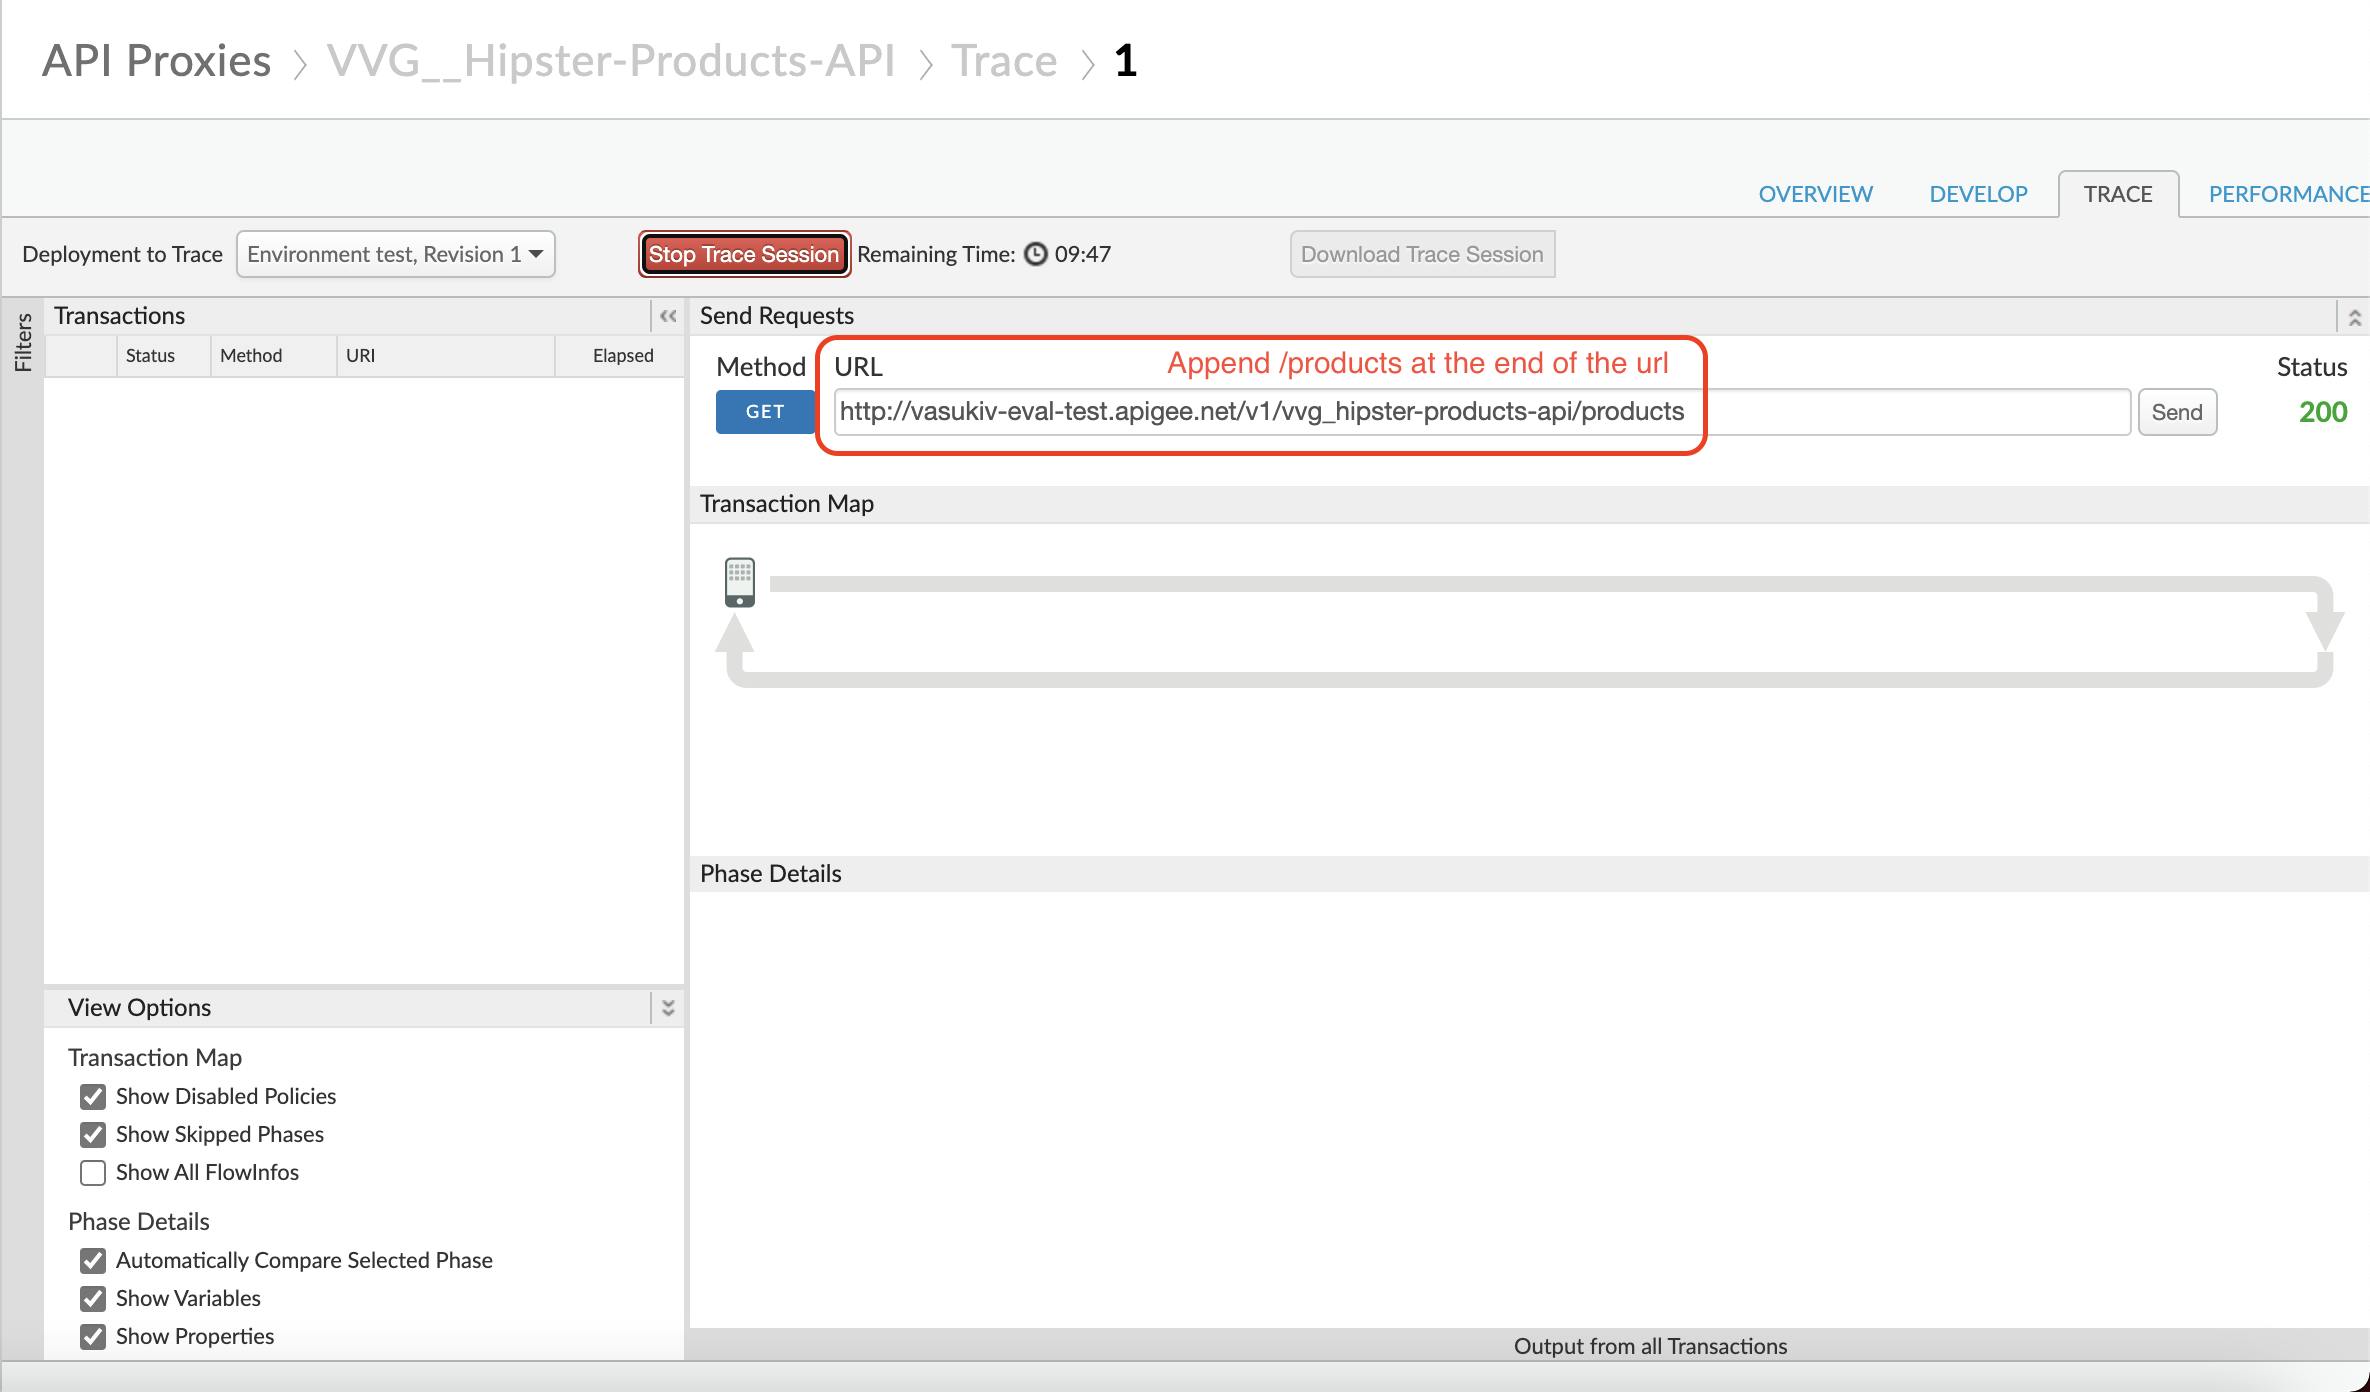
If you're using Trace Tool:
Navigate to your proxy's Trace tab.
Ensure that the deployed API revision is selected.
Hit Start Trace Session.

Wait for Trace session to start.
Modify the URL to send to a valid API resource - append a /products to the end of the URL.
Hit 'Send'.
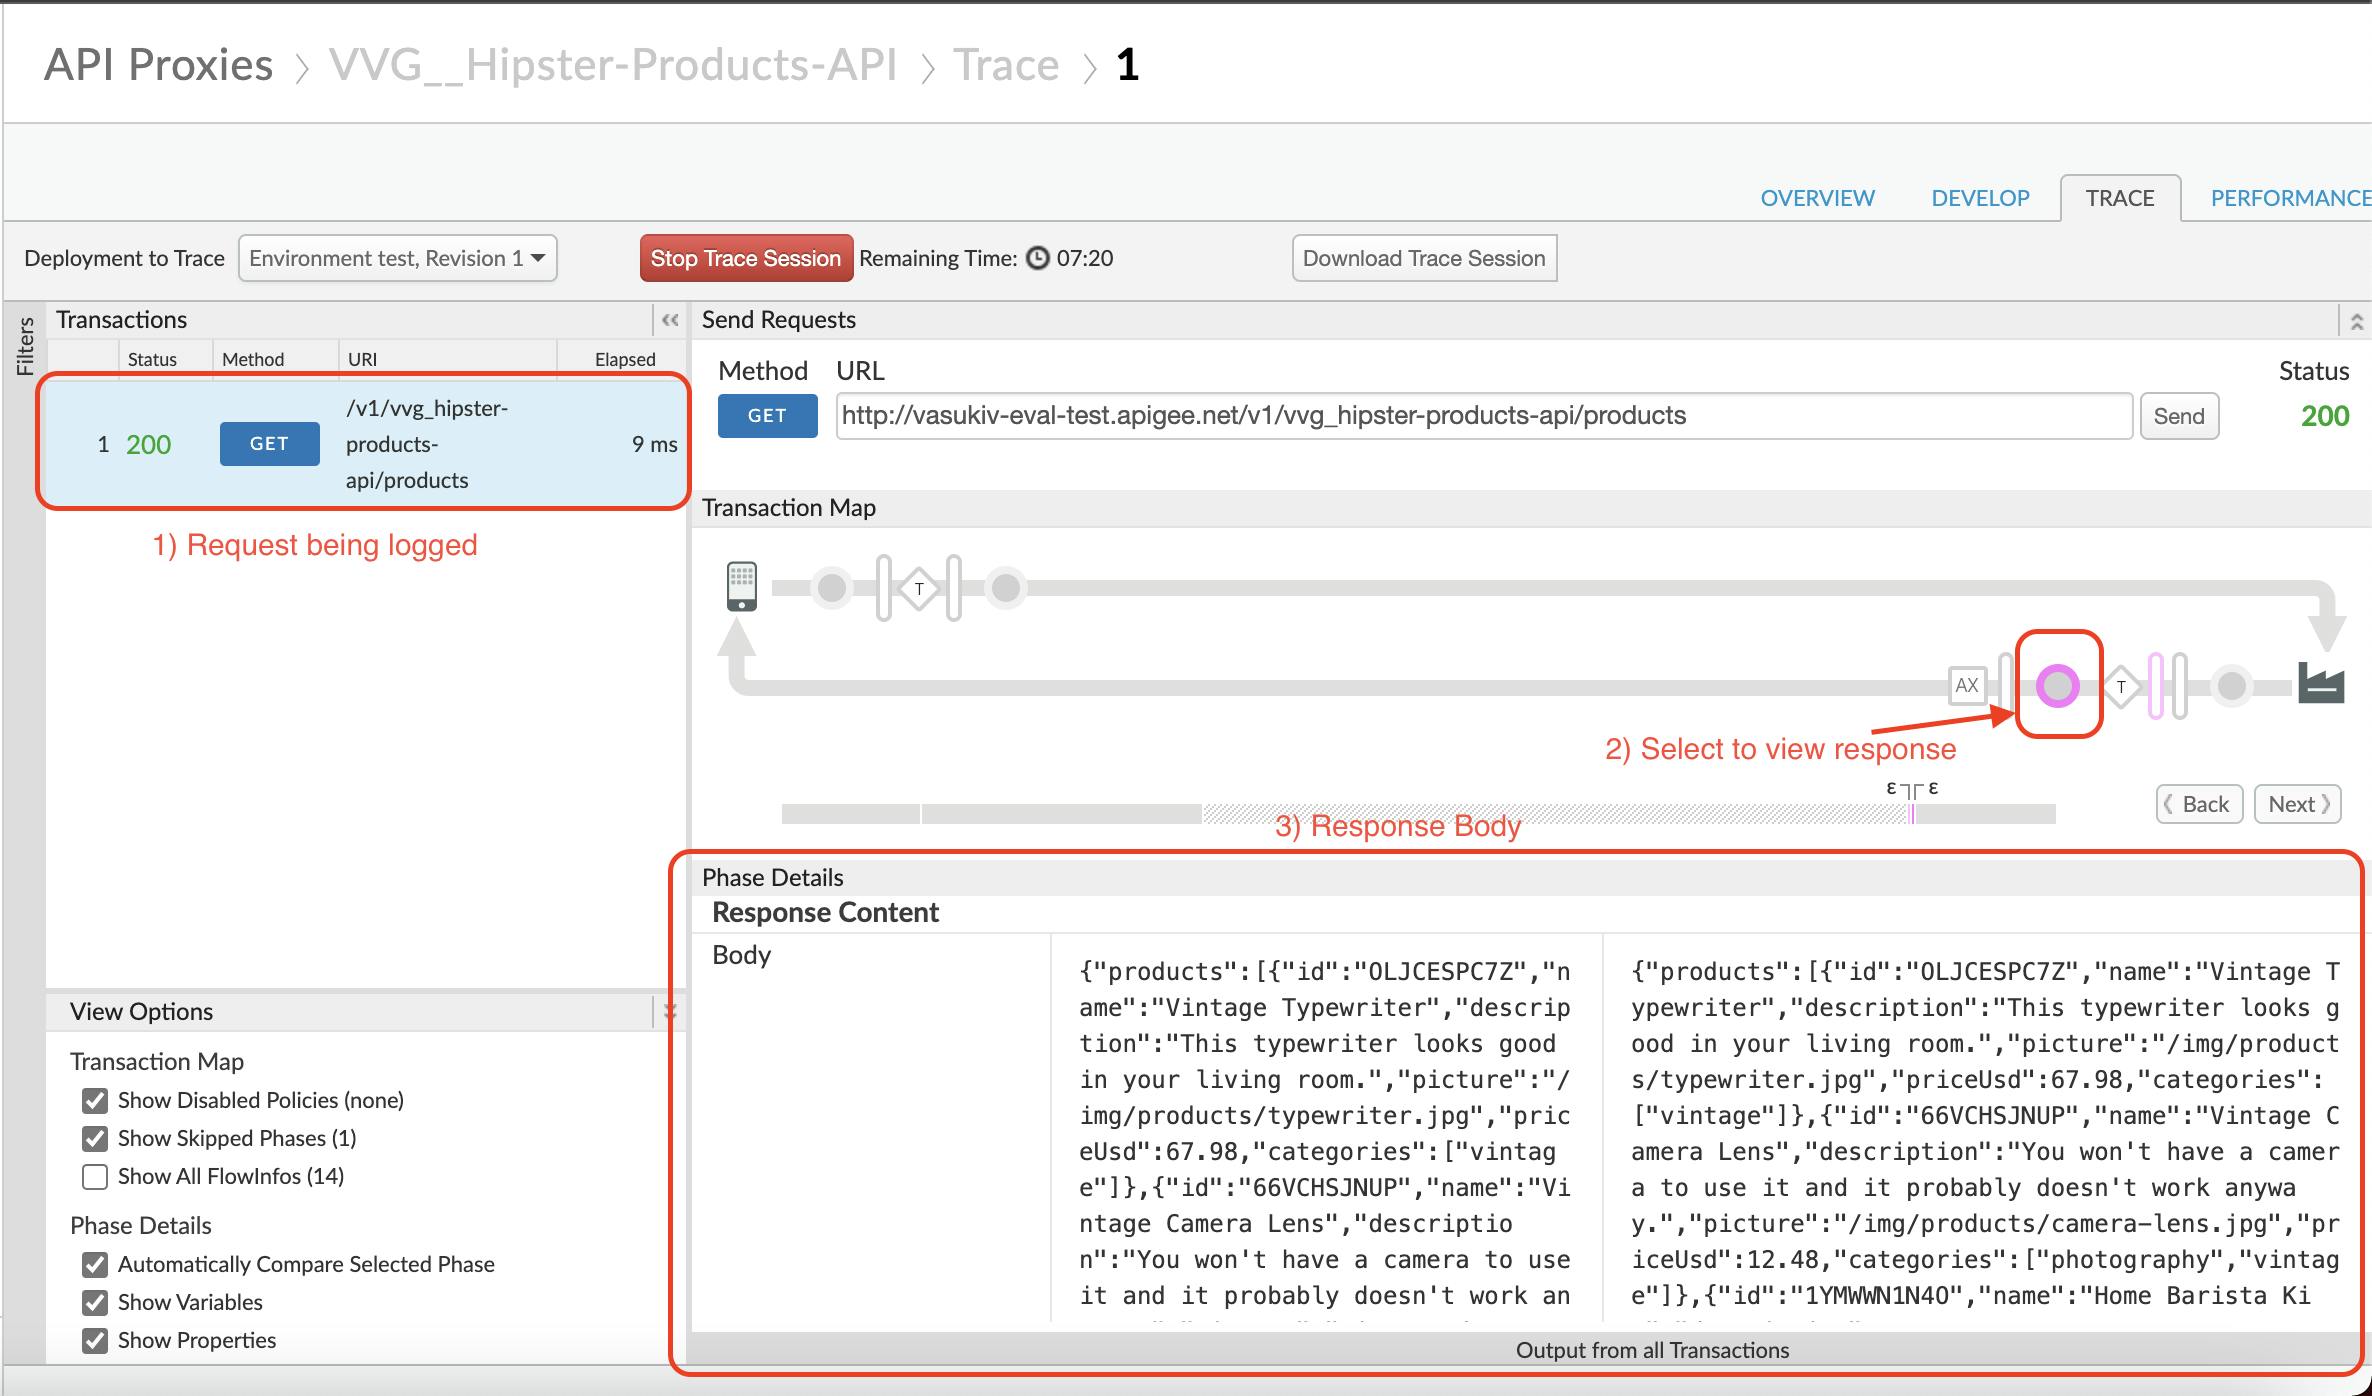
You will see that the API proxy received the request and sent back an HTTP status 200 response which was logged by the Trace session. You can click on the step shown below to view the response body:
Save the API Proxy
Let’s save the API Proxy locally as an API Bundle so that we can reuse it in the follow-up articles.
Save the API Proxy by downloading the proxy bundle. See screenshot below for instructions:

Final Words
You have now built and tested your first API Proxy to an existing backend. With this in place, in the follow-up articles, we will go through adding security to the API proxy and creating the first API Product that you can serve as a service to the world.
See you in the next one. 👋🏻