


AWS Amplify for Flutter - Part 1
A first-of-its series guide to integrating AWS Amplify to your Flutter Apps


About Amplify

Amplify, launched in 2017, is an end-to-end AWS solution for mobile and front-end web developers. It is a combination of services and tools that can be used together or individually to help mobile and frontend developers create and host their applications using AWS services.
One can compare Amplify with Firebase in terms of services offered by both platforms. Even though Firebase has been around for a while and the popular choice for many developers, Amplify has managed to make its way soon enough. Recently, it launched the admin UI which helps developers to create authorisation rules, database schemas, relations and much more without having to worry about factors like APIs and database connectivity.
Amplify is an all-in-one solution for developers who don't want to get their hands dirty while setting up authentication systems, databases, hosting, notification, etc... it also provides open-source tools for almost all major mobile and web frameworks which includes JavaScript, React, Angular, Vue, Next.js, and mobile platforms including Android, iOS, React Native, Ionic, Flutter.
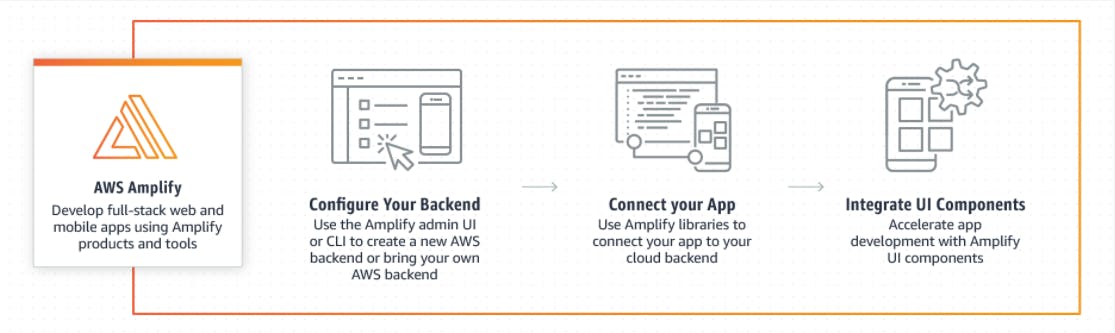
How Development works in Amplify:
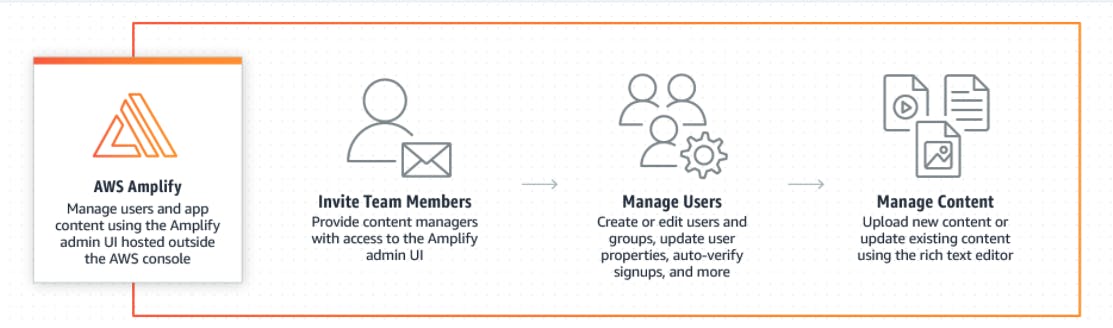
How App Management works in Amplify:
Benefits of using Amplify:
- Configure the backend fast - Using tools like Amplify CLI and Amplify Admin UI, has made it easy to configure the backend with Authentication, Storage, Function, Data, and other common use cases.
- Easy management of content - Admin UI can be shared with non-developers by the provision of administrative access to manage users and content without an AWS account.
- Seamlessly connect with the framework - Amplify CLI has made it very easy to integrate the software with your project. All you have to do is run
amplify initand answer the questions asked by the CLI tool. - Deploy in seconds - Simplify connect Git repository, host static website and single page web apps with Git-based CI/CD.
Services provided by Amplify:
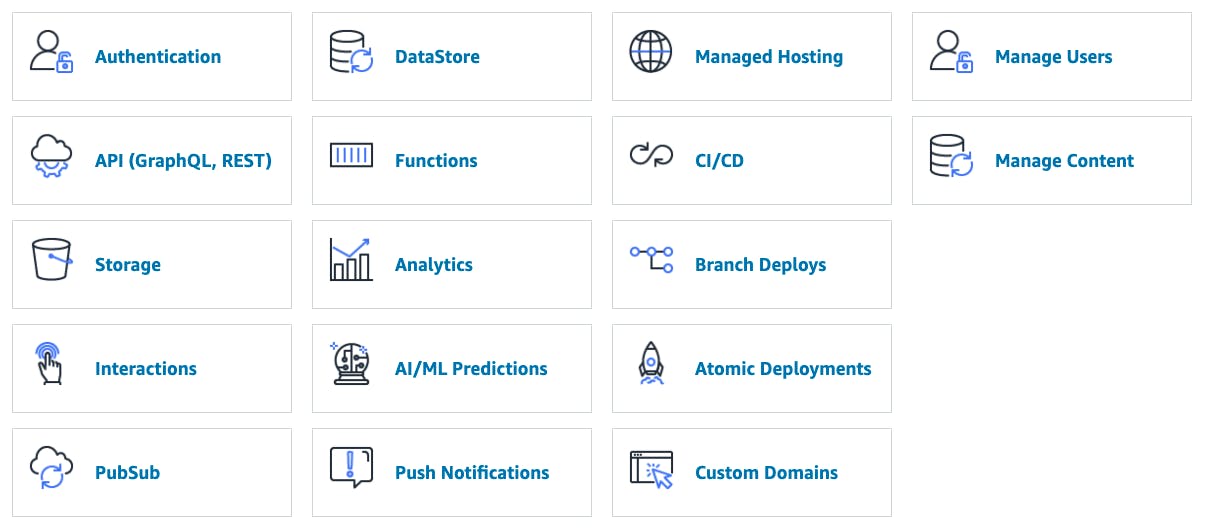
Authentication - Enable sign-in, sign-up, and sign-out within a minute with pre-build UI components and powerful authentication APIs (Cognito).
Storage - A simple mechanism for managing user content in public, protected or private storage(S3).
GraphQL API - Easy and secure solution to access backend data with support for real-time updates using GraphQL (AWS AppSync).
DataStore - Synchronize and persist online & offline data to the cloud.
REST API - A straightforward solution for making HTTPS requests using REST API (AWS API Gateway with AWS Lambda),
Analytics - Analytics that tracks user session, custom user sessions, custom user attributes, and in-app metrics to make informed decisions (AWS Pinpoint & AWS Kinesis).
Push Notifications - User engagement using push notifications with analytics(AWS Pinpoint).
XR - Support for Augmented Reality (AR) and Virtual Reality (VR) within the application.
PubSub - Provides a message-oriented middleware for real-time experience (AWS SQS & AWS SNS).
Interactions - To automate customer workflow, a conversational chatbot is provided powered by deep learning technologies.
AI/ML Predictions - Provides functionalities such as compute vision, translation, transcription and more (Amazon ML).
Since Amplify is not that mature, a few of these features are not supported by all frameworks. It's recommended to check before you start development.
Why choose Amplify?
Infrastructure as Code
Amplify uses AWS CloudFormation to allocate AWS resources to your project. This allows developers to modify configurations before executing them on AWS. Amplify allows full transparency through the resource allocation process so that developers can customise resources according to their will.
For example, to add Graphql API to your project, running amplify add api will bootstrap an AWS CloudFormation template in the Amplify/API folder in your project's root directory. This CloudFormation template then can be used in CI/CD process as well and can be used to replicate and remove the burden of allocating and configuring all the resources manually.
Local Mocking
Amplify supports mocking most of the services for local development and testing application before actually pushing it to the cloud. It currently allows mocking of API(Appsync), Database(DynamoDB), Storage(S3), Functions(Lambda) and Hosting. To start the mock server, run:
amplify mock
Multiple environments
Amplify supports multiple environments. Whenever you initialize an Amplify project it creates an environment.
Data modeling with GraphQL
Amplify allows you to easily model and access data via GraphQL so that developers can focus more on than business value and core application features rather than waste time architecting and re-architecting. Amplify GraphQL modeling allows deployment of AppSync GraphQL APIs with features including Authentication, Lambda resolver, elasticsearch engine, NoSQL Database and more using schema directives.
With Amplify there are always two ways to integrate any service. You can either use Admin UI or use Amplify CLI for this step. By using Amplify CLI, the entire setup and integration process can be built seamlessly. Since new features are constantly being added and bugs are constantly fixed, CLI makes the process less time-consuming.
Amplify CLI
The Amplify Command Line Interface(CLI) is a unified way to integrate Amplify services into your project.

Installing Amplify CLI
Follow the steps given below to install Amplify CLI. For NPM users:
npm install -g @aws-amplify/cli
Those using cURL can follow the steps given below:
curl -sL https://aws-amplify.github.io/amplify-cli/install | bash && $SHELL
To use Amplify with AWS resources, you first need to configure it with your AWS account. Follow the below instructions to configure Amplify with an AWS account:
amplify configure
Going forward, amplify configure will ask you to log in via AWS console in a browser. Once you are logged in. CLI will ask to create an IAM user. Follow the code given below:
Specify the AWS Region
? region:  # Your preferred region
Specify the username of the new IAM user:
? user name: the # User name for Amplify IAM user
Complete the user-created using the AWS console
Create a user with AdministratorAccess to create all the required resources in your project.
You can only give the required permission according to your need
Once you have successfully created an IAM user, it will provide accessKeyId and secretAccessKey at the end. Provide those keys to CLI when asked.
Enter the access key of the newly created user:
? accessKeyId:  # YOUR_ACCESS_KEY_ID
? secretAccessKey:  # YOUR_SECRET_ACCESS_KEY
This would update/create the AWS Profile in your local machine
? Profile Name:  # (default)

Successfully set up the new user.
Once you have successfully configured Amplify, navigate to your JavaScript, iOS, Android, or Flutter project root, and initialize AWS by running amplify init. It will ask you few configuration questions. After this command, it will create an amplify folder in your root directory along with the amplifyconfiguration file.
Amplify CLI Commands
amplify init
This is a one-time initialization process to create an Amplify supported application. This command helps you to choose which AWS profile is to be used to allocate all the AWS resources and select the framework language(Javascript, Flutter, Java, Swift) corresponding to the project. amplify init creates a parent CloudFormation template in an S3 bucket which will contain nested CloudFormation template for when other AWS resources are added. The same S3 bucket also contains Lambda zip files and AppSync schema and resolver files. amplify/ directory is created upon successful completion of the amplify init command which contains all necessary metadata files.
This is what the amplify/ directory structure looks like:
<project-root>
    |_amplify/
    |_ #current-cloud-backend/
        |_ amplify-meta.json
    |_ .config
        |_ aws-info.json
        |_ project-config.json
    |_ backend/
        |_amplify-meta.json
    |_.amplifyrc
amplify <category> add
Users can use this command to add necessary resources to their projects. This will create a CloudFormation template for the resource in the amplify/backend/<cateogry> directory. Once this process is complete, the user can run amplify push to run the CloudFormation template and assign all the resources to this project using Amplify IAM user.
amplify push
This command is used to create and update cloud resources. Using this, CLI will upload the latest nested stack template to S3 and then call AWS CloudFormation API to create or update the resource. Once CloudFormation has successfully been completed, awsconfiguration.dart (for Flutter project) will be updated. This CloudFormation template can be found at amplify/backend/awscloudformation.
amplify pull
The amplify pull command is similar to git pull. All it does is fetch remote backend configuration and update the local environment to match the definitions. This command is helpful when multiple developers are working on the same backend and the remote backend keeps on updating. It's recommended run amplify pull regularly to be safe from backend conflicts.
amplify console
This command will open the browser using the Amplify console to your project. This console provides central access to manage and view all resources used in the project. All user data is also analyzed in the console.
List of commands :
amplify <category> <subcommand>amplify pushamplify pullamplify env <subcommand>amplify configureamplify consoleamplify deleteamplify helpamplify initamplify publishamplify runamplify statusamplify logout
Amplify Console
Amplify console can be accessed via AWS console and acts as the control center for full-stack app development and deployment. Amplify console consists of two parts:
- Amplify Hosting
- Amplify Admin UI
Amplify Hosting
Amplify hosting is used to manage the front-end part of your app. It corresponds using Git. Each branch in Git is deployed and is available at a unique URL.
Amplify Admin UI
Amplify Admin UI is used to manage all backend services like DataStore schema, authentication, functions, storage, APIs, etc. Admin UI provides a console to underlying AWS services.
Integrating Amplify with flutter
Adding Amplify to your project is a very easy and very fast process. The prerequisite is you should have Amplify CLI setup with an AWS account.
To create new flutter project:
i) Use Flutter CLI to create your project.
flutter create flutter_amplify_demo
ii) Next, ass Amplify dependencies to your project by opening pubspec.yaml and pasting the dependencies given below:
dependencies:
  flutter:
    sdk: flutter

  amplify_flutter: '<1.0.0'
  amplify_auth_cognito: '<1.0.0'
  amplify_analytics_pinpoint: '<1.0.0'
iii) After this, run Flutter pub get:
flutter pub get
iv) Now to integrate Amplify, go to the project root directory and run amplify init as shown:
➜  flutter_amplify_demo $ amplify init
Initializing new Amplify CLI version...
Done initializing new version.
Scanning for plugins...
Plugin scan successful
Note: It is recommended to run this command from the root of your app directory
? Enter a name for the project: flutteramplifydemo
? Enter a name for the environment: dev
? Choose your default editor: Visual Studio Code
? Choose the type of app that you're building: flutter
Please tell us about your project
? Where do you want to store your configuration file?: ./lib/
Using default provider: awscloudformation
? Select the authentication method you want to use: AWS profile

For more information on AWS Profiles, see:
https://docs.aws.amazon.com/cli/latest/userguide/cli-configure-profiles.html

? Please choose the profile you want to use: default
v) To use the Amplify project, it has to be initialized when the app starts. In order to do so, edit the main.dart file and the boilerplate code given below:
import 'package:flutter/material.dart';
import 'package:amplify_flutter/amplify.dart';
import 'package:amplify_analytics_pinpoint/amplify_analytics_pinpoint.dart';
import 'package:amplify_auth_cognito/amplify_auth_cognito.dart';
import 'amplifyconfiguration.dart';

void main() {
  runApp(MyApp());
}

class MyApp extends StatefulWidget {
  @override
  _MyAppState createState() => _MyAppState();
}

class _MyAppState extends State<MyApp> {
  bool _amplifyConfigured = false;

  @override
  void initState() {
    super.initState();
    _configureAmplify();
  }

  void _configureAmplify() async {
  }

  void _recordEvent() async {
  }

  @override
  Widget build(BuildContext context) {
    return MaterialApp(
      home: Scaffold(
          appBar: AppBar(
            title: const Text('Amplify Core example app'),
          ),
          body: ListView(padding: EdgeInsets.all(10.0), children: <Widget>[
            Center(
              child: Column (
                children: [
                  const Padding(padding: EdgeInsets.all(5.0)),
                  Text(
                    _amplifyConfigured ? 'configured' : 'not configured'
                  ),
                  ElevatedButton(
                    onPressed: _amplifyConfigured ? _recordEvent : null,
                    child: const Text('record event')
                  )
                ]
              ),
            )
          ])
      )
    );
  }
}
In Amplify before using any Amplify package function, it has to mentioned configuration call. Note that this init method should only be called once at the root of the project.
void _configureAmplify() async {
  if (!mounted) return;

  // Add Pinpoint and Cognito Plugins
  Amplify.addPlugin(AmplifyAnalyticsPinpoint());
  Amplify.addPlugin(AmplifyAuthCognito());

  // Once Plugins are added, configure Amplify
  // Note: Amplify can only be configured once.
  try {
    await Amplify.configure(amplifyconfig);
  } on AmplifyAlreadyConfiguredException {
    print("Amplify was already configured. Was the app restarted?");
  }
  try {
    setState(() {
      _amplifyConfigured = true;
    });
  } catch (e) {
    print(e);
  }

}
addPlugin()should always be called beforeAmplify.configure(). CallingAmplify.configuremore than one time will result in an exception.
This is the first part of a series of articles on Amplify with Flutter framework. This series will include detailed articles on each service provided by Amplify for flutter. So stay tuned.
Thank you so much for reading 😁. That's it for today.
PS. If you find this article useful, then you can give a 👍 to this article and come say hi on Twitter.