Build A Web3 App Using Solidity & React - Part 1
A first-of-its series guide on setting up your own blockchain and writing a smart contract to build your first DeFi application.
Welcome to the first edition of the Building your Web3 app series! The primary goal of this tutorial series is to get you started on this exciting new sphere of web development that deals with the decentralized apps. At the end of this series, you will be able to build your own decentralized app or simply dApps.
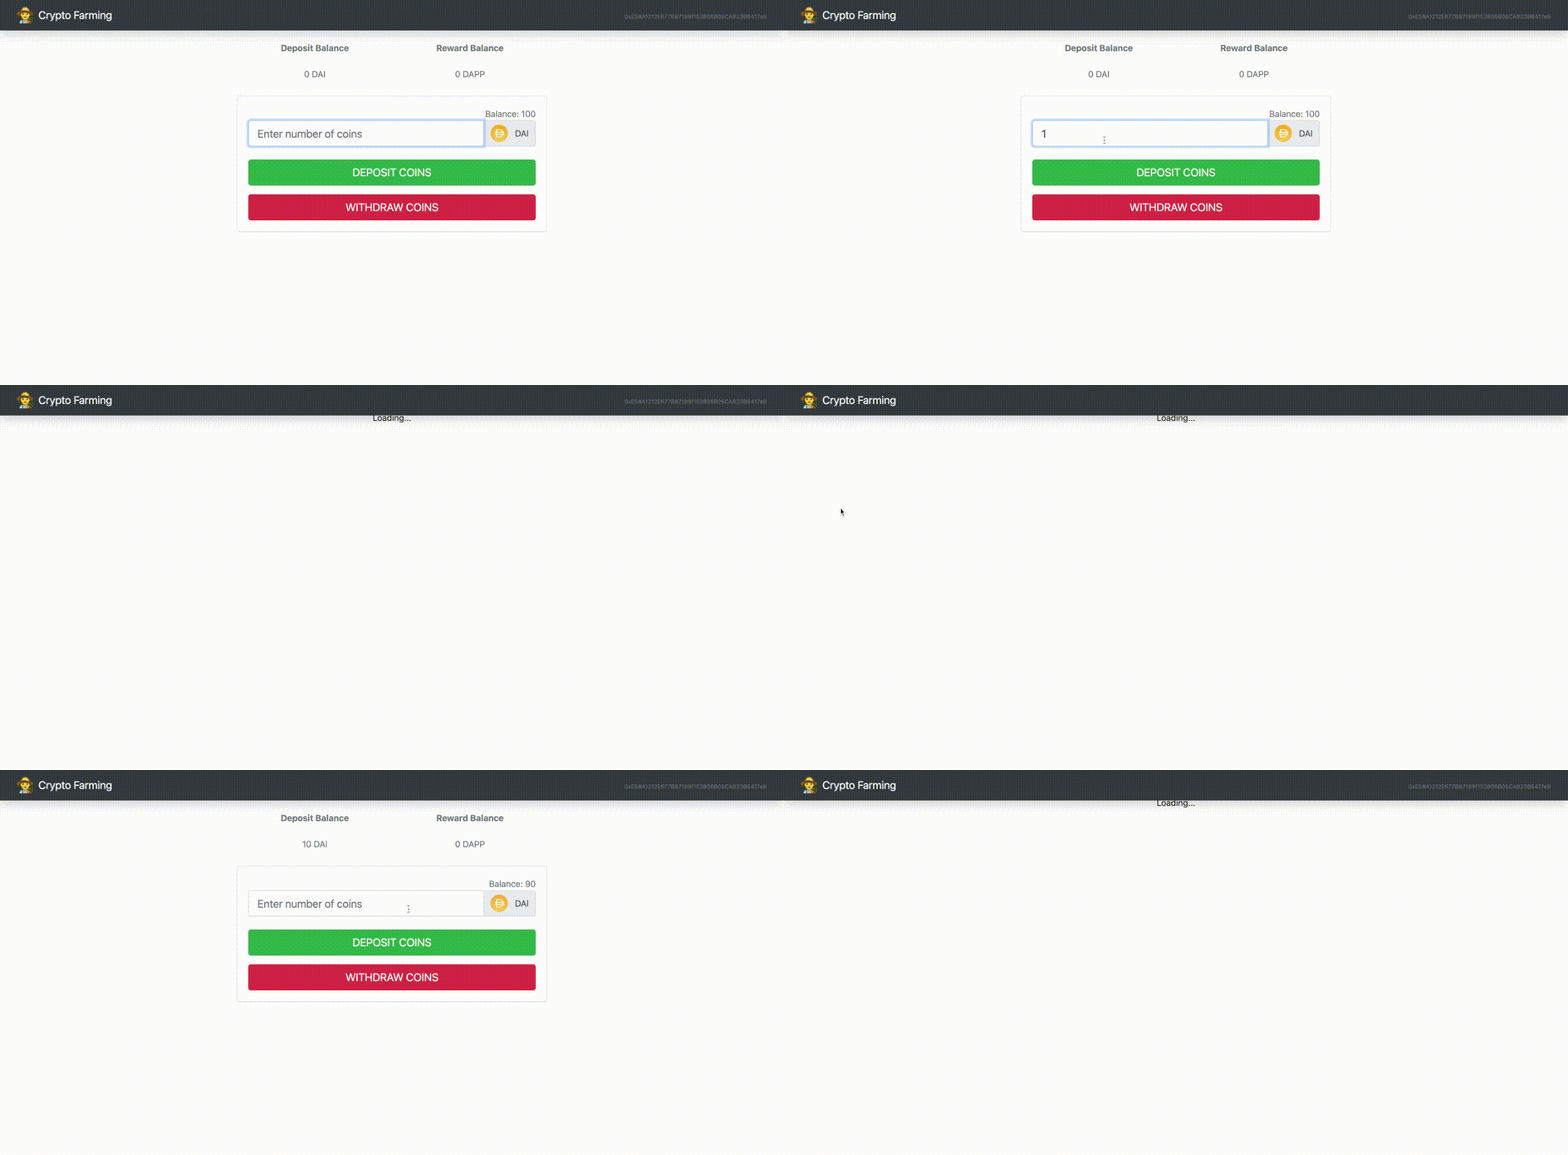
Sneak Peek to what you'll be building:

Note: What this series does not contain is another take to the Web2 vs Web3 debate. We have passed on that responsibility to social media... for the better. :)
Before we start...
Now before we commence building our dApp, there are a few pre-requisites we should take care of:
- Basic understanding of blockchain and cryptocurrency is helpful.
- Beginner/Intermediate knowledge of React, JavaScript is required.
- No prior experience with Solidity programming knowledge.
These are some tools we will use:
- Google Chrome or any other web browser.
- Visual Studio Code or any editor.
- Ganache.
- Node.js and npm.
For now, we do not need to worry about setting up these tools. We will go through each one of them in this series.
The coding:
Step 1: Setting up our own Blockchain
- Download Ganache at: trufflesuite.com/ganache.
- Before we start building our decentralized application, we need to have a blockchain. This is where we will compile and migrate our smart contracts(SC) and it will provide us with the data for our client-side React App.
Note: Although, all the above mentioned Web3 jargon may seem overwhelming at first. We will go through each one of them in detail when we start building our dApp.
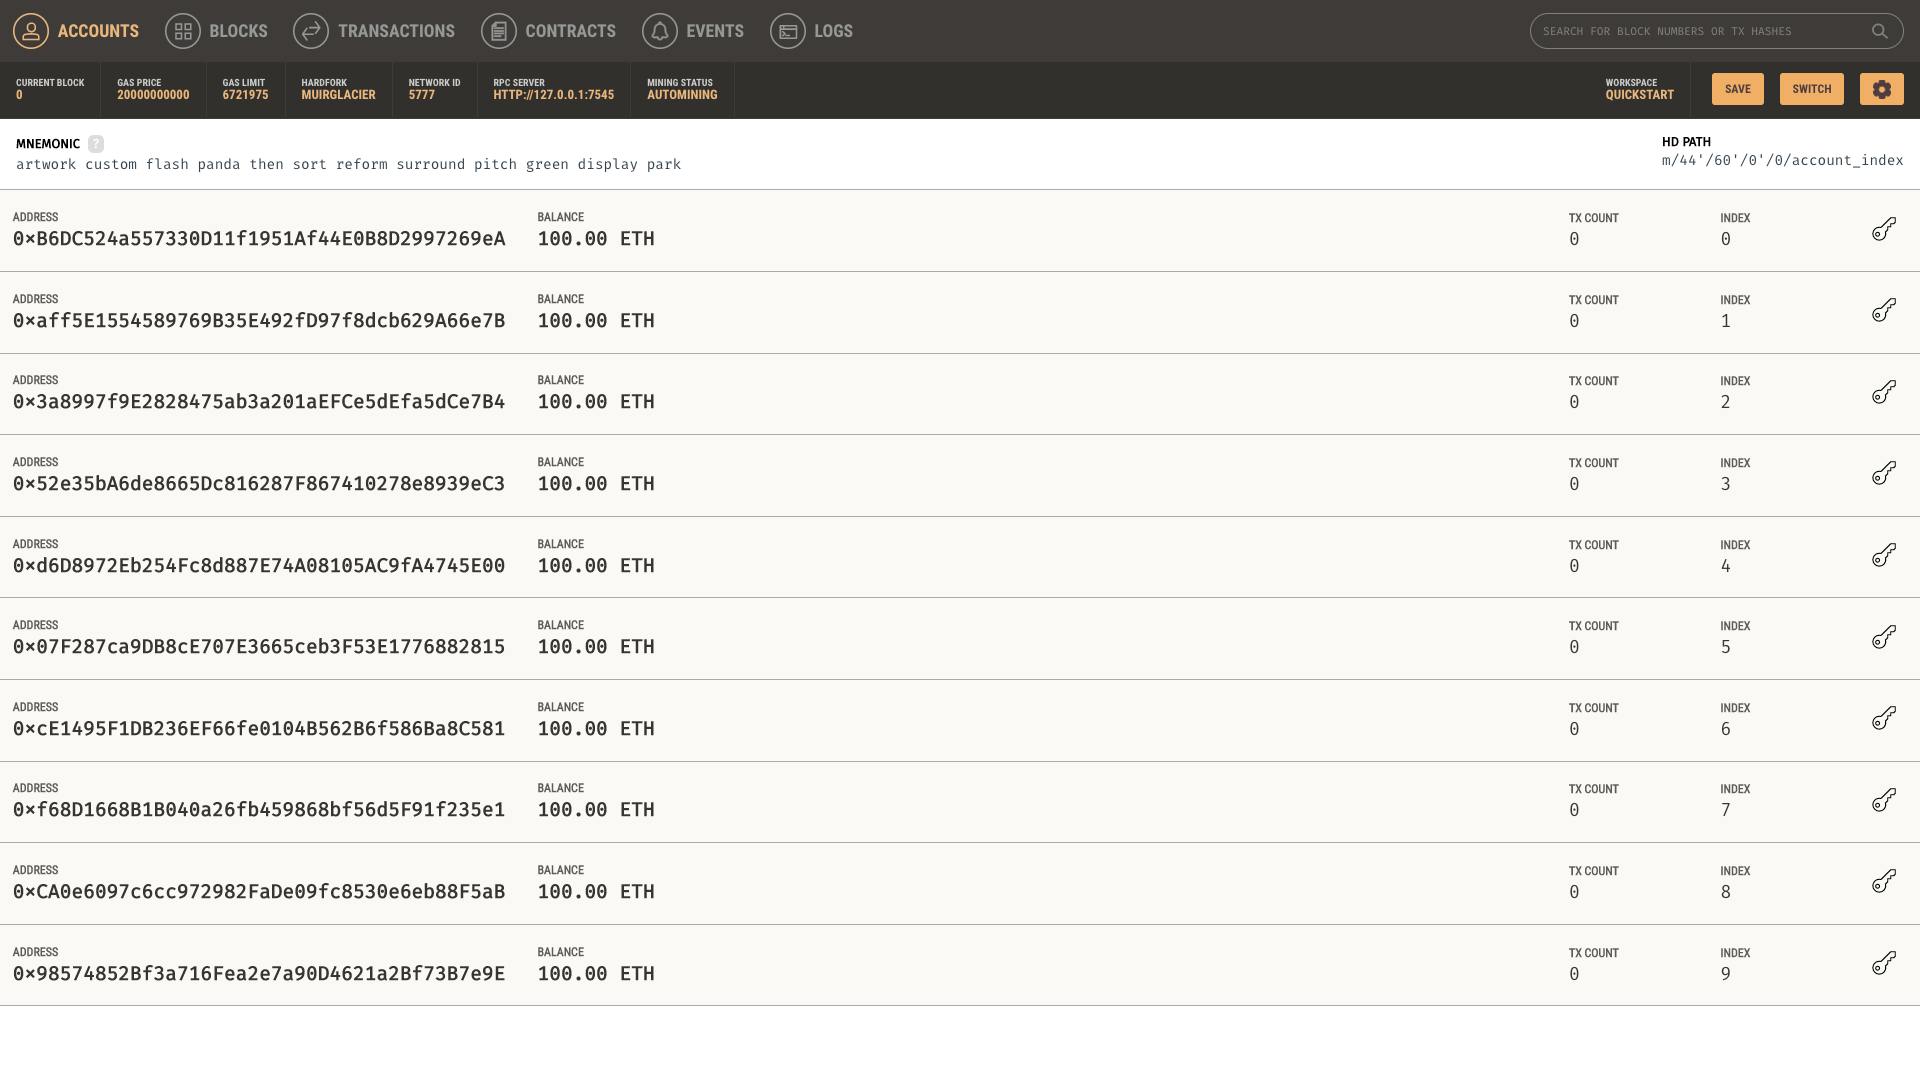
- Ganache is a great tool for setting up a local Ethereum blockchain. It will enable us to execute commands, run test cases and more on the blockchain. After it is installed, you can fire up a quick Ethereum blockchain through its application and subsequently, a similar dashboard will show up as displayed below:

Step 2: Installing Packages
We need to install a few packages before we start coding.
Install Node.js(with npm) from nodejs.org/en/download/. Once installed, you can go to the command prompt to check by using the following command:
node -v
npm -v
Install the truffle package from npmjs.com/package/truffle. We will be using a specific truffle package in this series. Enter the following snippet into your condole:
npm install --g truffle@5.1.39
Step 3: Setting up our cryptocurrency wallet
- Install the Metamask Chrome extension at: metamask.io/. We need a crypto wallet as it is essential in making Ethereum transactions with our app.
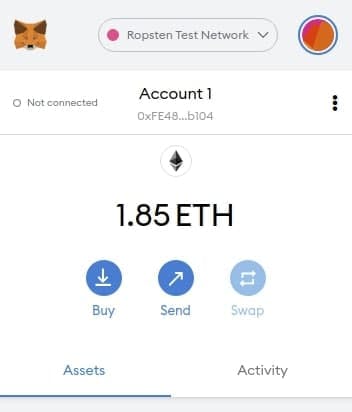
- In this series, we will be using the Metamask Chrome extension as our crypto wallet. Once installed, you can click on the extension icon on the browser panel and see a similar interface upon signing up on their platform. Refer to the image below:

Step 4: Let's code!
Now that we're done with all our setup, let's now move on to the coding part.
- We will begin with a starter code built keeping this series in mind. You can download the starter kit from here here. After cloning the repository, you will see a folder structure similar to the one below:
├── migrations
├── public
├── src
    ├── abis
    ├── components
    ├── contracts
├── package-lock.json
├── package.json
└── truffle-config.json
- Creating our smart contract - Now we get to writing our first line of code i.e., creating our smart contract. In layman's terms, a smart contract(SC) is the code that gets deployed to a blockchain to act as the Back-end for the Frontend application. You will need to navigate to the
contractsinside thesrcfolder and create a new solidity file namedTokenFarm.sol. Write the following code in very the same file:
   pragma solidity ^0.5.16;
   contract TokenFarm {
     //All smart contract logic goes here...
     string public name = "Dapp Token Farm"
    }
Creating migration for our smart contracts - A smart contract needs to have a respective migration logic in order to deploy it to the blockchain. You will need to navigate inside the
migrationsfolder which will require you to create a new javascript file named2_deploy_contracts.js. Write the following migration logic inside the very same file:const tokenFarm = artifacts.require('TokenFarm'); module.exports = function(deployer) { deployer.deploy(tokenFarm) }Compiling and Deploying our smart contract - Navigate to the root folder in your command prompt/terminal and run the following commands. Firstly, you'll need to compile the smart contracts. This will create the JSON file for our smart contract as shown:
truffle compileOnce compiled successfully, you will see a message similar to this:

Next, migrate the smart contracts. This will deploy the JSON file on the blockchain as shown:
`
 truffle migrate
Once the migration is done, you will see a message indicating the number of contracts deployed and the gas cost. Refer to the image given below:

Step 5: Try a test!
- So now that we have written our smart contract, let's try running a small test through
truffleby using its console feature. To launch the console in the command prompt/terminal, use the command given below:
truffle console
- This will connect to a developmental blockchain in our local network which will allow us to get details about our smart contract through the blockchain directly while testing our code in the process.
When the console is loaded, you will see the following prompt:
truffle(development)>Create a local variable and store the deployed smart contract using the following code:
truffle(development)>tokenFarm = await TokenFarm.deployed()Retrieve the address from the smart contract using the respective blockchain by entering the following code in your console:
truffle(development)>tokenFarm.address
'0x46573fb2d3B6ba4C7aC4c15ceb97b8A58135f8ff'
Use the following code snippet to retrieve the name from the smart contract:
truffle(development)>contractName = await tokenFarm.name()
'Dapp Token Farm'
truffle(development)>contractName
'Dapp Token Farm'
Wrapping up...
In this article, we saw how we can build a smart contract from scratch and deploy it on a blockchain. In the next part, we will be building further on our smart contract with Token Farm enabling all the features to start farming tokens. Thank you for reading the first article of this series. We could've written about building the token farming app from scratch in one article but it would have caused a longer read and may have been complicated for some!
Hope this article has been a helpful read to you. Be sure to like, share this article with all your developer friends, teammates and anyone who you think can benefit from this knowledge. We'll be back with the next part in a fortnight.
Till next time, cheers!

