Building A Chrome Extension In 2021
A step-by-step guide to launching your own Chrome extension using JavaScript.
A huge part of what makes Chrome such a widely-used product is how expandable it is and Chrome extensions have had a huge role to play in this expansion. There's a Chrome extension for anything and everything in this world and what's great is that it's remarkably easy to build one by yourself.
In this article, we'll be creating a Chrome extension from scratch and go all the way to publishing it to the Chrome web store. We'll also be keeping everything as per the Manifest V3(MV3) framework while building our extension.
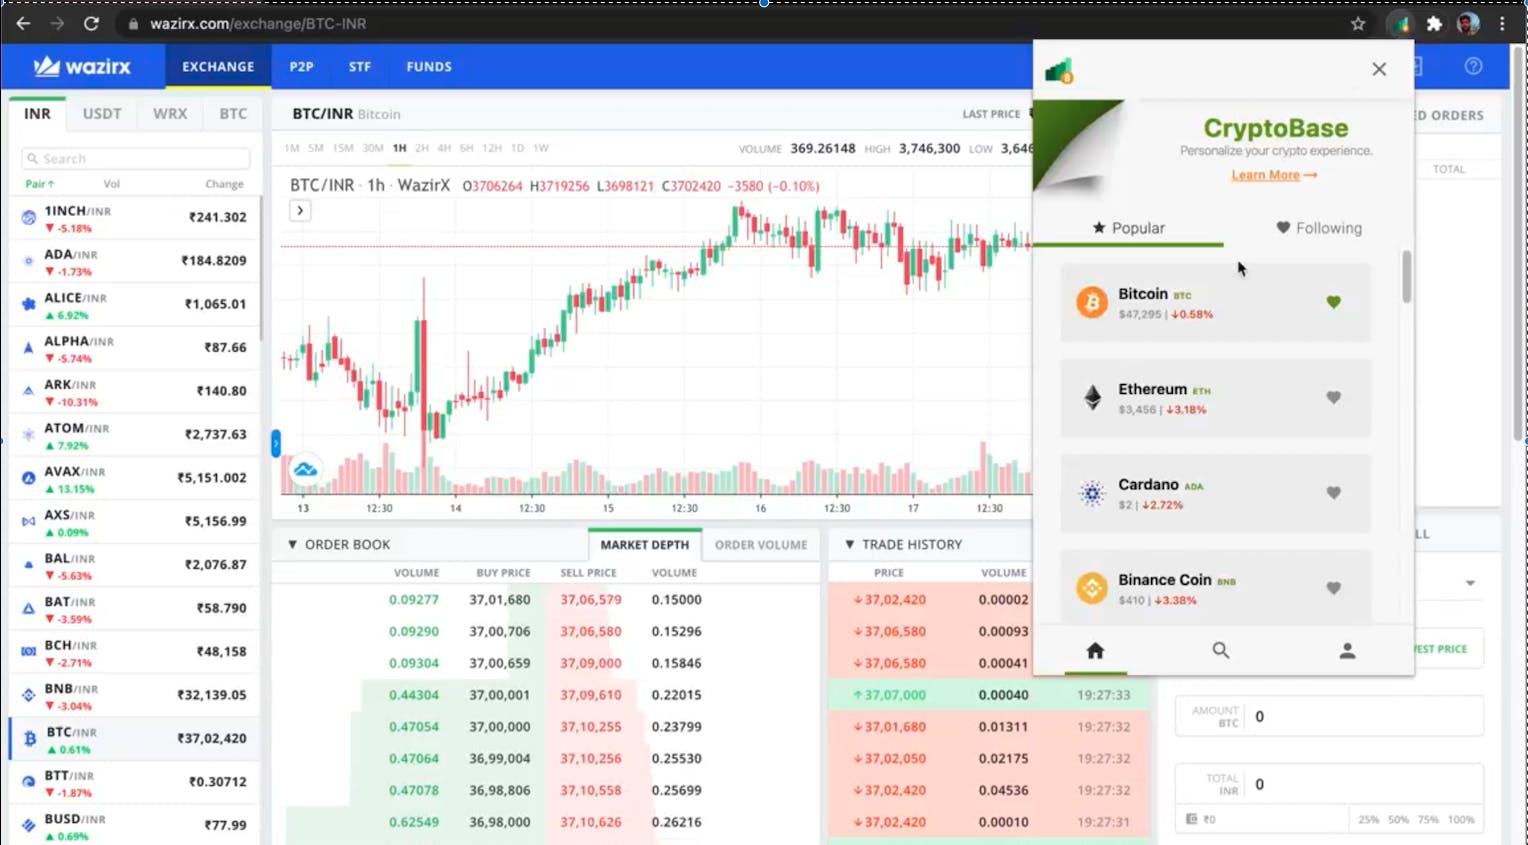
Here's a representation of what we're going to build:

We've all been pretty obsessed with cryptocurrencies lately, many times we find ourselves constantly checking the market trends just to stay updated. Wouldn't it be great if we could build a Chrome extension that gives us the latest price whenever we open the extension?
Let's get on with the building part then!
What's a Chrome Extension?
Before we start building, it would be great if we could get a sense of what exactly is a Chrome extension and how it works under the hood in a browser. On a basic level, an extension is just a collection of HTML, CSS and JavaScript snippets that lets us execute some extra functionalities through the JavaScript APIs that the Chrome browser exposes. In layman's terms, an extension is mostly a webpage hosted inside Chrome with access to some specific APIs.
In this blog, we're going to walk you through creating a basic Chrome extension called CryptoBase. This kind of extension fires a browser notification based on the fulfilment of specific business logic inside our extension and optionally execute some Javascript.
There are also a few terms you'll need to get accustomed to before we begin.
Chrome extensions start with a manifest.json file. You can run code in the background using the background service worker. Any code specific webpage can be run through a content scripts file while the Options file is used to help the users customise the extension by providing an options page by right-clicking the extension icon in the toolbar and finally, the main UI element of our Chrome extension will be built using the popup file.
Let's Get Coding
Step 1: Setting up the initial project.
- Use the following code to initialise the setup:
CryptoBase
├── icon-32.png
├── popup.html
├── popup.css
├── popup.js
└── background.js
- First things first, we need to create the project and all the files necessary for extension. Let's begin by creating a new directory called
CryptoBase. We'll be keeping all our files in this new folder. Chrome does allow us to load and test our extensiona by pointing to a specific folder that contains all the files.
- We also need a
manifestfile for our extension to run as it tells Chrome everything needs to properly load in our Chrome extension. We'll create a blankmanifest.jsonfile and put it into the same root folder calledCryptoBasethat we created earlier.
- Next, we'll need an icon for our extension. There are various dimensions you can go for like
16x16px,32x32px,48x48pxand128x128pxor go for a single default size to cover all devices.
- After that, we need to create a user interface for our extension and for that we'll use the
popupfiles in our extension by creating HTML, CSS and JS files for thepopupin ourCryptoBasedirectory.
You can get the complete setup here from the Chrome Developers' documentation.
Step 2: Creating a manifest file.
- Now our basic folder structure is done, we can add code to our
manifest.jsonfile which describes our extension to the browser. Use the snipper given below:
 "name": "Cryptobase",
  "description": "Cryptobase",
  "version": "1.1",
  "manifest_version": 3,
  "permissions": [],
  "host_permissions": [],
  "background": {
    "service_worker": "background/background.js"
  },
  "action": {
    "default_title": "Cryptobase",
    "default_icon": "assets/icon-32.png",
    "default_popup": "popup/popup.html"
  },
  "icons": {
    "16": "assets/icon-16.png",
    "32": "assets/icon-32.png",
    "48": "assets/icon-48.png",
    "128": "assets/icon-128.png"
  },
  "key": "MIIBIjANBgk..."
Step 3: Building the extension.
1. Creating the user interface.
- The first step in coding out our Chrome extension is to create the user interface that will get displayed when the extension icon is clicked. For the purpose of being concise, we'll be keeping the user interface very simple. It consists of a header that says "CryptoBase" followed by a list of top 50 cryptocurrencies(according to their respective market capitalization). Here's how our
popup.htmlshould look like:
<!doctype html>
<html>
  <head>
    <link rel="stylesheet" href="popup.css" />
  </head>
  <body>
    <main>
      <div class="container">
        <h1 class="heading">CryptoBase</h1>
        <h3 class="sub-heading">Chrome extension for cryptocurrencies.</h3>
        <div id="main-content"></div>
      </div>
    </main>
    <script src="popup.js"></script>
  </body>
</html>
- If you look at this HTML, we've included both
popup.cssandpopup.js. These are where we'll be putting our logic for our extension that'll execute whenever its icon is clicked.
2. Building the logic.
- The last thing we need is to implement the logic which should execute every time when the user clicks the extension icon. We'll want to add a basic fetch request to get the required data from the public API. When the extension icon gets clicked, the values will be fetched and corresponding HTML element will be created in the DOM. Use the code snippet given below to execute this:
const baseCoinAPI = "https://pro-api.coinmarketcap.com/";
const apiVersion = "v1";
const apiKey = `&CMC_PRO_API_KEY=${REACT_APP_CMC_KEY}`;

//Function to get the top 25 coins.
const getCoins = async (endPoint) => {
  let path = `${baseCoinAPI}${apiVersion}${endPoint}${apiKey}`;
  const fetchResult = await fetch(path);
  const result = await fetchResult.json();

  if (fetchResult.ok) {
    return result;
  }
  const responseError = {
    type: "Error",
    message: result.message || "Something went wrong",
    data: result.data || "",
    code: result.code || "",
  };

  let error = new Error();
  error = { ...error, ...responseError };
  throw error;
};

//DOM Manipulation to show all the coins and respective values
const coins = getCoins("/cryptocurrency/listings/latest?limit=25");
var mainContent = document.getElementById("main-content");
if (coins.length > 0) {
  coins.forEach((coin) => {
    var content = document.createElement("div");
    var paragraph = document.createElement("p");
    paragraph.textContent = `${coin.name} - ${coin.quote.USD.price}`;
    content.appendChild(paragraph);
    mainContent.appendChild(content);
  });
}
Step 4: Submitting for review.
Before publishing our extension to the Chrome Web Store, we need to get it reviewed from Chrome. Here are a few things we need to do to before submitting our extension for review.
1. Creating a zip file of our extension.
In order to upload the extension to the Chrome Web Store, we'll need to create a zip file that contains all the required files, assets and most importantly manifest file in the root directory.
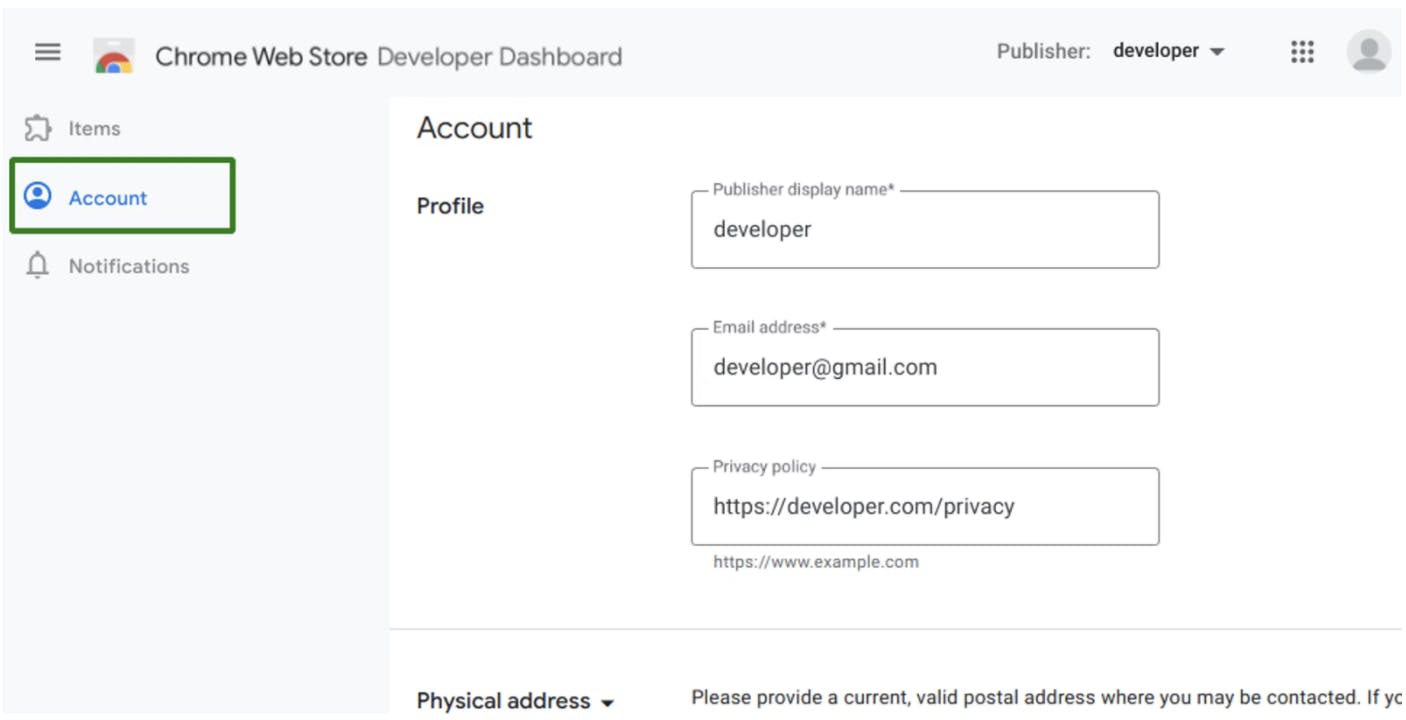
2. Setting up a developer account.
We also need to create a Chrome Web Store developer account in order to publish the extension. Here's what it should look like:

3. Uploading the extension.
Let's finish uploading the extension by following these steps below:
i. Go to the Chrome Developer Dashboard.
ii. Sign into the developer account we created earlier.
iii. Click the Add new item button.
iv. Click Choose file > our zip file > Upload. If our manifest and zip file are valid, we can edit the extension on the next page.
4. Add assets for our listing
We can add multiple assets for our extension on the Chrome Web Store. These include Screenshots and Promo tile amongst many other things. We could also create a separate webpage to tell users more about our extension.
5. Submit item for publishing
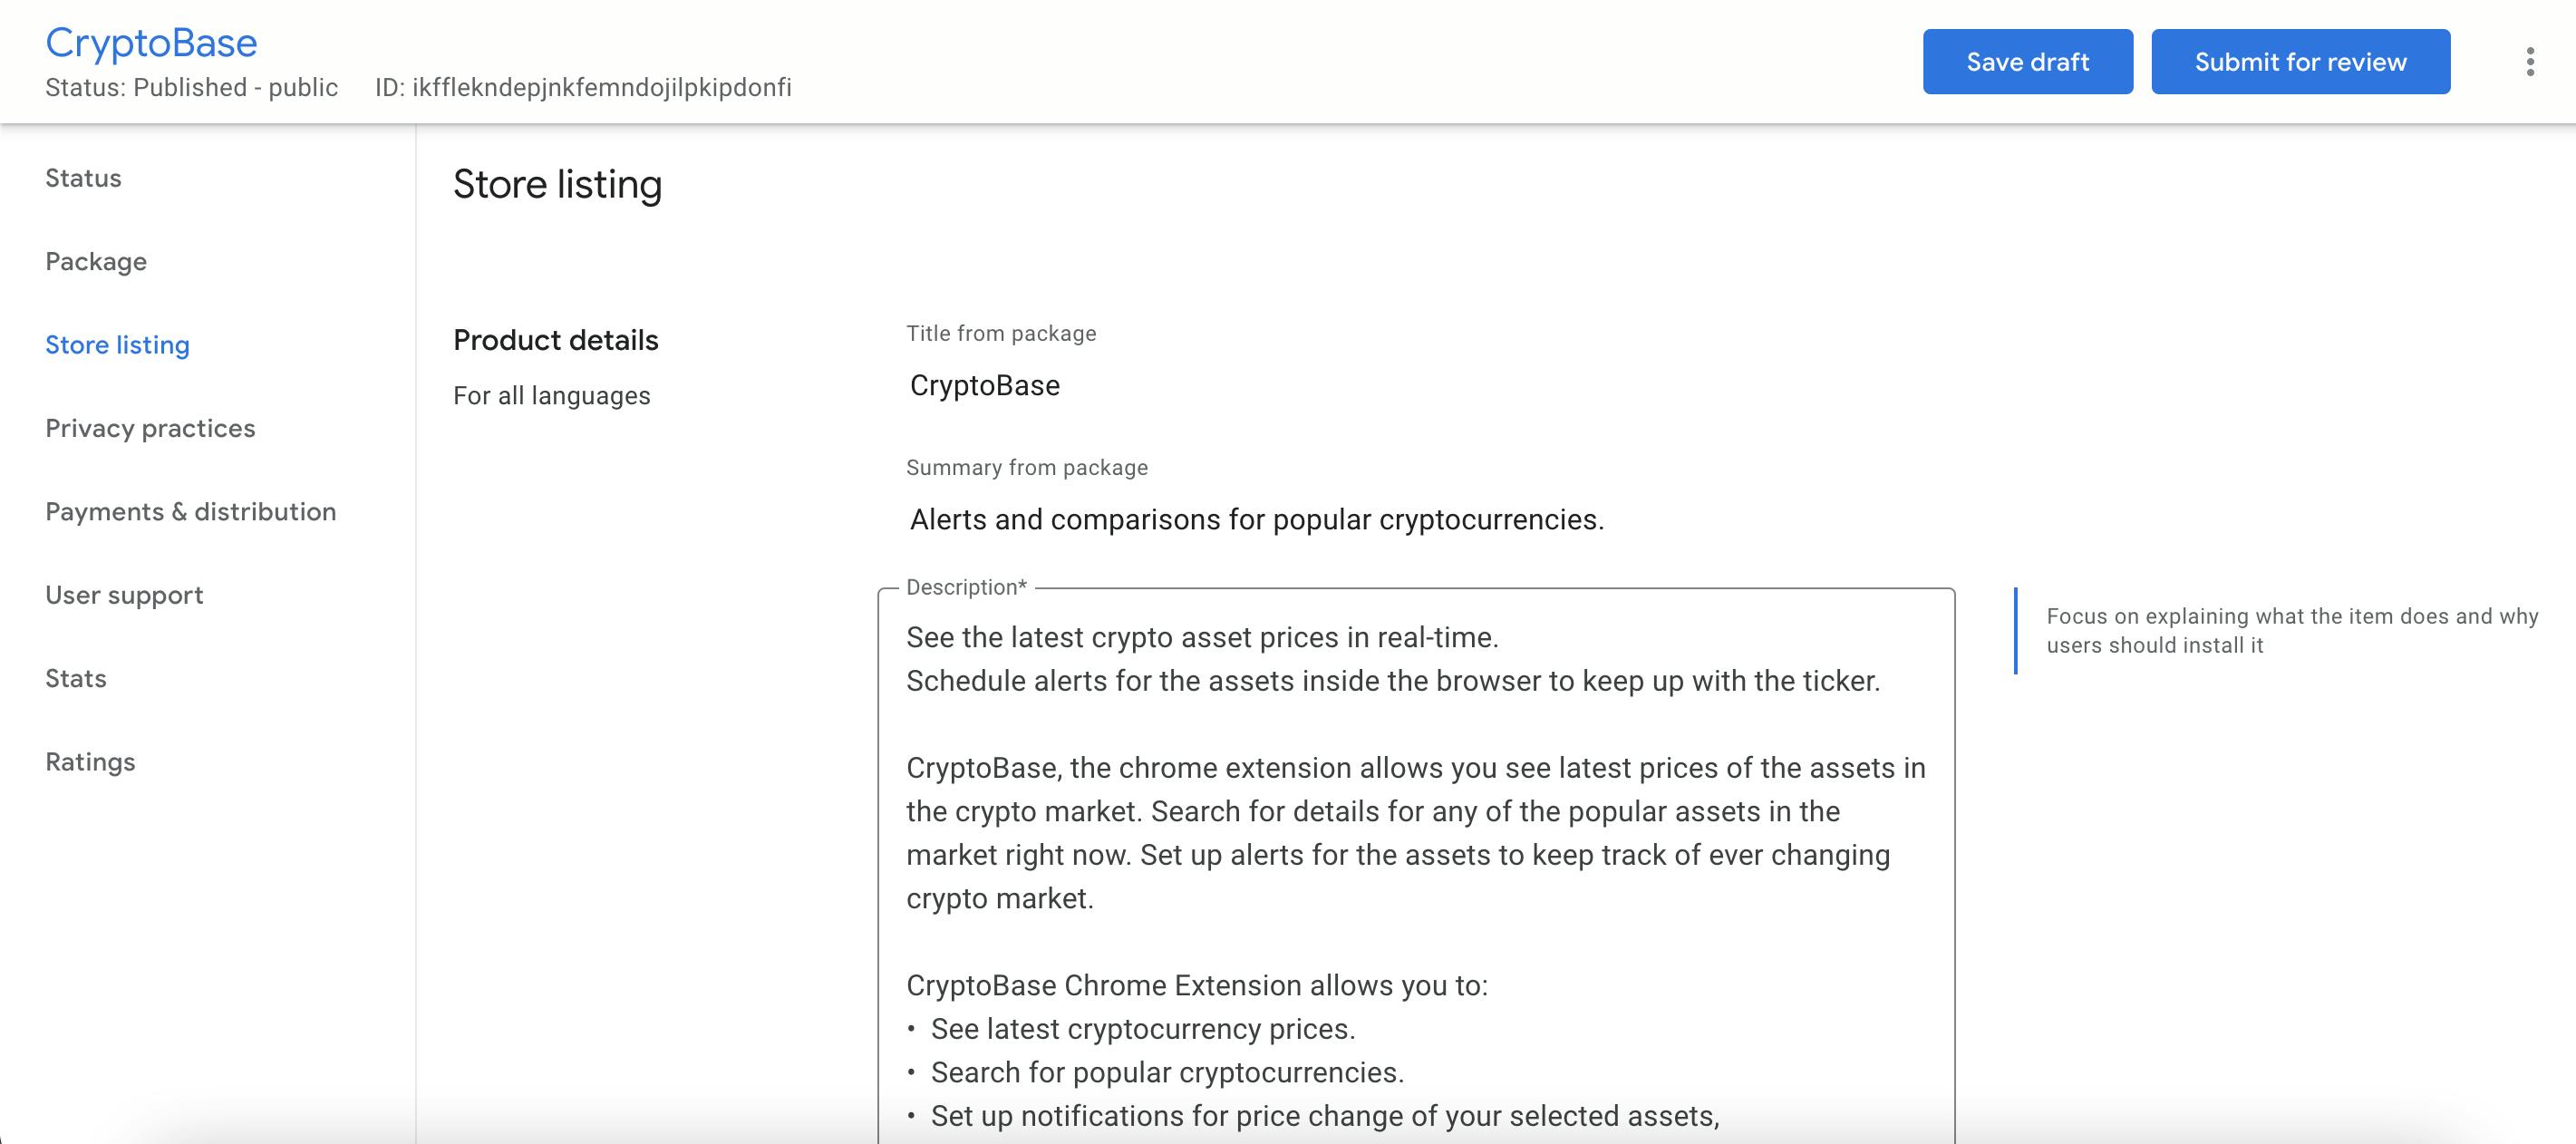
Once we've uploaded our extension, we can see it as an item in our dashboard. Here's what this should look like:

Step 5: Publishing the app on the Chrome Web Store.
After the extension is uploaded for review, it will go through a review process. The time taken for this review to finish depends on the nature of the item. Here's the result:

Conclusion
Now we've got a fully functional, albeit simple, Chrome Extension which can be accessed by anyone within the Chrome Web Store.
There are tons of areas where you can experiment with these extensions and perhaps use this as a building block to making something new, all by yourself. Use animations, add new scripts for things like popups, background, etc. There's a whole lot more you can do.
Go for it. :)
And that's it! We now have a working Chrome extension. If you found this post useful, show us the ❤️ and also feel free to reach out in the comment section.

