


Building The NativeBase Blog Using Next.js
Read how I built the NativeBase blog using Next.js and Tailwind CSS and you can build one too in about thirty minutes!


With the newest NativeBase release, we wanted to port the blog on the NativeBase website, which basically led to the origin of this article. I built the NB blog from scratch using Next.js by locally rendering files which have an MDX extension. We will using Tailwind CSS to style our components as this is the easiest way to build a blog when using this tech stack. By the end of this tutorial, you’ll have your very own personal or professional blog up and running in less than thirty minutes.
Check out the NativeBase Blog that I built here.
Tech Stacks:
Let's look into the tech stacks that we will be using in this guide and why we picked them:
Next.js
Next.js is an open source Frontend framework for React that adds additional optimization capabilities like server-side rendering (SSR) and static-site generation. To see an example of this, check out landing page of NativeBase which had been designed using Next.js as the framework. Also, another important reason for choosing Next.js for the framework is because it streamlines the development process by providing an official plugin to simplify the process of importing the MDX extension to the project.
Tailwind CSS
Tailwind is a utility first CSS framework packed with various classes that can be composed to build any design directly in the markup. We will be using Tailwind CSS for styling for all sections of the website other than blogs to remove any overhead that might occur
We are slowly migrating our website to NativeBase as it works very well on all platforms.
The Coding
Let's split the whole process into simple steps and build the blog website in a simplified manner. Follow the steps given below to proceed:
- The first step in this process is to render the markdown files. To do this, install
@next/mdxand runnpm init mdxto configure yournext.config.jsfile. - Next, wrap the app in an
MDXProviderand style all the components that will be used when styling markdown. - After this, create blog files in the
pagesfolder and write a utility function to fetch all the blogs along with its metadata. Metadata is basically all the information regarding a particular blog. For example, information about who wrote the blog, read time, the cover pictures associated with it, etc. - The next step is to create a template design for each blog post along with curating a list of blogs for further usage.
- Lastly, create a
Table of contentscomponent which will make it easier for users to choose the desired blog.
Folder structure
In the same fashion as Next.js dictates, set up the folder structure while also ensuring that it supports Next.js routing. To learn how to do this, you can refer to the official documentation by clicking on this link.
Let's start building.
Configuration to render and style markdown in Next.js
To use MDX with Next.js, we will be using the
@next/mdxpackage which allows us to create pages directly with the.mdxextension inside yourpagesfolder.In the next step, we will be matching other file extensions for MDX configuration in the
next.config.jsfile as only.mdxis supported by default on Next.js. Use the code snipper given below to do this:
const withMDX = require("@next/mdx")({
extension: /\.mdx?$/,
});
module.exports = withMDX({
  pageExtensions: ['js', 'jsx', 'md', 'mdx'],
})
Style the components
- Tailwind resets the styles to default; you can read more about it here.. We will be doing this as this step allows us to Tailwind components according to our need. Use the following code snippet to proceed:
export default function Anchor(props) {
  return <a className="text-cyan-400 underline" {...props} />;
}
const components = {
  h1: Heading1,
  ...
  a: Anchor,
};

function MyApp({ Component, pageProps }) {
  return (
    <AppContext.Provider>
      <MDXProvider components={components}>
        <Layout>
          <Component {...pageProps} />
        </Layout>
      </MDXProvider>
    </AppContext.Provider>
  );
}

export default MyApp;
- In the above code, we are wrapping the app layout which is required for the application.
Note: You can use the MDXProvider to pass components in only in certain predetermined scenarios.
Creating an MDX file
When we were designing NativeBase, we wanted to base our blog using a markdown. The rationale behind this was to making it easier for authors to write articles while also make the overall blog more robust. Hence, the next step was to create an MDX file for BlogPost and add some meta data to it. Look how this is done in the steps given below
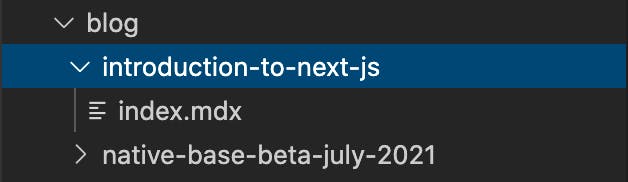
- Create a
blogfolder and list all the folders with a route name to be shown for each blog by asking anindex.mdxfile for each of them. Refer to the image given below:
- In the next step, we will be assigning a
MetaDatafor eachBlogPostby simply exporting the markdown under the template. Use the code given below:
import BlogPost from "../../../components/BlogPost";

export const meta = {
  title: "Introduction to Next.js",
  description: "Getting started with the Next framework",
  date: "2020-03-16T05:35:07.322Z",
  readTime: 3,
  ...
  hideSidebar: true,
  coverImage:
    "https://encrypted-tbn0.gstatic.com/images?q=tbn:ANd9GcSdPQiYnVjCaul7tl2diYbBR0NhIsvmzCBrxQ&usqp=CAU",
};

export default ({ children }) => <BlogPost meta={meta}>{children}</BlogPost>;

<img
  src="/img/nativebase-talk.svg"
  alt="Picture of the author"
/>

Lorem ipsum dolor sit amet, consectetur adipiscing elit. Quisque maximus pellentesque
dolor non egestas. In sed tristique elit. Cras vehicula, nisl vel ultricies gravida,
augue nibh laoreet arcu, et tincidunt augue dui non elit. Vestibulum semper posuere
magna, quis molestie mauris faucibus ut.
Layout for Blog Post pages
- In this segment, we will learn how to setup the layout for the blog post pages. To do this, create a component
BlogPost.jsfor the template layout of each blog.
- You can take style inspiration from any blog and give Tailwind classnames accordingly using the utility-first approach which makes it easy to style components. Use the code given below:
export default function BlogPost({ children, meta }) {
  return (
    <div>
      <BlogHeader meta={meta} isBlogPost />
      <div className="px-6 mx-auto md:px-10 xl:px-0 mt-10 mb-20 max-w-6xl">
        <div className="pb-4 grid grid-cols-1 lg:grid-cols-12 lg:gap-28">
          <div className="col-span-12 lg:col-span-8">
            <div>{children}</div>
          </div>
        </div>
      </div>
    </div>
  );
}
Creating a layout of list for blog pages
- Create a file called
blog.jsin the pages folder to show all blogs on the/blogroute. After this, we will be designing a basic layout and map for all blog items using the following code:
export const Blog = () => {
  return (
    <>
      <div className="main-wrapper">
        <main className="relative min-h-screen overflow-hidden duration-100 ease-linear bg-coolGray-50 dark:bg-blueGray-900 transition-bg py-28">
          <section className="relative z-10 max-w-6xl mx-auto sm:px-4 md:px-0">
            <h1 className="text-4xl text-gray-700 dark:text-gray-100 mb-12 font-medium px-7 md:px-0">
              Latest posts
            </h1>
            <div>
              {blogs.map((blog) => {
                return <BlogListItem key={blog.link} blog={blog} />;
              })}
            </div>
          </section>
        </main>
      </div>
    </>
  );
};
- In the next step we will be creating a utility function for all blogs to sort them according their dates. This step will fetch all blogs and pick their date from their meta data and sort the blogs list from latest to oldest. Use the code given below:
function importAll(file) {
  return file
    .keys()
    .map((fileName) => ({
      link: fileName.substr(1).replace(/\/index\.mdx$/, ""),
      module: file(fileName),
    }))
    .sort((post1, post2) =>
      post1.module.meta.date > post2.module.meta.date ? -1 : 1
    );
}
export const blogs = importAll(
  require.context("./pages/blog/", true, /\.mdx$/)
);
Creating anchors for the Table of Contents
- Providing a table of contents helps to improve the experience that the people reading your article will have help readers to the required section of the article. Use the code given below:
const anchors = React.Children.toArray(children)
    .filter(
      (child) =>
        child.props?.mdxType && ["h2", "h3"].includes(child.props.mdxType)
    )
    .map((child) => {
      const idText = getHeadingIds(child.props.children);
      return {
        url: "#" + idText,
        depth:
          (child.props?.mdxType &&
            parseInt(child.props.mdxType.replace("h", ""), 0)) ??
          0,
        text: child.props.children,
      };
    });
In the next step, we will be assigning a template for the table of content to oversee that all headings are showing at the same place to improve user experience. Use the code given below to proceed:
export default function Toc(anchors) {
  return (
    <div className="flex flex-col lg:sticky">
            <h5 className="mb-3 text-sm text-gray-500 dark:text-gray-100 ">
              Table of contents
            </h5>
            {anchors.anchors.length > 0 ? (
              <ol className="text-sm">
                {anchors.anchors.map((anchor) => (
                  <li key={anchor.text} className="mb-1.5">
                    <a
                      href={anchor.url}
                      className="text-gray-500 hover:text-gray-900 dark:text-gray-400 dark:hover:text-white"
                    >
                      {anchor.text}
                    </a>
                  </li>
                ))}
              </ol>
            ) : null}
    </div>
  );
}
Implementing additional features
Add a feature to hide Table of Contents
- We can add optional classes according to
hideSidebarkey in the metadata of a particular blog using the snippet given below:
hideSidebar: true,
- According to the key present in the metadata, we can add or remove classes in a
BlogPost. Use the code given below:
<div
    className={`px-6 mx-auto md:px-10 xl:px-0 mt-10 mb-20 ${
  meta?.hideSidebar === true ? "" : "max-w-6xl"
 }`}
>
Add meta tags to each post for shareablity
- To add meta tags for each post, use the code given below:
<Head>
      <title>{meta.title}</title>
      <meta name="keywords" content={meta.title} />
      <meta property="og:title" content={meta.title} />
      ...
      <meta name="twitter:image" content={meta.coverImage}/>
      <meta name="description" content={meta.description} />
</Head>
Conclusion
With this, you can now create your very own blog for your websites using Next.js along with Tailwind CSS. It is a super simple process and your blogs will be rich with all the basic features that you might need to get one up and running and then improve upon it iteratively.
Thank you so much for reading! Do leave some likes and comments if you have any questions!