


Creating Forms With Formik For React Apps
A brief read on handling form management in a better way by integrating Formik on React applications


Introduction
Forms are an important medium to collect user's information, which in turn helps us to deliver better features in the future of the application. In this article, we will learn more about Formik and why we need it for our React applications. The different features and options available on the software makes the development process more easy and manageable.
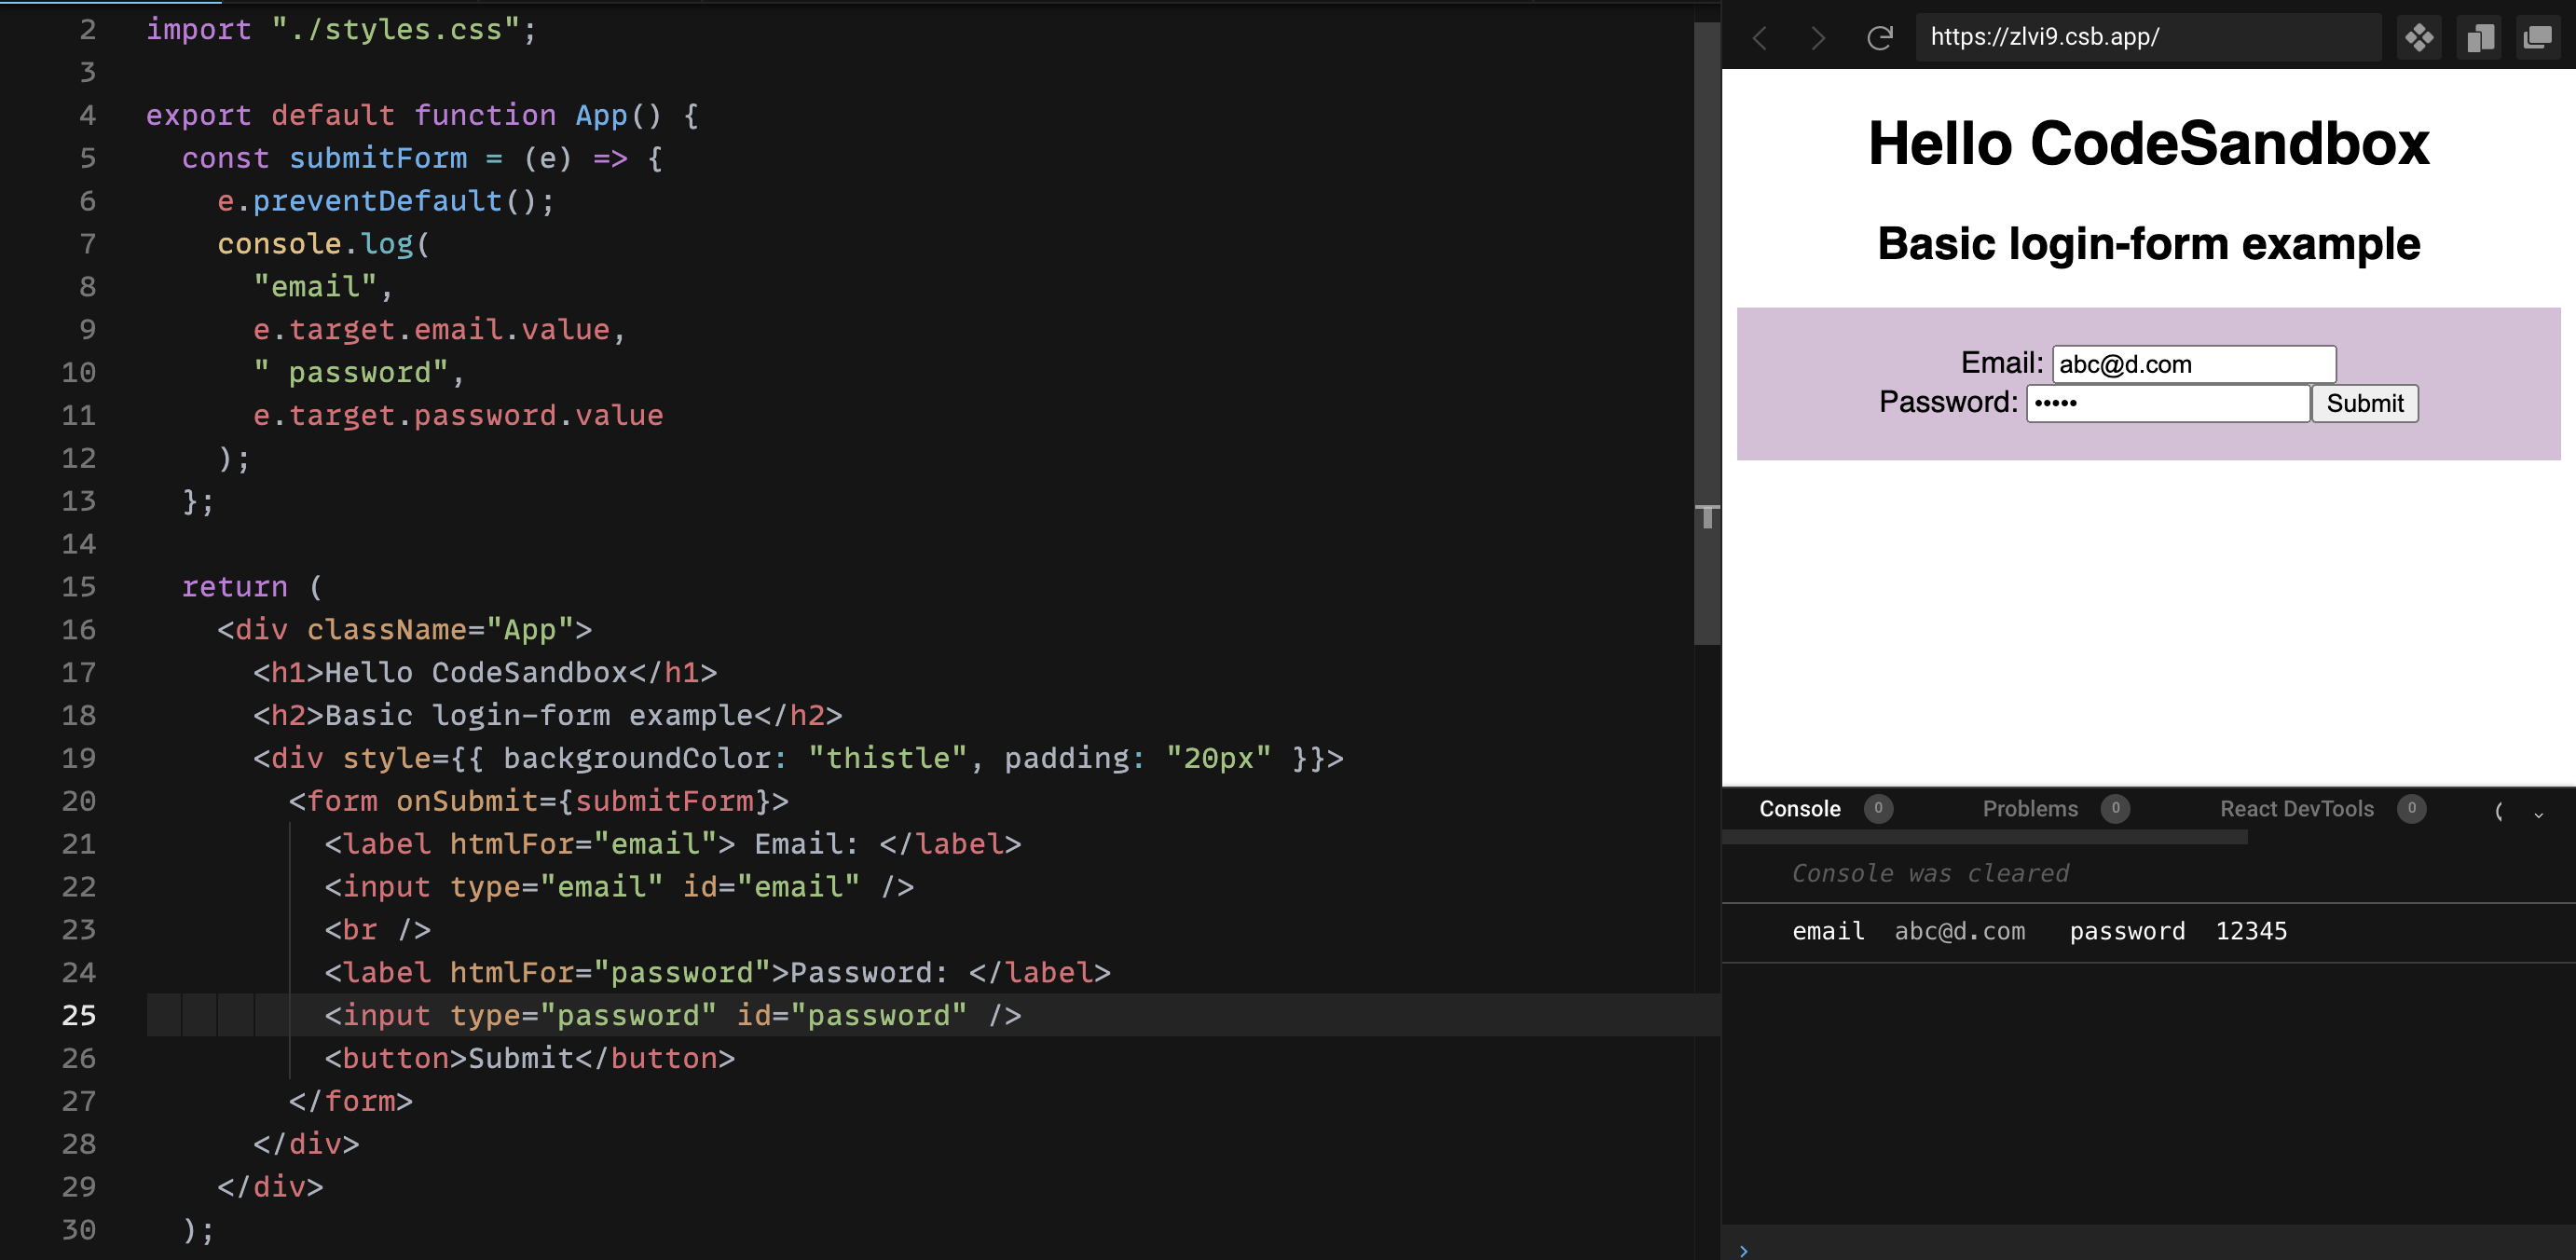
To create a form, we will make use of the most basic html input tag which primarily consists of input fields such as text-areas, checkboxes, radio-buttons, select-options, etc. using which we can create a form in JavaScript. For example, let us take a look at the basic login form shown in the below image:
We can follow this traditional approach when it comes to performing this function on React, but it seems to be an old-school way and not the React way to go about things! Let's create a simple login form on React with two fields, email and password. We can make use of the local state and capture the input by calling onChange or other event functions depending on the input we are using and then proceed to using the resultant data as required.
Refer to the following example for clarity:
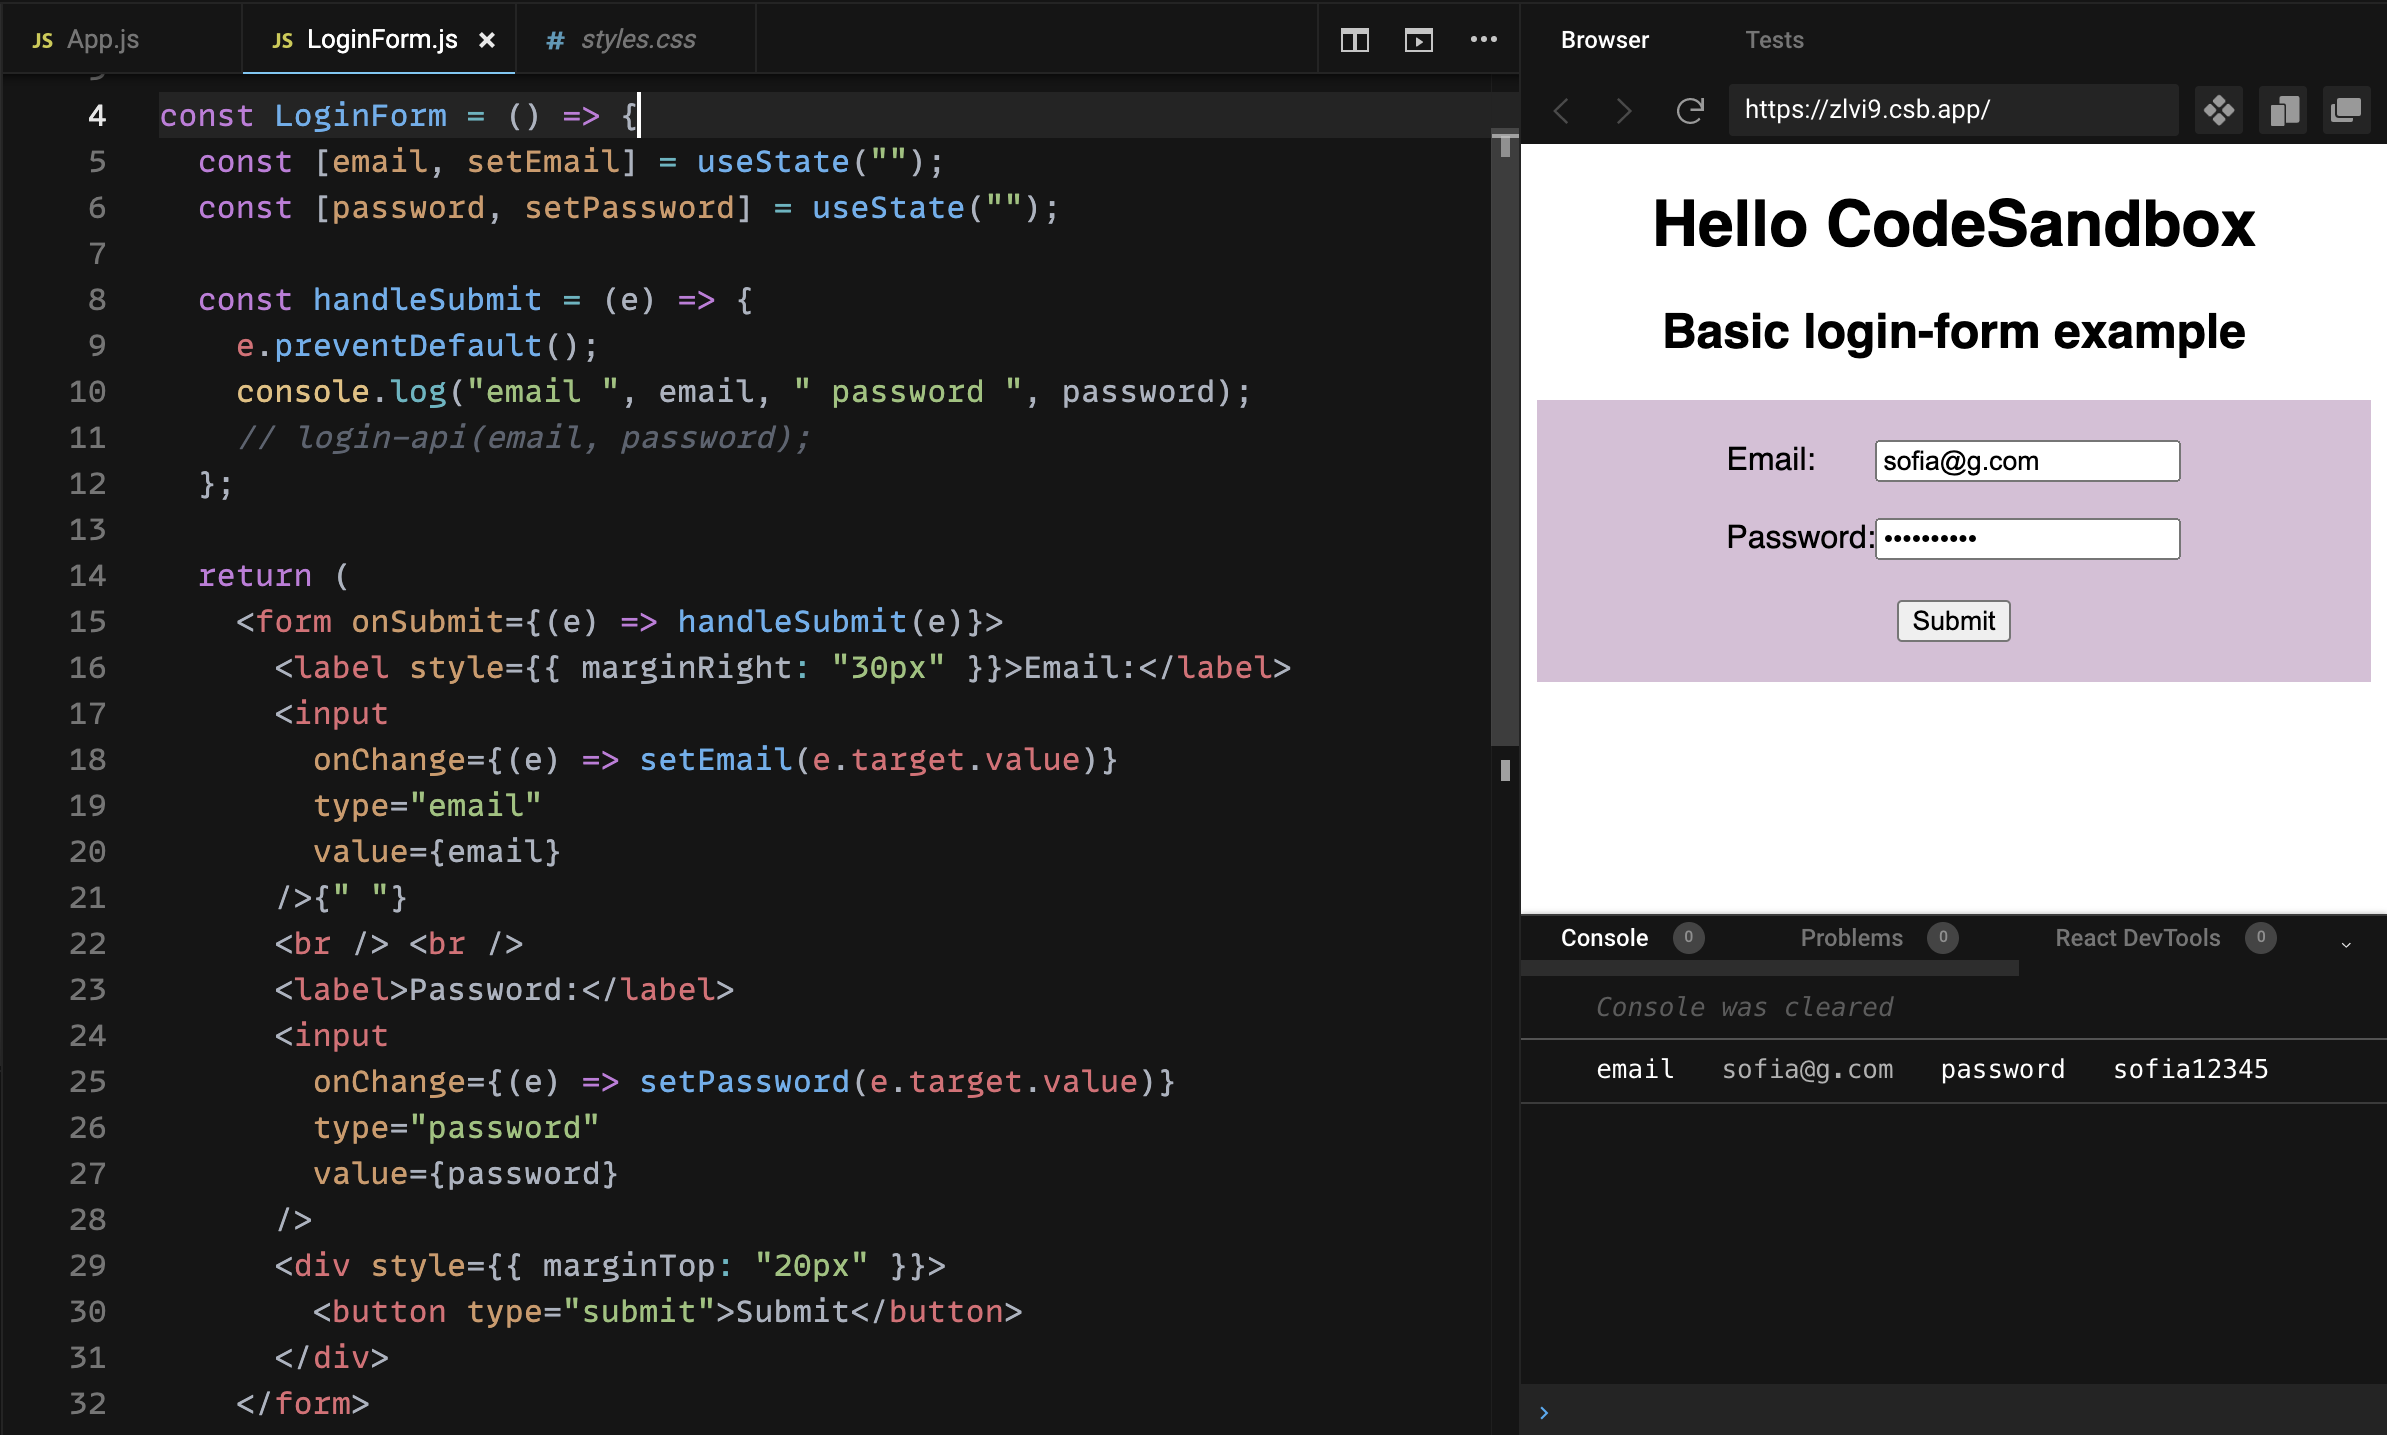
The form shown seems quite simple as it has only two fields to handle. But as the fields starts to add up and the form starts to grow, it gets complex as we have to declare states for each field and handle event functions for each of them. If we wish to handle validations, it will be very difficult to manage them as we have to handle the statement individually on such a huge form. So what can we do to handle huge forms while handling the validations by not compromising the user's information? This is where formik acts like a life saviour!
What is Formik?
Formik is a library which helps us to handle complex forms without worrying about the form state. It basically helps us with the 3 most annoying parts involved with a form:
- Getting values in and out of the form state
- Validation and error messages
- Handling form submission
The main idea behind Formik was to create a scalable, well-performimg form helper with minimal API that automates the process and leaves the rest up to us.
Prerequisites
Install Formik to get started. You can do this in the following ways:
- You can install Formik using NPM with the following code-
npm install formik --save.
- Use
yarn add formikto install Formic using YARN.
- Simply add the following
<script>tag to the bottom of your HTML file to install Formik using the CDN-<script src="https://unpkg.com/formik/dist/formik.umd.production.min.js"></script>
Basics of Formik
Formik generally provides some functions to handle events at the form level, like handleChange, handleBlur and handleSubmit. We can add these functions to our form via props. Let's check the most basic example of how to use Formik in the following representation:

See how we replaced the html <input> with formik's <Field> tag? This provides more flexibility to customise the input fields along with the existing features of Formik. <Field /> automatically hooks up the inputs to Formik and uses the name attribute to match up with Formik state. Post this, <Field /> will automatically default to an HTML <input /> element. We basically wrap the Form inside the Formik tag by using a render props pattern which then handles the form state separately from our component's state. This also gives us lot of useful props like values, errors, setFieldValue, setFieldTouched, etc. The values prop is the most commonly used prop to fetch the current form state value at any point. Similarly, errors provides us with an array of objects which will contain the field name and the required error message which we shall display to the user for a better user experience.
Validating with Formik
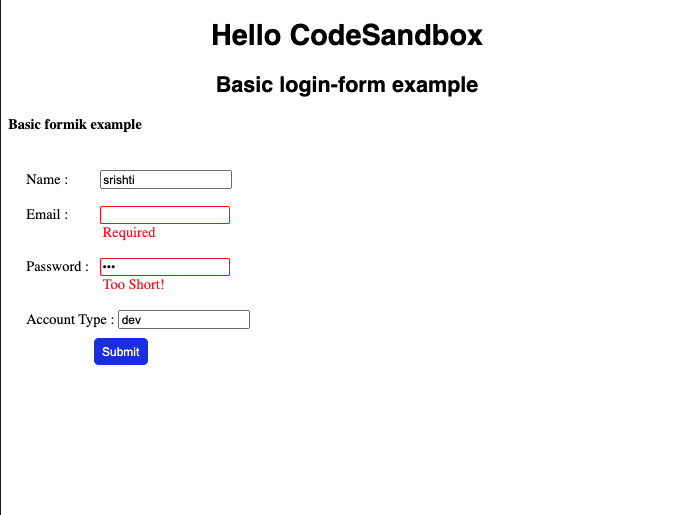
As you can see, we have a validate function inside Formik which accepts either a synchronous or asynchronous function, using which we can define a set of rules for our form values by determining which values are acceptable or are mandatory for the user to fill.
Validations with Yup
If we have a lot of validations in our form, we can also use a third party library like Yup to validate it. In fact, Formik has a special configuration option/prop for Yup object schemas called validationSchema which will automatically transform Yup's validation errors into a pretty object whose keys matches the values that are touched. This symmetry makes it easy to manage business logic around error messages.
We can either use the validate function from Formik or Yup's validationSchema depending upon the expectations. Following is an example of validating email and password:

Arrays and Nested Objects
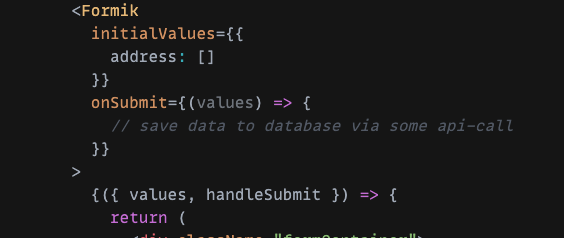
When we deal with the real-life projects, we end up handling complex objects or arrays such as data types. But this is not an issue as Formik also provides support for arrays and nested objects. Formik provides us with a<FieldArray> component which helps us to dealing with array/list operations. We can pass a property in name with the relevant path of the key in the relevant array and can then use inbuilt methods like push, swap, move, insert, unshift, remove, pop and replace which provided by arrayHelpers for performing basic calculations like adding, removing first/last element in an array.
Here are some example :
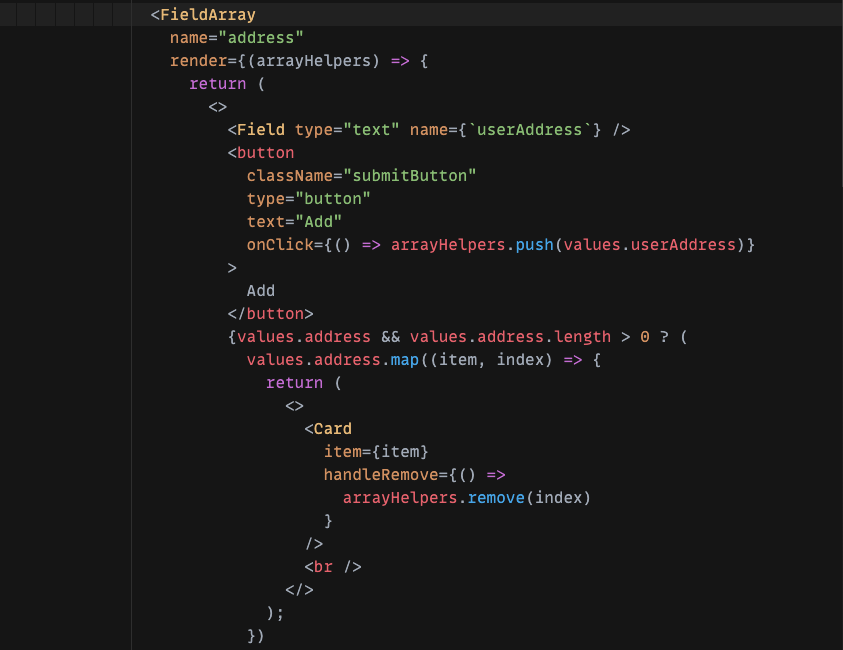


Consider the address field which we initialised as an empty array. Using this, we have the ability to add address values using the add button. On clicking the button, it calls the arrayHelpers.push() method which takes in the value and adds it in the array defined in FieldArray. Similarly, for removing any address, we can call arrayHelpers.remove() which will take in an index and removes that particular item from the array. This makes it very easy and simple to deal with the arrays/objects.
Form Submission
So far, we discussed about installing, validating and working with arrays; this leaves us with the final step of the form cycle i.e, form submission. To be precise, when we submit a form, it calls the onSubmit method on Formik, as shown below:

There are a couple of steps followed before the final submission like:
1. Pre-Submit: This step touches all fields once by incrementing submitCount=+1 and also checks for initialValues, which are required and should be specified.
2. Validate: This function checks all field-level validations like the validate function and validationSchema asynchronously and merges the results. In case of any errors, it simply aborts the submission by setting isValidating to false. And if no errors are found, then the submission is completed.
3. Submission: To finish the process, submit your form by calling your submit-handler (onSubmit/handleSubmit) and sets isSubmitting to false to complete the form cycle.
The following image displays the values derived from isSubmitting and isValidating:
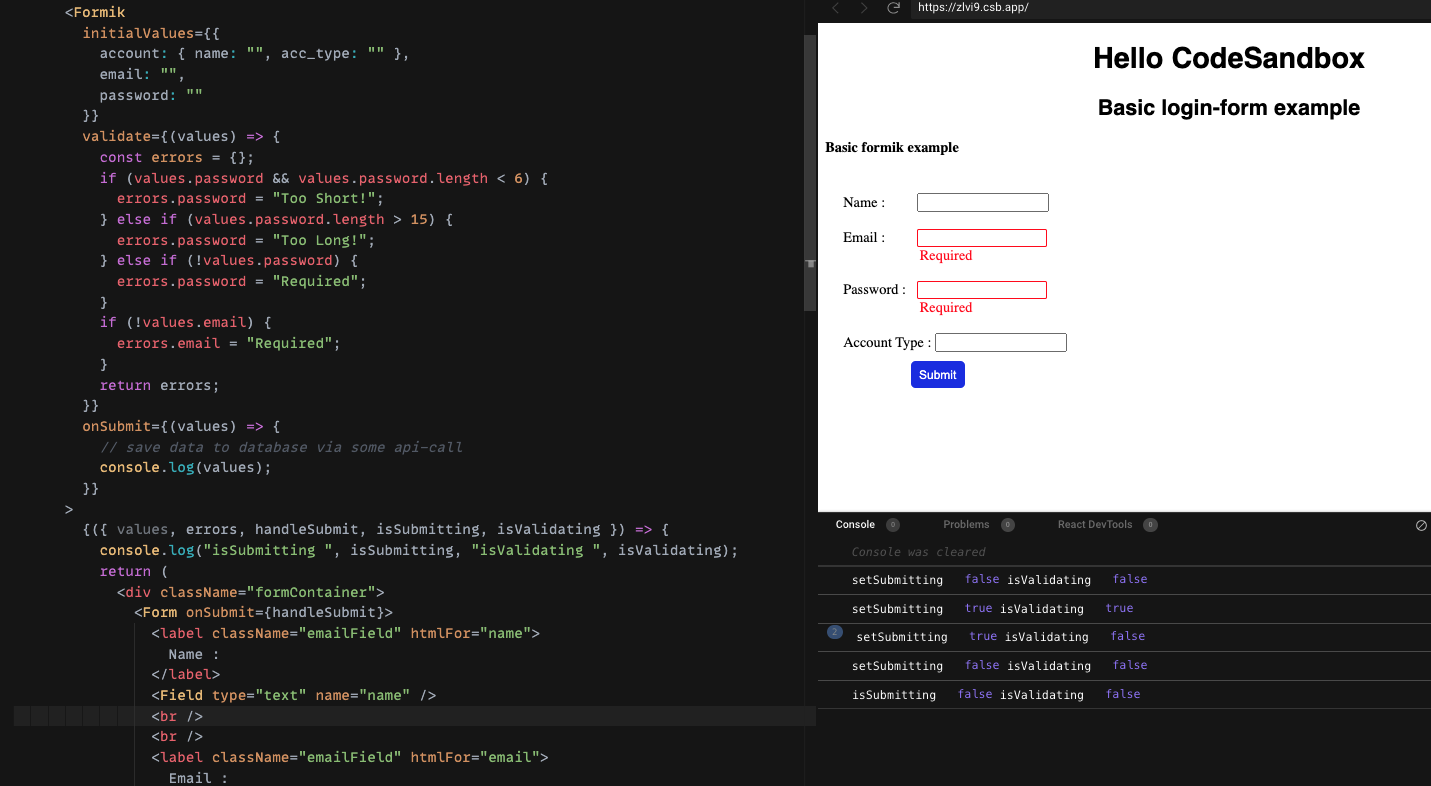
The main occurrence here is that the initial values are checked when the submit button is clicked. As the email and password fields are required, we shall continue on to set an object with the message we want to display in case of an error. As soon as user clicks on the submit button, the error message will pop up to let the user know which fields are mandatory. Thus, integrating Formik makes it easier for us to deal with forms and validation and also gives the application a great user experience.
Conclusion
To sum it up, we spoke about the the overview of Formik, how it works, how it helps us to deal with the messy operations involved and how it allows us to focus on what's important by handling all the tedious work. Hope this article has helped you to understand the basics of Formik. This article only covers a small part about what features and options we can avail, but the topic of Formik is quite vast. You can read the Formik documentation for more understanding.
Thank you for your patience. Happy Coding :)