Implementing Bing Maps on React Native
A quick know-how on integrating Bing Maps on to React Native
A while back, we got a project where we needed to use Bing Maps in React Native. As we researched the internet, we came across React Native Maps but sadly, it does not support Bing maps. So, we continued with our search and to no avail. We knew we will have to implement it ourselves so, we created react-native-bing-maps. As of now, it has basic API support for Bing maps in React native. In this blog, we will explain how to create a simple React Native project and implement Bing Maps.
First of all, let's create a simple React Native project:
Open your terminal and execute the following command to create a new react native project:
npx react-native init bingMapsExample
For more about React Native setup, you can refer to the React Native docs by using the following link:
Post this, we have to install React Native Bing Maps library to implement our Bing Maps using the following code:
npm install --save react-native-bing-maps
If using yarn, use the following code:
yarn add react-native-bing-maps
Next, let's obtain the Bings Maps keys:
Bing Maps Key must be obtained to use the Bing Maps SDK. The Bing Maps Key will need to be set through the API to use Bing Maps Native Control and to also make API requests to Bing Maps services. Visit the Bing Maps Dev Center Help page for detailed steps on obtaining one.
Now that you have the Bing Maps key, in order to use Bing Maps on Android we need to add this key to our gradle to proceed forward:
- Create a
secrets.gradlefile inandroid/app/folder with the following contentsext.credentialsKey = "you_bing_maps_key_here" Apply this key in your
android/app/build.gradlefile by adding at the top:apply from: 'secrets.gradle'Now add the key to the builds by adding the code given below In the
androidfield next todefaultConfig:buildTypes.each { it.buildConfigField "String", "CREDENTIALS_KEY", "\"$credentialsKey\"" }This will apply the same key to all build types. For separate credentials key for various build types, you can add its respective build type configuration to achieve the same.
Let's get down to coding on the JS:
For the purpose of this demo, we will use the app.js file itself. First, we will add all the imports as shown:
import * as React from 'react';

import { StyleSheet, View } from 'react-native';
import BingMapsView from 'react-native-bing-maps';
We will place Bing maps inside a view like this inside the main app component. Use the code given below to go forward:
export default function App() {
  return (
    <View style={styles.container}>
      <BingMapsView
        credentialsKey="your_bing_maps_api_key"
        mapLocation={{ lat: 12.9010875, long: 77.6095084, zoom: 15 }}
        style={styles.box}
      />
    </View>
  );
}
Note: CredentialsKey prop here is the same key you obtained from Bing Maps website. This prop is required for Bing Maps to work on iOS.
Now, let's create a stylesheet for our component using the code given below:
const styles = StyleSheet.create({
   container: {
     flex: 1,
     alignItems: 'center',
     justifyContent: 'center',
  },
  box: {
    height: height,
    width: width,
    marginVertical: 20,
  },
});
To Conclude
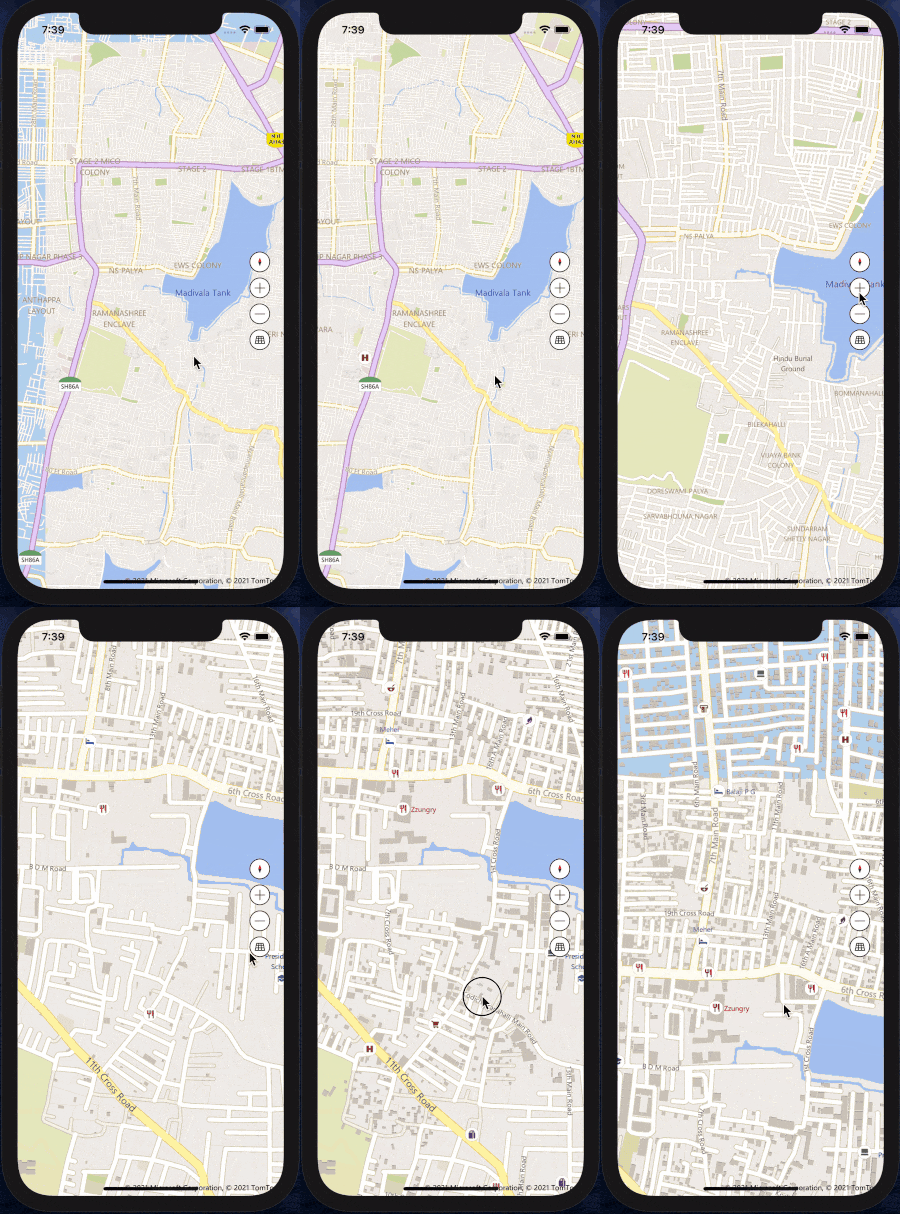
After implementing the above code, the final output should look like this:

For the full list of supported props visit the Docs
For an example of this implementation, you can visit the example code.
After the implementation that you have purview in this tutorial, we shall end up with a library that has basic API support for Bing Maps and Native API. We are currently working on adding more advanced features to this library.
Thank you for reading. Happy coding! :)
