


Implementing Bridging For Android Native Modules
Learn how to implement bridging when creating custom native modules for Android application


This article is a tutorial on how bridging works and how it can be implemented in React Native projects. In this tutorial, we will be building an OCR application with custom modules that will recognize the products from any receipt using a native SDK provided by micro blink called Blinkreceipt.
What is Bridging?
React Native builds cross-platform apps with native components which contain two threads: the main thread (common for all native apps) and the JavaScript thread (specific to React Native). These two threads communicate with each other, but not directly, to provide us with a native application. React Native Bridge helps in the communication between these threads; without this bridge, there is no way for the native code to send any information to the JavaScript code and vice versa.

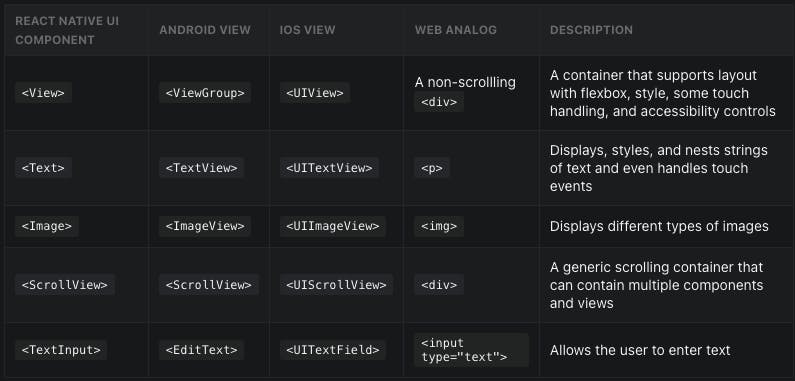
Some examples of the bridged components provided by React Native are given below:
Why do we need bridging?
Sometimes, a React Native app needs to access a native platform API that is not available by default in JavaScript, like the native APIs to access Apple or Google Pay. When this happens, the system exposes instances of Java/Objective-C/C++ (native) classes to JavaScript (JS) as JS objects, thereby allowing you to execute arbitrary native code from within the JS. If React Native doesn't export a native API that the JS app needs, then we can manually export it ourselves!
You can read more about native modules here..
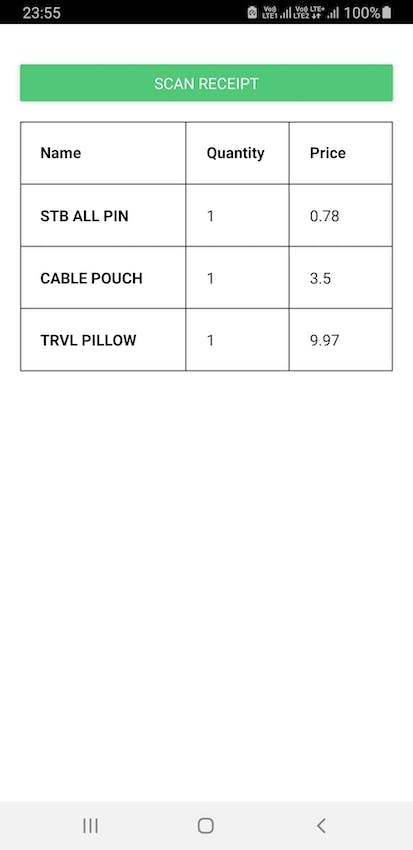
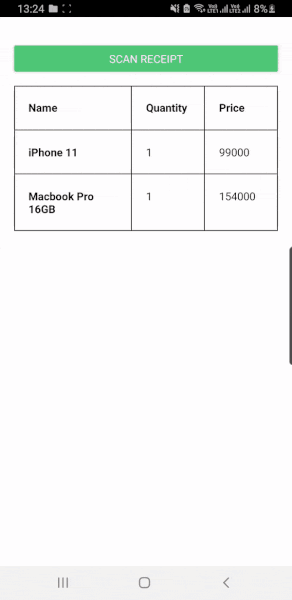
A glimpse of what we will build:
Let's Get Started
- First, let's create a new React Native application using the following code:
npx react-native init RNBlinkreceipt
cd RNBlinkreceipt
- Now that we have a basic structure of the app, let's create a simple design in our
App.jsfile which will display the list of products from the scanned receipt on our screen as shown below:
import React, {useState} from 'react';
import {View, Text, Button} from 'react-native';
import styles from './styles';

function App() {
  const [products, setProducts] = useState([
    {
      name: 'iPhone 11',
      quantity: 1,
      price: 99000,
    },
    {
      name: 'Macbook Pro 16GB',
      quantity: 1,
      price: 154000,
    },
  ]);
  const scanReceipt = () => {
    //NativeModule will be called here
  };

  return (
    <View style={styles.container}>
      <View style={styles.scanBtnContainer}>
        <Button onPress={scanReceipt} title="Scan Receipt" color="#50C878" />
      </View>
      <ScrollView>
        <View style={styles.tableHeader}>
          <Text style={styles.productNameHeader}>Name</Text>
          <Text style={styles.headerText}>Quantity</Text>
          <Text style={styles.headerText}>Price</Text>
        </View>

        <View style={styles.tableBody}>
          {products.map((product, index) => {
            return (
              <View style={styles.tableRow} key={index}>
                <Text style={styles.productNameBody}>{product.name}</Text>
                <Text style={styles.bodyText}>{product.quantity}</Text>
                <Text style={styles.bodyText}>
                  {Math.round(product.price * 100) / 100}
                </Text>
              </View>
            );
          })}
        </View>
      </ScrollView>
    </View>
  );
}

export default App;
We will be provided with a button that will call the native module to scan the receipt and display the respective products inside the receipt section in a tabular format. Currently, we are using some static products, like data and the
scanReceiptfunctions, to implement our native modules. As we have created a basic skeleton of the project, we will proceed to divide this article into two sections as mentioned below:Native Bridge in Android
- Native Bridge in iOS.
1. Native Bridge in Android
In this section, we will focus on creating a bridge between Java code(Android) and our React component. Before starting the android bridging, let's see the steps involved in the process of bridging a native SDK:
- Setting up Native SDK
- Creating the native module
- Registering the native module
1. Setting up Native SDK
- We will have to download the required SDK files from its GitHub repository to add the BlinkReceipt SDK in our app. We are only going to integrate the receipt scan functionality for which we require only three folders from this repository:
blinkreceipt-camera,core, andrecognizer. Download these three folders and paste them into your android folder as shown below:
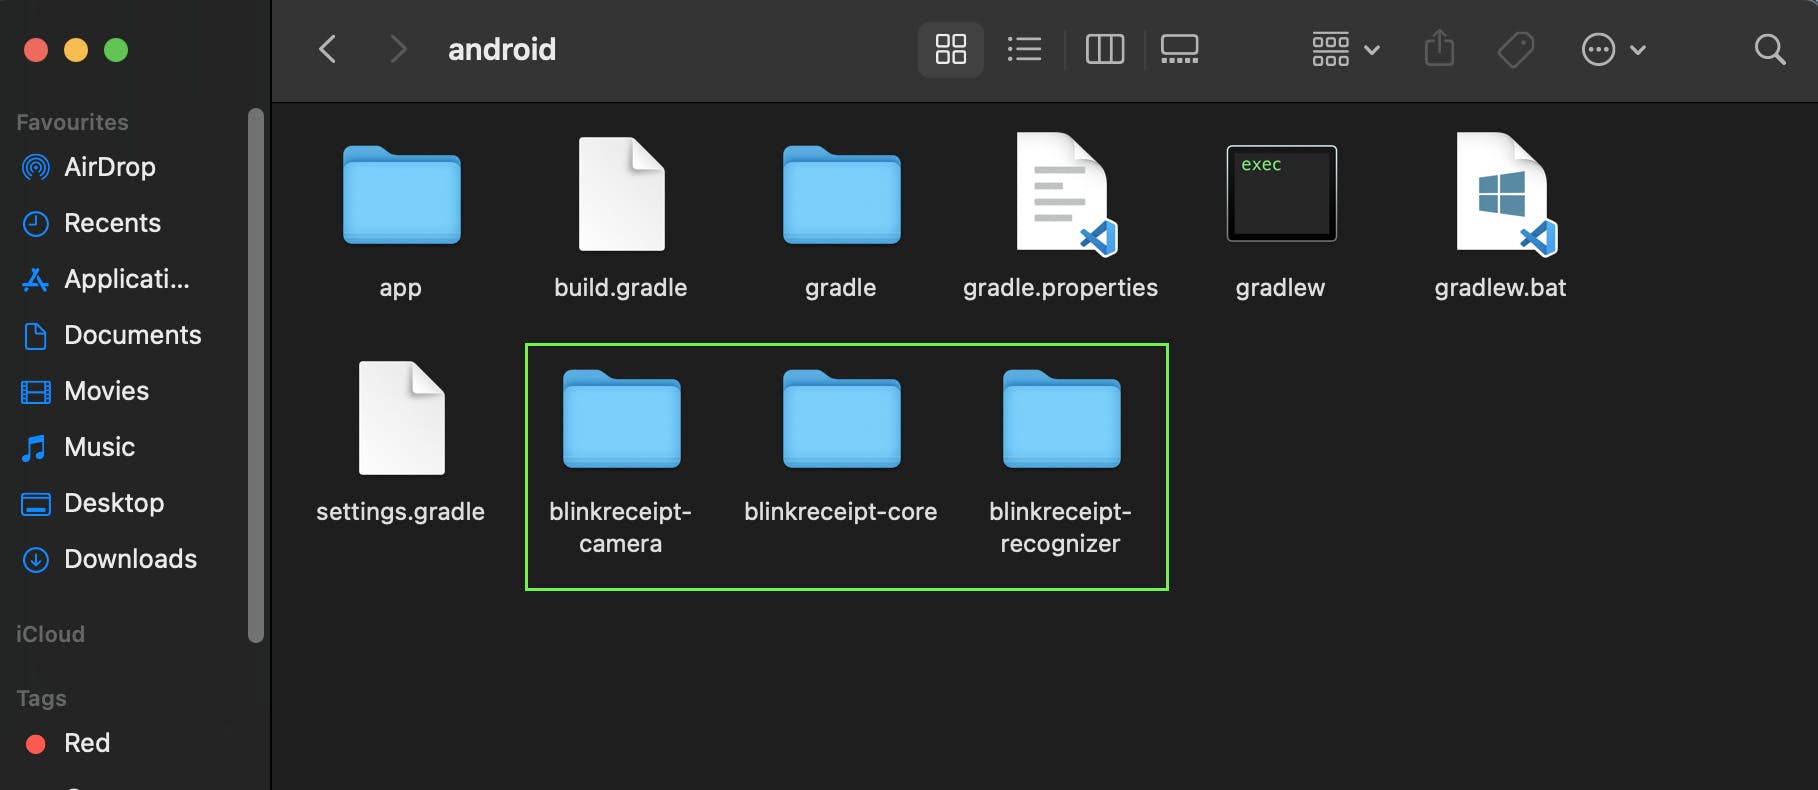
Note: These folders don't contain
build.gradlefiles and it needs to be added manually.
- After adding these folders to the android project, we have to make them accessible to our projects. We can do this by configuring some files by open the
settings.gradlefile and including these local folders inside to be used in android project. Refer to the code given below:
include ":blinkreceipt-core"
include ":blinkreceipt-recognizer"
include ":blinkreceipt-camera"
- After doing this, the next step will be to add the dependencies for these local SDK folders in the app's
build.gradlefile, which is found inside theandroid/appfolder, as mentioned in the SDK docs. Open the required file and add the following code in its dependencies :
implementation 'androidx.appcompat:appcompat:1.2.0'
implementation 'androidx.constraintlayout:constraintlayout:2.0.1'
implementation 'com.squareup.okhttp3:okhttp:4.9.1'
implementation 'com.squareup.retrofit2:retrofit:2.9.0'
implementation 'com.squareup.retrofit2:converter-gson:2.9.0'
implementation 'com.squareup.retrofit2:converter-scalars:2.9.0'
implementation 'com.squareup.okio:okio:2.10.0'
implementation "com.google.android.gms:play-services-tasks:17.2.1"
implementation "com.google.android.gms:play-services-auth:19.0.0"
implementation 'com.jakewharton.timber:timber:4.7.1'
implementation "androidx.webkit:webkit:1.4.0"
implementation "androidx.work:work-runtime:2.5.0"
implementation "androidx.work:work-runtime-ktx:2.5.0"
implementation "org.jetbrains.kotlinx:kotlinx-coroutines-core:1.5.0"
implementation "org.jetbrains.kotlinx:kotlinx-coroutines-android:1.5.0"
implementation "org.jetbrains.kotlinx:kotlinx-coroutines-play-services:1.5.0"
implementation "androidx.core:core-ktx:1.3.2"

implementation project( ':blinkreceipt-core' )
implementation project( ':blinkreceipt-recognizer' )
implementation project( ':blinkreceipt-camera' )
- With this our SDK setup is complete! The BlinkReceipt SDK requires a license key which can be generated here on the Microblink website. After generating the key for the BlinkReceipt, we can initialize our BlinkReceipt SDK. Even though there are different ways to initialize the SDK, the recommended method would be through the
AndroidManifest.xmlfile. Add the following code to go proceed:
 <meta-data
    android:name="com.microblink.LicenseKey"
    android:value="BLINK RECEIPT LICENSE KEY" />
Creating the Native Module
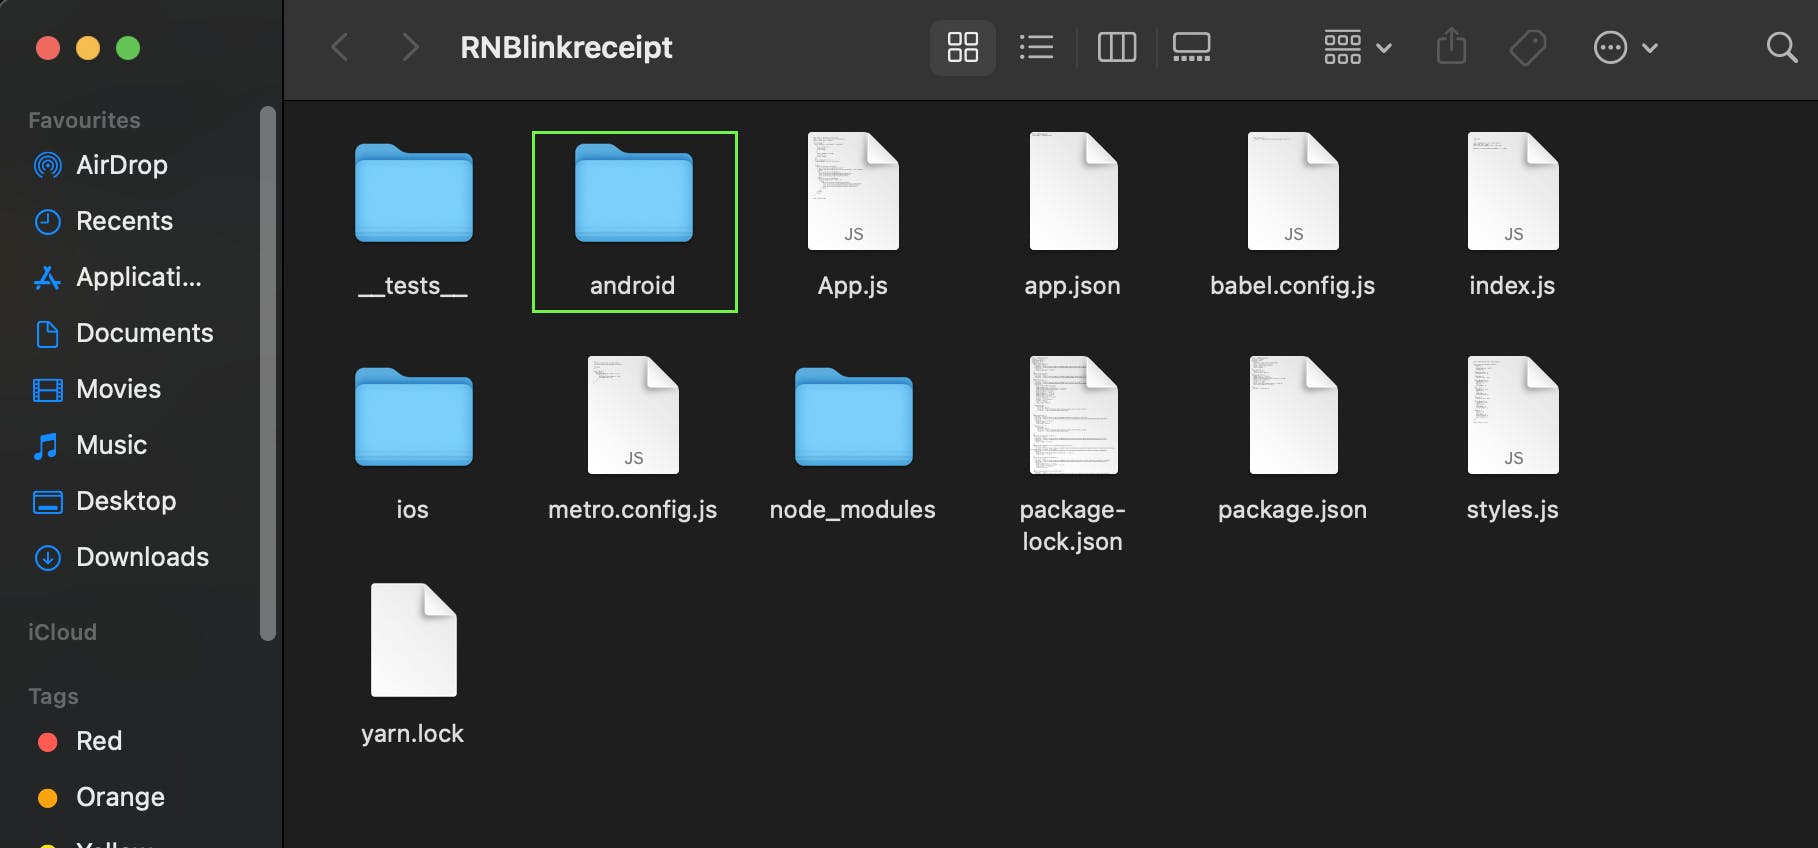
- To get started, open up the Android project within your React Native application in Android Studio as shown below:
- The first step is to create a new Java class named
ScanReceiptinsideandroid/app/src/main/java/com/rnblinkreceiptwhich contains the native module Java class. We can name this file anything we want as the file name doesn't represent the native module name. Now paste the following code in this file:
package com.rnblinkreceipt;
import com.facebook.react.bridge.NativeModule;
import com.facebook.react.bridge.ReactApplicationContext;
import com.facebook.react.bridge.ReactContext;
import com.facebook.react.bridge.ReactContextBaseJavaModule;
import com.facebook.react.bridge.ReactMethod;
import java.util.Map;
import java.util.HashMap;

public class ScanReceipt extends ReactContextBaseJavaModule {
    ScanReceipt(ReactApplicationContext context) {
        super(context);
    }
}
As you can see, we have extended the ReactContextBaseJavaModule class inside the ScanReceipt in this scenario.
Naming the Native Module
- To provide a name to our native module, we will use the
getName()method; this step is mandatory for all Java native modules in Android. This method will return a string which represents the name of the native module which can be used by JavaScript to access the native module. E.g: In the below code snippet,getName()returnsScanReceipt. To access the module on the JavaScript side, we can call methods onNativeModules.ScanReceiptwhereNativeModulesare imported fromreact-native. Refer to the code below:
@Override
    public String getName() {
        return "ScanReceipt";
    }
- Now that we have given a name to our native module, we will proceed to add methods in our native module which can be used for scanning the receipt using the blink receipt SDK.
Exporting a Native Method to JavaScript
- All native module methods meant to be invoked from JavaScript must be annotated with the
ReactMethodas this annotation defines how the module can be accessed on the JS side. You can execute this using the following code:
@ReactMethod
    public void scan() {
        try {
            System.out.println("Inside native scanReceipt method");
        }catch(Exception e){
            System.out.println(e.getMessage());
        }
    }
- In the above code, we have created a method called
scanusing which we can write our first native method. Let's proceed by completing this function and writing our scan functionality code using the BlinkReceipt SDK. But first, let's understand how we will send the scanned data back to the JavaScript side as we can't just synchronously return the data. If you want to know why, go through the documentation provided here..
Alternatively, we can create callbacks which can be used to pass data from Java to JavaScript in an asynchronous manner; similarly, they can also be used to asynchronously execute JavaScript from the native side. To use the callback, first we have to import the callback interface using the code given below:
import com.facebook.react.bridge.Callback;
- After this step, proceed to implementing the
scanmethod as shown below:
private static ReactApplicationContext reactContext;
private static final int SCAN_RECEIPT_REQUEST = 1;
private Callback successCallback = null;
private Callback errorCallback  = null;

public void scan(Callback success, Callback error){
        try{
            successCallback = success;
            errorCallback = error;
            ScanOptions scanOptions = ScanOptions.newBuilder()
                    .retailer( Retailer.UNKNOWN )
                    .detectDuplicates(true)
                    .frameCharacteristics( FrameCharacteristics.newBuilder()
                            .storeFrames( true )
                            .compressionQuality( 100 )
                            .externalStorage( false ) .build() )
                    .logoDetection( true )
                    .build();

            Bundle bundle = new Bundle();

            bundle.putParcelable( CameraScanActivity.SCAN_OPTIONS_EXTRA, scanOptions );
            Activity currentActivity = getCurrentActivity();
            if(currentActivity == null)
                return;
            Intent intent = new Intent( reactContext, CameraScanActivity.class )
                    .putExtra( CameraScanActivity.BUNDLE_EXTRA, bundle );

            currentActivity.startActivityForResult( intent, SCAN_RECEIPT_REQUEST );
        }catch(Exception e){
            errorCallback.invoke(e.getMessage());
        }
    }
In the above code, success and error callbacks are assigned to the class level
callbacks, so that they can be accessed from anywhere within the class; we can also invoke these callbacks whether the scan is successful or not.The next step is to set the scan options and starting an activity for scanning the receipt on an intent by giving it context. To get this context in the
ReactContextBaseJavaModulemethod, we can create a class-level context variable and assign the context in the constructor. We also need to attach an activity event listener to capture the result of the activity using this context as shown below:
private static ReactApplicationContext reactContext;

    ScanReceipt(ReactApplicationContext context) {
        super(context);
        reactContext = context;
        reactContext.addActivityEventListener(activityEventListener);
    }
public void onActivityResult(Activity activity, int requestCode, int resultCode, Intent data) {
    super.onActivityResult(requestCode, resultCode, data);
    try {
        if (requestCode == SCAN_RECEIPT_REQUEST && resultCode == Activity.RESULT_OK) {
            ScanResults brScanResults = data.getParcelableExtra(CameraScanActivity.DATA_EXTRA);

            Media media = data.getParcelableExtra(CameraScanActivity.MEDIA_EXTRA);
            List<File> receiptImage = media.items();
            String imageArr = "";
            try {
                for(int i=0;i<receiptImage.size();i++){
                    imageArr += receiptImage.get(i).toString();
                    if(i!=receiptImage.size()-1){
                        imageArr += " ";
                    }
                }
                String wrappedData = jsonWrapper(brScanResults);
                if(wrappedData == null){
                    errorCallback.invoke("INVALID_RECEIPT");
                }else {
                    successCallback.invoke(wrappedData, imageArr);
                }
            } catch (Exception e) {
                e.printStackTrace();
                errorCallback.invoke(e.getMessage());
            }
        } else if (requestCode == SCAN_RECEIPT_REQUEST && resultCode == Activity.RESULT_CANCELED && data != null) {
            errorCallback.invoke(data.getStringExtra("error"));
        } else if (requestCode == SCAN_RECEIPT_REQUEST && resultCode == Activity.RESULT_CANCELED) {
            errorCallback.invoke("RECEIPT_SCAN_CANCELLED");
        }
    } catch(Exception e){
        errorCallback.invoke(e.getMessage());
     }
  }
};
- Once the scan is complete, the activity listener will be called and we will receive the data and the scanned image along with the results of the scan activity. Post this, we can parse that data send it back to the javascript side. We have also added some wrappers to manipulate the data.
To check the complete code, click here. The intent in the above code is going to set the CameraScanActivity class provided by BlinkReceipt, which in turn will display the camera provided in the SDK for scanning the receipts as shown in the image below:

- We can also define our own custom UIs and implement this functionality. I will not go deep into how we can implement our custom UI but let me show you how to display the custom camera created by us. To do that, we just have to change our scan code as given below :
@ReactMethod
public void scan(Callback success, Callback error){
    try{
        successCallback = success;
        errorCallback = error;
        Activity currentActivity = getCurrentActivity();
        if(currentActivity == null)
            return;
        Intent intent = new Intent( reactContext, CustomCameraActivity.class );
        currentActivity.startActivityForResult(intent, SCAN_RECEIPT_REQUEST);
    }catch(Exception e){
        errorCallback.invoke(e.getMessage());
    }
}
- In the above code, the
CustomCameraActivitywill be used to derive the intent. Now when we call the scan method, the function will also call the custom camera using the intent instead of the SDK provided camera.
Registering a Native Module
- Once a native module is written, it needs to be registered with React Native. In order to do so, we need to add our native module to
ReactPackageand register it with React Native. During the app initialization, React Native will loop over all packages and register each native module within. A single package can also contain multiple native modules.
React Native invokes a method called createNativeModules() on a React package in order to get the list of native modules to register. If an Android module is not initialized and returned in createNativeModules, it will not be available on JavaScript. To proceed, let's create a new Java Class named ScanReceiptPackage.java that implements the React package inside android/app/src/main/java/.com/rnblinkreceipt using the following code:
package com.rnblinkreceipt;
import com.facebook.react.ReactPackage;
import com.facebook.react.bridge.NativeModule;
import com.facebook.react.bridge.ReactApplicationContext;
import com.facebook.react.uimanager.ViewManager;

import java.util.ArrayList;
import java.util.Collections;
import java.util.List;

public class ScanReceiptPackage implements ReactPackage {

    @Override
    public List<ViewManager> createViewManagers(ReactApplicationContext reactContext) {
        return Collections.emptyList();
    }

    @Override
    public List<NativeModule> createNativeModules(
            ReactApplicationContext reactContext) {
        List<NativeModule> modules = new ArrayList<>();

        modules.add(new ScanReceipt(reactContext));

        return modules;
    }

}
- The resultant file will import the native module which we have created called
ScanReceipt. It then instantiatesScanReceiptwithin thecreateNativeModules()function and returns it as a list of Native modules to register. If we are required to add more native modules down the line, we instantiate them and add them to the list of modules in a similar way .
Note: This method of registering native modules initializes all of the native modules returned in the form of a list on
createNativeModulewhich directly affects the start time of the app. We can useTurboReactPackageas an alternative to this as it will not initialise all the native modules on the app launch giving us the freedom to do it manually.
- Now, we have to add this package to the list of the packages inside
getPackages()method which can be found insideandroid/app/src/main/java/com/rnblinkreceipt/MainApplication.java. Use the code given below :
@Override
        protected List<ReactPackage> getPackages() {
          @SuppressWarnings("UnnecessaryLocalVariable")
          List<ReactPackage> packages = new PackageList(this).getPackages();
          // We can add packages in this react package list as the below line
           packages.add(new ScanReceiptPackage());
          return packages;
        }
- Now that we have successfully registered our native module for Android, we can access it from our JavaScript code itself. The next step is to provide permissions for the internet, camera, and storage which can be done by going to the
AndroidManifest.xmlfile and adding the code given below :
 <uses-permission android:name="android.permission.INTERNET" />
 <uses-permission android:name="android.permission.CAMERA" />
 <uses-feature android:name="android.hardware.camera.autofocus" />
 <uses-permission android:name="android.permission.READ_EXTERNAL_STORAGE" />
 <uses-permission android:name="android.permission.WRITE_EXTERNAL_STORAGE" />

 <uses-feature android:name="android.hardware.camera" />
 <uses-feature android:name="android.hardware.camera.front" android:required="false" />
- As we have left our
scanReceiptfunction empty on the JavaScript side, let's complete that and call our native module as shown in the below code :
const callbackSuccess = (scanResult, imageArr) => {
    let data;
    if (Platform.OS === 'android') {
      data = JSON.parse(scanResult);
    }
    let productsData = [];
    data.products?.map((product, index) => {
      productsData = [
        ...productsData,
        {
          name: product.productDescription.value,
          quantity: product.quantity.value,
          price: product.totalPrice.value,
        },
      ];
    });
    setProducts(productsData);
  };

  const callbackError = error => {
    console.log('error', error);
  };

  const scanReceipt = async () => {
    //NativeModule will be called here
    if (Platform.OS === 'android') {
      const granted = await PermissionsAndroid.request(
        PermissionsAndroid.PERMISSIONS.CAMERA,
        {
          title: 'Permission to Access Camera',
          message: 'App needs access to your camera to scan the receipts',
          buttonNegative: 'Deny',
          buttonPositive: 'Allow',
        },
      );
      if (granted === PermissionsAndroid.RESULTS.GRANTED) {
        NativeModules.ScanReceipt.scan(callbackSuccess, callbackError);
      } else {
        console.log('Camera permission denied');
      }
    }};
- In the above code,
scanReceiptis called and when we will ask the user for camera permissions which need to be approved to go forward. Once the permissions are granted, the native module is called along with success and error callbacks for the respective responses. Let's take a final look at the working example:
Conclusion
As we have reached the end of this article, we have successfully bridged a custom SDK in Android and used it to build an OCR app. This is not limited to this app only! Bridging can be helpful in a lot of cases like reusing some existing Objective-C, Swift, Java, or C++ libraries without having to reimplement it in JavaScript or writing some high performance, multi-threaded code for things like image processing.
Hope this article has helped you to understand bridging and creating custom native modules. In the next article, we will be bridging iOS for this OCR app. This is all for now.
Thank you, Happy coding!
References
OCR App Repo : https://github.com/Prince-Mittal/bridging-demo
React Native Docs : https://reactnative.dev/docs/native-modules-intro