

Implementing Bridging For iOS Native Modules
Implement bridging and create your own custom module for iOS through this read


Hi, welcome the second instalment of integrating bridging library inReact Native. In the first part, we discussed what is bridging and how we can implement it to create our custom native modules. We also implemented a custom native module in Android. If you haven't read Part 1 of the article then you can check it out here. So let's start with today's article.
In this article, we are going to see how we can bridge iOS and implement a similar OCR functionality using Microblink's dynamic framework for iOS and it is called BlinkReceipt. As we have already completed the JavaScript side code in part one, we are going to focus only on implementing the native module for iOS in this read.
Native Bridge in iOS
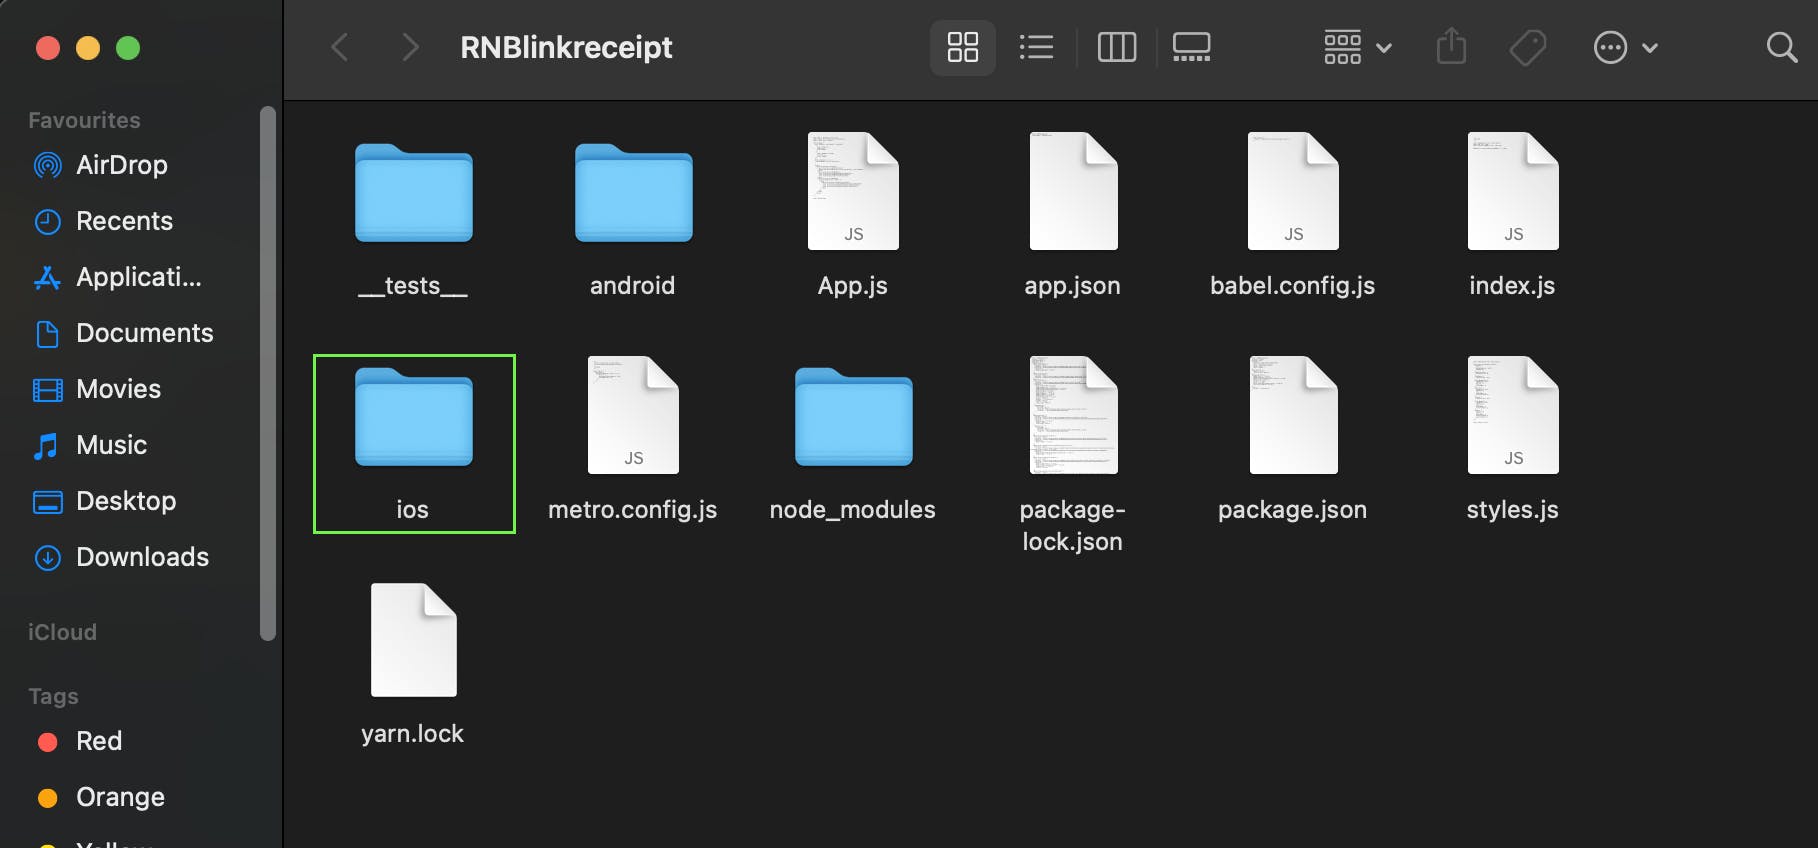
In this section, we will focus on creating a bridge between Objective-C/Swift code(iOS) and our React Component. To get started, open up the iOS project within your React Native application in Xcode. We can find our iOS project here within the React Native app as shown below:
Now after opening our project in Xcode, the first step will be to set up the BlinkReceipt.
Setup
- We can set up BlinkReceipt in our iOS app by following the integration instructions mentioned in the blinkreceipt-ios repository docs. According to the docs, we have to add these lines of code to our podfile to complete our setup:
source 'https://github.com/BlinkReceipt/PodSpecRepo.git'
source 'https://cdn.cocoapods.org/'

platform :ios, '9.0'

target 'YourTarget' do
  use_frameworks!

  pod 'BlinkReceipt', '~> 1.8'
end
- But here we may encounter a problem while doing a pod install. We will understand what the problem is in the later section of this article but currently, we can get started with the setup via the app. To make it work, we have to install a plugin called
cocoapods-user-defined-build-typesand then add these lines to the podfile:
plugin 'cocoapods-user-defined-build-types'

enable_user_defined_build_types!

pod 'BlinkReceipt', '~> 1.8' , :build_type => :dynamic_framework
- After adding this in the podfile , we will now do a
pod installto install the BlinkReceipt and with this, we are done with the setup. Now as discussed in the previous article BlinkReceipt requires a license key which can be generated here on the Microblink website. After setting up the and generating the key for the BlinkReceipt, we can initialize our BlinkReceipt framework by adding the license key in theAppDelegate.mfile. Add the following code todidFinishLaunchingWithOptionsfunction:
[BRScanManager sharedManager].licenseKey = @"LICENSE_KEY";
Create a ScanReceipt class and Bridge Header
- To get started we will create a
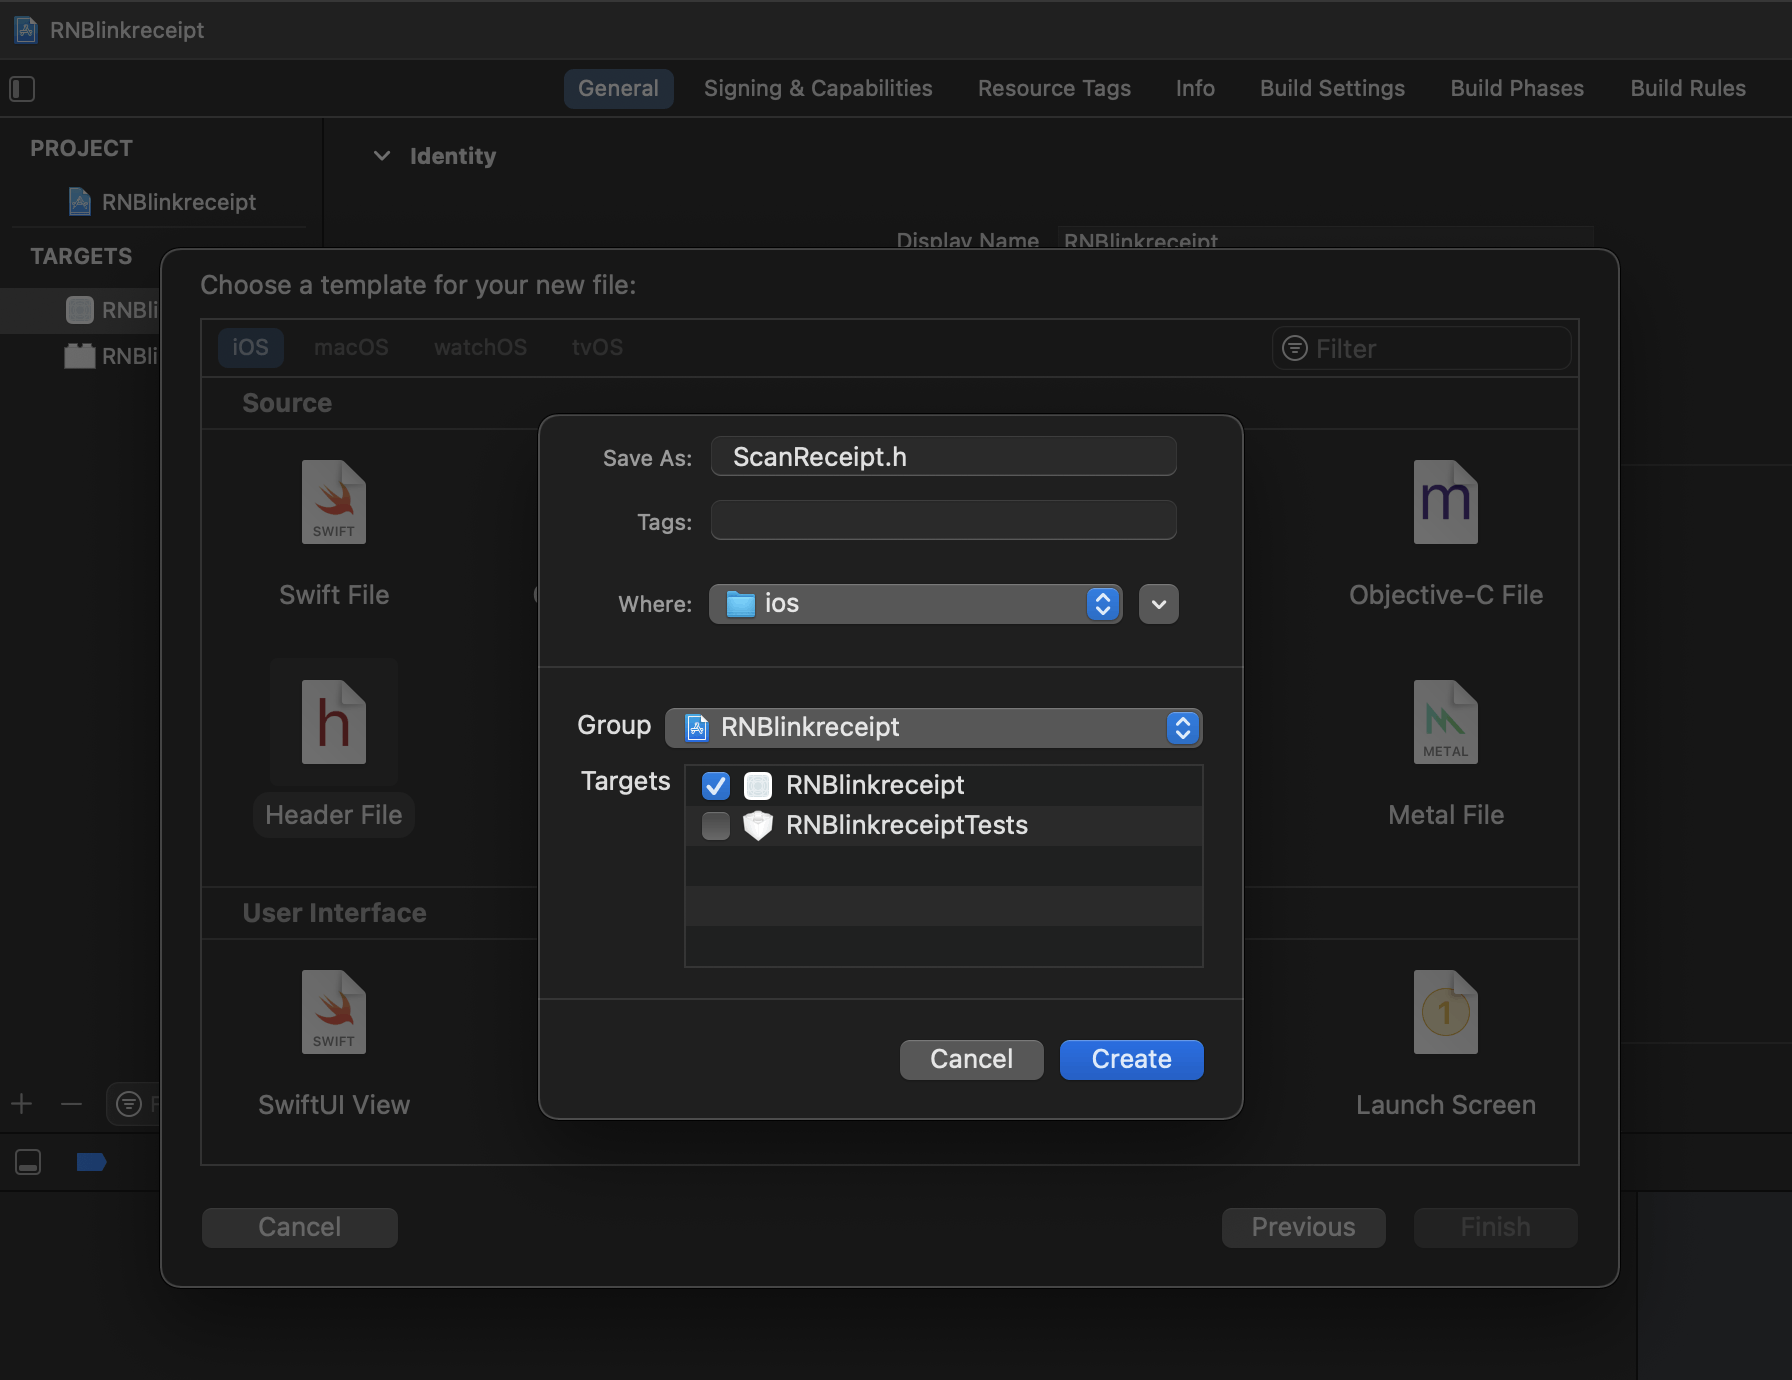
ScanReceiptclass in Objective-C which will have our scan method to scan the receipts. And then we will access this method from JavaScript. Once you open the project in Xcode, create a new custom header file namedScanReceipt.hand set your project target as shown below:
- Next, add the following code in the file:
#import <React/RCTBridgeModule.h>
#import <BlinkReceipt/BlinkReceipt.h>

@interface ScanReceipt : NSObject <RCTBridgeModule,BRScanResultsDelegate>

@end
Naming the Native Module
- We can use any name that fits the native module that we are building in this scenario. We are naming the class as
ScanReceiptsince we are creating a Receipt Scan OCR native module. As you can see above, theScanReceiptclass implements the RCTBridgeModule protocol. A native module is an Objective-C class that implements theRCTBridgeModuleprotocol.
- Next up, let’s start implementing the native module. Create the corresponding implementation file,
ScanReceipt.min the same folder and include the following content:
// ScanReceipt.m
#import "ScanReceipt.h"

@implementation ScanReceipt

// To export a module named ScanReceipt
RCT_EXPORT_MODULE();

@end
- For now, our
ScanReceipt.mnative module only includes aRCT_EXPORT_MODULEmacro, which exports and registers the native module class with React Native. TheRCT_EXPORT_MODULEmacro also takes an optional argument that specifies the name wherein the module will be accessible in your JavaScript code(similar togetNamein Android).
- This argument is not a string literal. In the example below
RCT_EXPORT_MODULE,ScanReceiptis passed and notRCT_EXPORT_MODULE. Follow the example given below:
// To export a module named ScanReceipt
RCT_EXPORT_MODULE(ScanReceipt);
- This native module can be accessed from our JS code as
NativeModules.ScanReceipt. If we don't specify a name, the JavaScript module name will match the Objective-C class name and in case we are using prefixes likeRCTorRK, they will be removed by default.
Exporting Native Method to JS:
React Native will not expose any methods in a native module to JavaScript unless we explicitly tell it to do that; this can be done using the RCT_EXPORT_METHOD macro. Methods written in the RCT_EXPORT_METHOD macro are asynchronous and the return type is therefore always void. In order to pass a result from an RCT_EXPORT_METHOD method to JS, we can use callbacks as we have done in android.
Let’s go ahead and set up a native method for our ScanReceipt native module using the RCT_EXPORT_METHOD macro. We have to assign it the same name scan as we have assigned in the android method, else we have to call them differently based on the platform that is being used.
RCT_EXPORT_METHOD(scan:(RCTResponseSenderBlock)callbackSuccess callbackError:(RCTResponseSenderBlock)callbackError){}
In the above code, we are exporting a React method from the native iOS (Objective-C). This method is accepting two callback arguments called callbackSuccess and callbackError. Now let's implement our method to scan the receipts. Add the code given below to the scan method:
RCT_EXPORT_METHOD(scan:(RCTResponseSenderBlock)callbackSuccess callbackError:(RCTResponseSenderBlock)callbackError){
  @try {
    self.callbackSuccess = callbackSuccess;
    self.callbackError = callbackError;
    NSString *mediaType = AVMediaTypeVideo;
    AVAuthorizationStatus authStatus = [AVCaptureDevice authorizationStatusForMediaType:mediaType];
    BRScanOptions *scanOptions = [BRScanOptions new];
    scanOptions.storeUserFrames = true;
    scanOptions.jpegCompressionQuality = 0.6;
    scanOptions.detectDuplicates = true;
    if(authStatus == AVAuthorizationStatusAuthorized) {
        dispatch_async(dispatch_get_main_queue(), ^{
                [[BRScanManager sharedManager] startStaticCameraFromController:[self currentApplicationViewController]
                                                                     scanOptions:scanOptions
                                                                    withDelegate:self];
        });
    }else{
      // not determined
      [AVCaptureDevice requestAccessForMediaType:mediaType completionHandler:^(BOOL granted) {
        if(granted){
            dispatch_async(dispatch_get_main_queue(), ^{
              [[BRScanManager sharedManager] startStaticCameraFromController:[self currentApplicationViewController]
                                                                   scanOptions:scanOptions
                                                                  withDelegate:self];

            });
        } else {
          callbackError(@[@"CAMERA_PERMISSION"]);
        }
      }];
    }
  }@catch(NSException *e){
    callbackError(@[e.reason]);
  }
}
In the above code snippet, we are using AVFoundation to determine the camera permission status of our iOS device and we can for camera permissions if we don't already have them based on the results dereived . We have defined some of the scan options like detecting duplicate receipts and image compression level and also whether we want to store images or not. Once get the required permissions, we can launch the static camera from the BlinkReceipt Scan Manager provided by the blinkreceipt framework with our self-defined scan options.
Now if you notice in the above code we have a currentApplicationViewController, wondering what that is about?? So this currentApplicationViewController is a function written by us to get the current view controller. Follow the example given below:
- (UIViewController *) currentApplicationViewController {
    UIWindow *window = [UIApplication sharedApplication].keyWindow;
    UIViewController *rootViewController = window.rootViewController;

    if([rootViewController isKindOfClass:[UIViewController class]]){
        return [[UIApplication sharedApplication]delegate].window.rootViewController;
    } else {
        UINavigationController *navigationController = (UINavigationController *)[[UIApplication sharedApplication]delegate].window.rootViewController;
        return(UIViewController *)[navigationController topViewController];
    }
    return nil;
}
Now why do we need to write a function to access the view controller, can't we use it directly as done in the iOS apps? The answer is no, in the case of React Native, there is only one view controller and that is the root view controller. The task now is to access the rootViewController and replace that with our camera controller.
Now that our camera is displayed on the screen, we will be able to click the receipt images but the question that now remains is how do we access the result. So in order to get the result, we can wrie two listeners in the same file where one is didFinishScanning and the other is didCancelScanning as mentioned in the BlinkReceipt iOS docs. If we cancel our scan, then the didCancelScanning action will be called and that will dismiss the camera controller and give control back to the root controller and also call our callbackError as shown in the below code snippet :
- (void)didCancelScanning:(UIViewController *)cameraViewController{
  NSLog(@"Scan Cancelled");
  @try{
  dispatch_async(dispatch_get_main_queue(), ^{
    [cameraViewController dismissViewControllerAnimated:YES completion:nil];
  });
    self.callbackError(@[@"cancel"]);
  }
  @catch(NSException *e){
    self.callbackError(@[e.reason]);
  }
}
And in case we have completed our scan successfully then the didFinishScanning listener will be called with the result and the receipt images captured by the user as shown in the below code snippet :
- (void)didFinishScanning:(UIViewController *)cameraViewController withScanResults:(BRScanResults *)scanResults {
  @try{
    NSUInteger n = [BRScanManager sharedManager].userFramesFilepaths.count;
    NSString* imageArr = @"";
    for(int i=0;i<n;i++){
      NSString* currentPath = [BRScanManager sharedManager].userFramesFilepaths[i];
      if(i==0){
        imageArr = currentPath;
      }else{
      imageArr = [[imageArr stringByAppendingString:@" "] stringByAppendingString:currentPath];
      }
    }
  if(scanResults.products.count > 0){
    NSDictionary *resultsDict = [scanResults dictionaryForSerializing];
    self.callbackSuccess(@[resultsDict,imageArr]);
  }
  else{
    self.callbackError(@[@"Please scan a valid Receipt"]);
  }
  dispatch_async(dispatch_get_main_queue(), ^{
    [cameraViewController dismissViewControllerAnimated:YES completion:nil];
  });
  }
  @catch(NSException *e){
    self.callbackError(@[e.reason]);
  }
}
In the above code snippet, we have stringified the images array and serialized the scan result to a dictionary that is similar to the JSON in JavaScript and we will receive these two arguments based on React Native's callbackSuccess method that we have passed. In case the scanned receipt is not valid we can call the error callback to alert the user.
With this our iOS native module is complete and now we can go back to our JavaScript code. We have already written a call for this native module when we have created the android native module. The final code will look like this :
import React, {useState} from 'react';
import {
  View,
  Text,
  Button,
  NativeModules,
  PermissionsAndroid,
  Platform,
  ScrollView,
} from 'react-native';
import styles from './styles';

function App() {
  const [products, setProducts] = useState([]);

  const callbackSuccess = (scanResult, imageArr) => {
    let data = scanResult;
    if (Platform.OS === 'android') {
      data = JSON.parse(scanResult);
    }
    let productsData = [];
    data.products?.map((product, index) => {
      productsData = [
        ...productsData,
        {
          name: product.productDescription.value,
          quantity: product.quantity.value,
          price: product.totalPrice.value,
        },
      ];
    });
    setProducts(productsData);
  };

  const callbackError = error => {
    console.log('error', error);
  };

  const scanReceipt = async () => {
    //NativeModule will be called here
    let granted;
    if (Platform.OS === 'android') {
      granted = await PermissionsAndroid.request(
        PermissionsAndroid.PERMISSIONS.CAMERA,
        {
          title: 'Permission to Access Camera',
          message: 'App needs access to your camera to scan the receipts',
          buttonNegative: 'Deny',
          buttonPositive: 'Allow',
        },
      );
    }
    if (
      granted === PermissionsAndroid.RESULTS.GRANTED ||
      Platform.OS === 'ios'
    ) {
      NativeModules.ScanReceipt.scan(callbackSuccess, callbackError);
    } else {
      console.log('Camera permission denied');
    }
  };

  return (
    <View style={styles.container}>
      <View style={styles.scanBtnContainer}>
        <Button onPress={scanReceipt} title="Scan Receipt" color="#50C878" />
      </View>
      <ScrollView>
        <View style={styles.tableHeader}>
          <Text style={styles.productNameHeader}>Name</Text>
          <Text style={styles.headerText}>Quantity</Text>
          <Text style={styles.headerText}>Price</Text>
        </View>

        <View style={styles.tableBody}>
          {products.map((product, index) => {
            return (
              <View style={styles.tableRow} key={index}>
                <Text style={styles.productNameBody}>{product.name}</Text>
                <Text style={styles.bodyText}>{product.quantity}</Text>
                <Text style={styles.bodyText}>
                  {Math.round(product.price * 100) / 100}
                </Text>
              </View>
            );
          })}
        </View>
      </ScrollView>
    </View>
  );
}

export default App;
With this, we have completed the bridging and learned how we can create our own custom native modules. Before finishing up this article, we will now discuss the extra installation steps we have implemented at the start and the issues that we would have faced while integrating a dynamic framework in iOS.
Bridging React Native with iOS Dynamic frameworks
This is a certain issue that one may face while bridging the native iOS code using a dynamic framework. As we know for iOS we use Cocoapods to compile our dependencies(pods) and by default these Cocoapods install our dependencies as static libraries. So React Native’s iOS dependencies are already compiled as static libraries(with any bundle resource being copied to the main app) because of which compilation issues may arise when we try to use a dynamic framework.
Note: If you don’t yet understand the difference between static libraries, static frameworks, dynamic libraries, and dynamic frameworks, I suggest you read this article. as we will be using this terminology quite a bit.
Swift dependencies are often bundled as dynamic frameworks. So assume a swift pod has the dependency graph assume below now:
VendorSwiftySDK
 ├ VendorSwiftyCore
   ├ SomeBigFramework
   └ AnotherFramework
 └ Alamofire
The Swift framework is dynamic and can have multiple dynamic dependencies. At runtime, loading VendorSwiftySDK will attempt to dynamically load (via dyld) its dependencies and if it’s unable to find these frameworks (often in your app bundle’s framework folder) you’ll be greeted with an error similar to:
`dyld: Library not loaded:
@rpath/VendorSwiftyCore.framework/VendorSwiftyCore`
As mentioned before, Cocoapods compile React Native’s iOS dependencies as a static library by default. To use a dynamic framework like this one we have to use use_frameworks! which is Cocoapods directive in our Podfile. However using the use_frameworks! callback will cause all pods to be compiled as dynamic frameworks even if they are static libraries and it will also cause some react native pods to fail and a large number of third-party packages might fail as well. So what we have to do is compile only the VendorSwiftySDK and its dependencies as a dynamic framework and other dependencies as static libraries. But CocoaPods pod command doesn’t allow mixing the build types because of which, we can either use libraries that are selected by default or add use_frameworks! to compile every dependency as a framework. But this may cause linking issues with dependencies that need to be compiled as static libraries as shown in the image below.:

So while researching a way to use dynamic frameworks with static libraries I stumbled upon a CocoaPods plugin called cocoapods-user-defined-build-types. We can use this plugin to define the build type of a specific pod or for multiple pods. So in simpler terms, we can define use_frameworks! directive only for specific pods we want to like on VendorSwiftySDK and its dependencies while other pods can still be compiled as static libraries. So how do we use this plugin? Let’s see.
So the first step is to install the plugin on your device. For that open your terminal and run the following command :
gem install cocoapods-user-defined-build-types
After this go to your project’s Podfile and on top of the file add the following code:
plugin ‘cocoapods-user-defined-build-types'
enable_user_defined_build_types!
The above code will enable the custom user-defined build types in our iOS project and then we can define the custom build type for a specific pod as shown below:
pod 'RandomSwiftySDK', '~> 2.6.0', :build_type => :dynamic_framework
In the above code, set 2.6.0 and the version of the SDK and then we can go on to define the build type for that specific pod. And in a similar way, we can define custom build types for multiple pods and all other pods will be compiled as static libraries by default.
After using this plugin some of the dependencies may or may not cause build issues while running on the real device as shown below:
libextobjc -fembed-bitcode is not supported on versions of iOS prior to 6.0
Command Ld failed with a nonzero exit code.
FBSDKCoreKit Command compileSwift failed with a nonzero exit code.
To resolve this issue we can disable the bitcode from the build settings of the project. These issues are related to the iPhone’s deployment target build configurations while that have already been set to a specific version but somehow those wont work in the case of some libraries. This may be due to the mixing up of build types or some other build configurations issues that may arise due to the mixing of the build types.
If this problem is still not resolved we can forcefully define the deployment target for every dependency that will be installed using the pod command. To achieve this we used the code given below in our Podfile:
post_install do |installer|
    installer.pods_project.targets.each do |target|
        target.build_configurations.each do |config|
            config.build_settings['IPHONEOS_DEPLOYMENT_TARGET'] = '10.0'
        end
    end
end
What this code will do is a post-installation of a pod where it will set the build settings configuration of each pod by setting the iPhone deployment target for each pod which may have not been set due to mixing up the build types that are not supported by default in the Cocoapods.
These are some of the issues we have faced and resolved while integrating a dynamic framework as a native module for our app.
Here is a working demo for you:
Conclusion
As we have reached the end of this article, we have successfully learnt how to bridge a dynamic framework in iOS and use it to build an OCR app. As discussed in the previous article, bridging can be helpful in a lot of cases like reusing some existing Objective-C, Swift, Java, or C++ libraries without having to reimplement it in JavaScript or writing some high performance, multi-threaded code for things like image processing.
Hope this article has helped you to understand bridging in iOS and creating custom native modules.
Thank you, Happy coding!
References
OCR App Repo: https://github.com/Prince-Mittal/bridging-demo
React Native Docs: https://reactnative.dev/docs/native-modules-intro
Cocoapods User Defined Build Types: https://github.com/joncardasis/cocoapods-user-defined-build-types