


Introduction to Sentry SDK
A basic introduction to Sentry SDK and its integration with React applications


No application is perfect, the scope for improvement is always there.
Making our code 100% error-free is a next-to-impossible task. Finding hidden bugs and exceptions can be a tedious task for a developer to accomplish as the application grows in size and this affects user's experience in the production environment without us knowing it. Sentry is a great cloud-based error tracking tool that handles all this hassle for us so that we can focus on the coding aspect.
Why Sentry?
Sentry provides us a way to automatically track crashes and exceptions while showing us the exact stack trace which can make debugging a lot easier and faster. Let's look at some advantages Sentry provides us:
- Real-time error tracking
- Performance monitoring
- Get exact source of error
- Detecting group errors in the environment
- Release tracking
- Assigning issues to team members
What are source maps?
Sentry supports the un-minifying of JavaScript via source maps which lets us see the untransformed code when an error occurs in the stack trace. A source-map is a file (files with .map extension) whose main purpose is to provide a link between minified transformed files to browser along with the actual untransformed source code. When we make an actual release distribution, the whole code in our project is converted to a minified bundle file which is readable by the browser. The debugging logs will show only the bundled JS code since the source code had been transformed; we can use source maps to solve this.
Now let's dive straight into the actual integration.
Integration with React
Let us create a free account on Sentry.
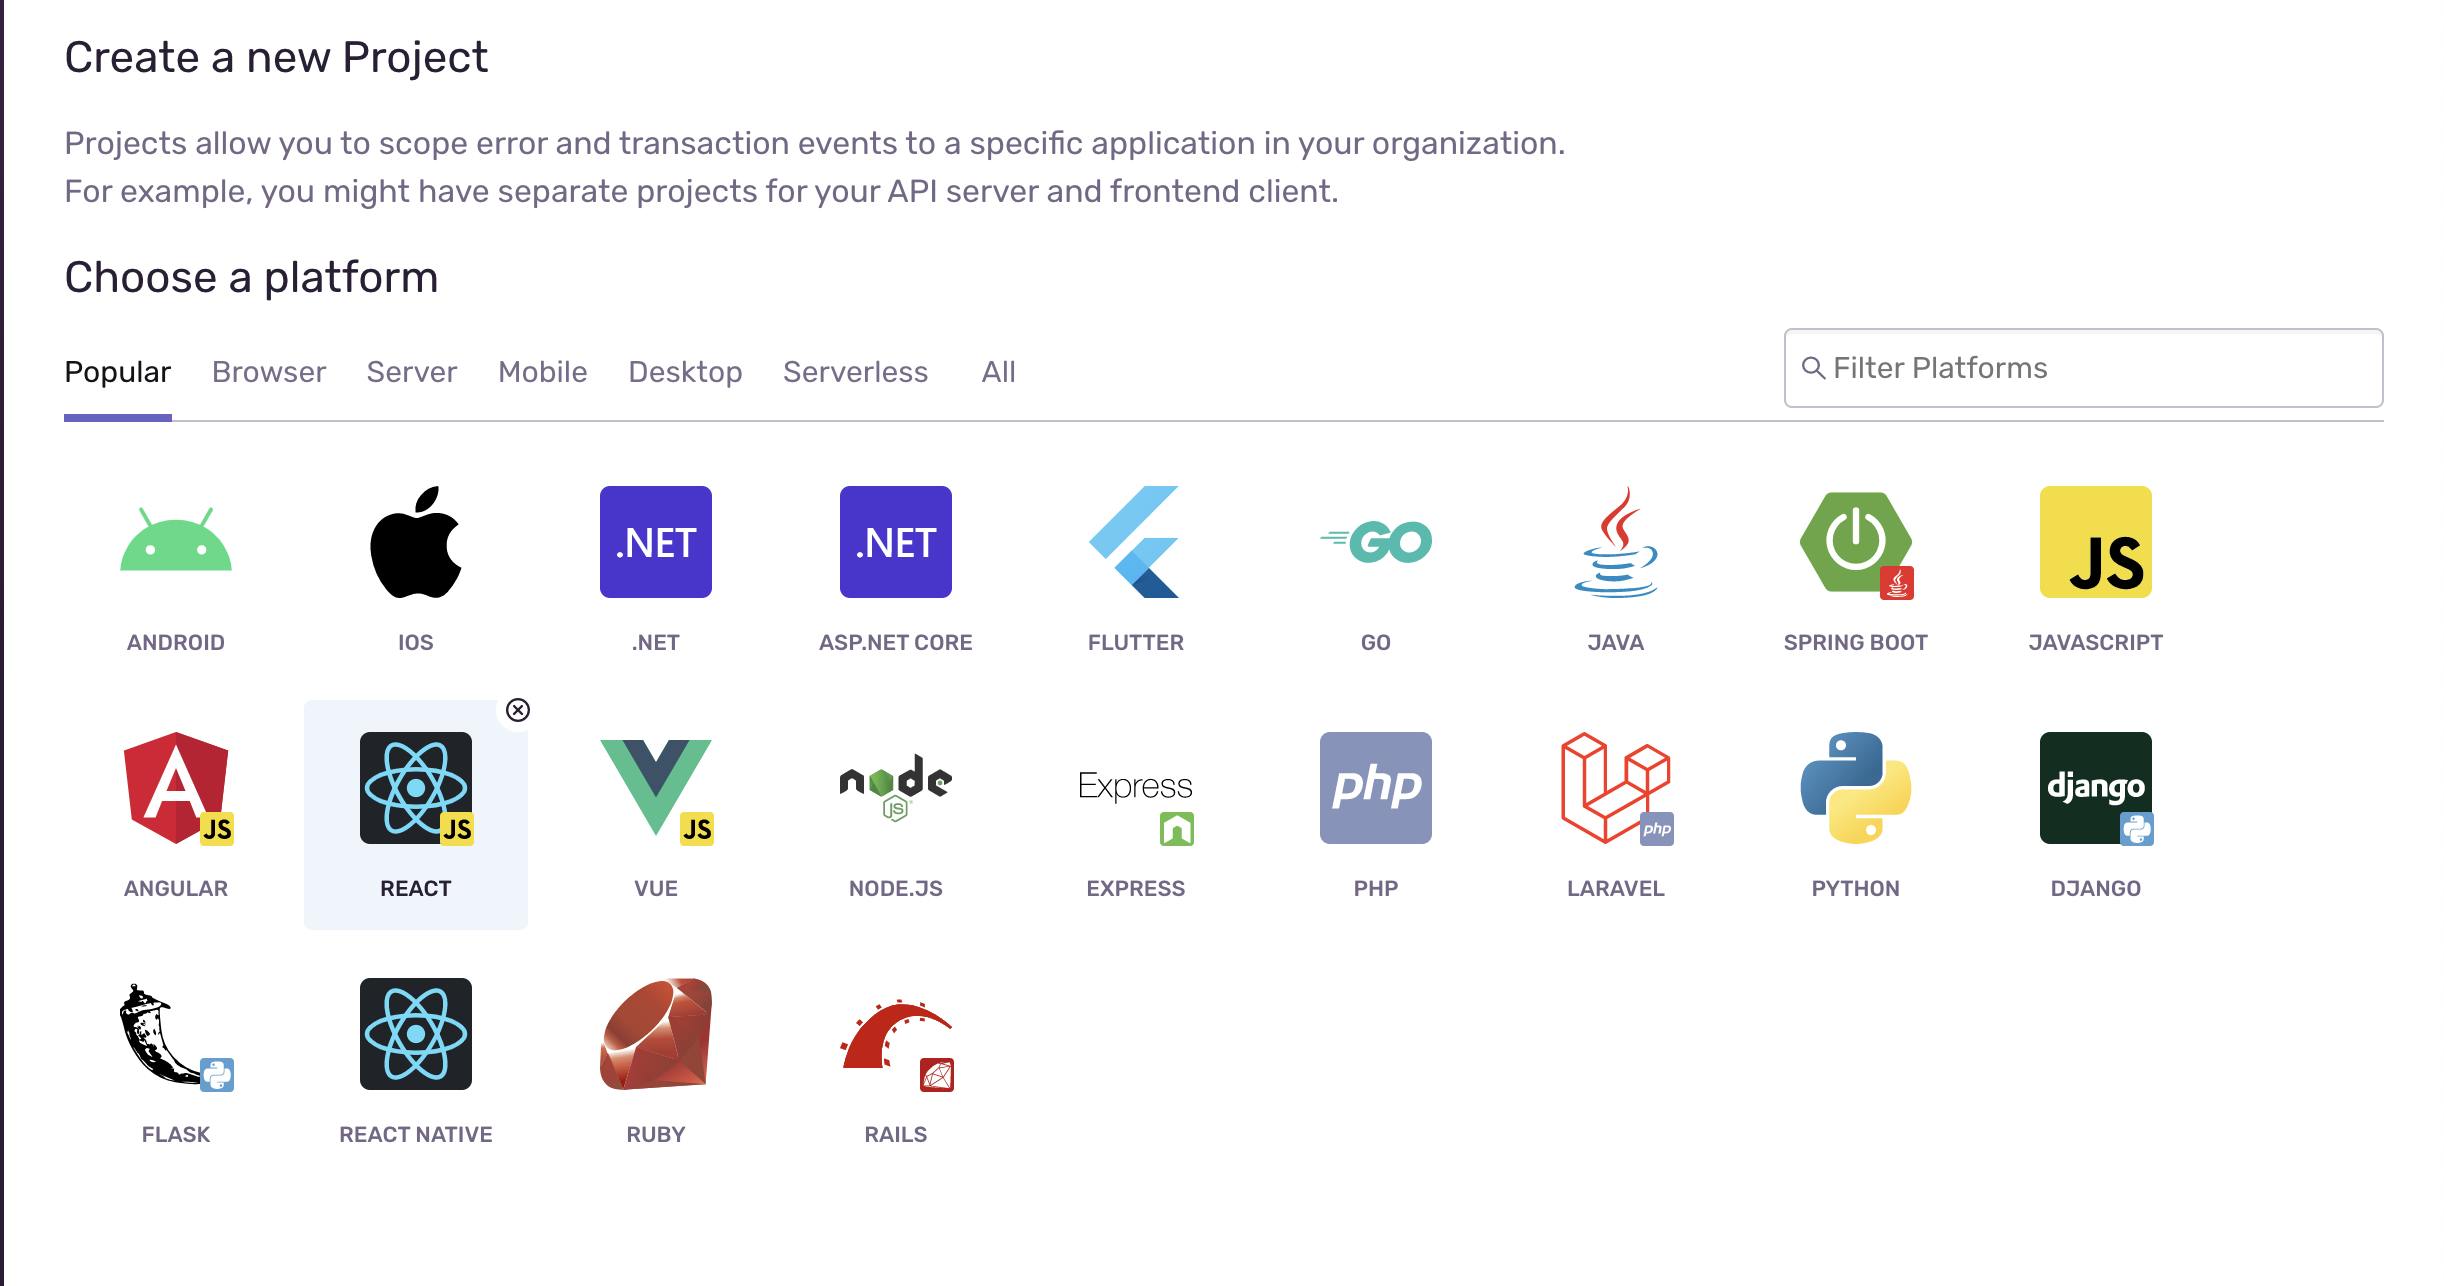
After creating an account, we'll be prompted to select the framework/platform and create a project. Proceed as shown in the image given below:
- Now let's create a React project and test it out. Enter the code given below into your terminal:
npx create-react-app my-app
- To make Sentry work we need to add the following packages to our project:
yarn add @sentry/react @sentry/tracing
- Now, let's configure Sentry in our project. Import the packages which had just integrated and add
the below code to the
src/index.jsfile. We can initialise Sentry anywhere in the project according to our needs. Use the code given below:
import * as Sentry from "@sentry/react";
import { Integrations } from "@sentry/tracing";

Sentry.init({
  dsn: "your project DSN",
  integrations: [new Integrations.BrowserTracing()],
  release: "1.0",
  environment: "production",

  // Set tracesSampleRate to 1.0 to capture 100%
  // of transactions for performance monitoring.
  // We recommend adjusti
Below is an example DSN.
https://public_key123@sentry.example.com/12345
- DSN can be easily found in the project setting on the Sentry dashboard. Refer to the following image to proceed:

We can also add "release" and "environment" parameters. The release parameter is important since Sentry has the ability to scrap source maps and the minified bundle and this makes it necessary to map the error correctly for different releases of the app.
Now let us add a test error to our app. Open the
App.jsfile and add a button. Lets add a function to throw an error on the click of a button by using the code given below:
function methodDoesNotExist() {
  throw new Error('Test sentry error')
}

function App() {
  return (
    <div className="App">
      <header className="App-header">
        <button onClick={()=>methodDoesNotExist()}>Log Error</button>
      </header>
    </div>
  );
}

export default App;
- We can start the React project and test it now! I have already deployed the current version of the application so let' see what happens when the button is clicked. Here's a pictorial depiction for your understanding:
- As you can see, we can view the error in the browser console. The application would have crashed if it were the normal version. Let's check the Sentry dashboard to see if the error was captured. Let's click on the Issues tab of the project as shown below:
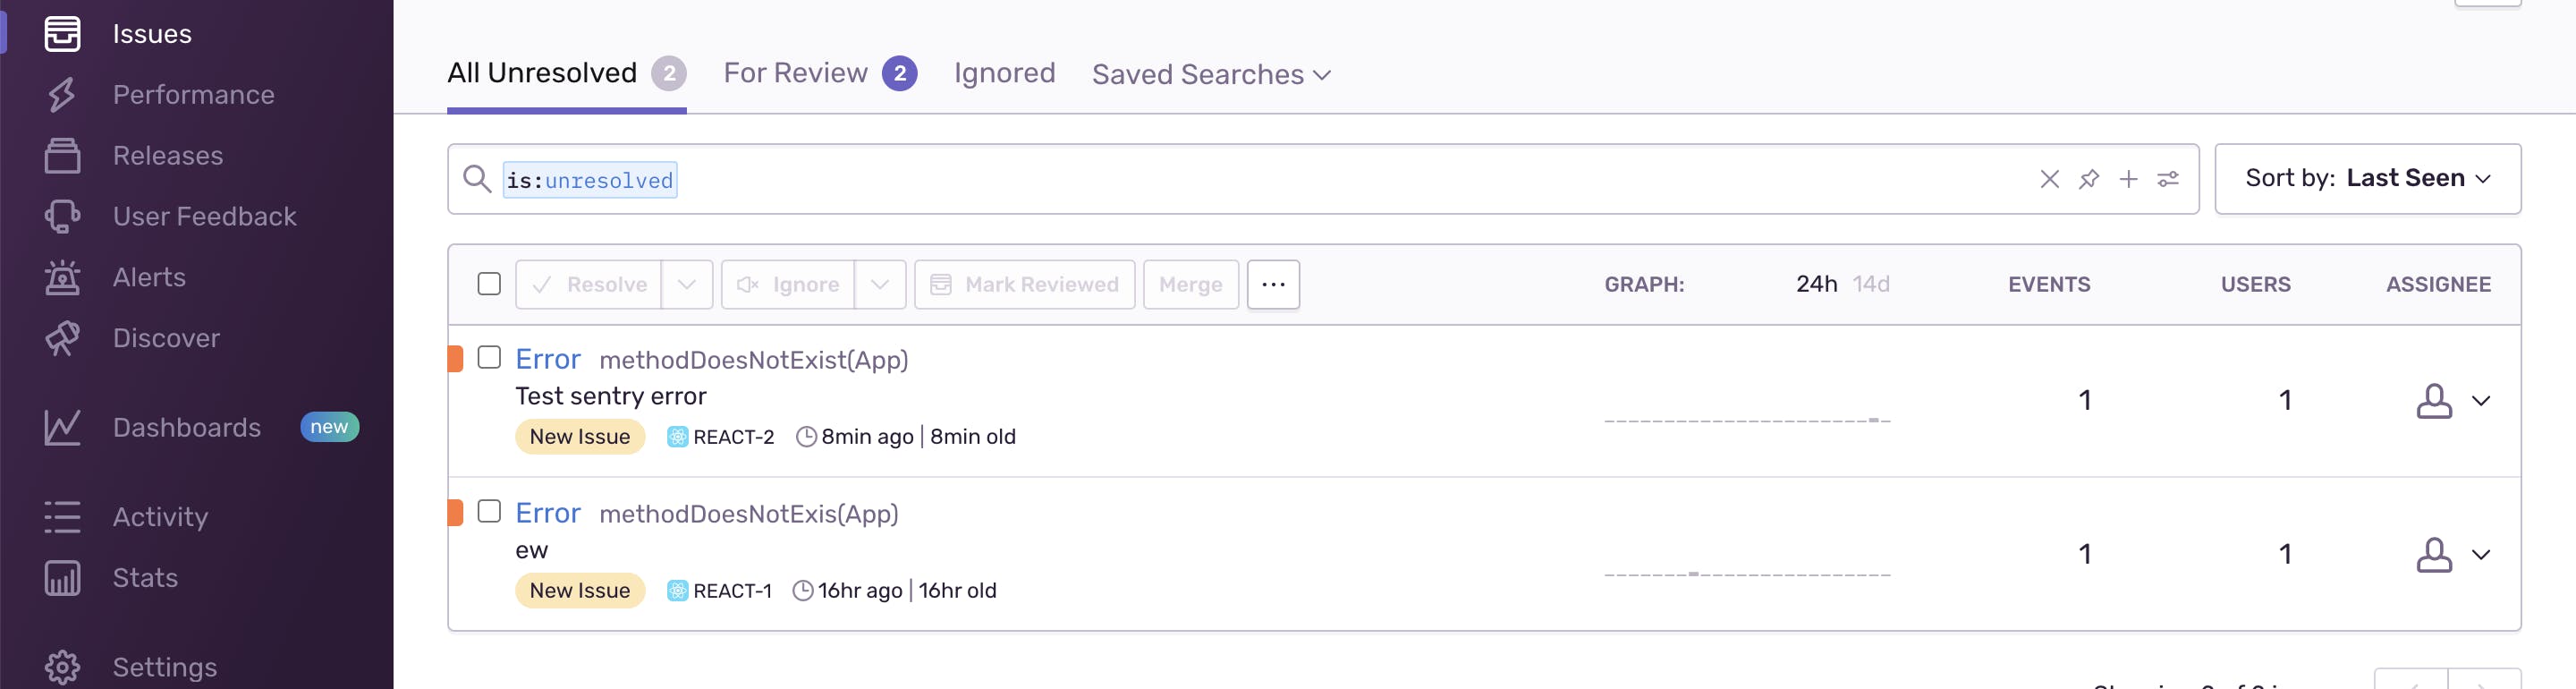
- We will be able to see the list of error and exceptions as Sentry automatically assigns a particular error type like fatal, non-error exception etc. based on the severity of error. Refer to the image given below:
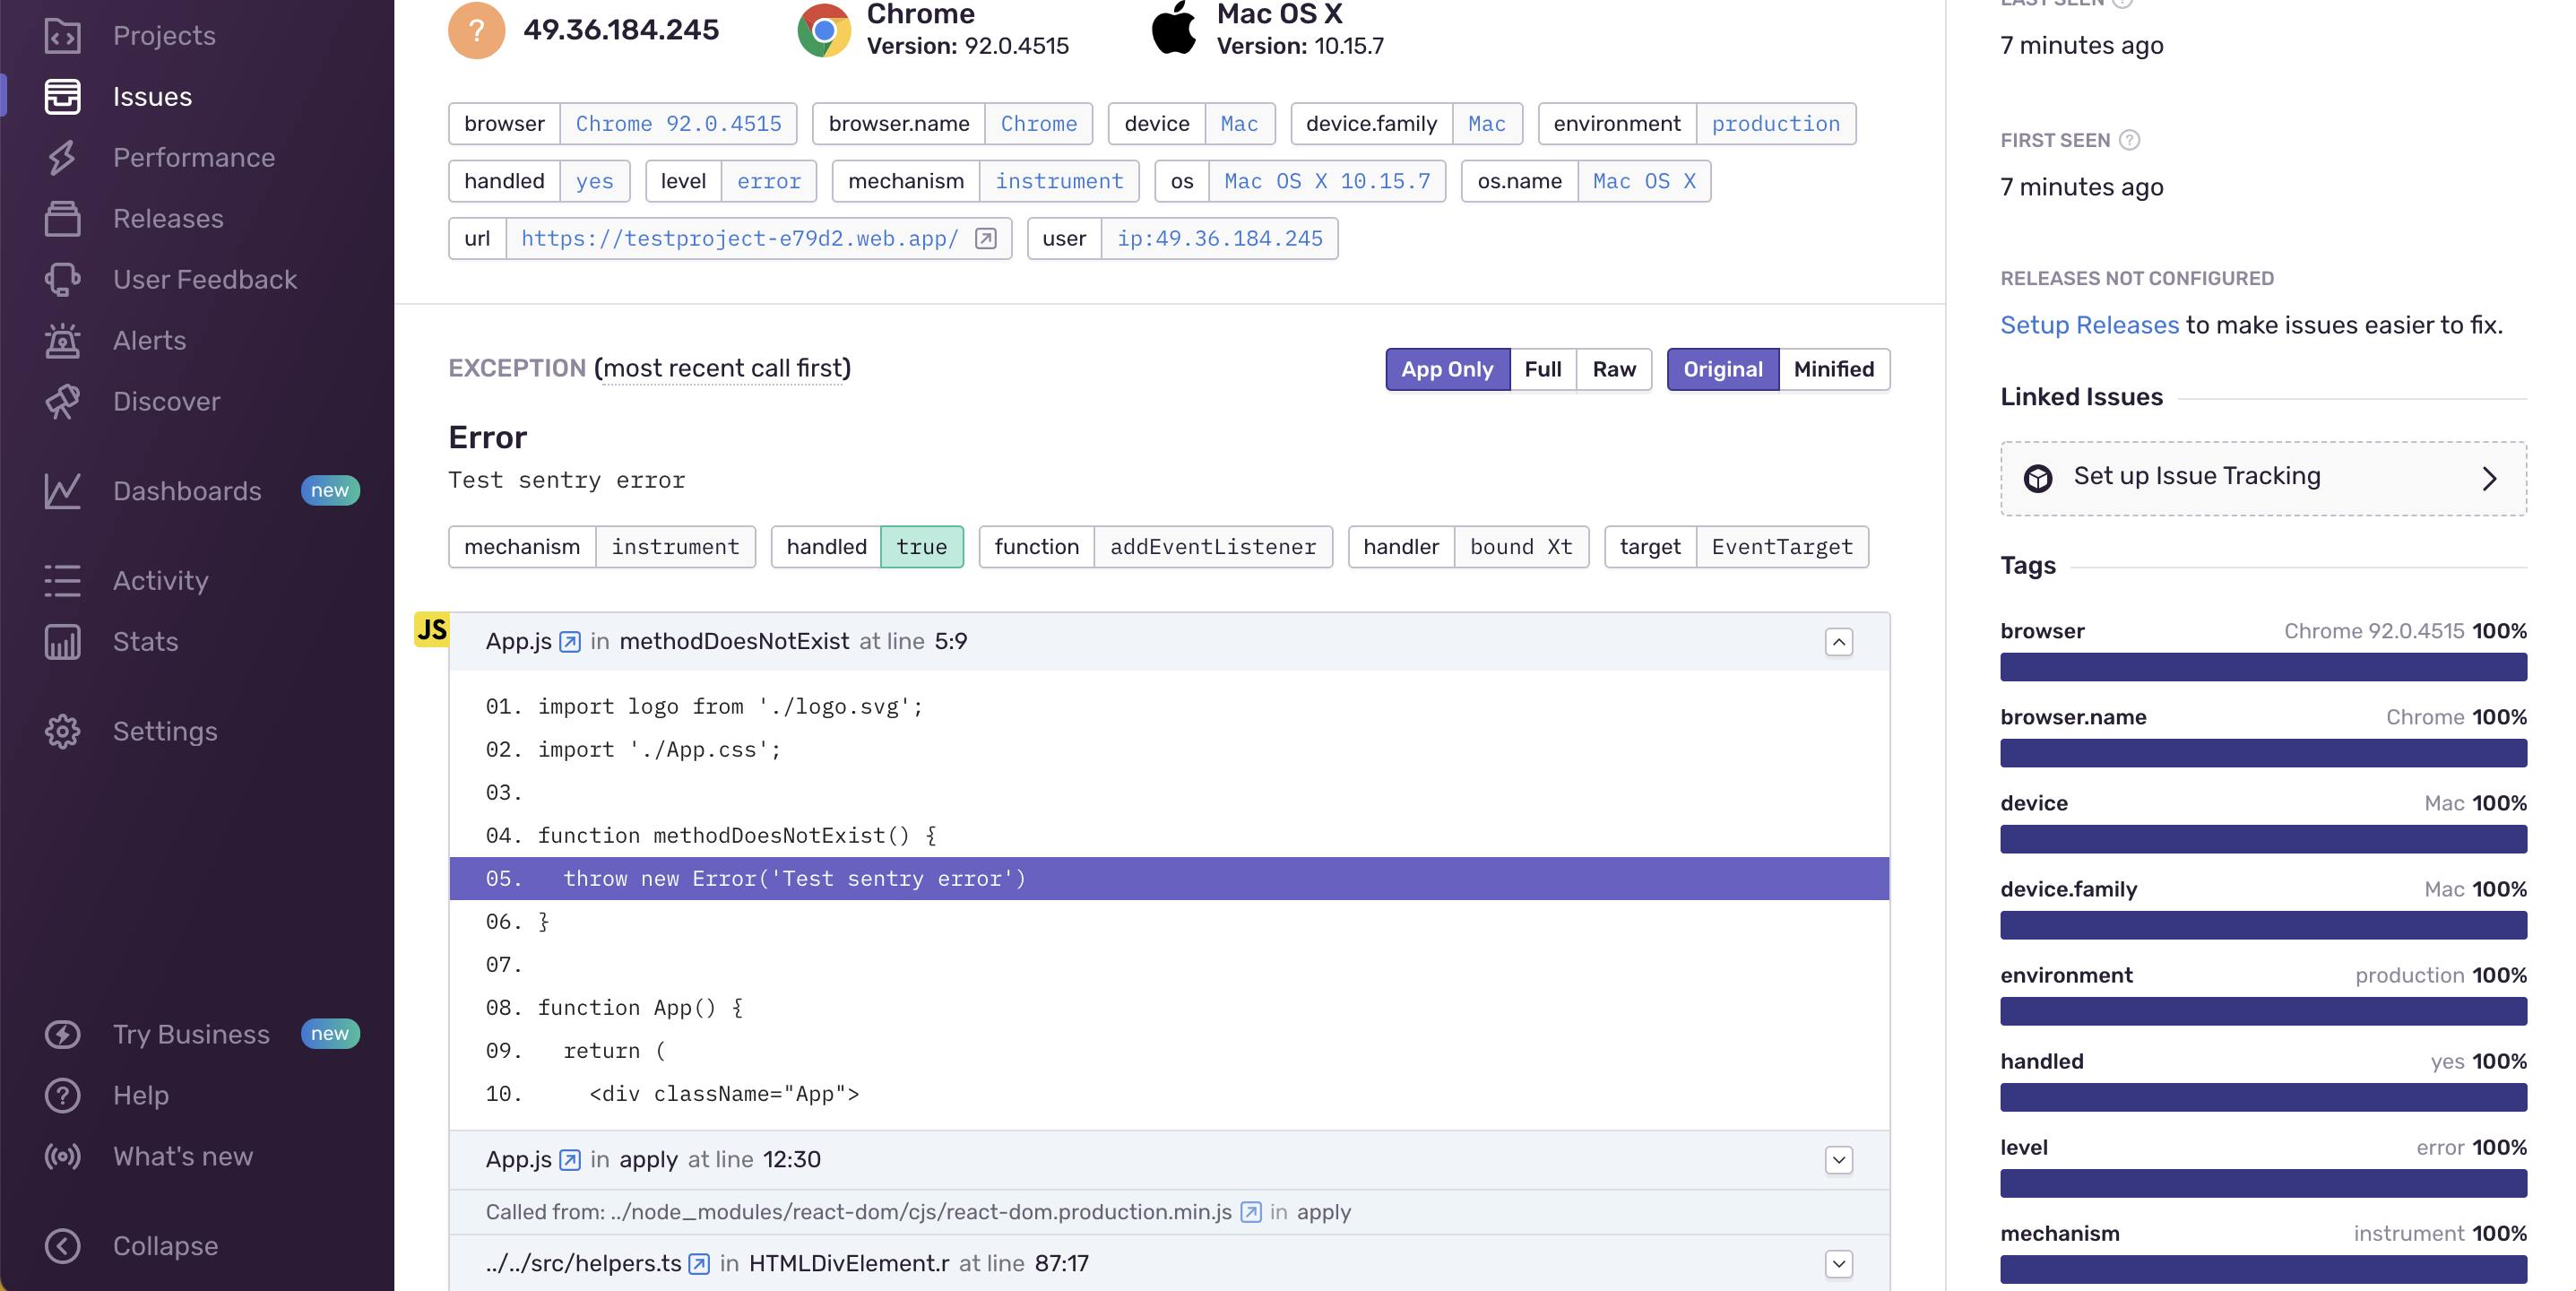
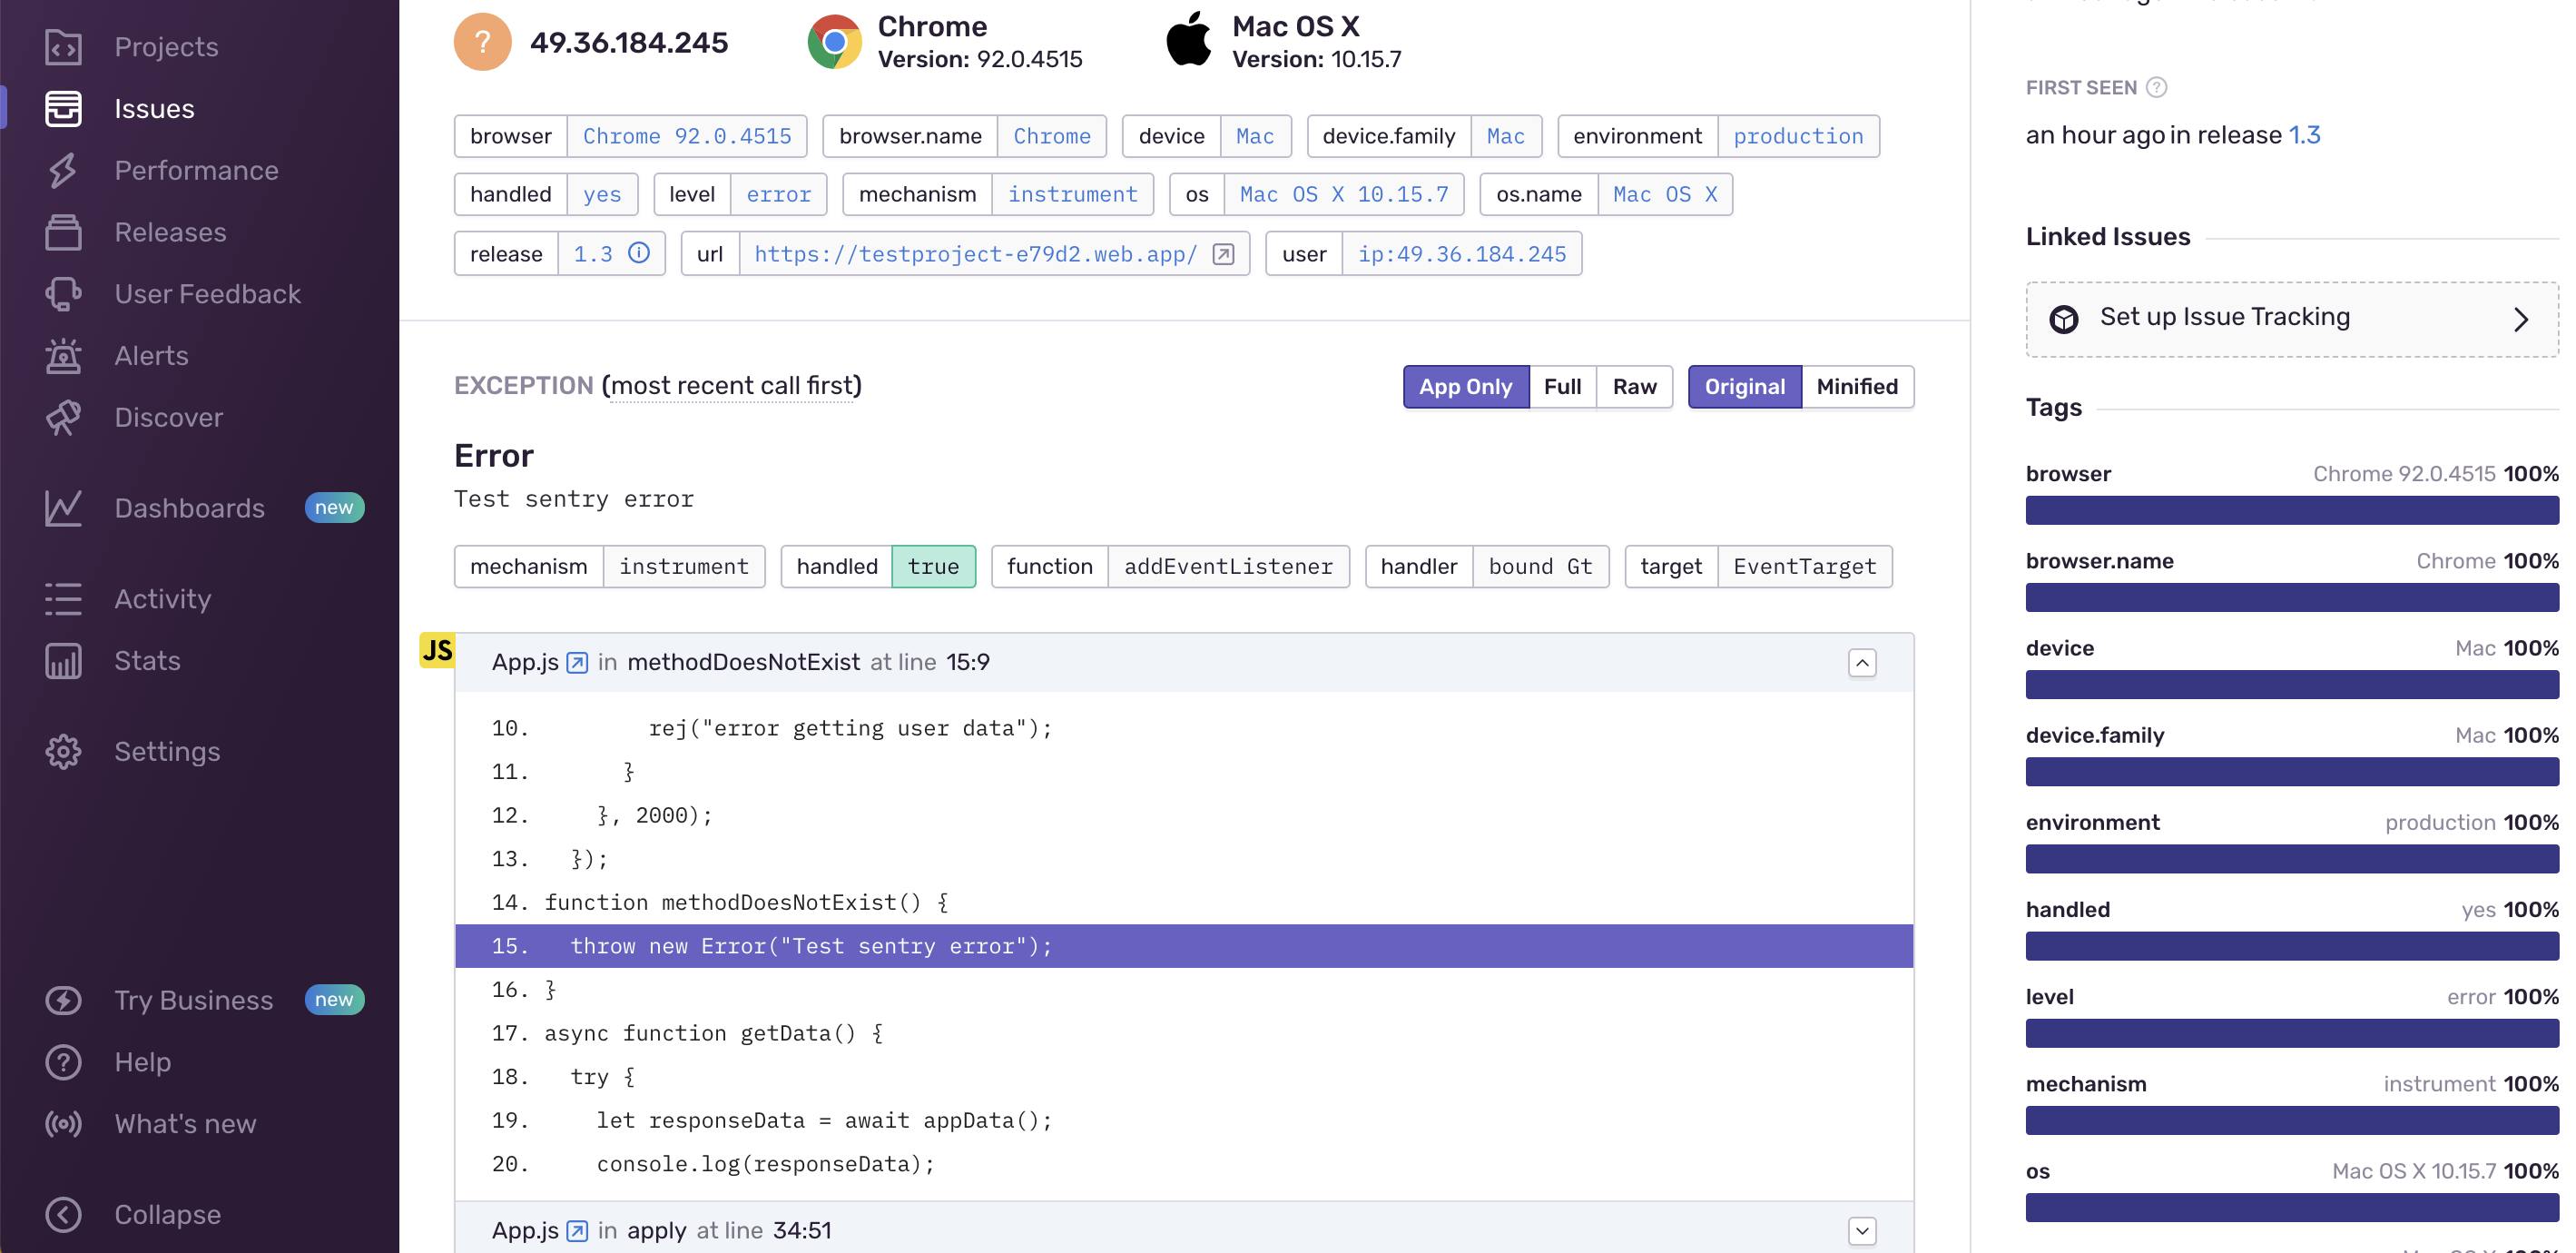
- On checking stack traces using
methodDoesNotExist, we found out the error was occurring in theApp.jsmethod. Other than this, we can see that Sentry provides other additional information about the event, for e.g., the IP address of the application user, environment etc.
Uploading Source Maps manually
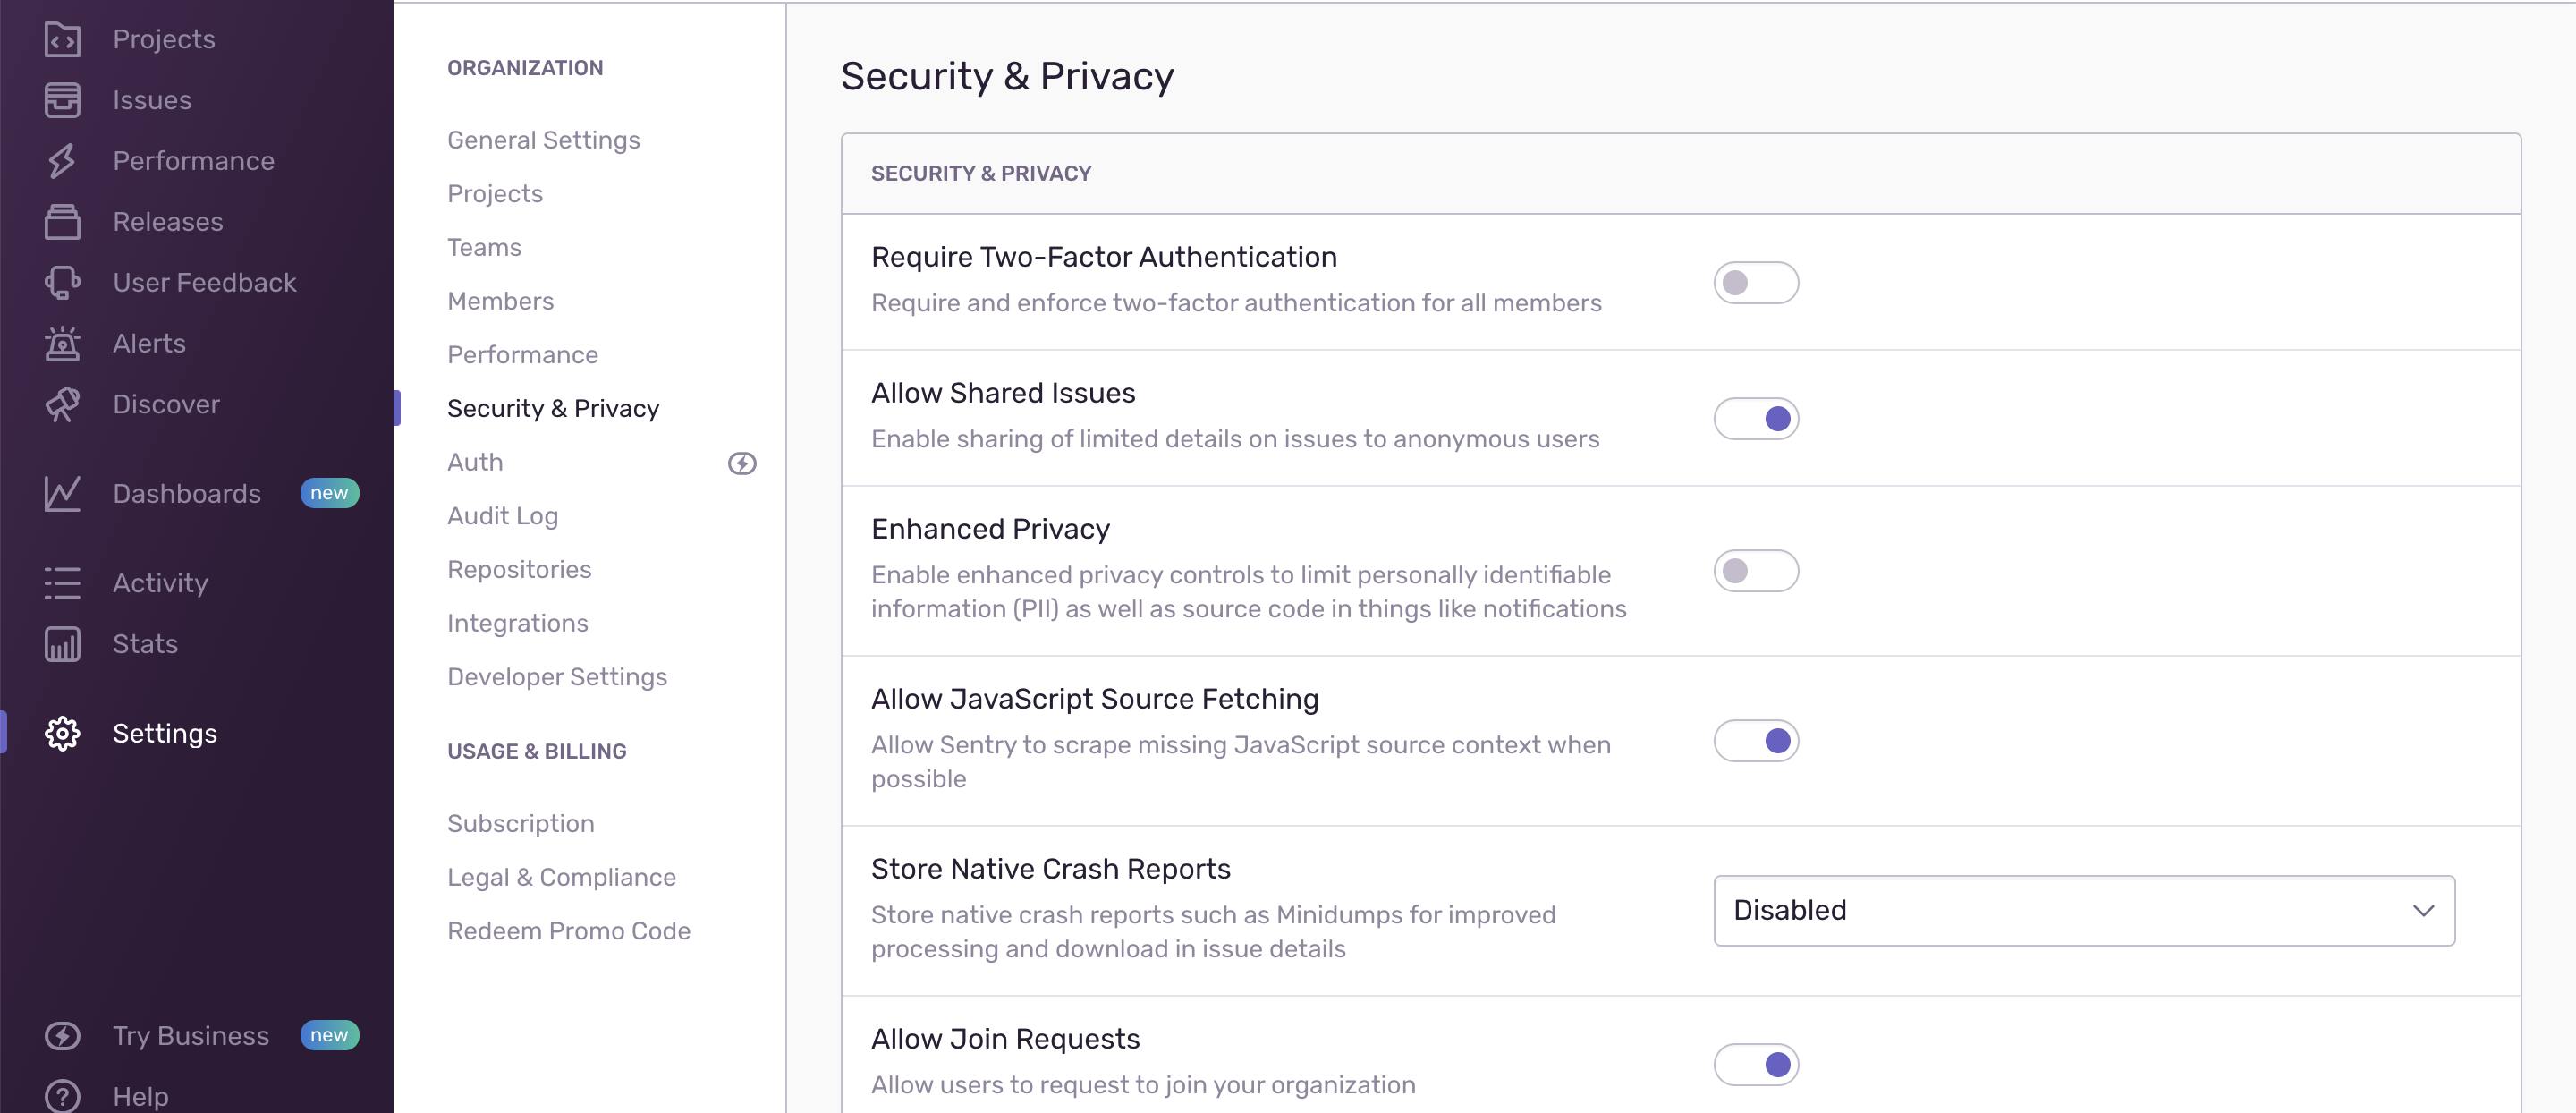
When we initialise Sentry, it automatically scraps out the minified JS files (JS bundle) and the source maps for us (We can see how it's enabled in the settings). In your sentry dashboard, go to Security & Privacy and enable Allow JavaScript Source Fetching (This setting is project specific as well as team specific). Refer to the image given below:
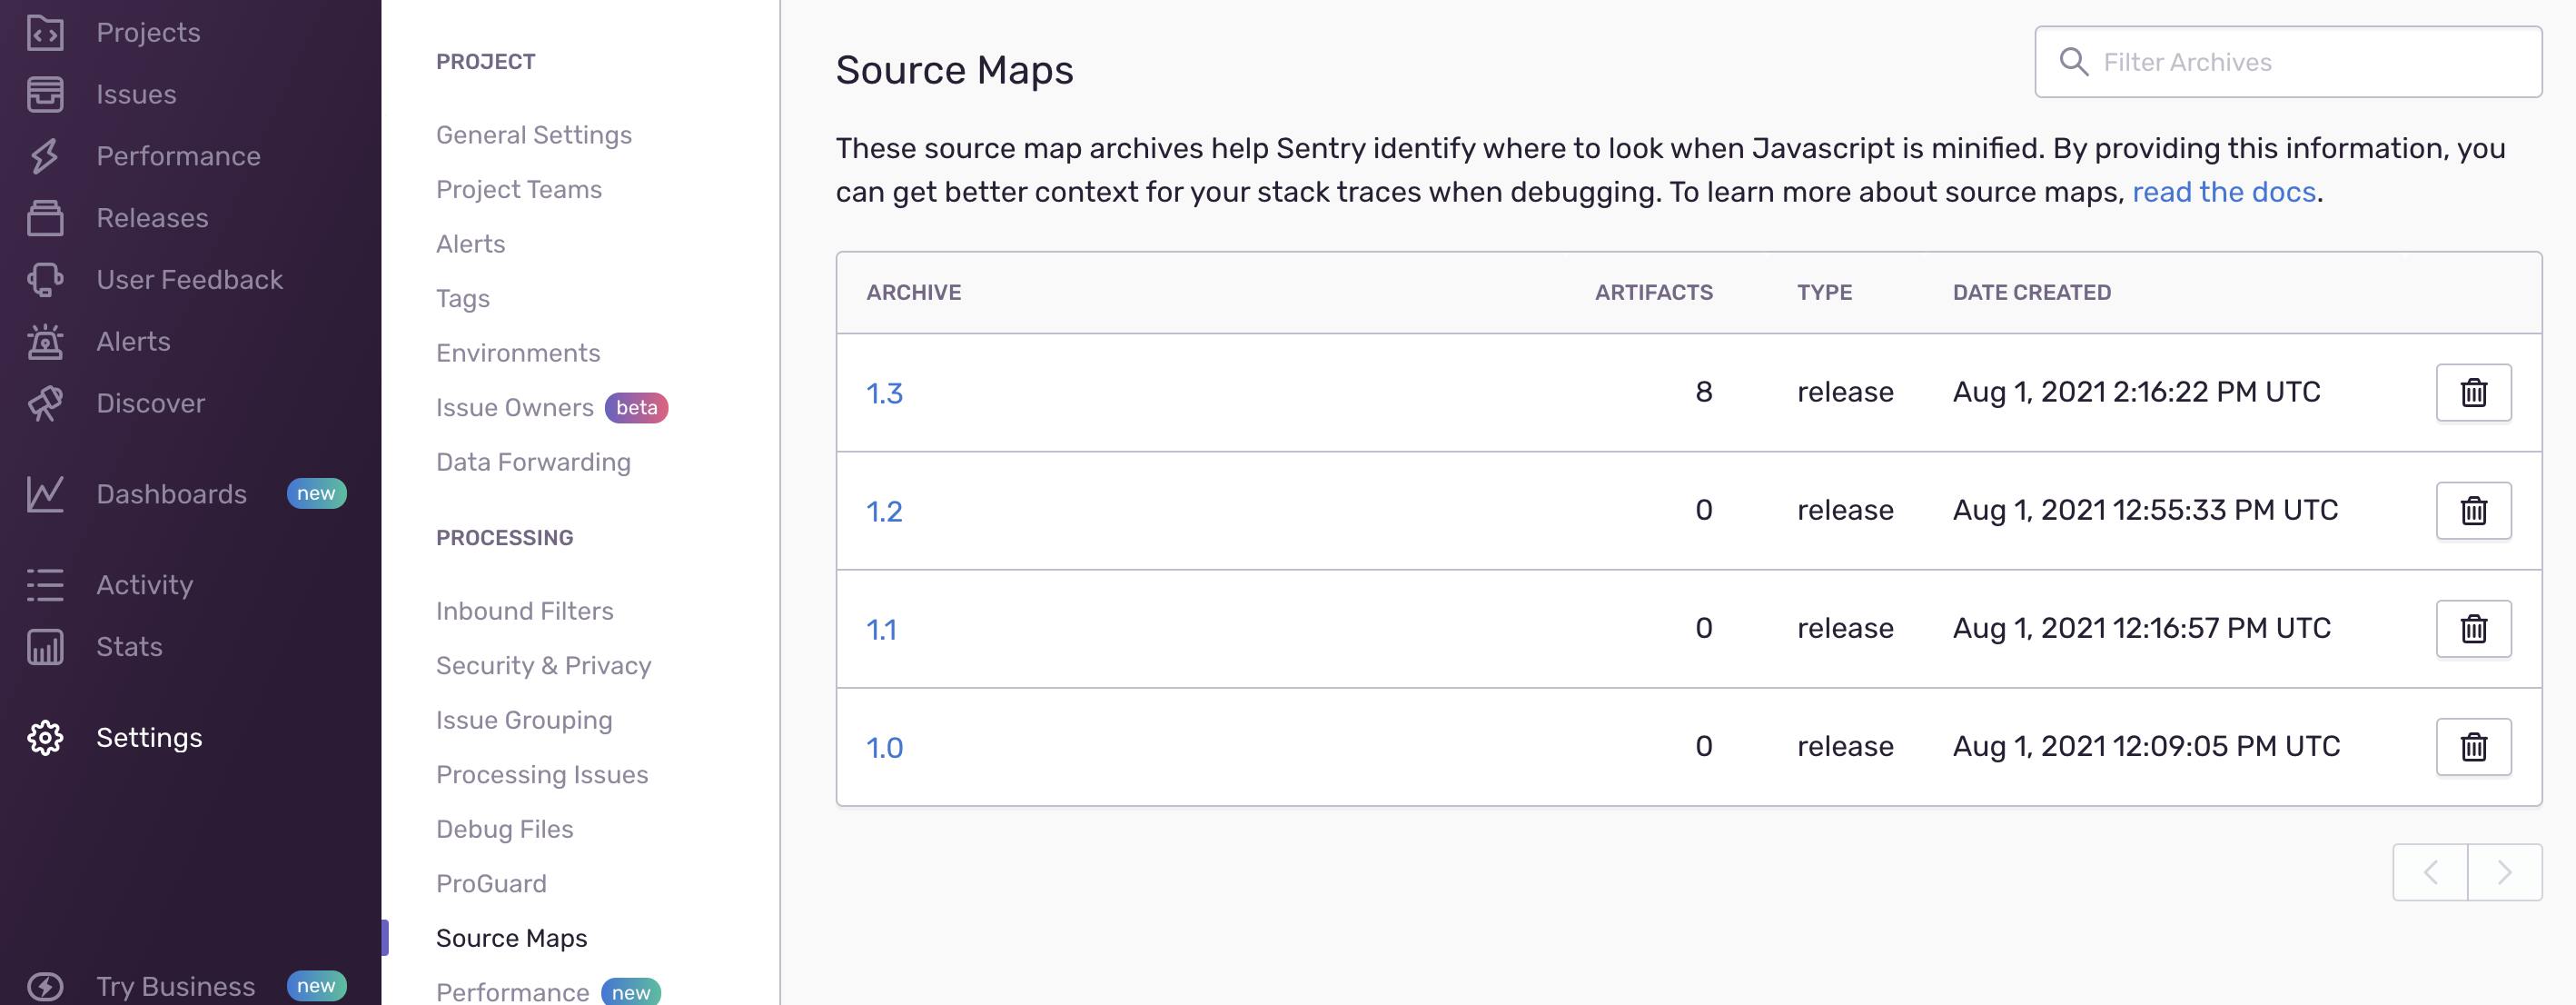
We can see in the following screenshot that source maps are not uploaded for the previous releases and we were still able to see the error logs correctly (The test sentry error and its source line). This is because we have enabled the source fetching option. Refer to the image given below:
For production builds, enabling this option must be avoided as stated in Sentry's official blog. Sentry recommends using sentry-cli to upload the minified JS files and source maps as a part of the build process. Let us check out the steps to do it:
- Firstly, install
sentry cliusing the command given below:
yarn add --dev @sentry/cli
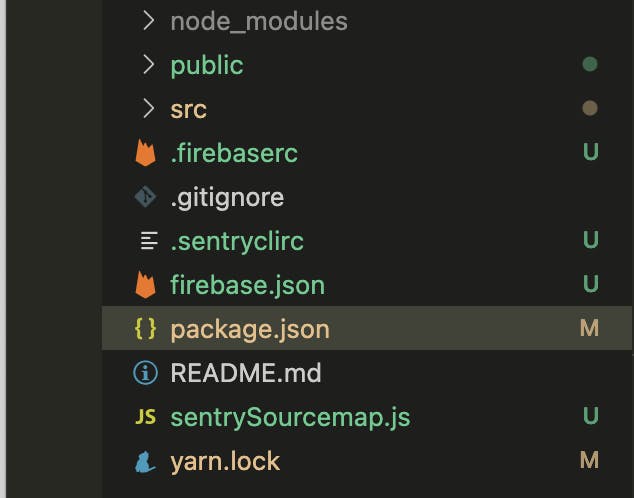
- Now, we need to add the
sentryclircfile in the root directory of our React project:
- Next, open the
.sentryclircfile and modify the file as follows:
[defaults]
project=PROJECT_NAME
org=ORG_NAME

[auth]
token=SENTRY_AUTH_TOKEN
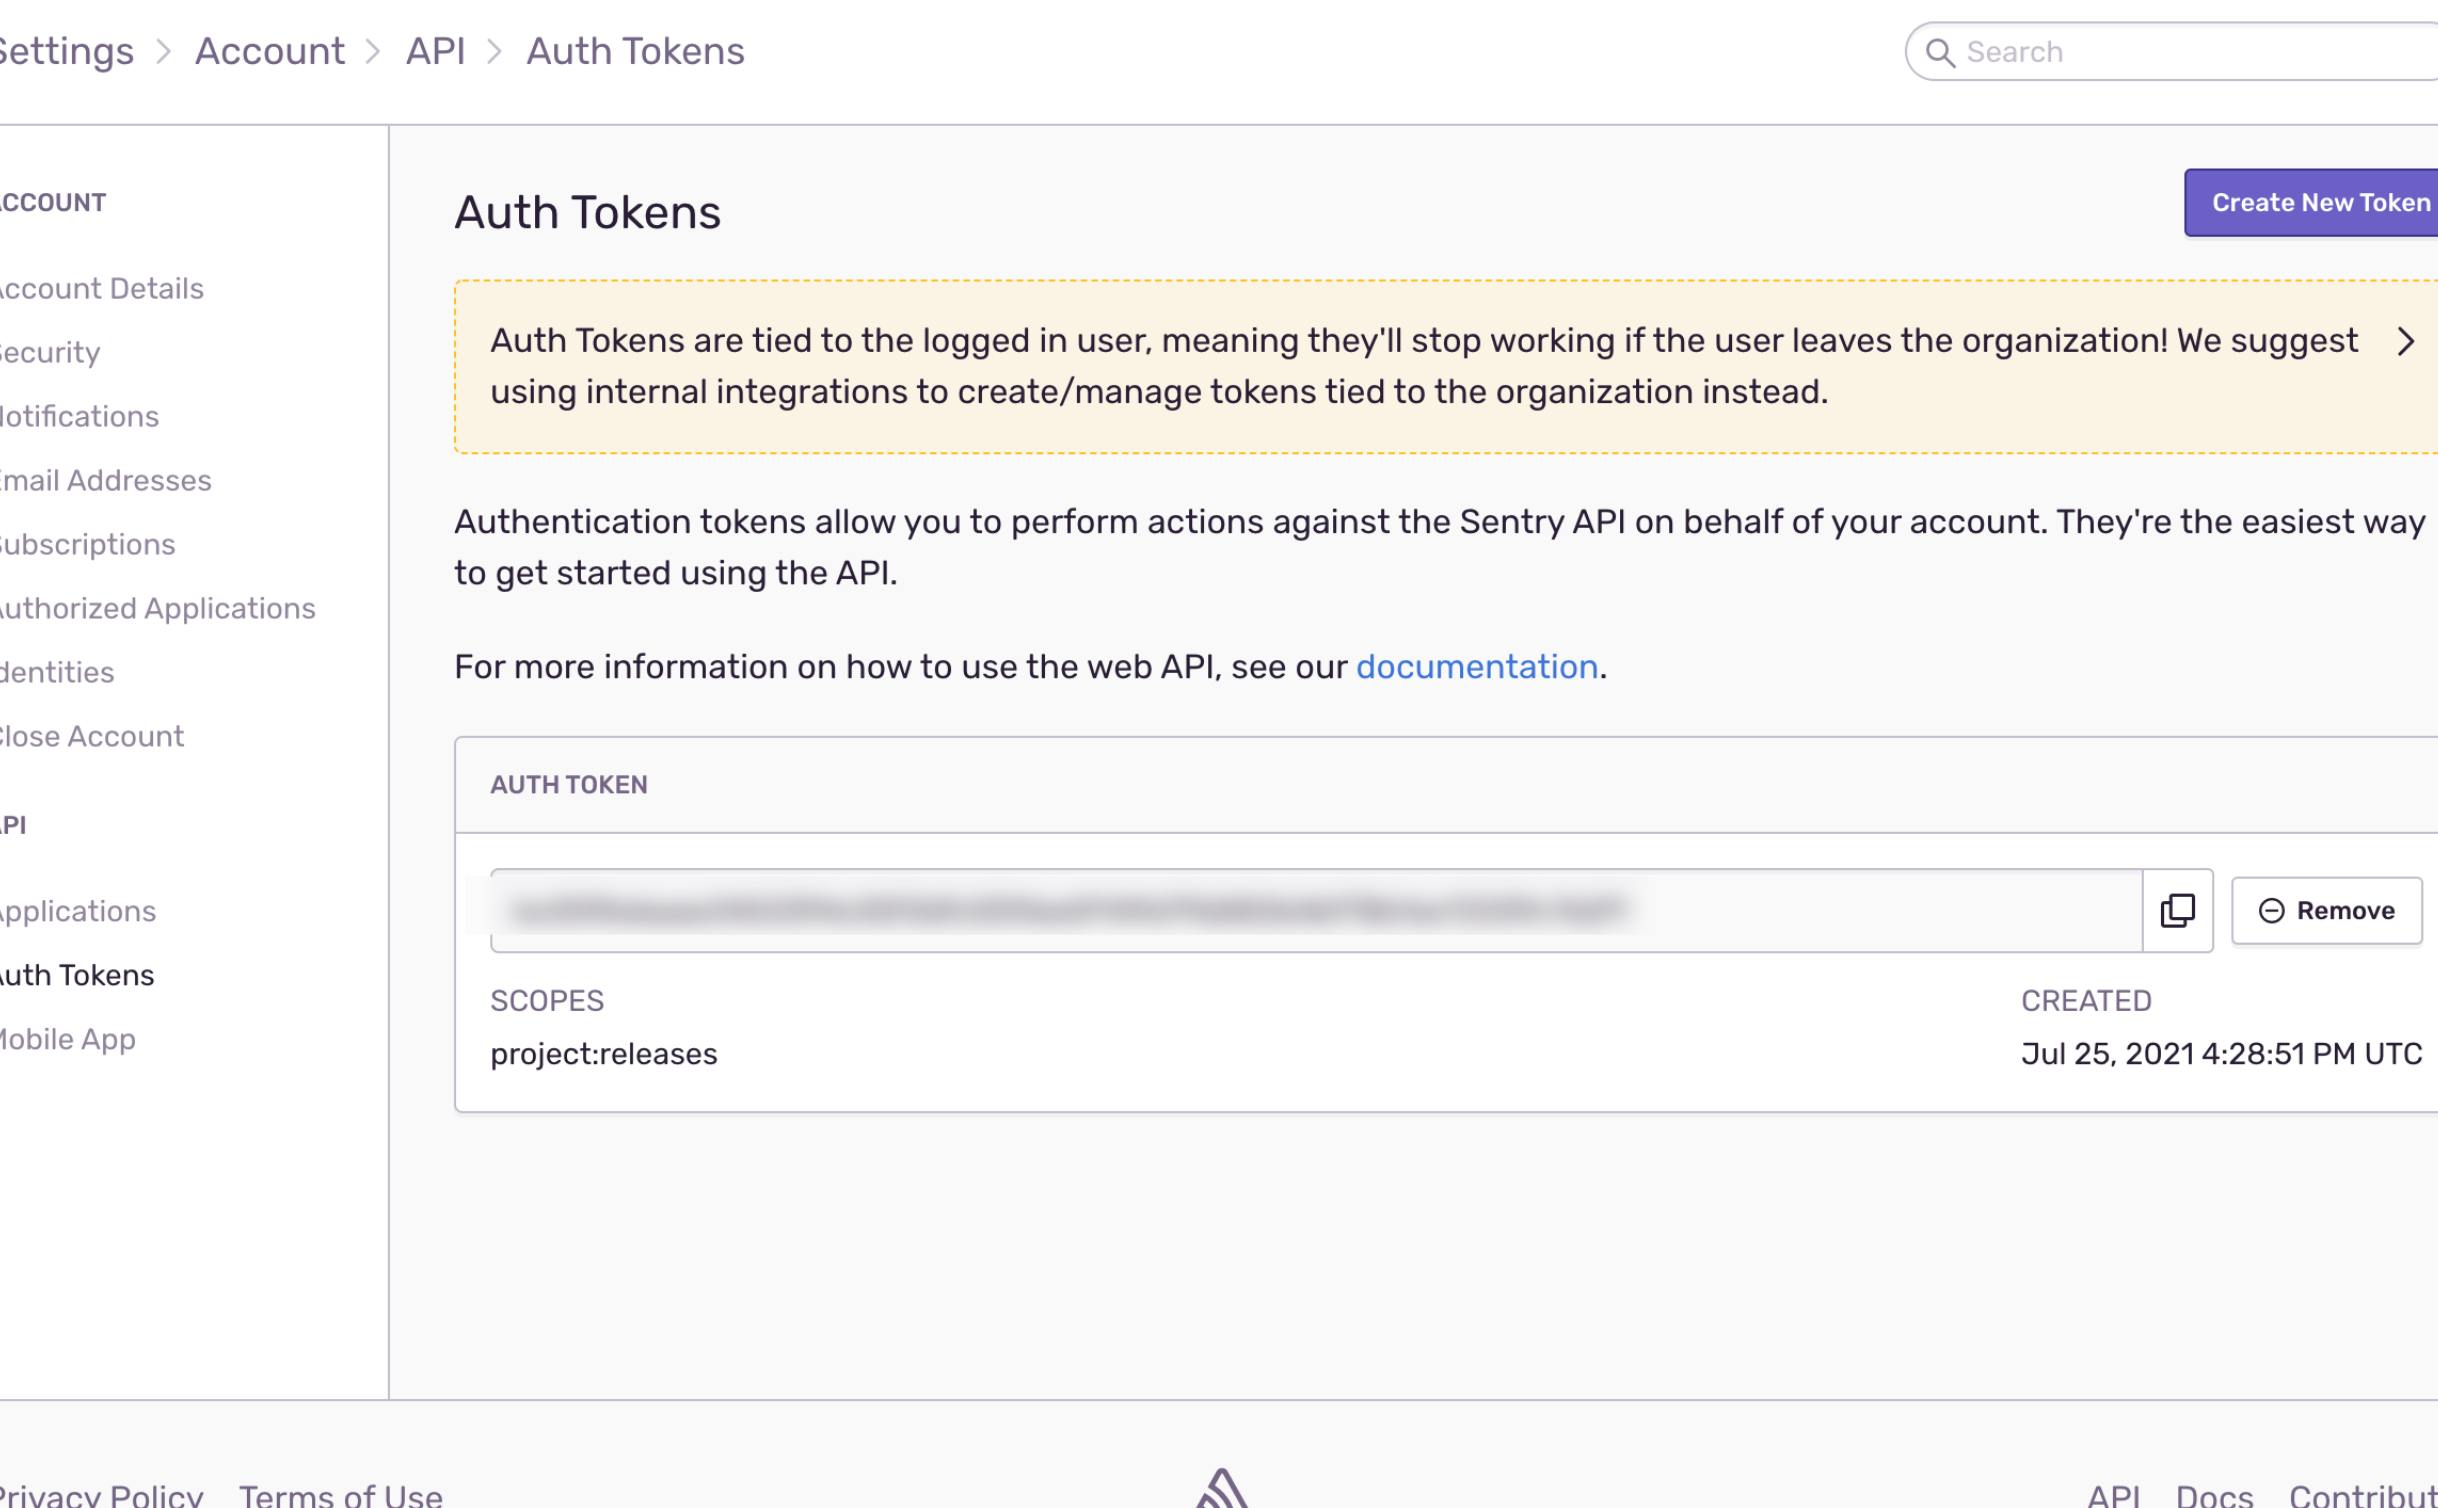
The SENTRY_AUTH_TOKEN can be found in the user settings of sentry dashboard.
- Now let us create a script file to write all the logic for uploading source maps and other files. I created a
sentrySourcemap.jsfile in the root directory of project as shown below:
const SentryCli = require('@sentry/cli');

async function uploadSourcemapsAndRelease() {
  const release = "1.3";
  if (!release) {
    return;
  }
  const cli = new SentryCli();
  try {
    console.log('Creating sentry release ' + release);
    // creates a new release, in our case its 1.3
    await cli.releases.new(release);

    // uploads already generated source maps by CRA to sentry
    await cli.releases.uploadSourceMaps(release, {
      include: ['build/static/js'],
      urlPrefix: '~/static/js',
      rewrite: false,
    });
    await cli.releases.finalize(release);
  } catch (e) {
    console.error('uploading failed:', e);
  }
}
uploadSourcemapsAndRelease();
Note that the release in the above script must be same as the release we pass in the
Sentry.initfunction.
- Lastly, we'll update the build script-
package.json script, to upload the source maps as follows.
 "scripts": {
    "start": "react-scripts start",
  - "build": "react-scripts build",
  + "build": "react-scripts build && node sentrySourcemap.js",
    "test": "react-scripts test",
    "eject": "react-scripts eject"
  }
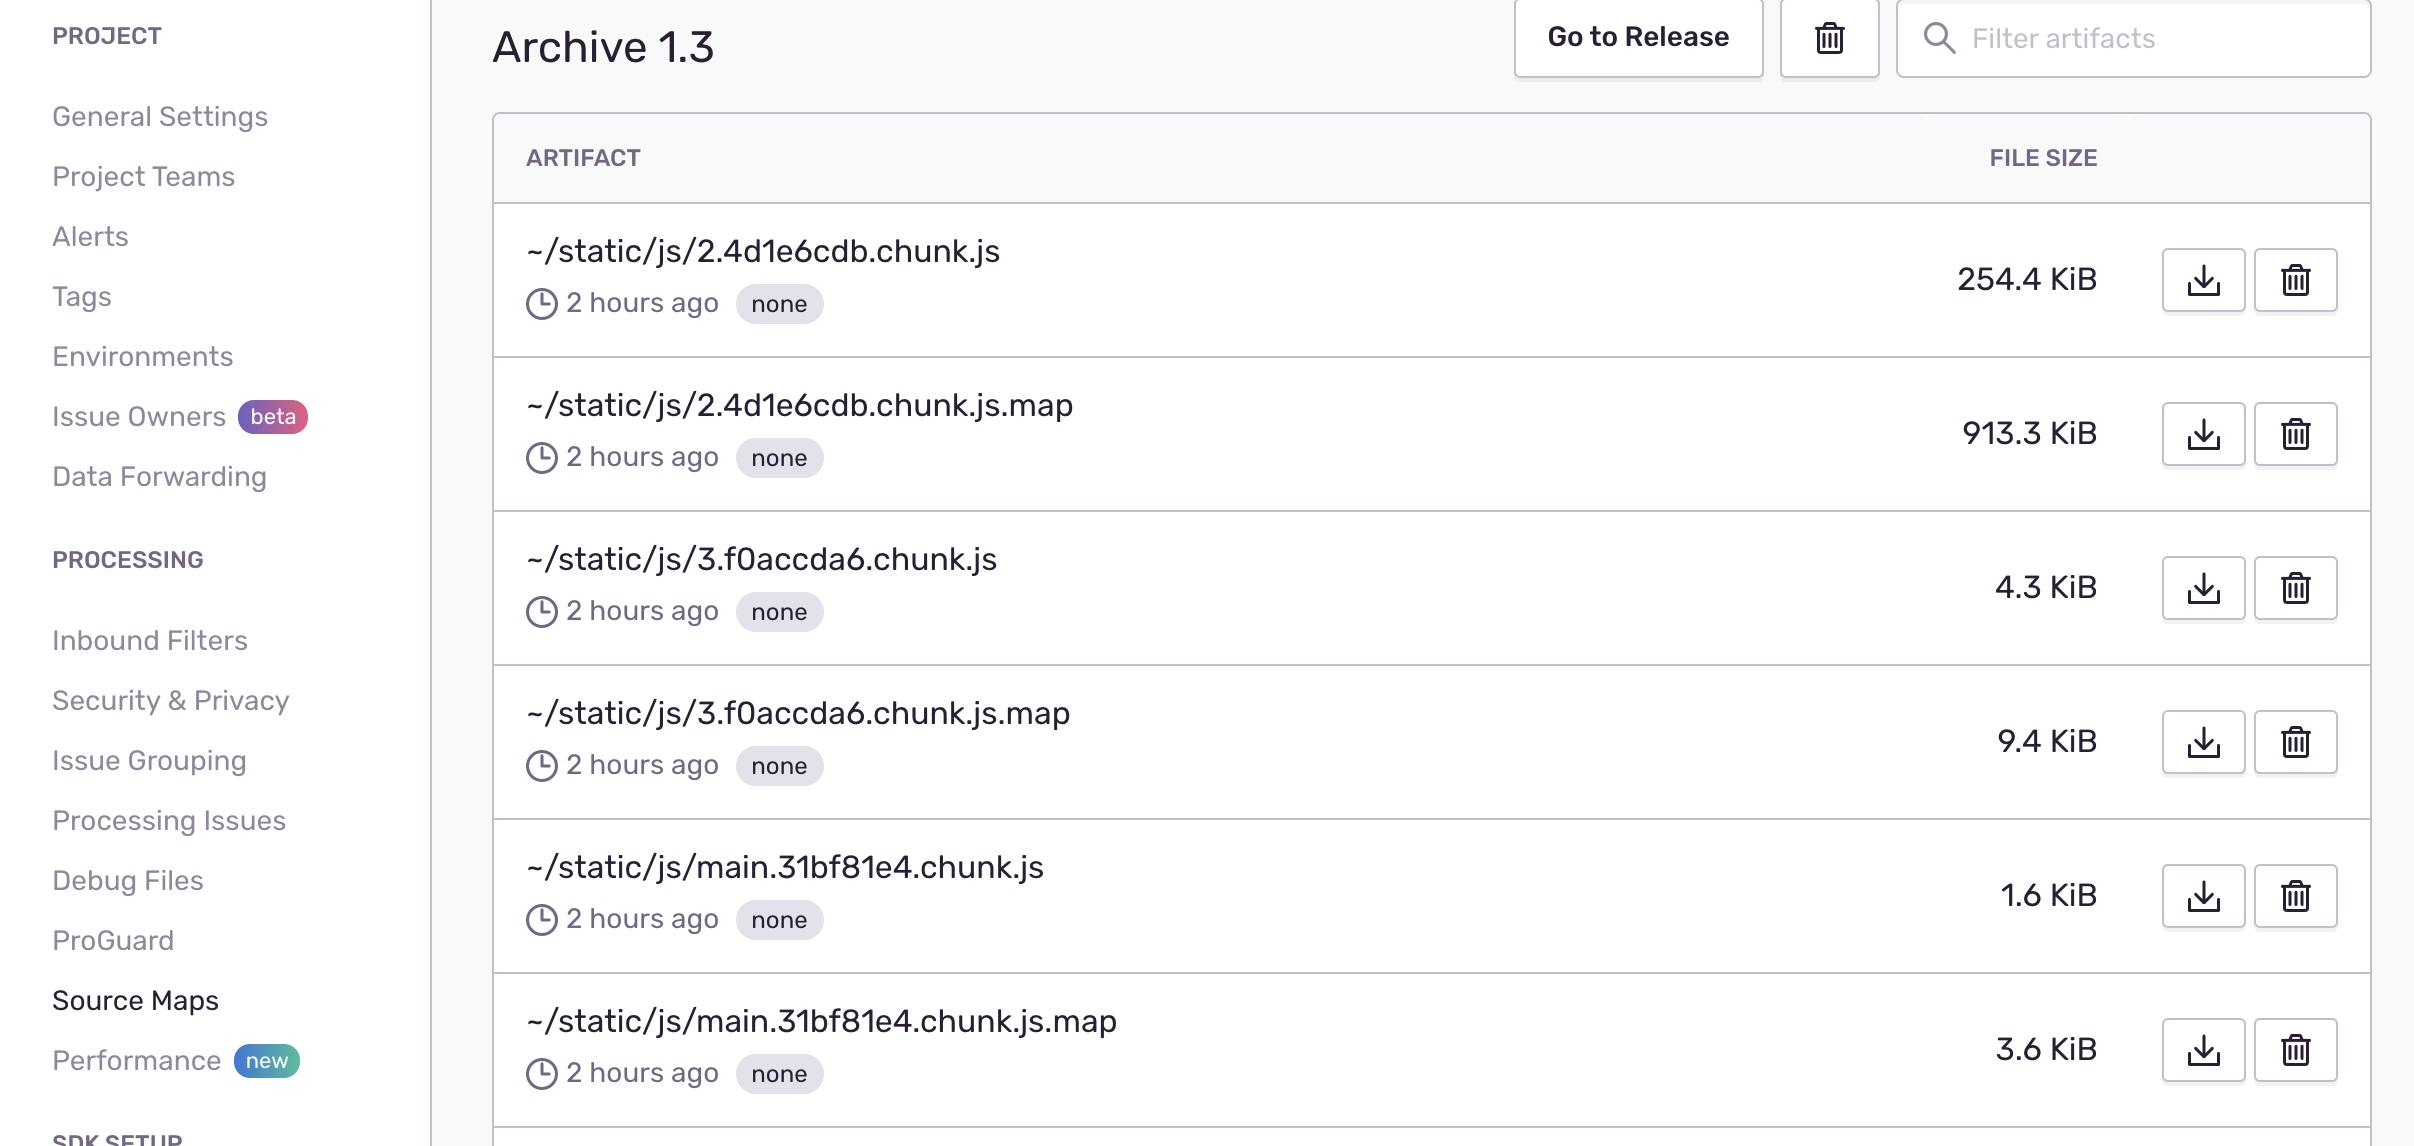
- Now when we run
yarn buildornpm run build, the generated.mapfiles(source maps) and the bundled.jsfiles will be uploaded to Sentry in respect to version 1.3. Refer to the following image:
- We can now disable the
Allow JavaScript Source Fetchingoption from the settings and see that error tracking and the source lines are still functioning. 😎
Conclusion
I hope this articles gave some valuable information on how this technology works. Checkout Sentry's complete documentation for more features. We'll explore the integration with React Native in the next article.
Thank you for reading!😊