


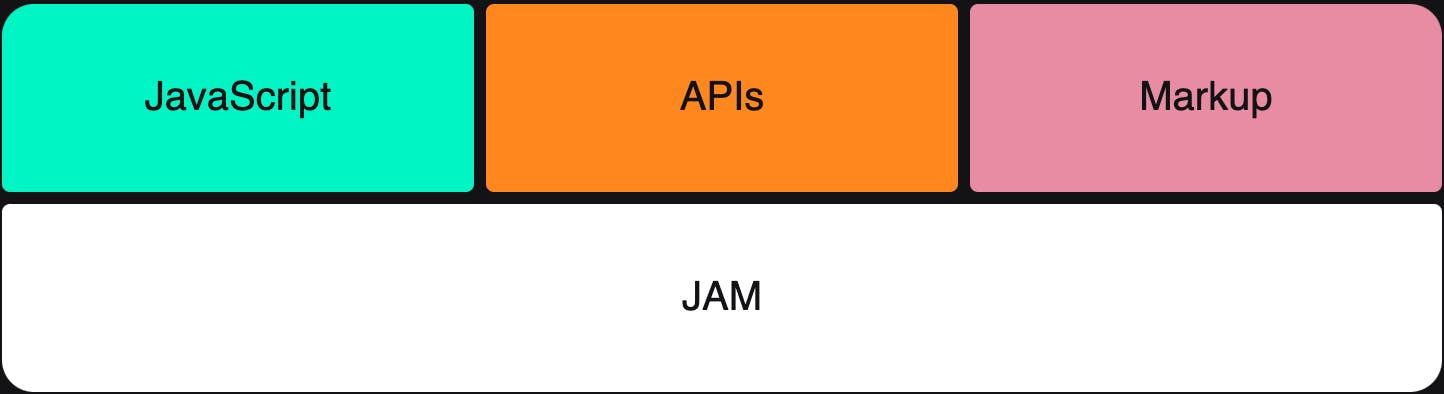
This article is designed to give you a quick self-introduction containing all essential information related to Jamstack- a streamlined outlook to Frontend web development. Jamstack allows developers to quickly create and service websites. JAM is an acronym for JavaScript, APIs, and Markup. Read on to understand more about this pioneering software in modern web development.
What is Jamstack?
Jamstack is an architecture designed to make the web faster, more secure, and easier to scale. It builds on many of the tools and workflows which developers love and bring maximum productivity.
You can read much more in depth about it here.
The core principles of Jamstack are to offer better performance, higher security with cheaper and faster scaling features, while also offering a better overall developer experience. Pre-rendering and decoupling services, enabling sites and applications can be delivered with greater confidence and resilience than ever before.
Jamstack breaks down to:
- JavaScript for dynamic functionalities.
- API for server side operations over HTTPS with JavaScript.
- Markup for websites are served as static HTML files. These can be generated from source files, such as Markdown, using a Static Site Generator (A static site generator is a software application that creates HTML pages from templates or components and a given content source.).
How Jamstack works.
It can more easily be understood with the help of an example:
Let's suppose John builds a web application for weather updates. His backend application creates HTML pages that show the weather, then sends those pages to the user. However, the web application is somewhat slow. Before a user can view those pages, they have to wait for the backend application to run, the HTML to be generated and the HTML to reach their device.
John uses Jamstack to rebuild the application. He creates a series of lightweight HTML pages that the user will see when they first open up the website and, at the same time, API calls are made to get the live updates on weather and fill in the required places. Now, this makes John's website faster as it uses CDN to store the static HTML pages.
Let's see what Jamstack looks like in action. In this article, we will be using Gatsby.js as the static site generator. We will try to create a simple application. Something that gives a clear understanding of how Jamstack works using Gatsby.
Gatsby is a React-based open-source framework for creating websites and apps and uses GraphQL as the query language.
The following are the steps to use Jamstack with Gatsby.js:
- Install
gatsby-cli.
Get detailed information on how to set it up here . If you are using NPM, these are the following steps:
npm install -g gatsby-cli
npm init gatsby
cd gatsby-folder
npm run develop
Now hit the endpoint URL for the website and use http://localhost:8000/ to view the website and
http://localhost:8000/___graphql to view GraphiQL in an in-browser IDE.
Now whatever Javascript file we create under the
/pages/folder will serve as a different API endpoint URL (http://localhost:8000/<the-name-of-file>)We go through the recommended approach of creating a
gatsby-config.jsfile, as here we can maintain all of the configurations and plugins as the development of the application proceeds.
module.exports = {
  siteMetadata: {
    title: "title-of-you-choice",
  },
  plugins: [
    ...
  ],
};
We can also query this data used in the application. For example, here we can query siteMetadata in GraphiQL using:
query TestQuery{
     site{
         siteMetadata{
                title
              }
       }
}
- Now, we create a folder,
/pages/, that will contain all the markdown files. A sample of the markdown file is titledfirst.md, which is as below:
---

title: First
date: 2020-09-09

---

Lorem ipsum dolor sit amet, consectetur adipiscing elit, sed do eiusmod tempor incididunt ut labore
et dolore magna aliqua. Ut enim ad minim veniam, quis nostrud exercitation ullamco laboris nisi ut
aliquip ex ea commodo consequat. Duis aute irure dolor in reprehenderit in voluptate velit esse
cillum dolore eu fugiat nulla pariatur. Excepteur sint occaecat cupidatat non proident, sunt in
culpa qui officia deserunt mollit anim id est laborum.
Learn how to write a markdown file here.
- Now, we will add the required plugins in the
gatsby-config.jsfile:
gatsby-source-filesystem -> It is a Gatsby source plugin for sourcing data into your Gatsby application from your local filesystem and allows to read all files from any folder.
gatsby-transformer-remark -> It transforms markdown files into MarkdownRemark nodes from which you can query an HTML representation of the markdown.
module.exports = {
  siteMetadata: {
    title: "Aditya Prakash",
  },
  plugins: [
    {
      resolve: "gatsby-source-filesystem",
      options:{
        name: "data",
        path: "/Users/adityaprakash/Documents/JAM/my-gatsby-site/pages"
      },
    },
    "gatsby-transformer-remark"
  ],
};
- Now, we need to create and update some files to create a proper workflow:
Create a gatsby-node.js file:
const { createFilePath } = require("gatsby-source-filesystem");
const path = require("path");


exports.onCreateNode = ({ node, getNode, actions}) => {
    const { createNodeField } = actions;
    if (node.internal.type === "MarkdownRemark") {
        const slug = createFilePath({node, getNode, basePath: `pages`});
        createNodeField({
            node,
            name: "slug",
            value: slug
        });
    }
};

exports.createPages = async ({graphql, actions}) => {
    const {createPage} = actions;
    const result = await graphql(`
        {
            allMarkdownRemark {
                edges{
                    node {
                        fields{
                            slug
                        }
                    }
                }
            }
        }
    `);

    result.data.allMarkdownRemark.edges.forEach(({node}) => {
        const slug = node.fields.slug
        console.log(slug)
        createPage({
            path: slug,
            component: path.resolve("./src/templates/page.js"),
            context: {
                slug: node.fields.slug
            }
        });
    });
};
This file is used to dynamically create a single HTML page for each markdown file in /pages/ folder.
This is done with the help of onCreateNode, which is called when a new node is created and createPages to tell plugins to add pages.
Create a layout.js file:
import React from "react";
import {useStaticQuery, graphql} from "gatsby";

const Layout = ({children}) => {

    const data=useStaticQuery(graphql`
    query MyQuery {
        site{
          siteMetadata{
            title
          }
        }
      }
    `);

    return(
        <>
        <header>
            <h1>{data.site.siteMetadata.title}</h1>
        </header>
        <main>{children}</main>
        </>
    );
}

export default Layout;
This file is a general layout template for the website.
Create a page.js file:
import React from "react";
import {graphql} from "gatsby";
import Layout from "../components/layout";

export const query = graphql`
    query PageQuery($slug: String!) {
        markdownRemark(fields: {slug: {eq: $slug}}) {
            frontmatter {
                date(formatString: "MMM, DD YYYY")
                title
            }
            html
        }
    }
`;

export default ({data}) => (
    <Layout>
        <h3>{data.markdownRemark.frontmatter.title}</h3>
        <span>{data.markdownRemark.frontmatter.date}</span>
        <div dangerouslySetInnerHTML={{__html: data.markdownRemark.html}}/>
    </Layout>
);
This page is used to create an output whenever endpoint URL for a single page in /pages/ folder is opened.
The slug here is passed from the gatsby-node.js file.
Update the index.js file:
import * as React from "react"
import Layout from '../components/layout';
import {graphql} from "gatsby";

export const query= graphql`
query pages {
  allMarkdownRemark {
    edges {
      node {
        frontmatter {
          date(formatString: "MMM, DD YY")
          title
        }
        id
        excerpt
      }
    }
  }
}
`;

export default ({data}) => (
 <Layout>
    {data.allMarkdownRemark.edges.map(edge => {
      const {frontmatter, excerpt, id} = edge.node;

      return (
        <div key={id}>
          <h3>{frontmatter.title}</h3>
          <span>{frontmatter.date}</span>
          <div dangerouslySetInnerHTML={{__html: excerpt}}/>
        </div>
      );
    })}
  </Layout>
);
This file displays all the information for each page in /pages/ folder.
Now run:
npm run develop
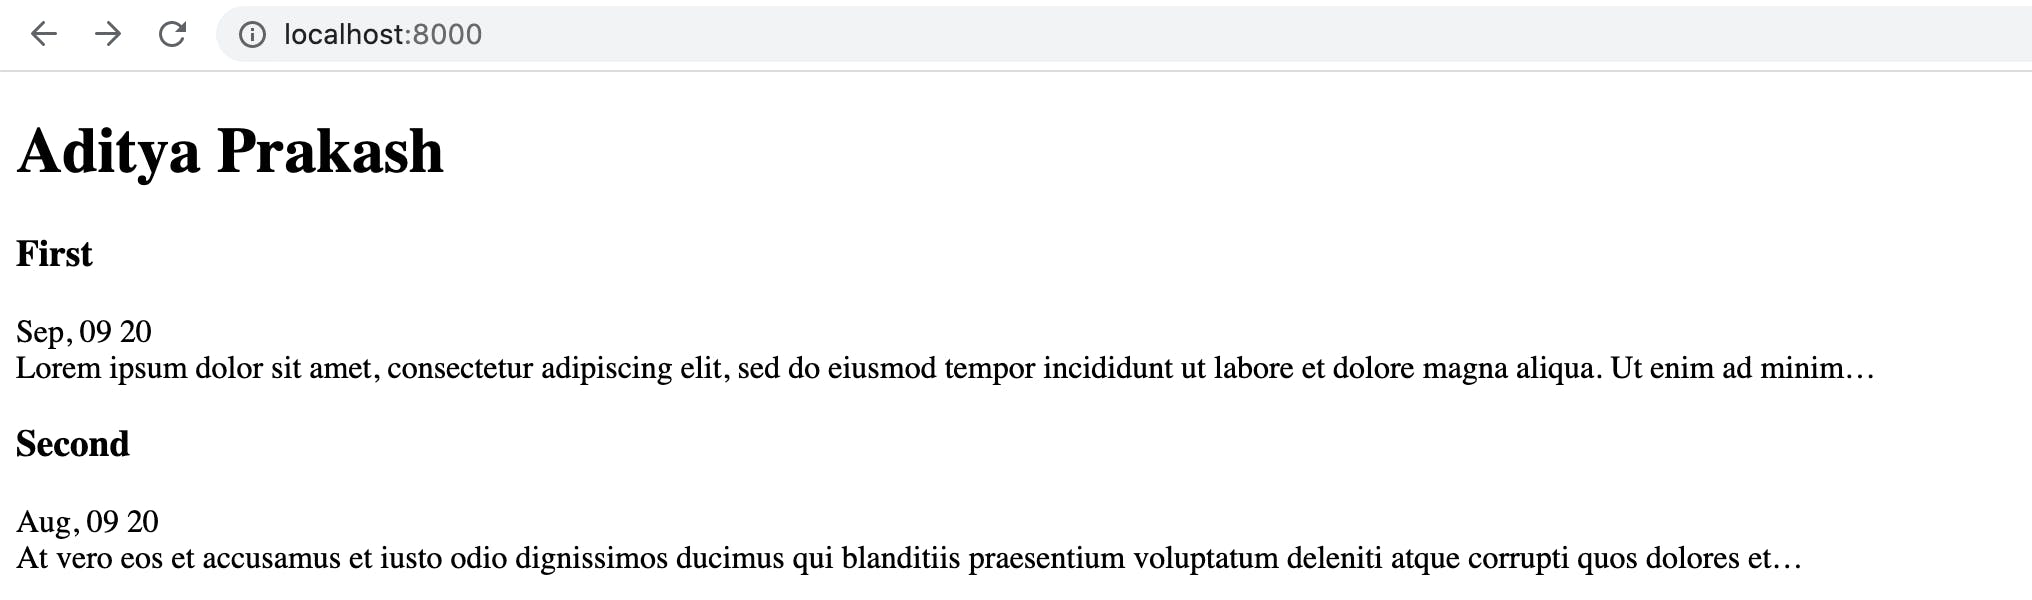
The output is as follows:
The home page:
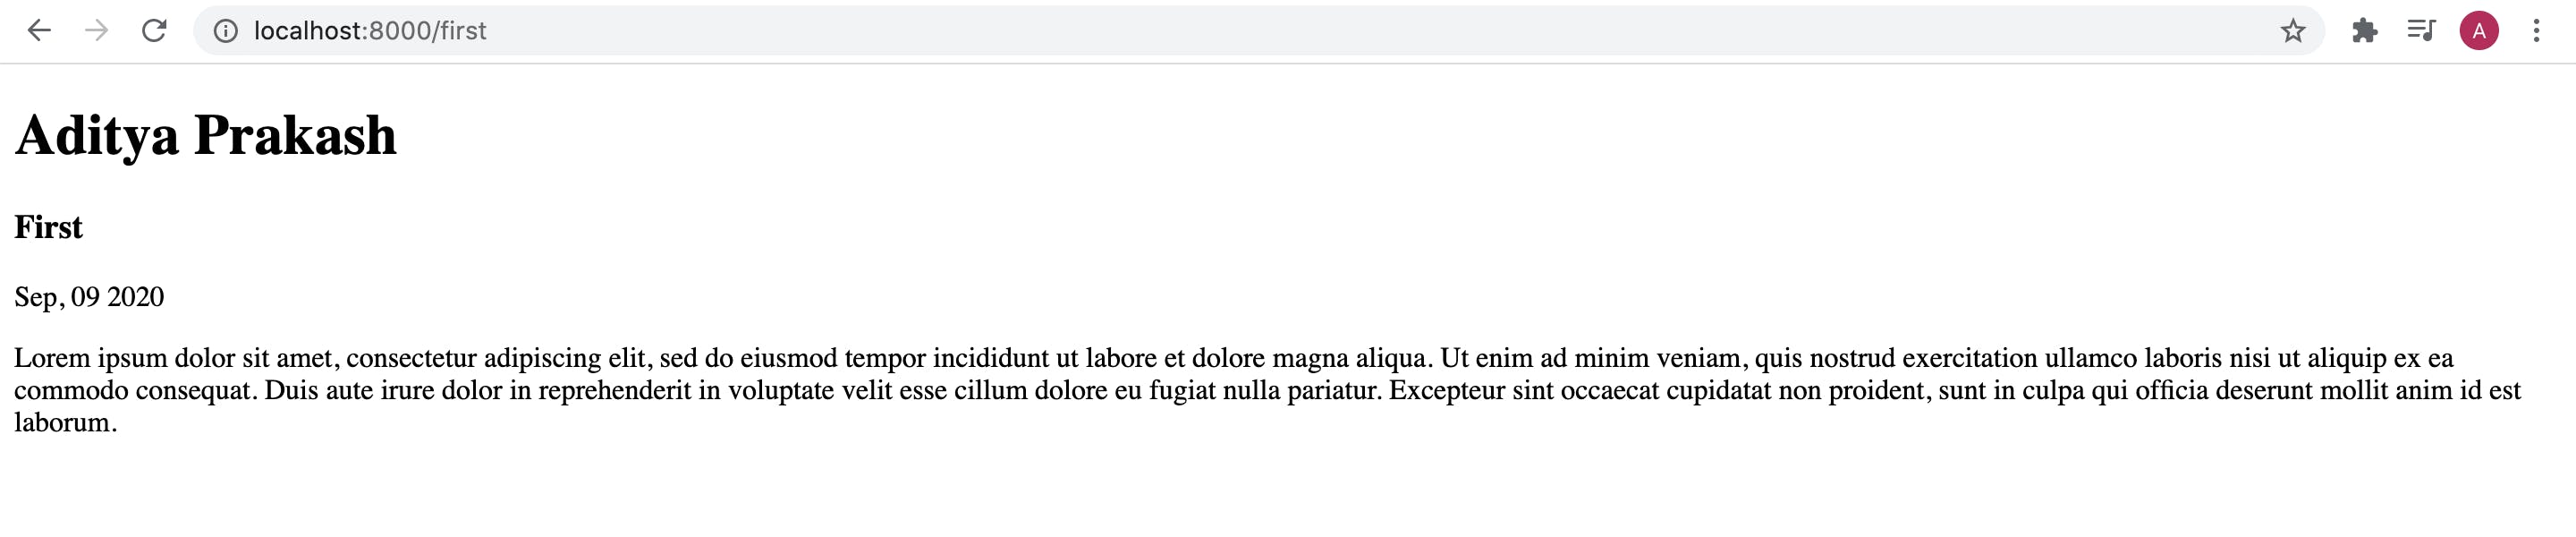
The output for an individual markdown file:
http://localhost:8000/<fil-name>
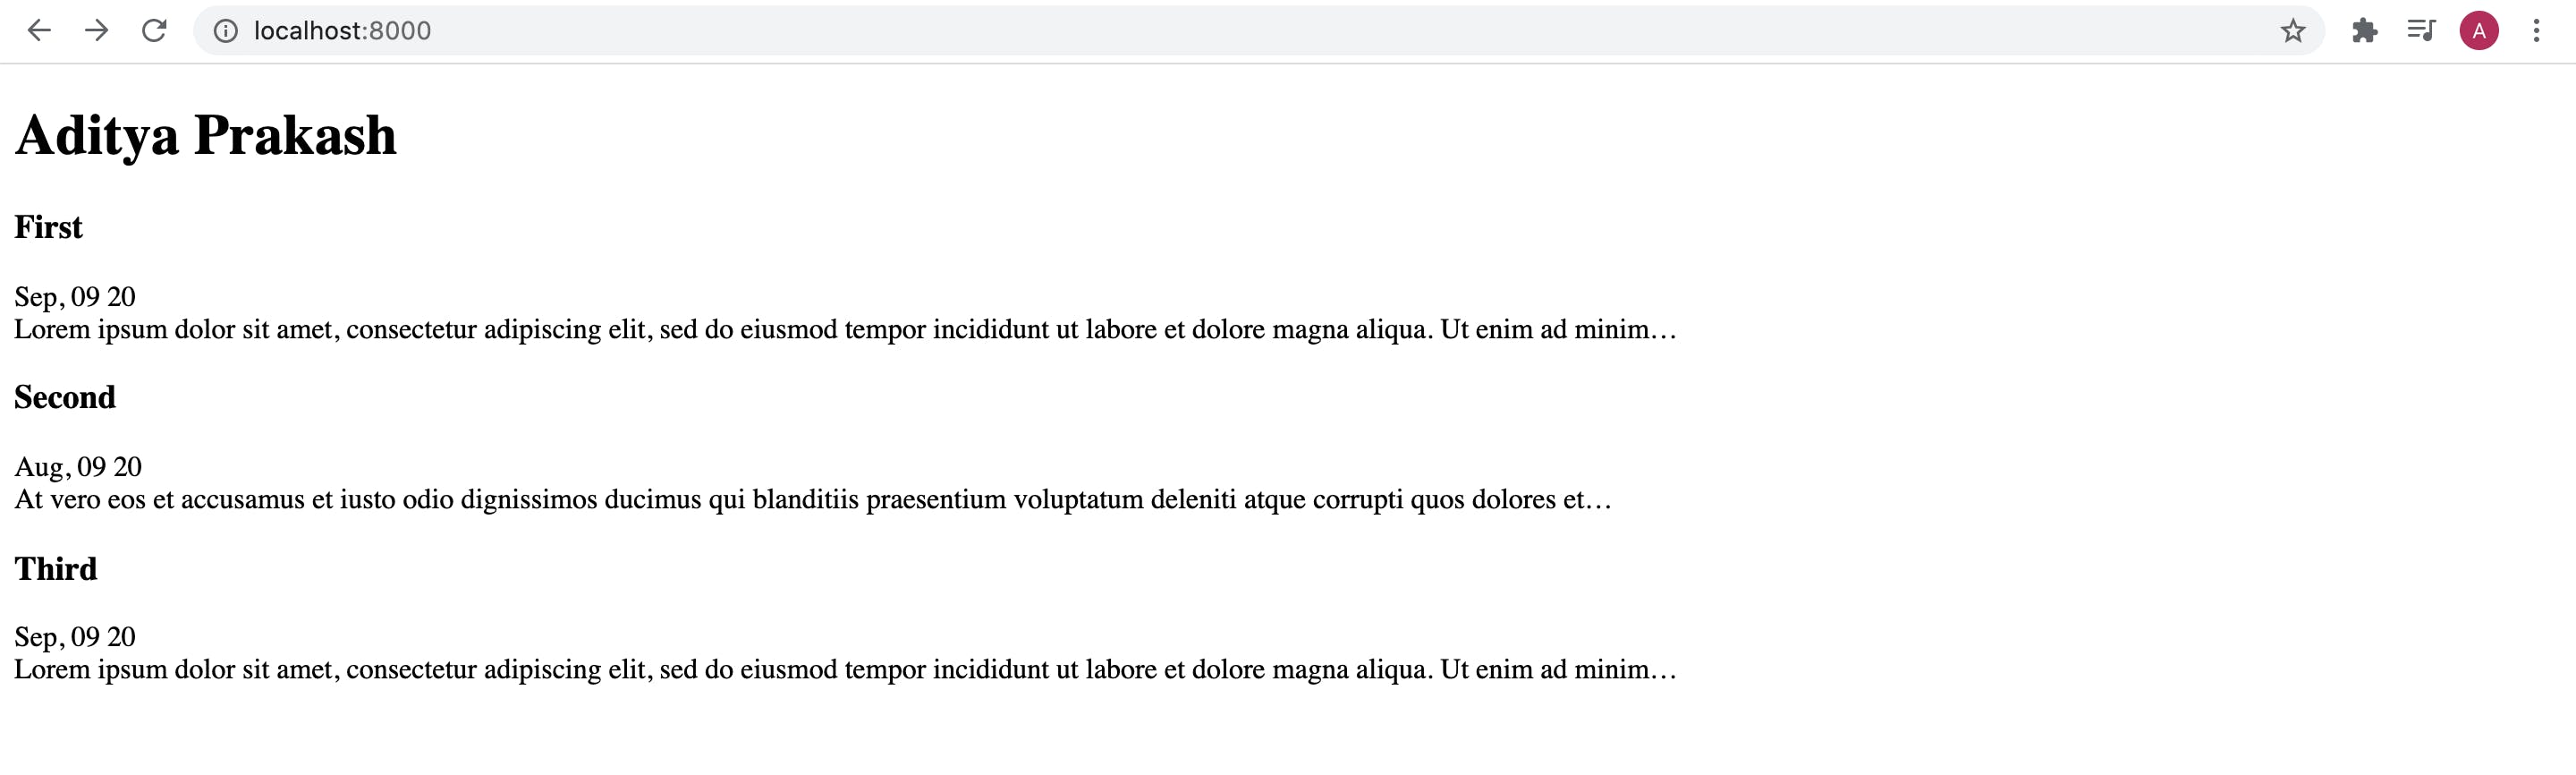
Now, add another markdown file in the /pages/ folder and it will become available to the website.
Output of a wrong endpoint URL:
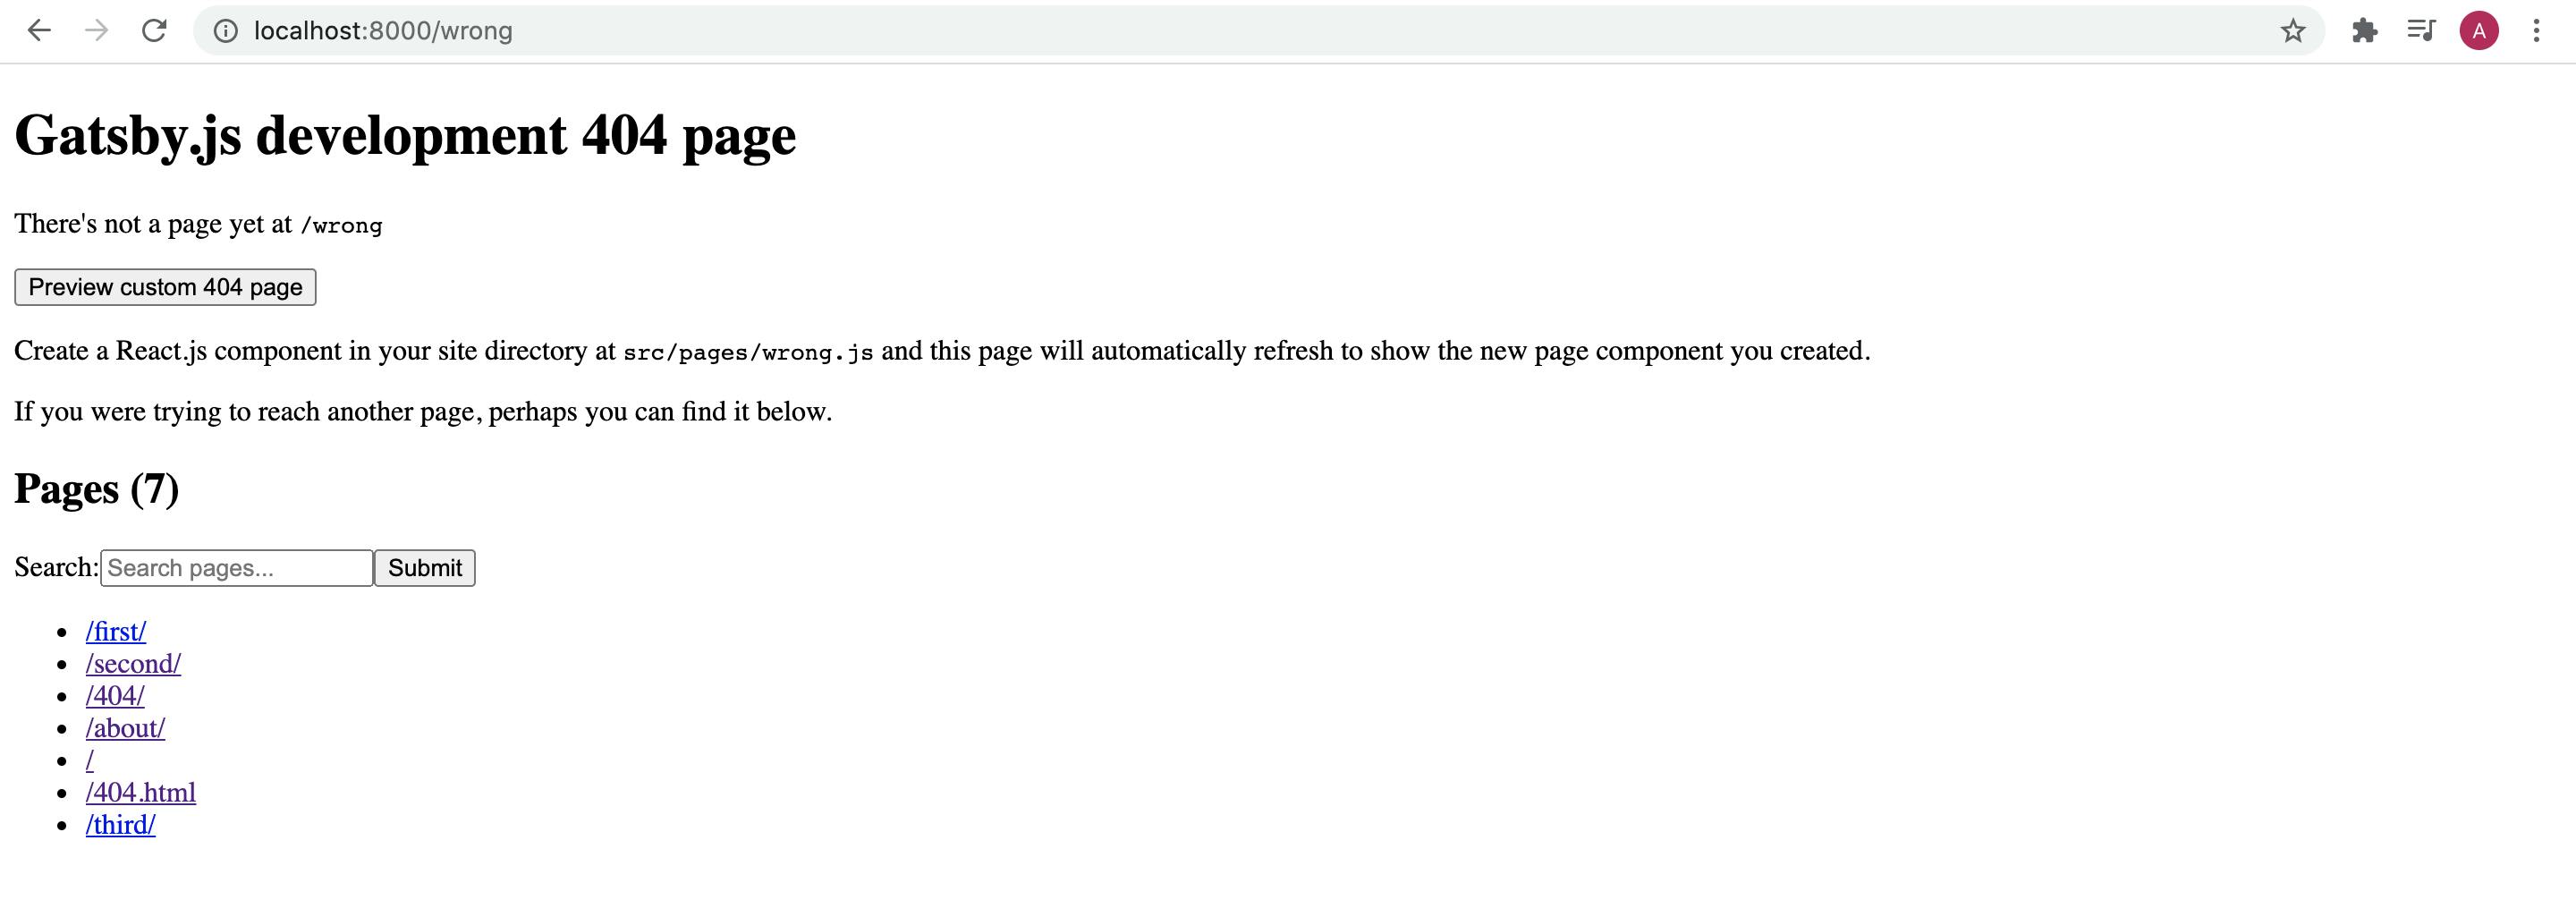
It is helpful as it shows all the available pages that can be found.😁
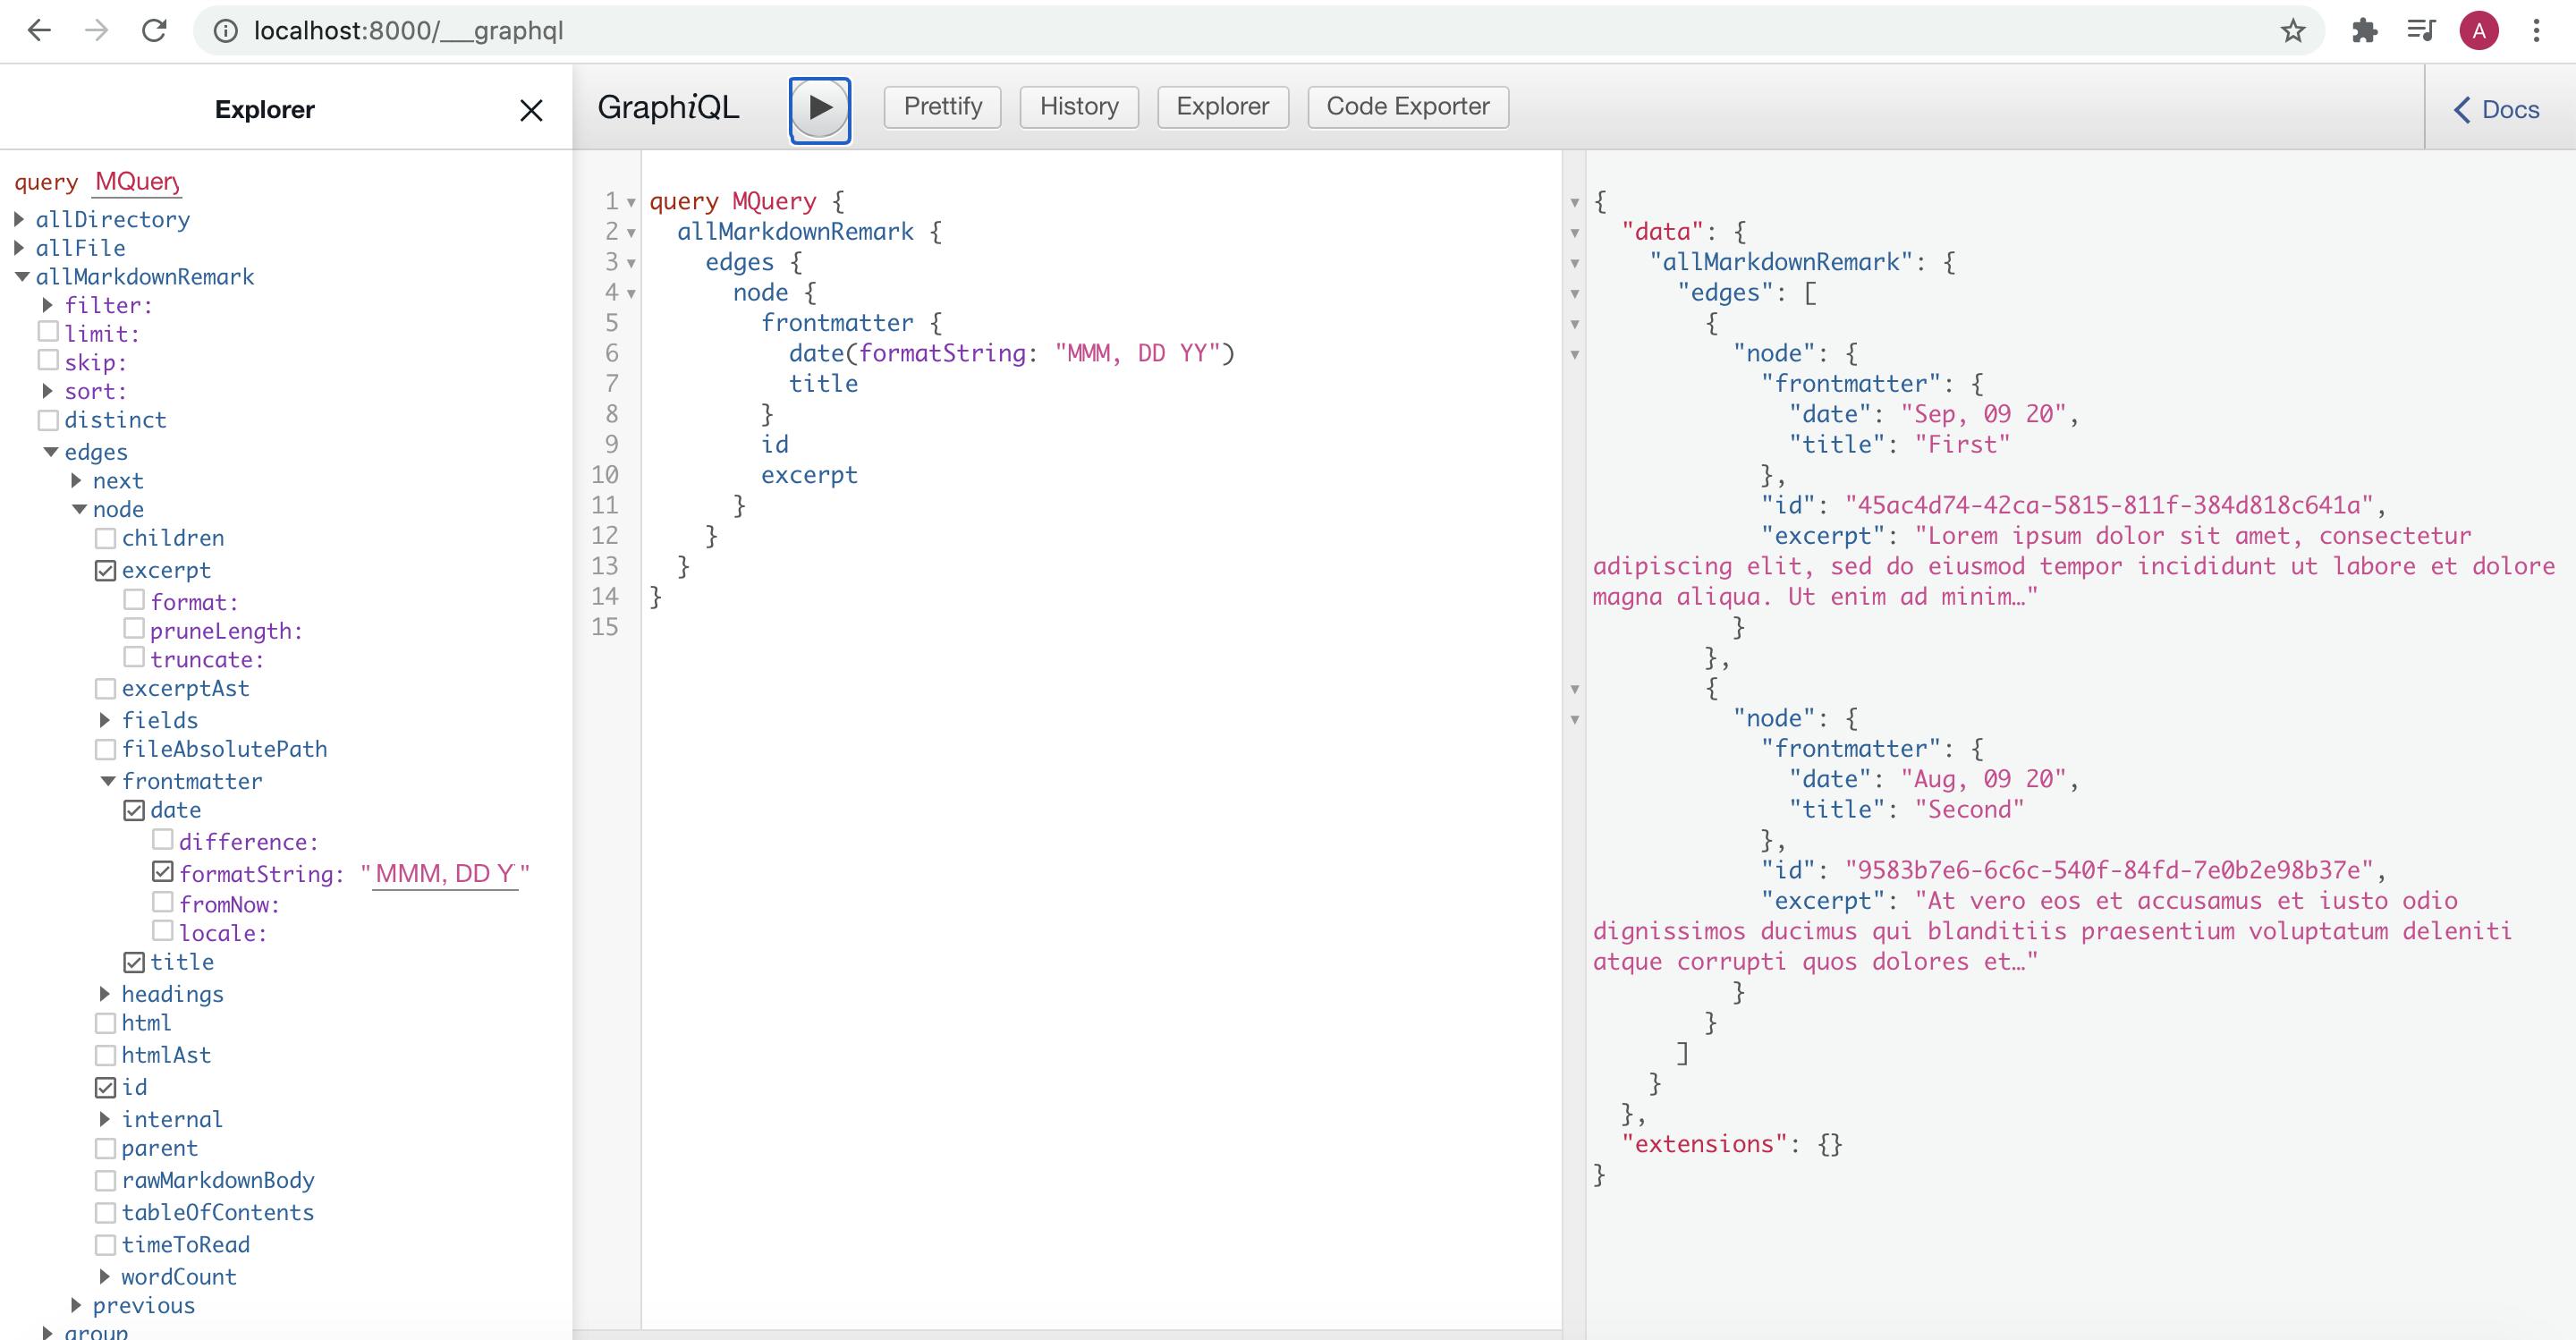
Tip => Try to use GraphiQL to understand how queries used in the codes above are used.
Hope, this article helps you to understand the basics for Jamstack using Gatsby and how the markdown files are used. I hope this article urged you to try your hand at Jamstack and experience how it makes Frontend development simple and streamlined.
Thank you for reading.😊