Nested Navigation In Flutter : Navigator Widget
Learn more about how implement nested navigation in Flutter apps using the Navigator widget
Introduction
A Navigator widget in Flutter is what we use to maintain a stack of routes and it plays a huge role in helping us to navigate between routes. The Navigator widget often works under the hood without us having to initialise it but there are certain use cases where we may have to do it manually. Most Flutter apps tend to use methods associated with Navigator like push and pop to move to other screens instead of defining it. This is because when we start our app with the MaterialApp widget, it will introduce a Navigator for us to use. In this article, we shall explore more about using multiple Navigators / Nested Navigation.
Nested navigation is mostly needed when we don't want to completely replace the current screen with a new screen. In such cases, what we'll be doing is pushing a screen only at certain intervals and keeping the rest of the screen intact. For example, the Instagram app.
In this article, you will be learning more about:
- Using multiple Navigator widgets
- Performing Nested navigation
- Using keys to access the desired Navigator
Setting Up
- Let's start with an example where we have only one Navigator widget. Our class will have a
BottomNavigationBarwrapped inside aMaterialAppand aNestedScreen()which acts like the body of theBottomNavigationBar. To go forward, we will pass a navigator calledNavigatorKeys.navigatorKeyMainto theMaterialApp`. Refer to the code snipper given below to understand this better:
class NestedScreen extends StatelessWidget {
  NestedScreen({Key key}) : super(key: key);

  void _push(BuildContext context, String name) {
    Navigator.of(context).push(
      MaterialPageRoute(
        builder: (context) => Scaffold(
          appBar: AppBar(
            ...
          ),
          body: Center(
            ...
          ),
        ),
      ),
    );

  }

  @override
  Widget build(BuildContext context) {
    return Scaffold(
         body: _home(context)
       );
  }

  Widget _home(BuildContext context) {
    return Scaffold(
      body: Center(
        child: Column(
          mainAxisAlignment: MainAxisAlignment.spaceEvenly,
          children: [
            GestureDetector(
              onTap: () => _push(context, 'Page 1'),
              child: Text(
                'Page A',
                style: TextStyle(fontSize: 50),
              ),
            ),
            GestureDetector(
              onTap: () => _push(context, 'Page 2'),
              child: Text(
                'Page B',
                style: TextStyle(fontSize: 50),
              ),
            )
          ],
        ),
      ),
    );
  }
}
Here’s the full source code .
With one Navigator widget
And this is how our screen looks like:
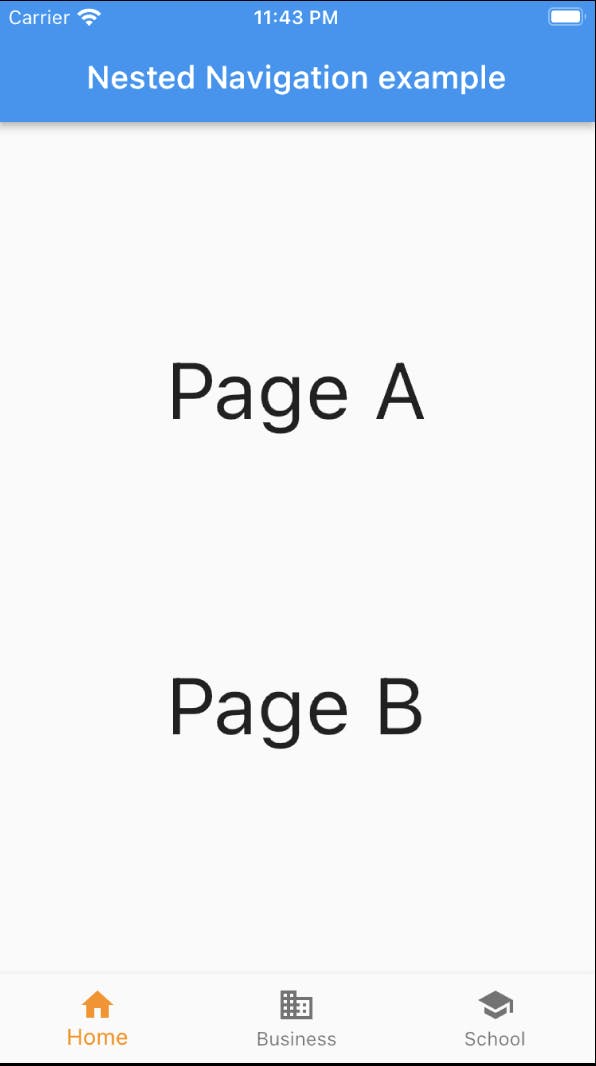
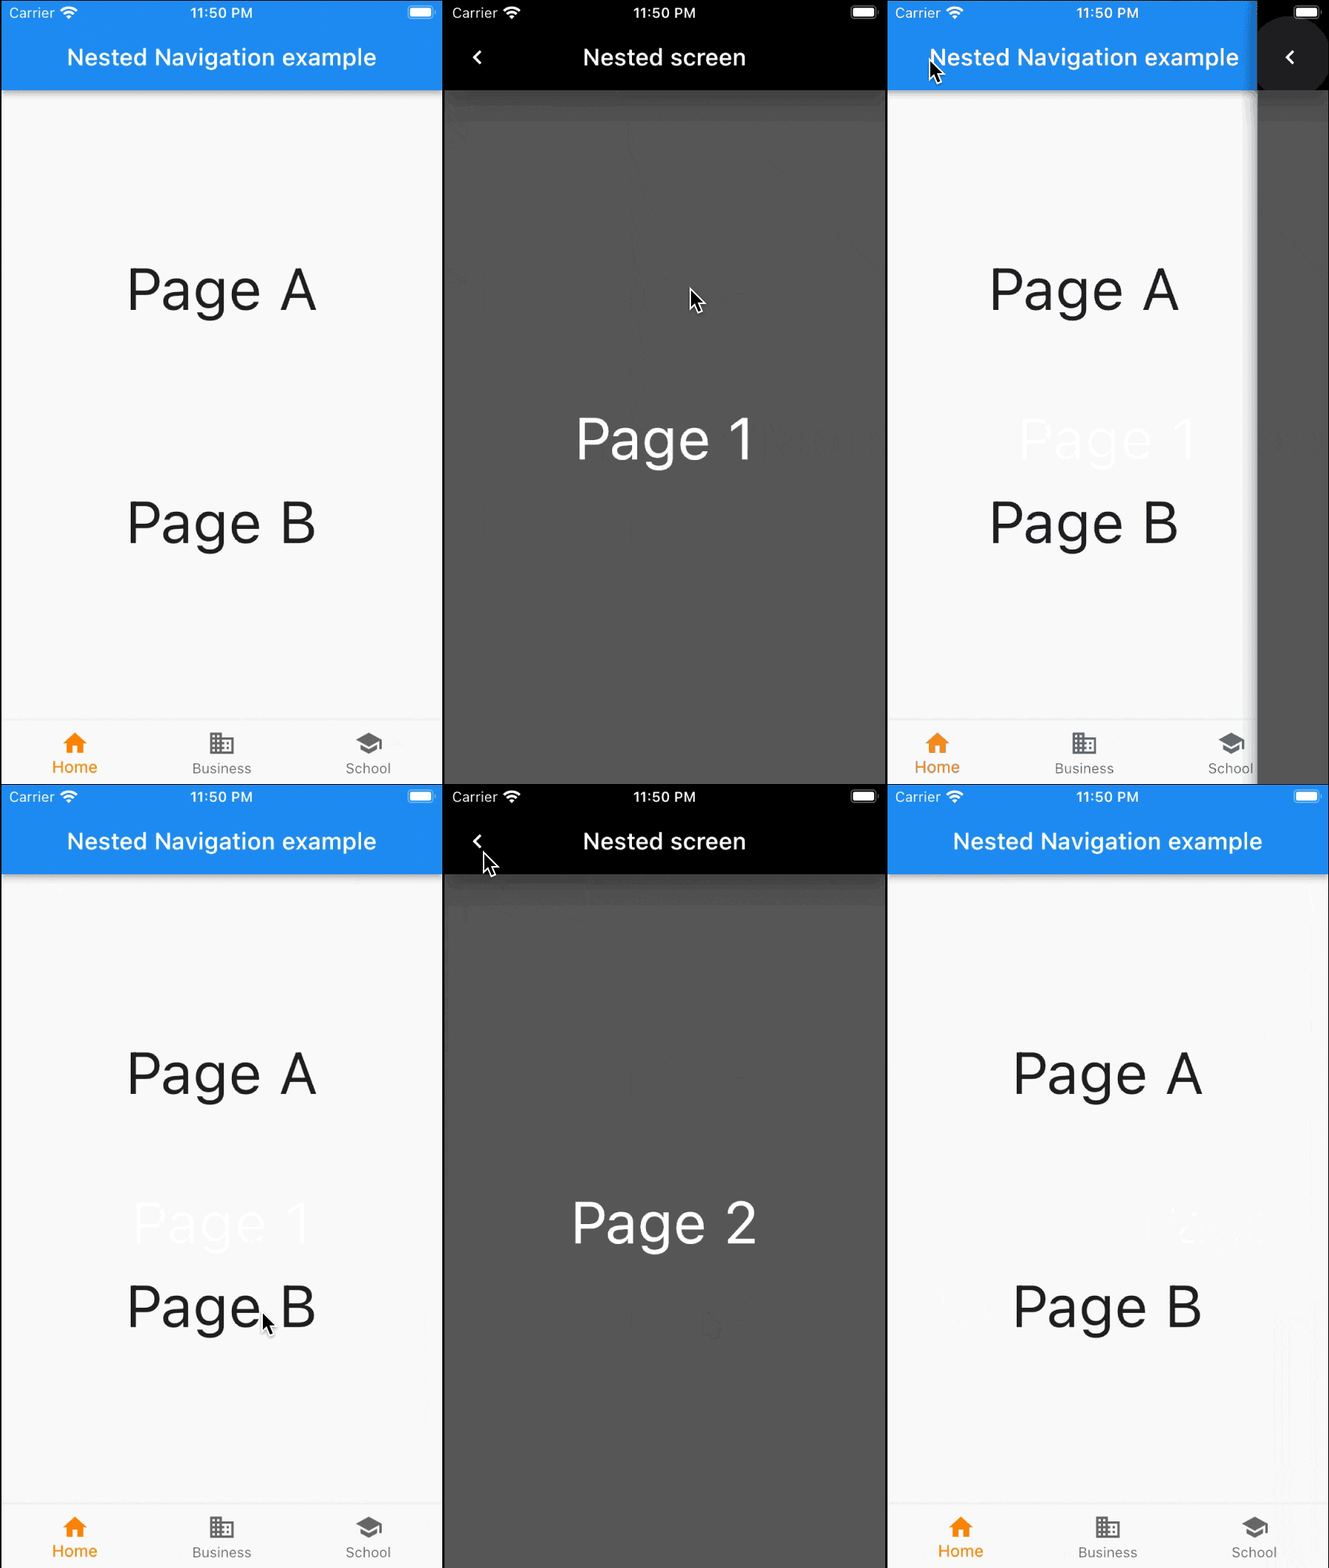
If we click on Page A or Page B then we will notice that a new screen Nested Screen replaces the current screen, which is definitely not what we wanted.
With two Navigator widgets
- Having two widgets can potentially be a hassle. So, to solve this problem we will have to introduce a new
Navigatorin the widget tree after theBottomNavigatorBarwidget and use it which will cause theNavigatorto only replace the body of the current screen. First lets add a function_routeBuilders()to ourNestedScreenclass and aGlobalKeyvariable as shown below:
class NestedScreen extends StatelessWidget {
  NestedScreen({this.navigatorKey, Key key}) : super(key: key);
  final GlobalKey<NavigatorState> navigatorKey;
   ...
Map<String, WidgetBuilder> _routeBuilders( BuildContext context ) {
    return {
      '/': (context) => _home(context),
      /// we only have one screen for now
    };
  }
   ...
}
- The function given above will manage routes for us.(Here we only have one screen) Now, add a new
Navigatorwidget in the body ofNestedScreenclass as shown below:
class NestedScreen extends StatelessWidget {
   ...
@override
  Widget build(BuildContext context) {
    var routeBuilders = _routeBuilders(context);

    return Scaffold(
      body: Navigator(
        key: navigatorKey,
        initialRoute: NestedScreenRoutes.root,
        onGenerateRoute: (routeSettings) {
          return MaterialPageRoute(
              builder: (context) => routeBuilders[routeSettings.name](context));
        },
      ),
    );
  }
   ...
}
- In our newly introduced
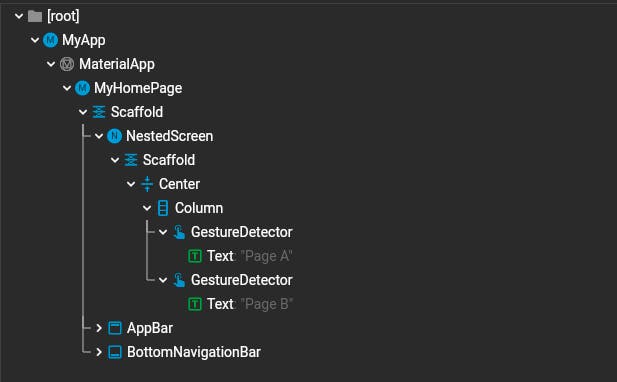
Navigatorwidget we will pass thenavigatorKeyas the key. This is how our widget tree looked before adding theNavigatorwidget:
- And this is our new widget tree after adding the
Navigatorwidget:
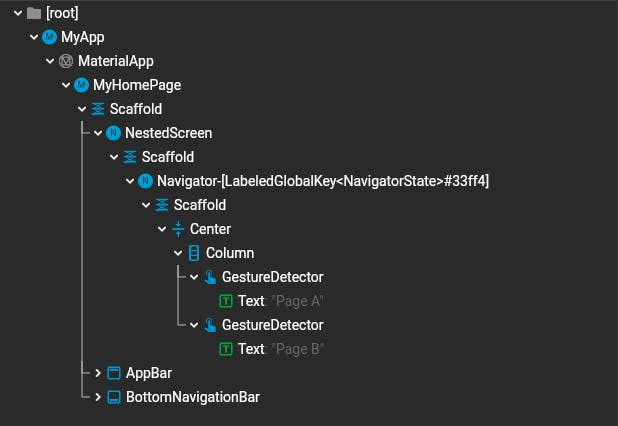
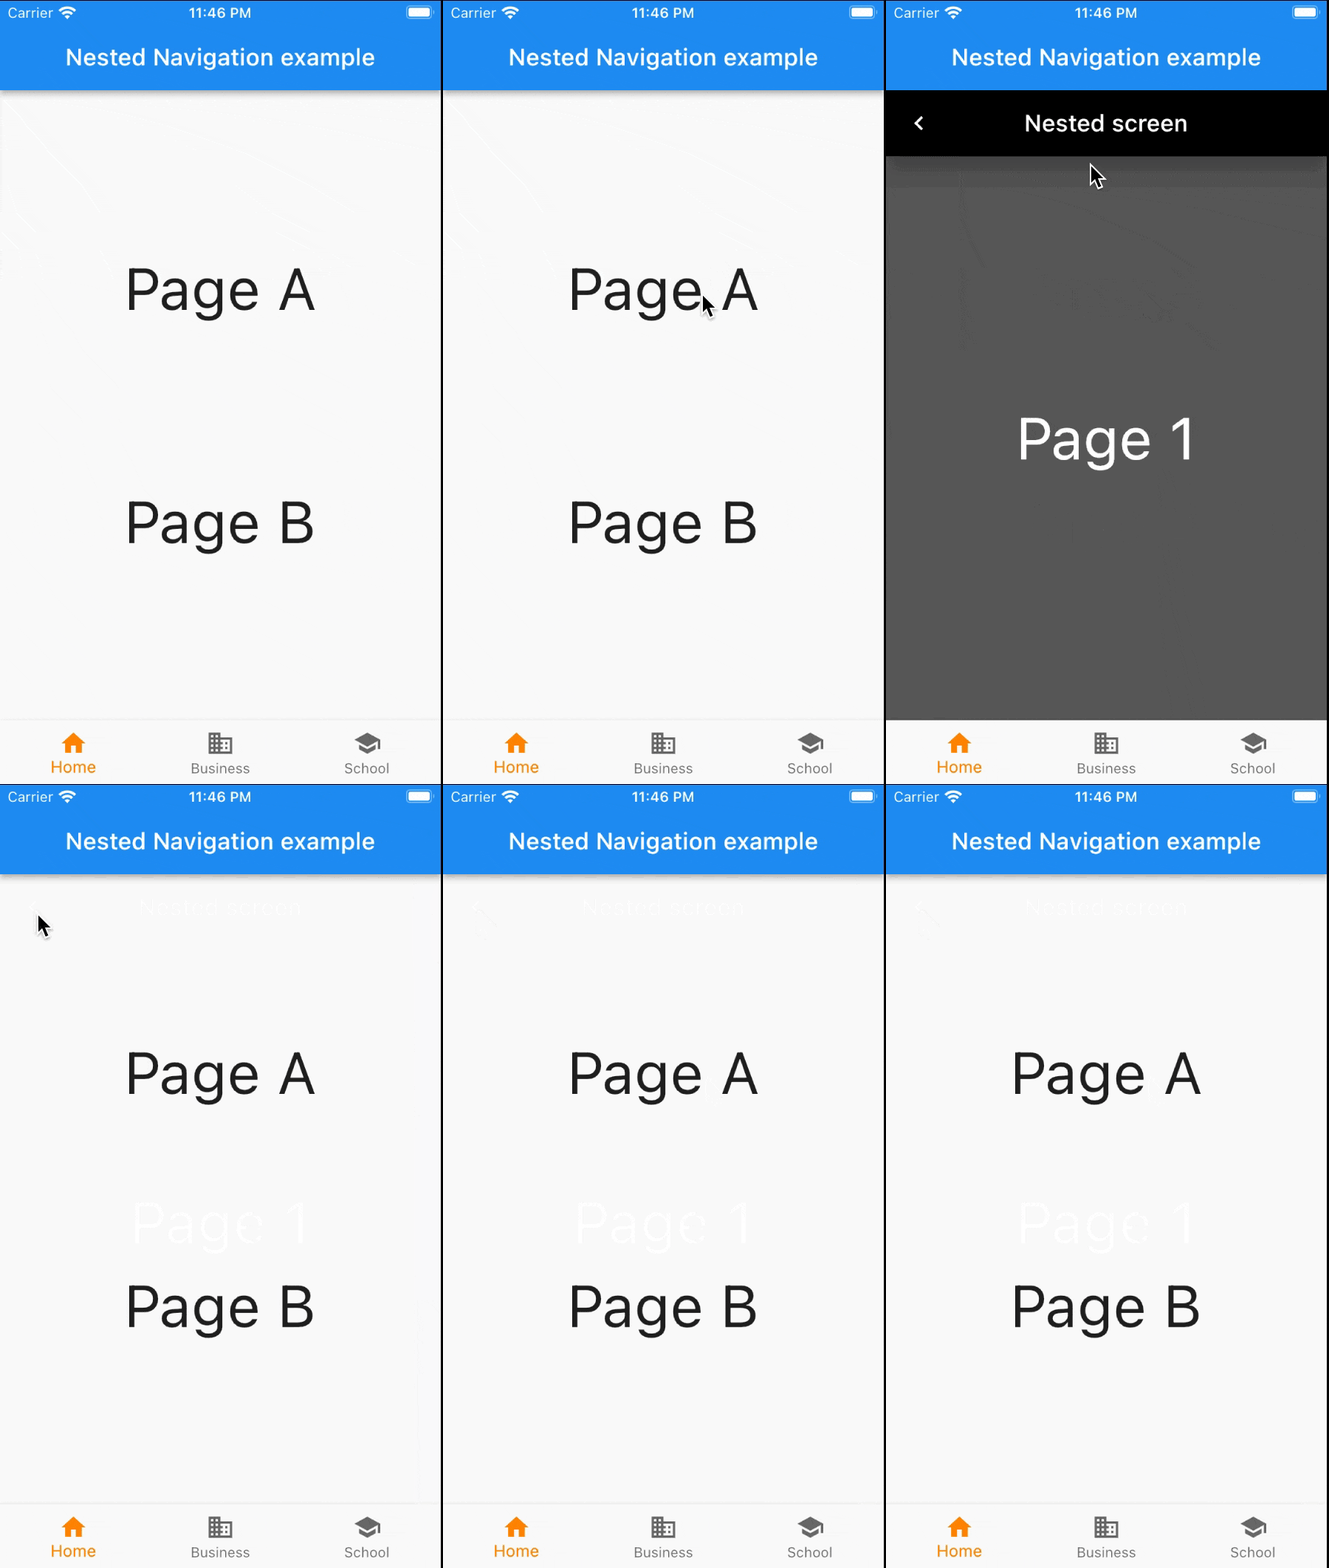
- We can see a new Navigator widget in our NestedScreen class. Now. when we click on Page A or Page B we will notice that the
Nested Screenreplaces only the body of the current screen, which is what we wanted. Refer to the picture given below:
Decoding
Let's understand how to go about the decoding process in this segment. After adding a new Navigator widget, we will now have two Navigator widgets in our widget tree: One above the BottomNavigatorBar (in the MaterialApp) and one below the BottomNavigatorBar. After this, when we write Navigator.of(context).push(), the nearest (above) Navigator widget is accessed and everything below it is replaced. So, when we access the Navigator above the BottomNavigatorBar, it replaces the BottomNavigatorBar, but when we access the Navigator below the BottomNavigatorBar, is holding cause any changes
But there can be cases when we would like to use the other Navigator widget, such as if we want to replace the entire current screen with a screen on clicking Page B and replace only a part of it on clicking Page A. To do this, we will have to access the Navigator when we click on `Page B.
Let's see how can we do this.
Use keys to access the desired Navigator
To access a desired Navigator, we will have to pass the respective context while performing operations. Based on whether Page A or Page B is clicked, we will get either the context from the navigatorKey variable or NavigatorKeys.navigatorKeyMain which is used at the start of the MaterialApp level. For this, we will change the _push() method of the NestedScreen class as shown below:
class NestedScreen extends StatelessWidget {
...
  void _push(BuildContext context, String name) {
    BuildContext _desiredContext;
    if (name == 'Page 1') {
      _desiredContext = navigatorKey.currentContext;
    } else {
      _desiredContext = NavigatorKeys.navigatorKeyMain.currentContext;
    }
    Navigator.of(_desiredContext).push(...);
  }
...
}
Now, if we click on Page A the lower Navigator widget will be accessed and only the body of the BottomNavigationBar will change. and by clicking on Page B, the above Navigator widget will be accessed and the entire current screen will change.
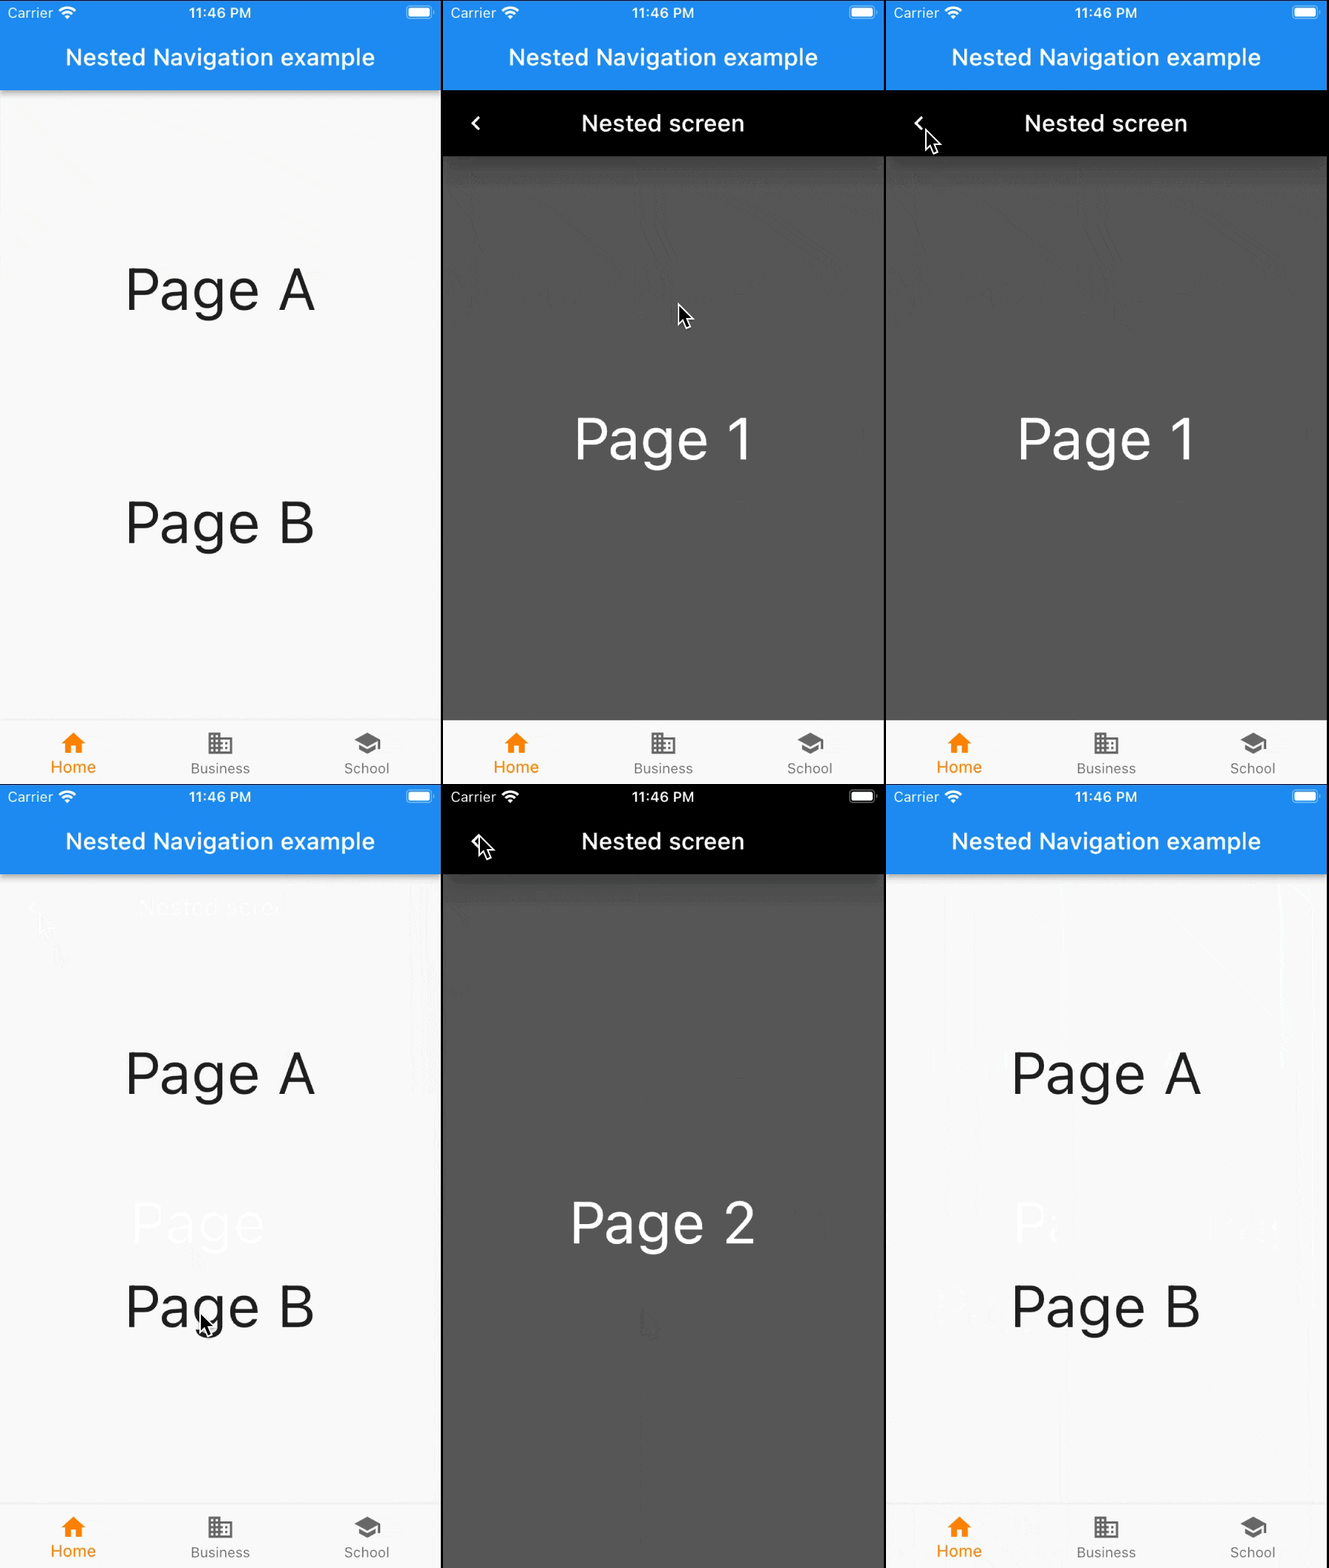
And that is how we use the desired Navigator widget from the widget tree!
Conclusion
The main ingredient to nested navigation is a second Navigator widget. When we start with a MaterialApp, we will introduce a Navigator which we can use throughout the app as shown in this article. When we call the Navigator.method(), then the nearest Navigator widget (above this widget in widget tree) is used and we can use keys to access the desired Navigator. Here’s the final project link .
Thanks for reading.

