


React Component Testing Using Cypress
Let's understand how to test React components using Cypress


What is Component Testing?
Let's first learn what component testing is. Component testing, also known as program or module testing, is done after unit testing. In this type of testing, objects can be tested independently as individual components without integrating with other components e.g., modules, classes, objects, and programs.
Why Do We Need Component Testing?
Component testing ensures that the component's functionality works properly and as specified. So to reduce risks, component testing validates each component of the software and helps identify bugs in the software code and fix them.
I hope now we have a better understanding of the component testing; let's just quickly start with setting up the cypress.
Before we start with the component testing, we require a React application.
Steps to Create a Sample React App to Get Started with the Cypress
- Run the below command
npx create-react-app my-sample-app Go into the directory and run the below command for cypress
cd my-sample-app
npm install cypress -D
Open Cypress and follow the instructions!
npx cypress openConfiguring Component Testing
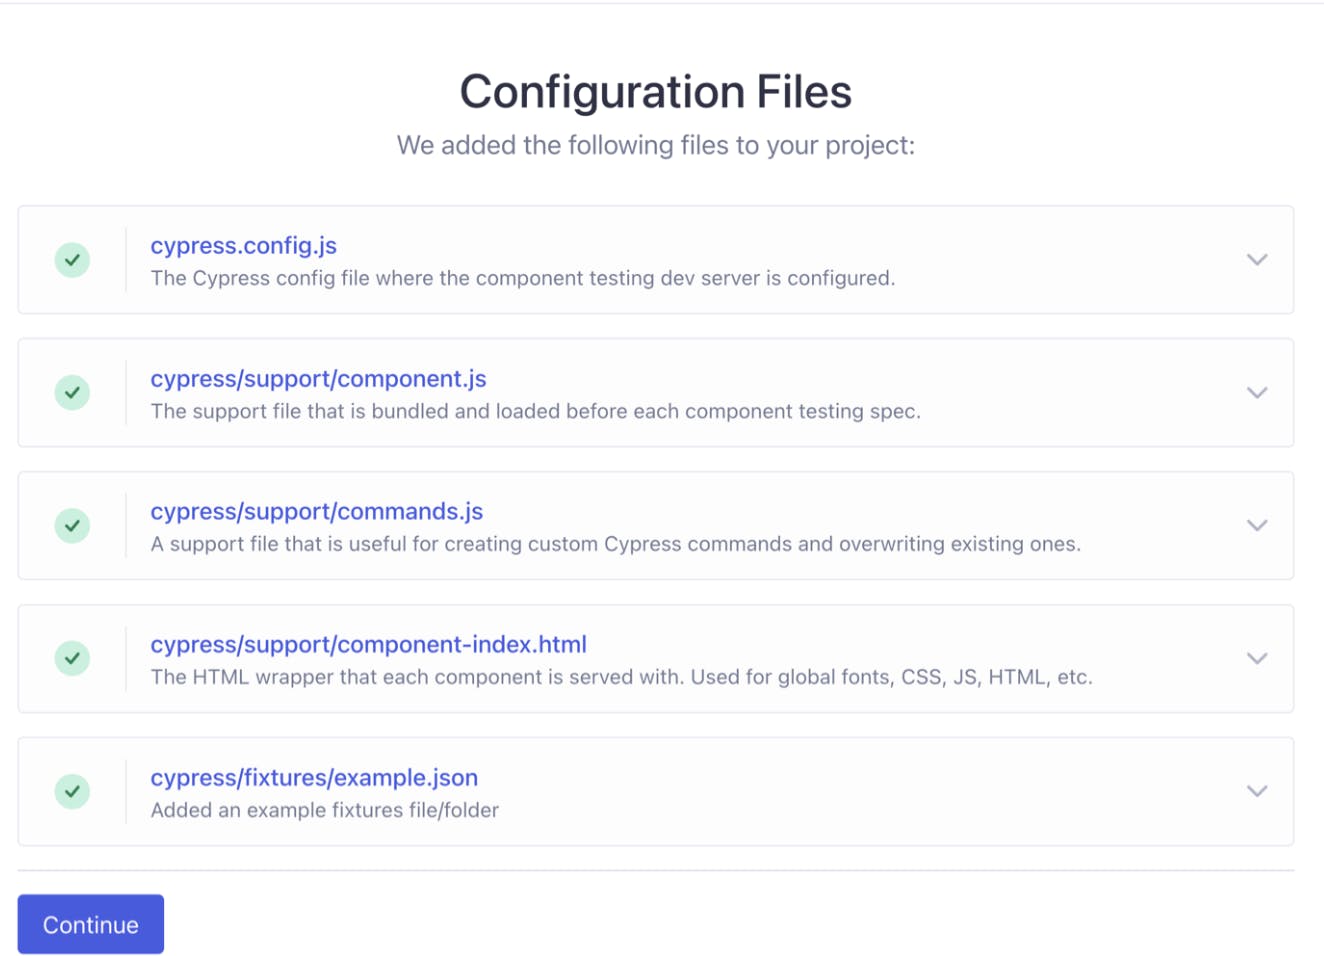
When the cypress opens up, it prompts you to set up either E2E Testing or Component Testing. Choose Component Testing and step through the configuration wizard.
Next, the Cypress setup will automatically detects your framework and generate all the necessary configuration files, and ensure all required dependencies are installed.
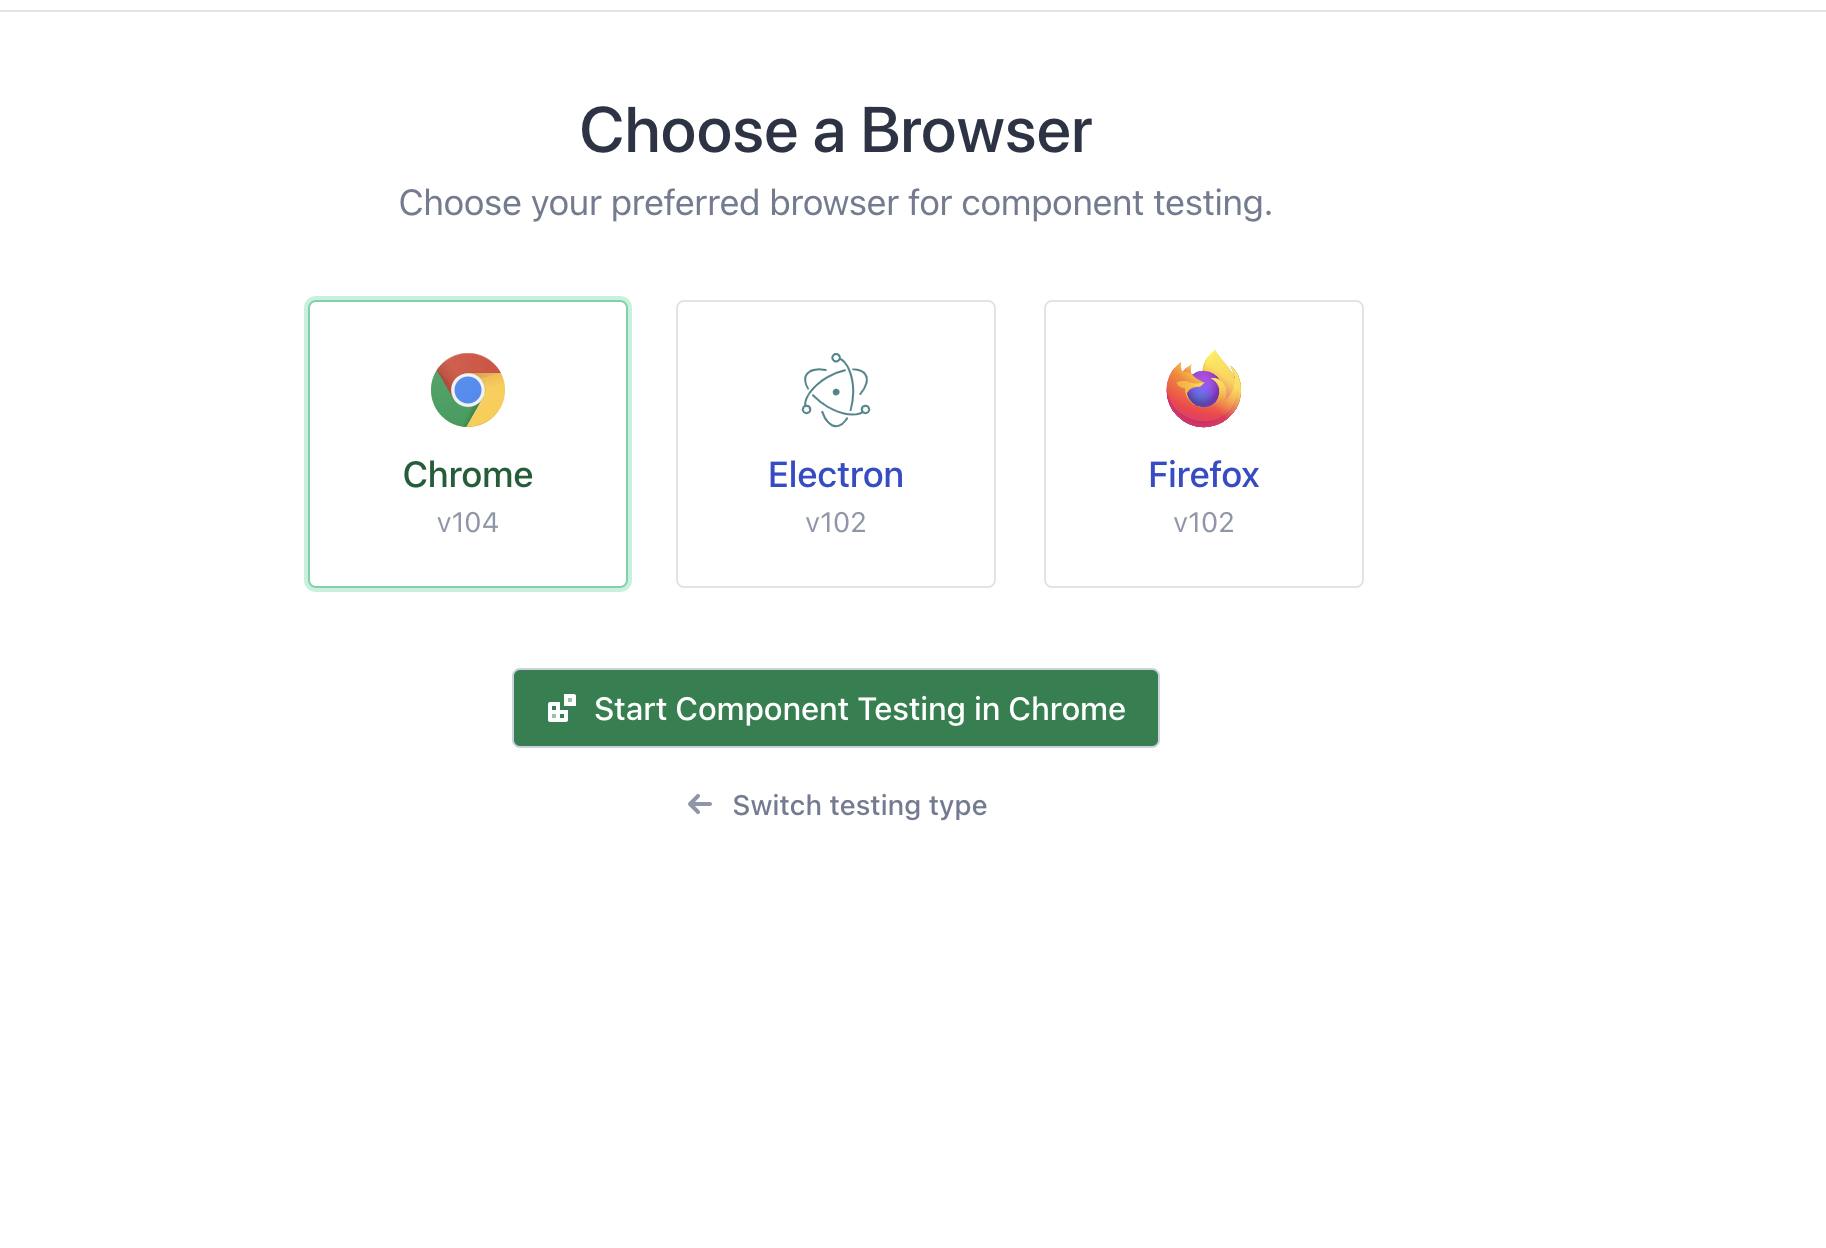
After setting up component testing, you will be at the Browser Selection screen.
Pick the browser of your choice and click the Start Component Testing button to open the Cypress app.
 The setup is done!!
Now the question is how the component testing is to be done.
To do the component testing, we require components, so let's just create one sample component for testing.
Create a counter component inside src folder and name it Counter.jsx.
export default function Counter({ initial = 0 }) {
    const [count, setCount] = useState(initial)

    return (
        <div style={{
            padding: 30
        }}>
            <button style={{ color: "black", backgroundColor: "green", margin: 10 }} aria-label="decrement" onClick={() => setCount(count - 1)}>
                -
            </button>
            <span data-cy="counter">{count}</span>
            <button style={{ color: "black", backgroundColor: "green", margin: 10 }} aria-label="increment" onClick={() => setCount(count + 1)}>
                +
            </button>
        </div>
    )
}
Now we learn the biggest slice of the cake i.e., Mounting Components.
What is Mounting/Mount Function ?
We use a mount function imported from the cypress package. It is responsible for rendering components within Cypress's sandboxed iframe using cy.mount() anywhere
import { mount } from 'cypress/react'
Let's write a script that mounts the component
To get started, create a spec file Counter.cy.jsx inside the same folder and write the script
import Counter from './Counter'

describe('<Counter>', () => {
    it('mounts', () => {
        cy.mount(<Counter />)
    })
})
Here, we have a single test that ensures that our component mounts.
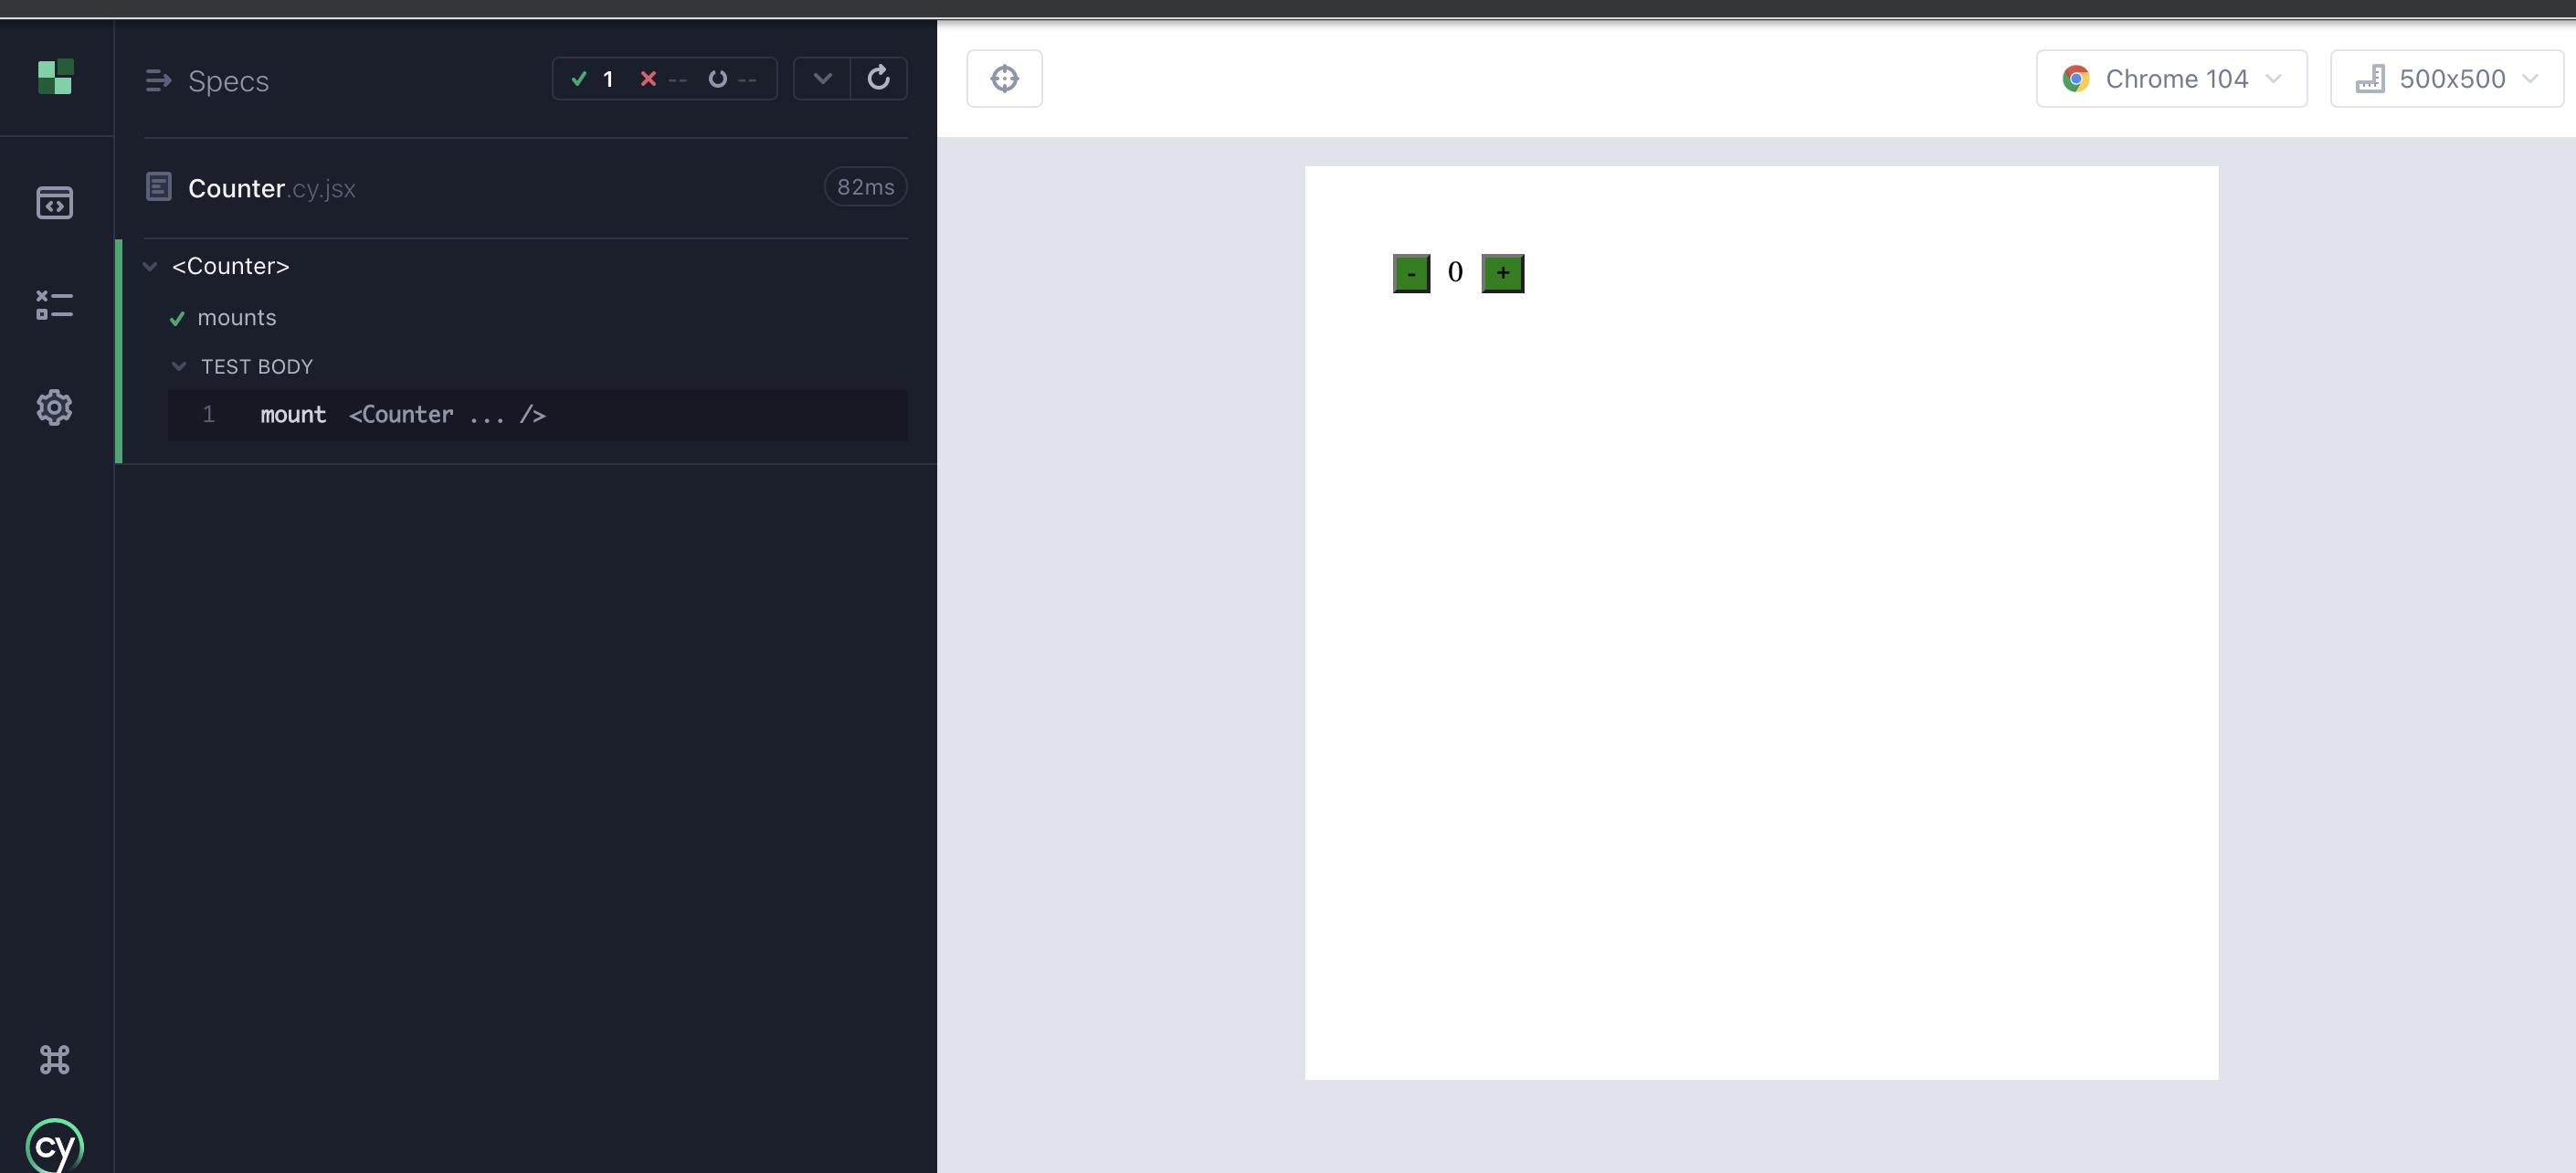
Now it's time to see the test in action. Open up Cypress if it is not already running, use the below-mentioned command
npx cypress open --component
And launch the browser of your choice. In the spec list, click on Counter.cy.js and see the counter component mounted in the test area.
Here is the desired output!!
Let's get dig more about component testing and understand the purpose of using it.
Here i am asserting few properties and some actions
import Counter from './Counter'

describe('<Counter>', () => {
    const counterSelector = '[data-cy="counter"]'
    const incrementSelector = '[aria-label=increment]'
    const decrementSelector = '[aria-label=decrement]'
    it('mounts', () => {
        cy.mount(<Counter />)
        // Act
        cy.get(incrementSelector).click()
        // Assert
        cy.get(counterSelector).should('contain.text', 1)
        // Act
        cy.get(decrementSelector).click()
        // Assert
        cy.get(counterSelector).should('have.text', '0')
        // Assert color
        cy.get(decrementSelector).should("have.css", "color")
            .and("eq", 'rgb(0, 0, 0)');
        // Assert background color
        cy.get(decrementSelector).should("have.css", "background-color")
            .and("eq", 'rgb(0, 128, 0)');

    })
})
Here we can verify in the first case, clicking on the increment button and asserting the value at the next line and also the same for the decrement in the third case i.e., asserting button color and button background color.
TADA 🎉 We got it!

The above test scripts are sample cases likewise, we also can assert every actions and property which are related to that specific component.
Pros and Cons of Component Testing
Pros:
It finds the defects in the module and verifies the functioning of the software.
It helps in faster delivery.
More reliable systems because previously tested components are used.
It leads to the re-usability of software which provides a lot of benefits.
Reduces the development cycle time.
Helps in reducing project costs.
Leads to a significant increase in productivity.
Cons:
Less control over the evolution of the system.
There is a need to compromise the requirements.
To know more about component testing Click here.
Thank you, folks!!