


You might know about Microsoft's Flight Simulator release in August last year and like me, if you're interested in flight simulators or photorealistic recreations of real life places, you might have spent a lot of time staring in awe at the amazing detail crammed into the latest iteration of the series.
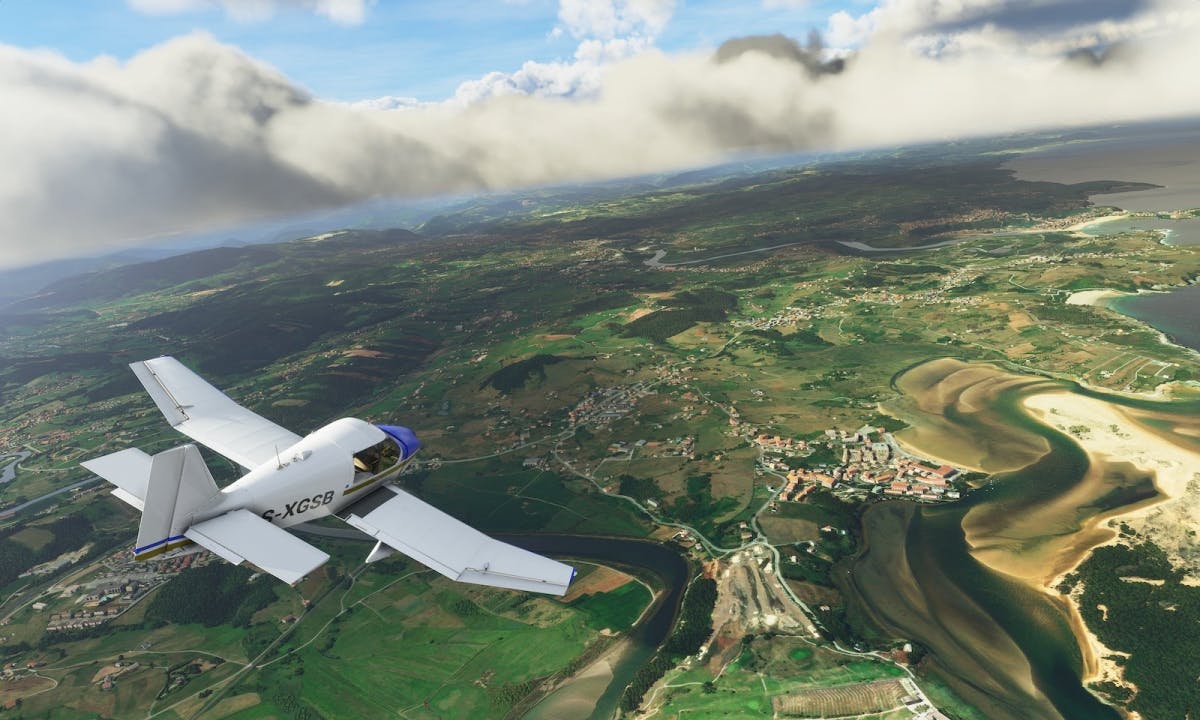
Flight Simulator uses satellite scans and terrain data from Bing maps to generate the terrain in real time. I won't go into the details, and you can get a gist of what's going on here, but suffice to say, the results are some of the most accurate recreations of real life places, with some people saying they could even spot their house if they flew over to the town where they live.
This article is going to help you recreate something similar, albeit in much lower detail and on a much, much smaller scale. However, I think you'll find it's exciting nonetheless. So let's get started.
WebGL and Three.js
Ever since WebGL brought the immense capabilities of OpenGL to the Web, it made developing 3D environments with complex textures and lighting more accessible via the web, which is arguably the most accessible platform. It gave developers a way to showcase their work on any platform that came with a web browser and supported WebGL. Today, the list of platforms that support WebGL is pretty large and covers a huge proportion of the user base.
Three.js made things even easier for developers by allowing them to write their code in JavaScript and interact with browser APIs like the DOM, audio APIs and WebSockets just to name a few. Three.js still allows you to drop down into the WebGL layer by directly calling its APIs. We'll need that in one use case in this article.
More recently, a library called react-three-fiber took this one step further, by providing React developers with a reconciler that would allow them to effortlessly write their Three.js code declaratively using JSX.
Baby steps
We're going to try and recreate a piece of terrain in Three.js and try and make it as photorealistic as possible. We're going to use data from various sources and organise it so that we have all we need.
But first, let's get a minimum working app set up so that we have something tangible that gives us an idea of the end result.
We'll start off by creating a small scene in CodeSandbox. This scene will contain:
- One single square plane in 3d space, that will eventually turn into a piece of terrain
- A light source so that we can see it
- And controls, so that we can look around.
Here is a CodeSandbox with our starting point, with details in the code comments:
For a more complete guide to how this code works, you should check out Vikrant's article on our old blog explaining react-three-fiber basics.
The "terrain" is just a green square right now. So our next steps are going to involve getting the data we need to make it look more earthly.
First let's pick a nice spot on the Earth.
The location
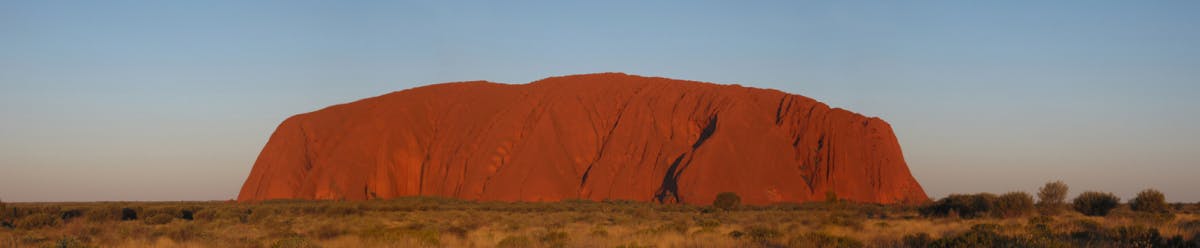
For this article, I'll be using a real life location called Uluru (also known as Ayers Rock), which is a natural rock formation and UNESCO World Heritage Site in central Australia. It is made of sandstone, has a distinctive red-brown color and is surrounded by the arid landscape of the Uluṟu-Kata Tjuṯa National Park.
It is one of the featured sites on Google Earth.
Beautiful, isn't it? Almost like the surface of Mars, except for the shrubs. I chose this spot because the terrain has some prominent features that would be interesting to recreate and because the changes in terrain height are distinct.
We'll be recreating the the terrain in two steps:
- First, we'll modify the flat plane we drew earlier so that it has the shape of the terrain
- Then, we'll add textures, so that it looks like the real thing
For both steps, we'll need different kinds of data, so we'll get those before each step.
Mapping the terrain height
The easiest way to describe something is with a picture. Pictures can be far more descriptive than words. In the case of computer graphics, images can be one of the most efficient forms of encoding data, with the added advantage of allowing humans to easily perceive that data.
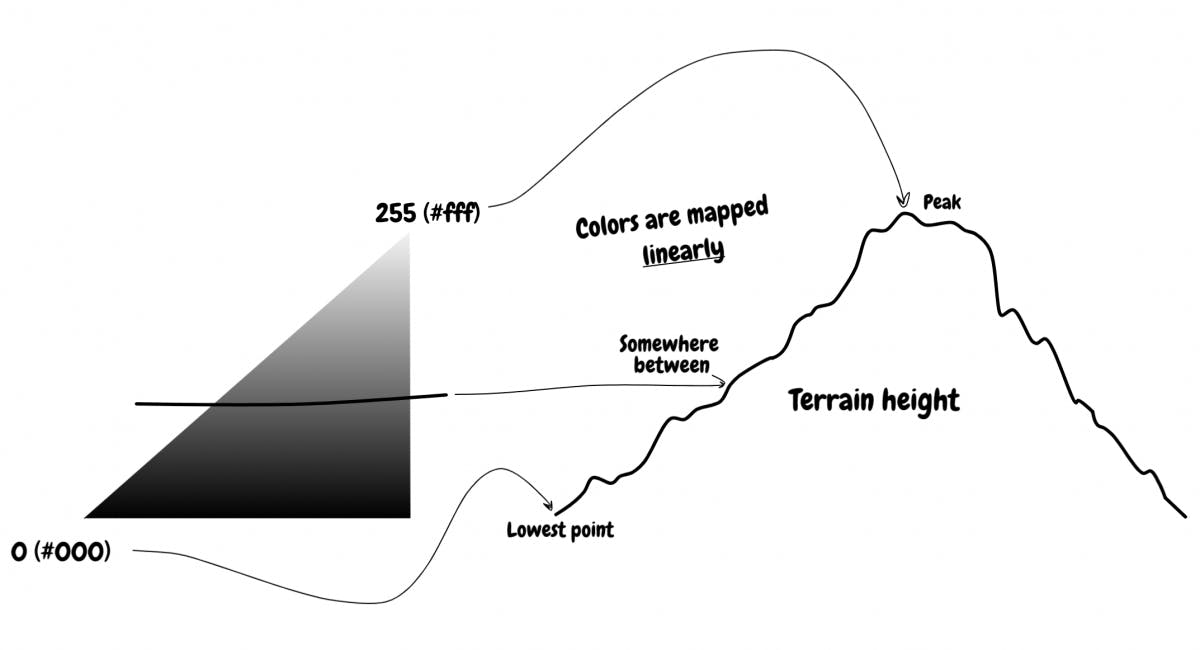
The first data we need is the height or altitude mapping of each point on the terrain. One way to do this is to encode each point on the plane to a pixel in an image. The color of the pixel could represent the height of the corresponding point above the ground.
The most natural mapping one could think of is: the lighter the pixel, the higher up the point is on the Earth.
Lucky for us there's a few tools that can give us exactly this. One pretty popular example is terrain.party which is used by the Cities: Skylines community to generate terrains in game.
But we'll be using a different free online tool called Tangrams Heightmapper.
Here's what the heightmap looks like for all of Australia:
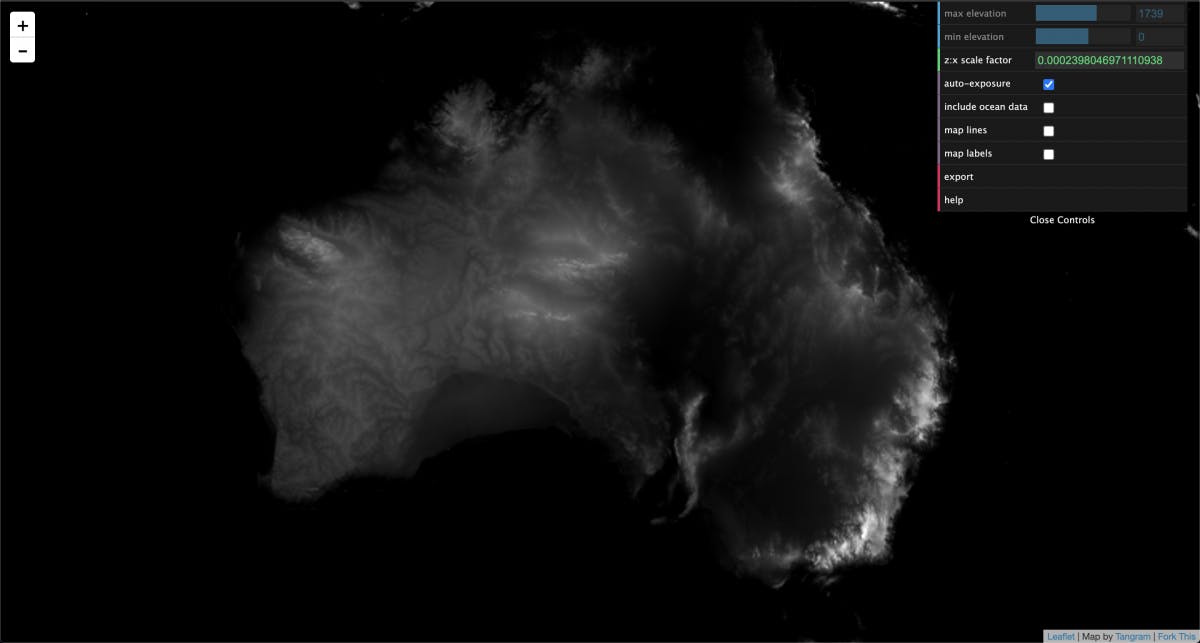
We need a specific part of Australia, so I did the work of zooming into the coordinates for Uluru:
tangrams.github.io/heightmapper/#15.19444/-..
The white part is Uluru, which is higher up while the surroundings, which are almost black, are the ground around the rock formation.
Tangrams does the hard work of making sure that the lowest level (which is around 500m above sea level), is black (#000), while the peak of Uluru (at 800m above sea level) is white (#fff), and the rest is linearly mapped in between the two.
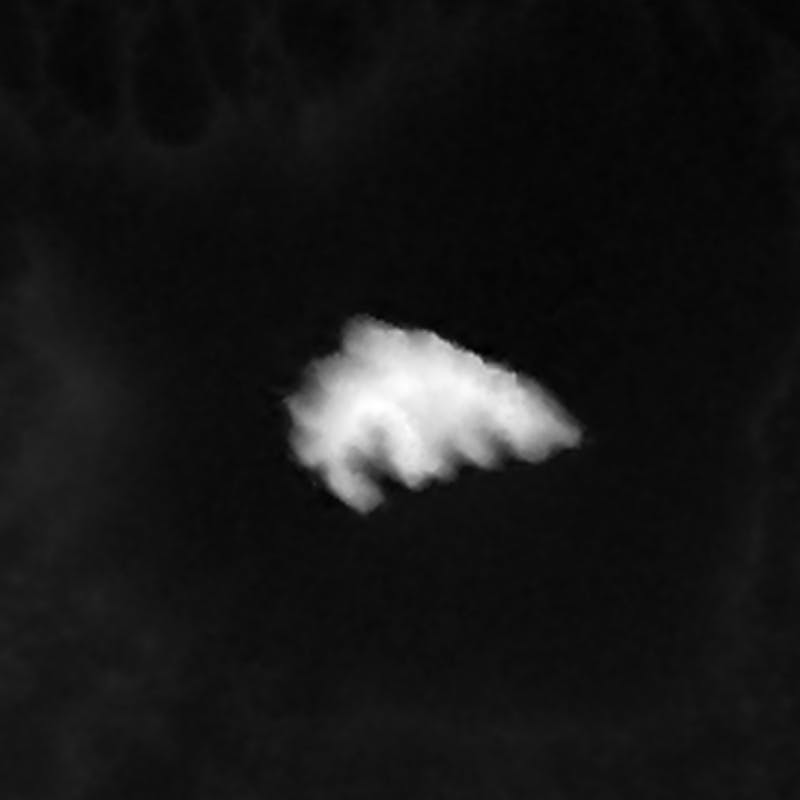
After exporting an adequate range of the terrain to a PNG, I scaled and cropped it into a 1024x1024 format using GIMP. It's important for later that the height and width be a power of two.
Here is the final heightmap:
Now we need to add this to the Three.js scene so that our plane starts to take the form of the final terrain.
But first...
A brief intro to shaders
A shader is a sort of function that decides what a pixel looks like based on several parameters. In WebGL, there are two types of shaders:
- Vertex shaders
- Fragment shaders
Let's talk about these in the context of 3d objects. 3d objects consist of polygons, which are usually just triangles (because any shape can be broken down into triangles and triangles are simple).
The vertex shader decides where the vertices are rendered in 3d space.
The fragment shader then decides what the space between those vertices (which are shown as pixels on the screen) will look like.
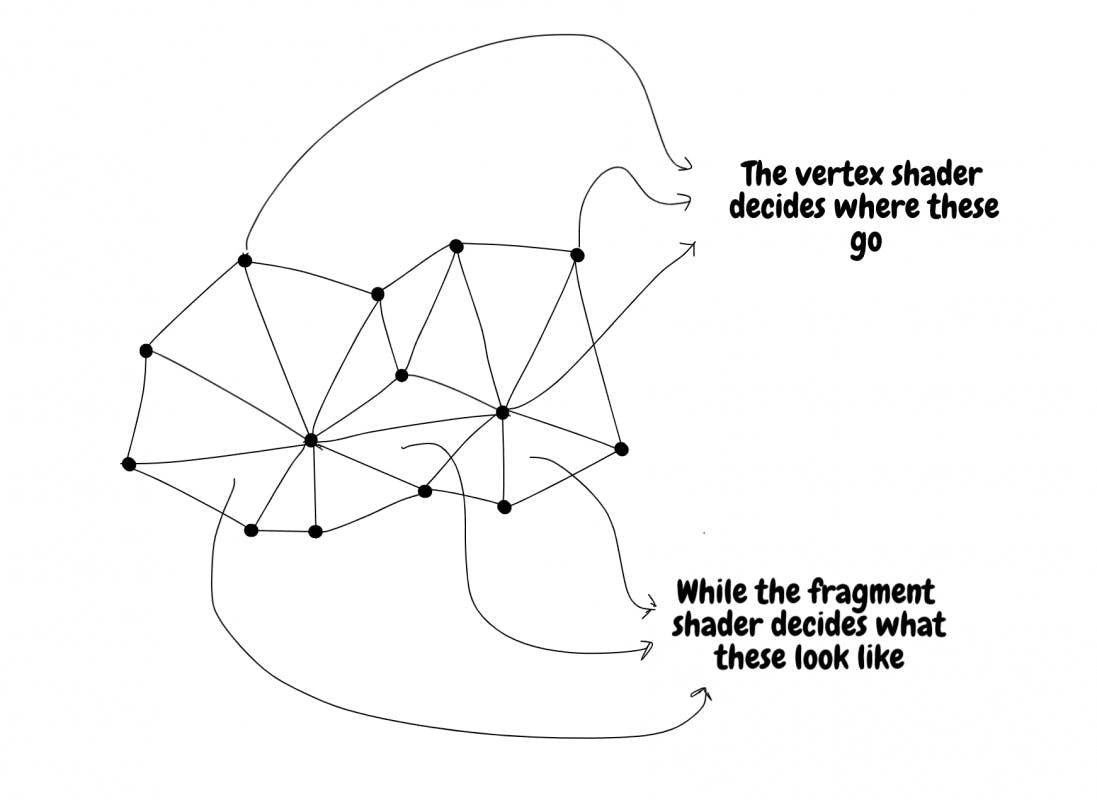
So the vertex shader will help us use the heightmap to shape our terrain, while the fragment shader will be useful when we need to apply textures.
We won't be able to use the same material (MeshBasicMaterial) we used in the first sandbox with the green square. Instead, we'll need a special material called ShaderMaterial, that will let us pass in our hand crafted shaders.
Applying the heightmap using a vertex shader
WebGL shaders are written in a language called GLSL, which is similar to C++ in some ways, but gets compiled to run directly on the GPU. Each shader can have a main function. The code in this main function is applied to each pixel in the framebuffer on the GPU.
In Three.js, these shaders can be passed into the ShaderMaterial as a string. As long as the string is a valid GLSL program, everything will work.
We'll make a vertex shader that takes the red component (the R in RGBA) of each pixel of the heightmap and combines it with a scaling factor to decide the height of each point above the X-Z plane (the plane our terrain lies in).
We could have used the blue and green components too, but since everything is in grayscale, those values will be identical to the red component in our heightmap.
We'll also create a rudimentary fragment shader that just makes points that are higher up a lighter shade of green, so that we can more easily see the results.
Here's what the vertex shader will look like:
// Uniforms are data that are shared between shaders
// The contain data that are uniform across the entire frame.
// The heightmap and scaling constant for each point are uniforms in this respect.

// A uniform to contain the heightmap image
uniform sampler2D bumpTexture;
// A uniform to contain the scaling constant
uniform float bumpScale;

// Varyings are variables whose values are decided in the vertext shader
// But whose values are then needed in the fragment shader

// A variable to store the height of the point
varying float vAmount;
// The UV mapping coordinates of a vertex
varying vec2 vUV;

void main()
{
    // The "coordinates" in UV mapping representation
    vUV = uv;

    // The heightmap data at those coordinates
    vec4 bumpData = texture2D(bumpTexture, uv);

    // height map is grayscale, so it doesn't matter if you use r, g, or b.
    vAmount = bumpData.r;

    // move the position along the normal
    vec3 newPosition = position + normal * bumpScale * vAmount;

    // Compute the position of the vertex using a standard formula
    gl_Position = projectionMatrix * modelViewMatrix * vec4(newPosition, 1.0);
}
Here's the working example:
Cool, huh?
You can find the code for both shaders in shaders.js.
Try and increase the bumpScale variable in App.js to exaggerate the heights of everything.
So we've mapped the terrain height to our ShaderMaterial using a height map and careful use of a vertex shader. But our fragment shader is only good enough if you're a data scientist and wanted to visualise the terrain height in 3d.
What we need now, is textures.
Getting the terrain textures
This whole section goes over how I got the terrain texture. You can skip it if you know better ways to get textures and there probably are. Also you don't need to read this if you came here just for the Three.js and WebGL stuff. You can just skip to the next section.
We need real textures if we need our terrain to look anything like the real thing.
But what does the real thing look like? We've seen pictures of it. But we need a point of reference on it that's similar to the height map's. In other words, we need a top down view of the real thing. A satellite image.
The technique I used to get the images was not exactly scientific. So expect imperfections.
There's a lot of options for this. Many online maps come with satellite views of the world. After considering many options like Google Maps and Bing Maps, I settled on Mapbox, since it provided the most vivid satellite imagery for our location.
I created an account, customized my theme to remove all layers from the map like place names, except for the actual satellite image.
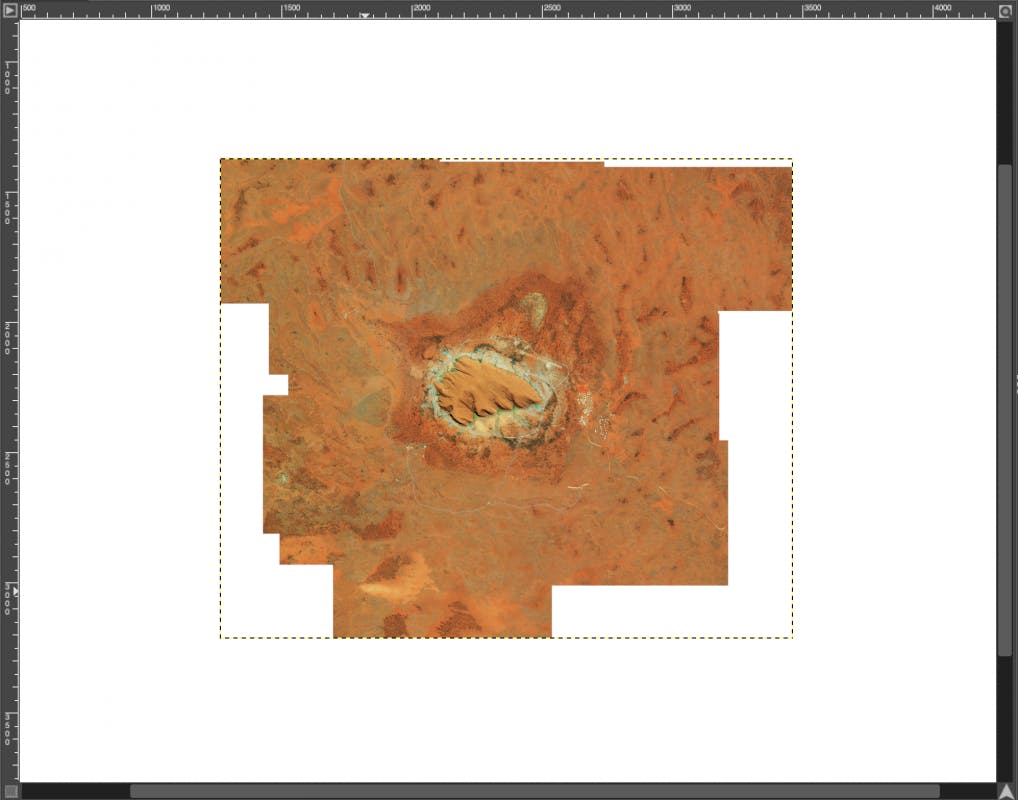
Next, I basically took a bunch of screenshots of Uluru in Mapbox and then laid them out in Gimp.
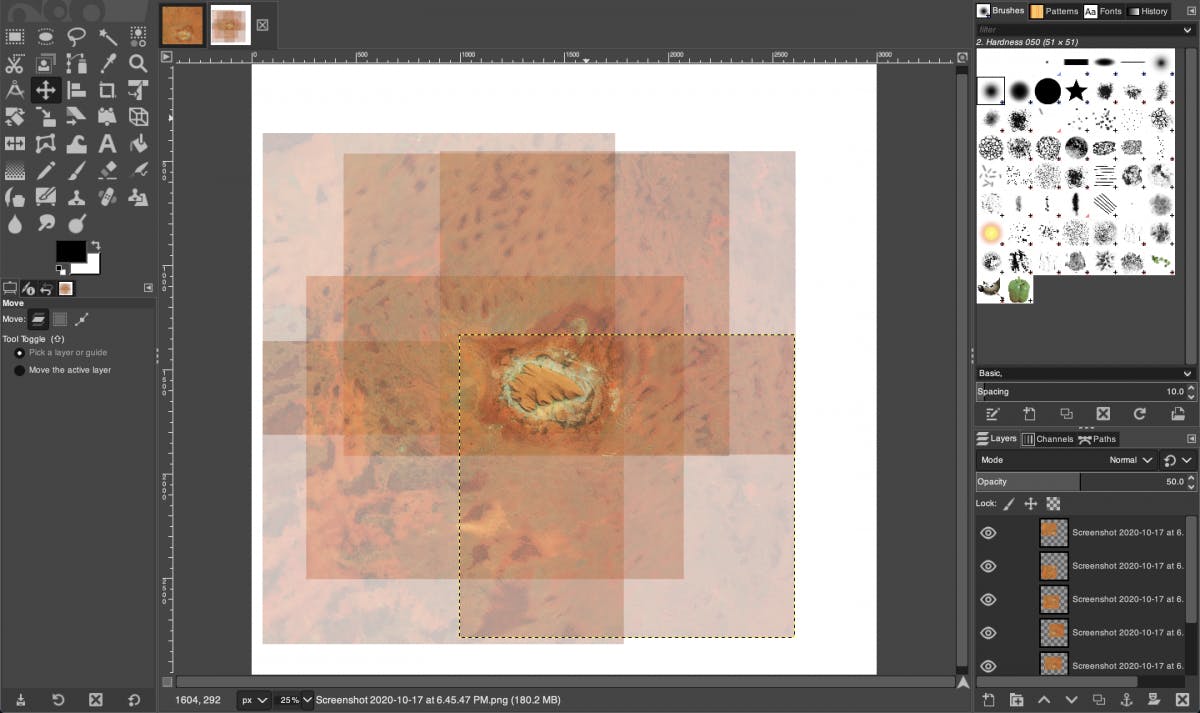
I positioned them in Gimp by reducing their opacity and matching up terrain features, particularly roads. I had to ensure the zoom level was exactly the same for all screenshots, otherwise they wouldn't match up.
I then merged them into a single layer.
I finally opened up the heightmap as another layer and overlaid it on top of the newly created merged layer.
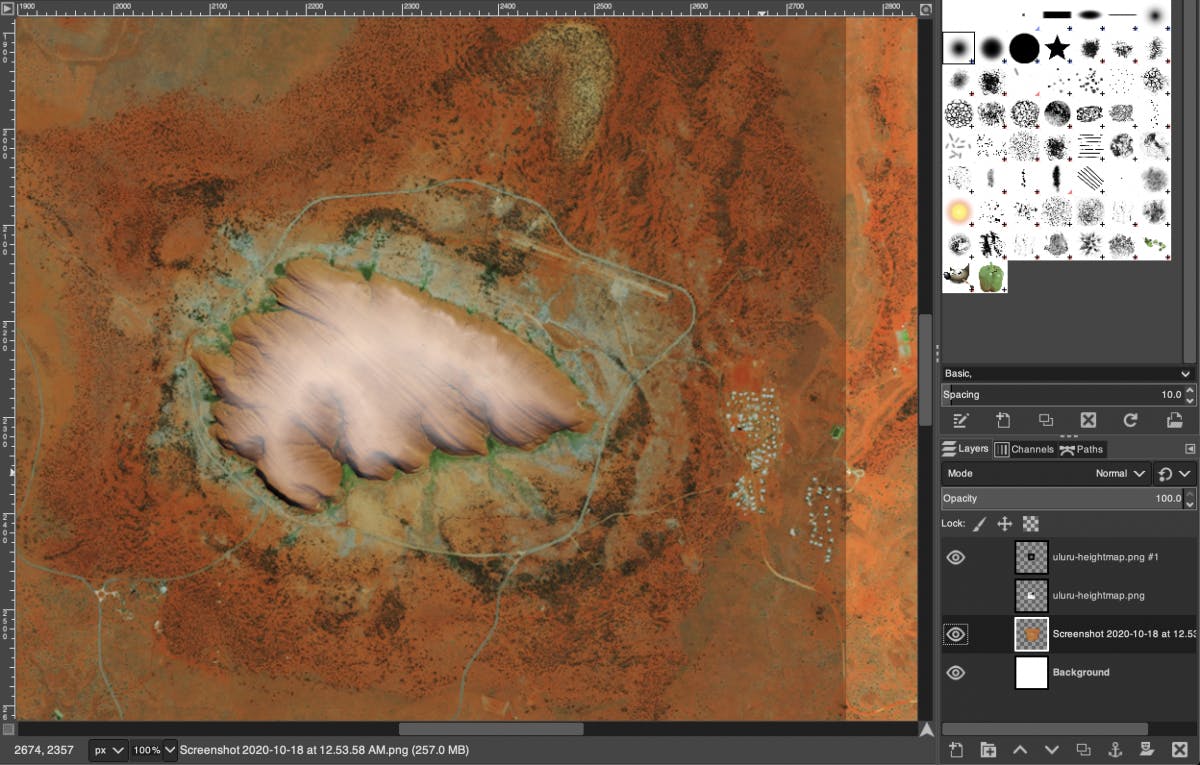
Since the two images were from different sources, I needed to resize the texture to match the heightmap's zoom level. It isn't exact, but it was good enough. To help with the positioning, I added thresholding to the heightmap (shown below) so that features would stand out in the heightmap and help me with the positioning.
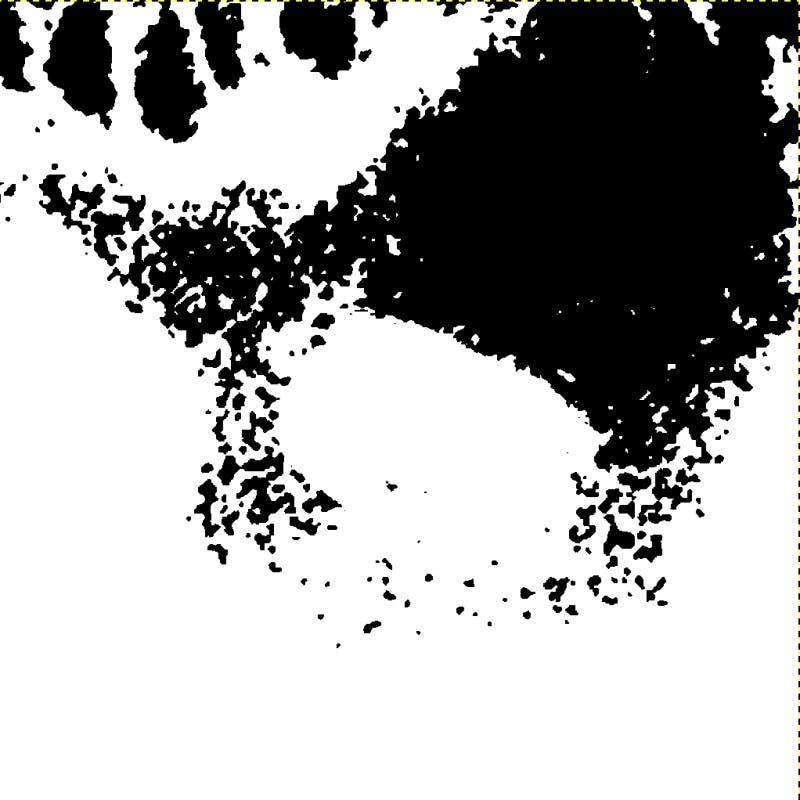
Placing the thresholded heightmap on top of the texture map made it easier to match common features and position it correctly.

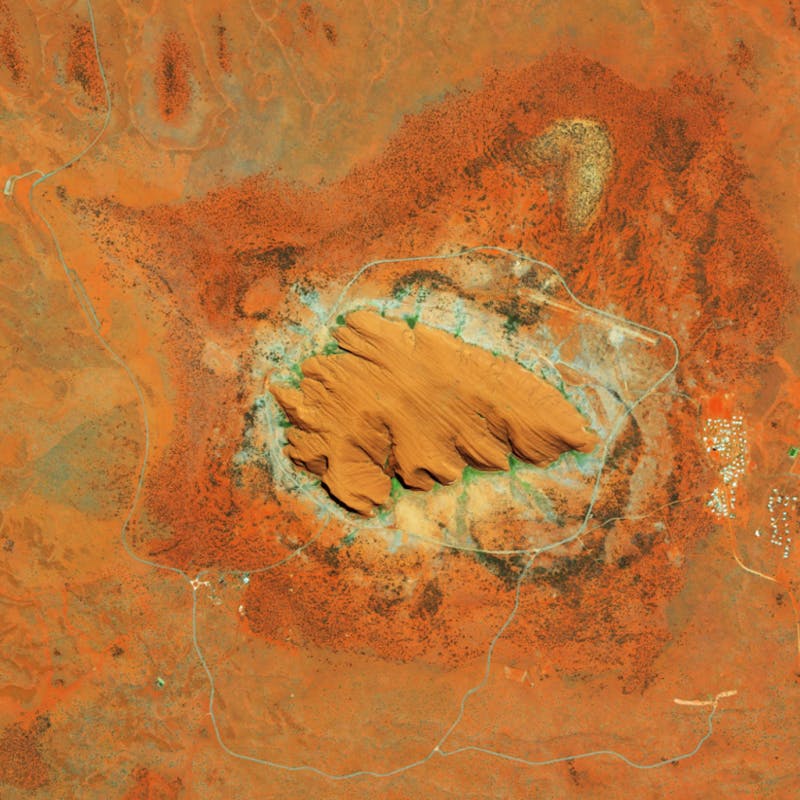
Finally I cropped the texture layer to exactly the same size as the heightmap.
Mapping terrain textures
So we've mapped the terrain height to our ShaderMaterial using a heightmap and careful use of a vertex shader.
We've also gotten hold of a texture map which is the exact same size and zoom level, and of the same location as the heightmap.
Now we need to create a fragment shader that can map the terrain texture onto our ShaderMaterial.
I our case this is surprisingly simple. We just need to read the texture map image and set the color of the corresponding pixel using the fragment shader. Here is the code for just the fragment shader:
// A uniform fot the terrain texture image
uniform sampler2D terrainTexture;

// Get the varyings from the vertex shader
varying vec2 vUV;
// vAmount isn't really used, but could be if necessary
varying float vAmount;

void main()
{
    // Get the color of the fragment from the texture map
    // at that coordinate in the UV mapping
    gl_FragColor = texture2D(terrainTexture, vUV);
}
Here's the final working example:
Neat. I'm getting Black Mesa vibes. Maybe because the texture resolution is a bit low. It's 1024x1024 right now, just like the heightmap. But if you find a higher res version of this you could swap it in. Just remember that any texture you use needs to have a resolution that's a power of two, because that's what WebGL expects. It's just easier for it to work with powers of two for its internal representations of textures and things like calculations and tiling.
Conclusion
In this article, we've set up a basic scene, learned about two types of materials (MeshBasicMaterial and ShaderMaterial), learned about shaders, learned how to customise ShaderMaterial using shaders and recreate a piece of real world terrain using Three.js and React.
The results are pretty good. But there are a few more things we could do.
First, when the camera is far away from the terrain, it looks pretty good. But when you zoom in and bring it closer, the terrain looks smudged because or textures have a fixed resolution. There are a few ways this can be overcome:
- One is to use higher resolution textures at higher zoom levels. But these may not always be available.
- The other is to use not satellite images directly, but a combination of custom textures instead using a technique called texture splatting, which would give us more control over the quality and look of the terrain. But that's probably for another article.
Second, when the camera looks at the terrain from a lower angle, the textures are difficult to make out. This could potentially be overcome using different filtering techniques, but I won't go into that in this article either.
Despite these limitations, I hope you found this article interesting. It really showcases the power and flexibility of Three.js, how convenient it is to directly call GLSL code from JavaScript and also how easy it is to use these with React using react-three-fiber.
If you've made it this far, great job! There's a lot more to learn, so I'm going to leave you with some helpful resources. There's a lot more things to experiment with and the possibilities are endless!
Bye for now and thanks for reading!
Further reading
- Here is the homepage of react-three-fiber. It has a bunch of useful examples. Always read the docs!
- Vikrant's article on our old blog is a great introduction to react-three-fiber and Three.js concepts.
- Drei is an extremely useful helper library for use with react-three-fiber and worth looking into.
- Here's an article about writing your own shaders. It's in two parts and goes into a lot of the fine details.
- If you're interested in full on game development, here's a really cool tutorial involving a clone of a much loved Nintendo game.
- The cover image is taken from TextureHaven, a great place to get custom textures for 3d modelling.