Understanding Docker Networking
Let us understand the concepts of Docker Networking using examples.
Hi, I’m Aditya Prakash, a Senior DevOps Engineer II at GeekyAnts India Pvt. Ltd. With over three years of experience in DevOps and cloud solutions, I specialize in designing, implementing, and optimizing cloud infrastructure. My expertise spans multiple Cloud Service Providers, including AWS, Azure, GCP, and DigitalOcean.
I hold certifications as an AWS Certified Developer Associate and Microsoft Azure Certified Developer Associate, which reflect my deep understanding of cloud technologies. My passion lies in solving complex technical challenges and bridging the gap between development and operations, with a strong focus on building efficient systems and automating workflows.
With hands-on experience in managing and automating the entire DevOps lifecycle, I am skilled in configuration management, CI/CD pipelines, and Infrastructure as Code (IaC). I continuously strive to improve cloud-based deployments, ensuring they are scalable, reliable, and optimized for performance. I am always exploring new technologies and sharing insights with the community to drive innovation and best practices in the DevOps space.
Docker Overview
Docker is an open platform for developing, shipping and running applications. Read more about Docker here.
What is Docker Networking?
Docker Networking is way in which Docker containers connect to other containers on the same host or on different hosts and also to the outside world, i.e., the internet.
Docker’s networking subsystem is pluggable using drivers. Several drivers exist by default and provide core networking functionality.
There are various kinds of Docker networks such as:
Bridge Network
Host Network
None Network
MACVLAN and IPVLAN Networks
Overlay Network
About this article
In this article, we discuss about the various available docker networks and try to implement those to have a hands on experience on getting started with various network types.
So, let's get started.
To view all the available networks on a system, use:
docker network ls
Bridge Network
Default Bridge Network
Whenever we install docker, it creates a default bridge network to which all the containers with no defined network can be connected.
It is a solution to provide isolation of containers from underlying host network.
If we inspect this network, we will find the following:
docker inspect bridge

This is one of the most important parts of the output.
We see that a separate interface(docker0) is created with a specific Subnet and Gateway. Any docker container launched in this network will take up IP addresses from the specified network only.
Let us test this ⬆️
We spin up a nginx container with no network specified:
docker run --name mynginx1 -p 8080:80 -d nginx
--name => It defines the name of the container.
-p => To define that port 80 of container to be exposed via port 8080 of the host.
-d => This runs the container in detached mode, i.e, the background.
nginx is the name of image we are using.
Now, let us spin up another container similarly:
docker run --name mynginx2 -p 8081:80 -d nginx
docker inspect mynginx1 mynginx2
View their IP Addresses.

mynginx1 has IP 172.17.0.2 and mynginx2 has IP 172.17.0.3. This proves that are connected the default host bridge.
But this has disadvantages. However, bridge is an isolation solution from the host network. If no network is specified, we can't get isolation as all containers will connect to this default bridge only. Docker solves this issue with help of custom bridge networks.
Custom Bridge Network
Creating a custom bridge network will create its own separate Network ID, interface, Subnet and Gateway.
This will help creating isolated infrastructures.
docker network create custom
Let us inspect this to view the above details:
docker inspect custom

Launch a container in this network and view that its IP is in the subnet of the custom bridge.
To launch use the --network tag:
docker run --name mynginx3 -p 8082:80 --network custombridge -d nginx
One can log into a container and ping other containers in the same network to test the implementation.
Host Network
Sometimes we do not require isolation from the host, we can simply spin up container on the host network and use host network directly.
docker run --name hostnginx --network host -d nginx
We do not use the -p tag here because there is no connection to any other network. This will launch the container in the host network.
None Network
This network is useful when there exists a container that requires complete isolation from any kind of network.
Use --network none in this case.
MACVLAN and IPVLAN Networks
They are generally used for applications that are running on the host but a separate IP address, different than the physical network, is required for them.
One can use the MACVLAN network driver to assign a MAC address to each container’s virtual network interface, making it appear to be a physical network interface directly connected to the physical network.
If we have some services (with well-defined ports) running on the system, and we want to launch these services but can not ask the container to expose it to a not well-defined port. For example, if we are already running nginx on port 80 (well-defined port for nginx), and we want a new nginx service, we will have to expose it to a different port on the host. But as it is cumbersome to do so, we can use MACVLAN here.
To create one we can use:
docker network create -d macvlan --subnet x.x.x.x/20 --gateway x.x.x.x -o parent=eth0 macnetwork
The subnet I get from running the ifconfig on my linux container.
Now, we can launch a different service onto this created MAC network.
docker run --name macnginx --network macnetwork -d nginx
On inspecting the network and container we find that:
macnetwork-
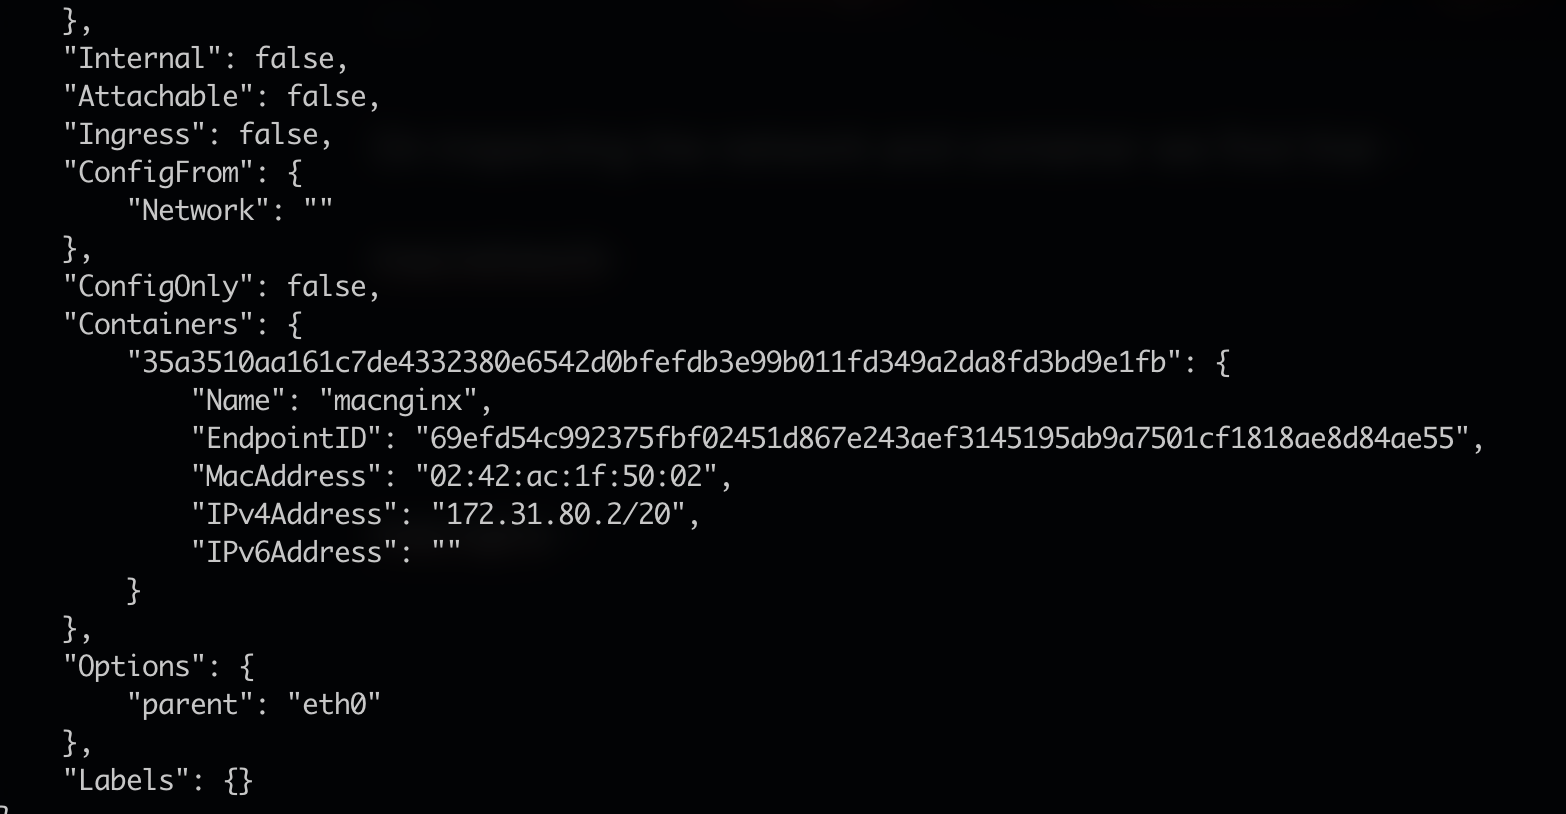
macnginx -

The basic difference between MACVLAN and IPVLAN is that MACVLAN assigns a different MAC address to each attached docker container and IPVLAN assigns the same MAC address to all containers attached to it.
Overlay Network
Overlay network is used in case of a Docker Swarm Cluster.
For more details on the same, you can have a look at my article on the implementation of Docker Swarm.
It is basically a number of nodes connected together to create a cluster to manage the number of containers running onto them. So, there needs to be some kind of network connection between all nodes.
Overlay network is utilised for creating an internal private network to the Docker nodes in the Docker Swarm cluster.
This will be a common network that will be present on all nodes in the Swarm cluster.
Conclusion
I believe that this article will help one understand the basics of Docker Networking and it might become easy for the readers to improve their Docker infrastructures with this understanding. Docker is a very vast topic and having an understanding of Docker Networking right in the beginning will make the learning curve relatively less steep when one moves to advanced topics.
So, this brings us to the end of this article.
Hope you enjoyed the concepts we discussed here. Happy learning !! 😊😊
This is a part of a series of articles to help understand Docker better. Find the other articles as follows: