A CI/CD Guide For Serverless.com
An exploratory guide for you to explore CI/CD processes on serverless.com which can be implemented for AWS services
We have gone through the concept of what serverless computing is and how it can help developers to enhance development processes through server management. If you have any queries, you can refer to my previous article which is linked here. Now that we are clear about the advantages of serverless computing and what it brings to the table, let's have a look at how we can implement it in CI/CD processes for AWS services.
About this article
In this article, we will be deploying Lambda functions for different environments. We will also try to roll back/redeploy previously made changes while also monitoring the deployed functions.
However, serverless.com can be used as an entire IaaS to deploy the entire infrastructure on the AWS cloud. Let us have a look at how this is done:
Prerequisites
Here are some basic prerequisites you need to have for you to follow this article:
- Basic knowledge of CI/CD concepts.
- Basic knowledge of Lambda functions
- A server with Node.js installed on it (I used an Ubuntu server with node v16.14.0)
So let’s get started!
How to setup serverless
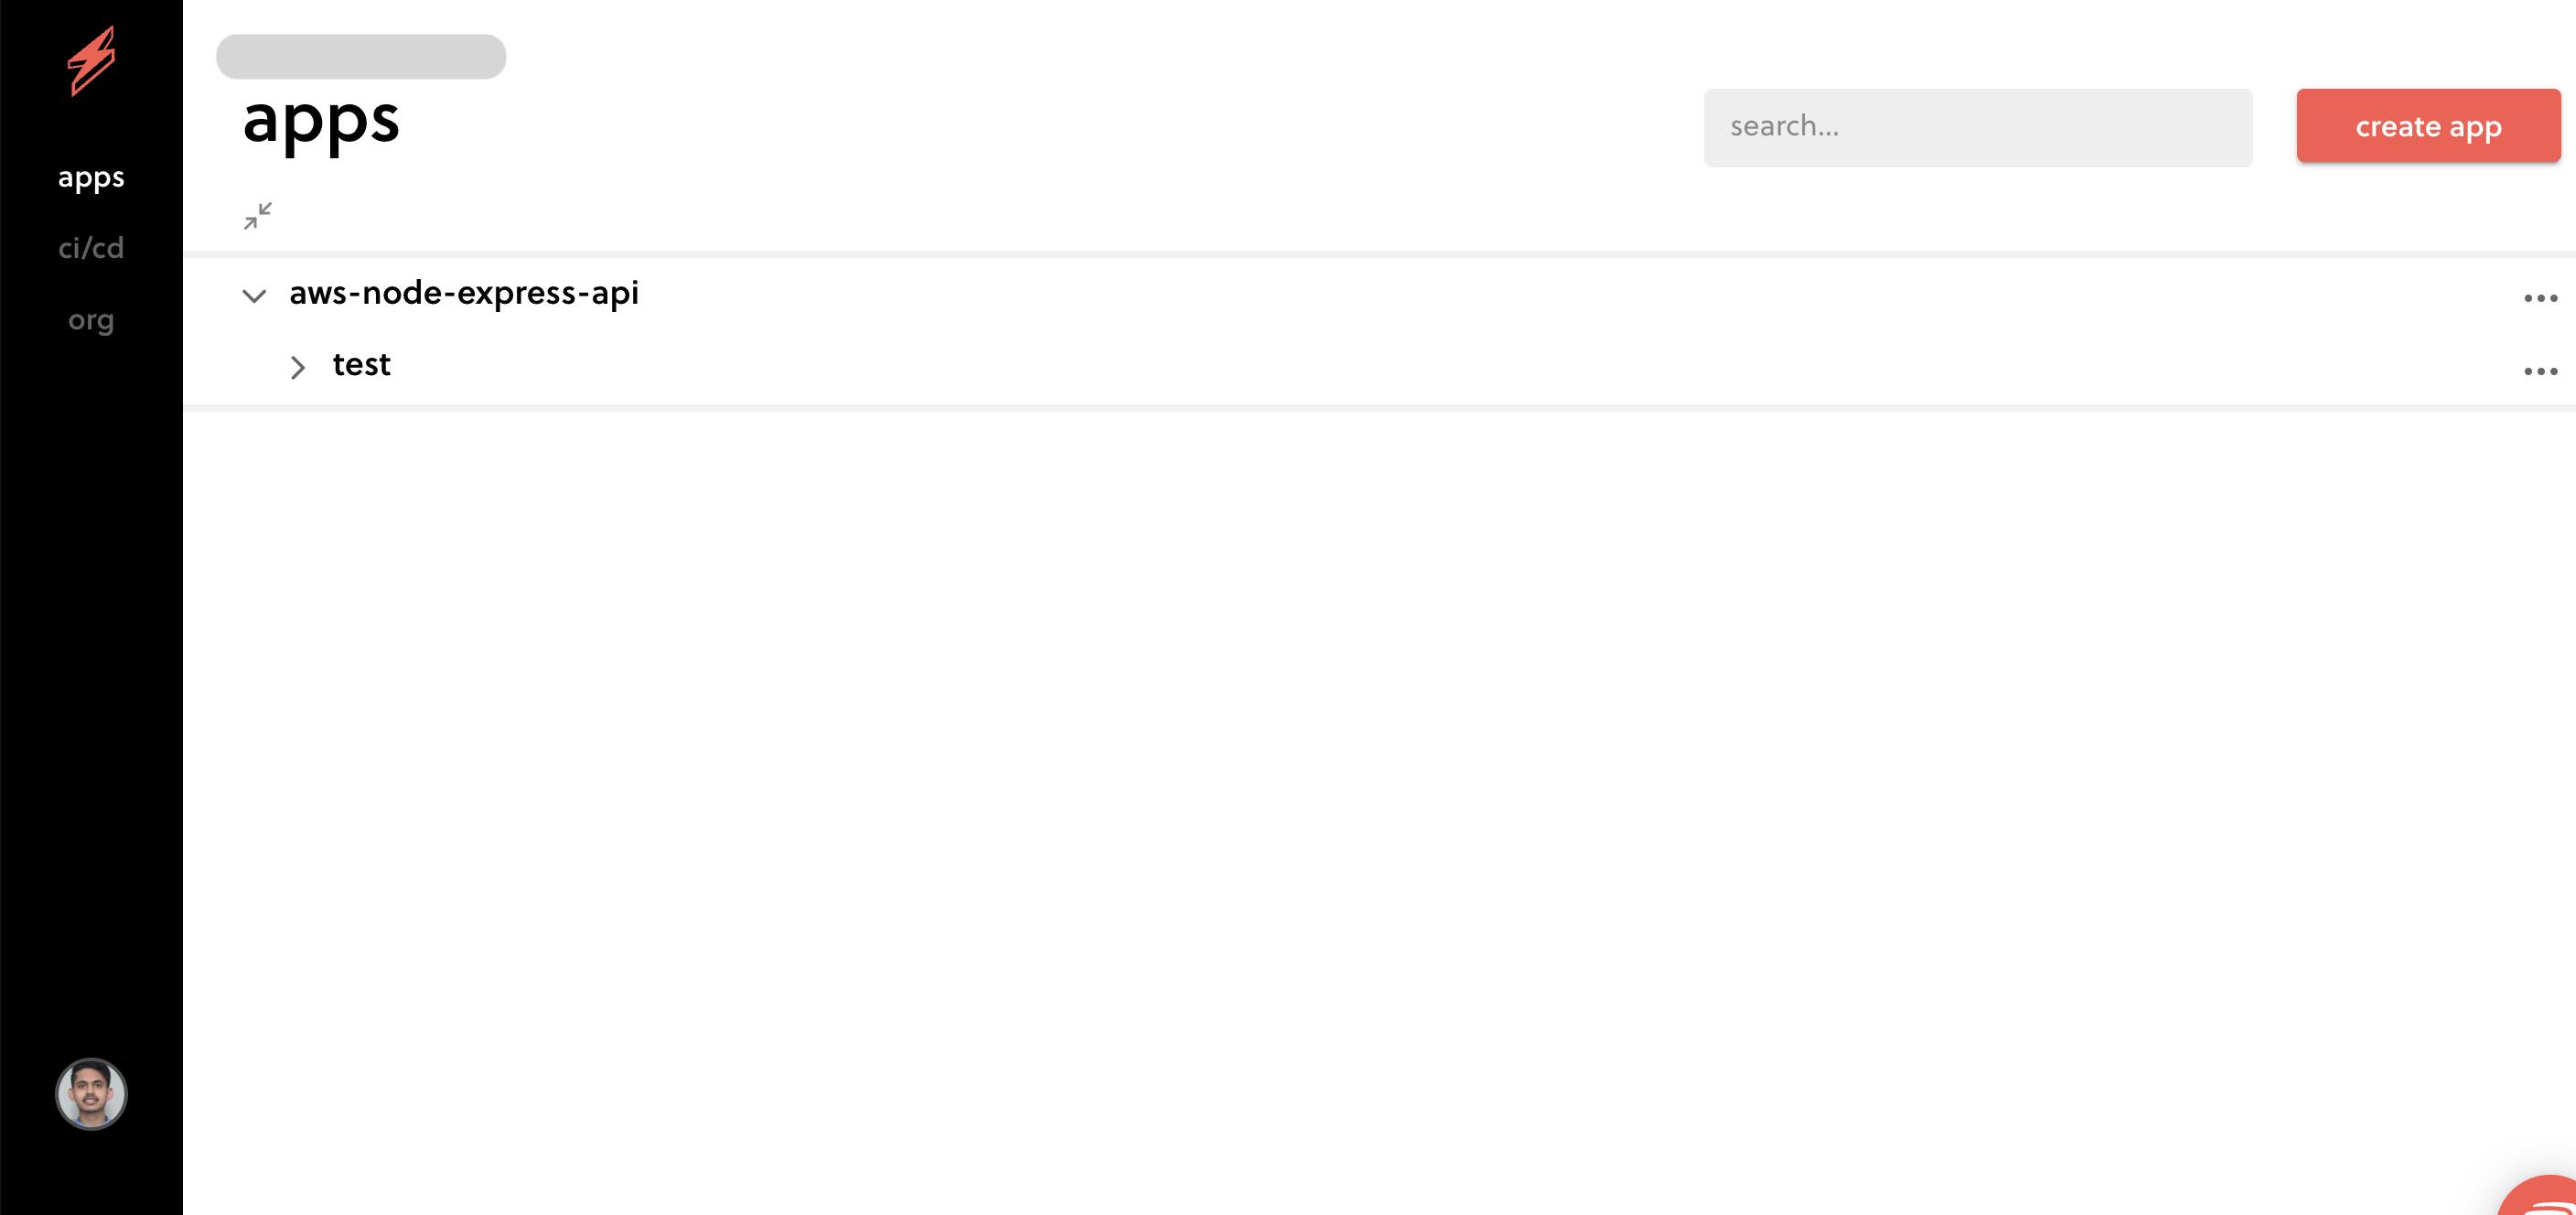
- To begin with, let us create an account on serverless.com and explore the dashboard which looks like the image given below:

If you need to access the applications that are deployed from a particular account, you can access them in the apps tab where all the information regarding the CI/CS as well as the git activity including the status and info of each deployment will be available. If you need to access the keys, providers, webhooks or billing management, you can do this in the Org tab for teams.
Click on create app to use the templates for some of the basic use cases provided by serverless.com. Here, let us choose the
node Express.js APIwidget which deploys a Node Express API which comes with the serverless framework.
You will be provided with a command that will help you to set up serverless on your server. Enter the following code snippet into your console to continue:
npm i -g serverless && serverless \
  --org=<your org> \
  --app=aws-node-express-api \
  --name=aws-node-express-api \
  --template=aws-node-express-api
Let's review the important content present in the template:
handler.js- This contains the code for the lambda function.
serverless.yml- This is the most important file as it will contain all the services that we need to deploy inside the app we just created.
- Enter the following snippet into your console for your
serverless.ymlfile: ``` org: app: aws-node-express-api service: test frameworkVersion: '3'
provider: name: aws runtime: nodejs14.x
functions: api: handler: handler.handler events:
- httpApi: '*'
- Following the above steps will help you define that AWS is the provider along with the Lambda test functions that you wish to deploy.

A comprehensive guide to writing these frameworks can be found [here.](https://www.serverless.com/framework/docs/providers/aws/guide/serverless.yml)

## Create and set up a service

- You can create a new service using [serverless cli](https://www.serverless.com/framework/docs/providers/aws/cli-reference/create) or using `*...*` beside the add app on the UI.

Just keep in mind that your service name matches the service name in the `serverless.yml` file.

- The next step is to push your code to GitHub. Here is what I have done on my code structure for the master branch which consists of the production code and the staging branch which consists of the staging code in `handler.js`. Enter the following code to run `handler.js` in the main branch:
const serverless = require("serverless-http"); const express = require("express"); const app = express();
app.get("/", (req, res, next) => { return res.status(200).json({ message: "Hello from root!", }); });
app.get("/hello", (req, res, next) => { return res.status(200).json({ message: "Hello from path!", }); });
app.get("/rdj", (req, res, next) => { return res.status(200).json({ message: "Hello from iron-man! 3000", }); });
app.use((req, res, next) => { return res.status(404).json({ error: "Not Found", }); });
module.exports.handler = serverless(app);
- Enter the following code snippet to implement an addition in `handler.js` for the staging branch:
app.get("/rdj", (req, res, next) => { return res.status(200).json({ message: "Hello from iron-man!", }); });
- The next step to go ahead with the deployment is to configure the services. Here is how you do it:

i) Create a connection with Github and add the repository that was created earlier.
ii) Create a connection with AWS by creating an `IAM` role in your AWS account with the required permissions(like Lambda functions access) and add its Access Key and Secret Key here. Here is an image for your reference:

iii) Create stage using Add Stage. (I have created add prod and stage)
iv) Add branch and stage mapping so that a particular branch is used for a particular stage/environment.
v) Enable Automatic Deploys so that it automatically deploys pull requests, so that the team can easily review deployments. Here is an image for your reference:

## Deployment
- Serverless uses [AWS Cloudformtion](https://docs.aws.amazon.com/AWSCloudFormation/latest/UserGuide/Welcome.html) to create the entire stack required for deployment. Run the following inside the path where code is present
sls deploy --stage prod sls deploy --stage stage
- If nothing is mentioned, `--stage` is taken to be `dev`. After the successful deployment of each stage, you will get an endpoint that can be hit to test the API and the stages show up on the serverless dashboard. Here is an image for your reference:

- The Lambda functions will also be up and running as shown below:

- Here is what the output for the staging endpoint will look like:

- All the deployment via CI/CD can be viewed along with the current status, as shown below:

## Auto Deployment
- The next step is to test the auto-deployment in the stage branch code:
app.get("/rdj", (req, res, next) => { return res.status(200).json({ message: "Hello from iron-man! Proof that Tony Stark has a heart!!", }); });
- Now after the deployment status shows a success message in the ci/cd tab, hit the previous endpoint again and the changes will be live as shown below:

- The next step is to merge the code into the master branch. This step is the same as moving the reviewed code to production and you simply have to merge the branches. After a successful merge, the changes will be visible on the prod code and prod endpoint.
- Click on any of the success statuses of any previous deployment on the CI/CD tab and move it to the deploy tab and click redeploy to roll back to any previous version as shown below:

## Monitoring
Apart from the Deploy tab, there are other various tabs that can be used for the monitoring of stages. Some metrics are like follows:


> Note that the metrics here are low considering this is a demo. However, it can be used as an APM for complex situations to identify bottlenecks and effective performance.
## Destroying the service
- To destroy the service, simply run:
sls remove --stage prod sls remove --stage stage ```
- This will automatically destroy all of the infrastructures that is created above.
Conclusion
Serverless uses concepts that are simple and easy to follow and they have great predefined templates which make development as well as CI/CD processes a breeze. It also offers an awesome user interface for the web and it is a very handy CLI tool which will not only make deployment easy for Lambda but the entire infrastructure. It can prove to be useful for any team be it development, IT and DevOps for CI/CD pipelines
Hope this article helps you to learn the CI/CD feature of serverless.com and it would instill in you the interest to explore the same.
Thank you !!😊😊

