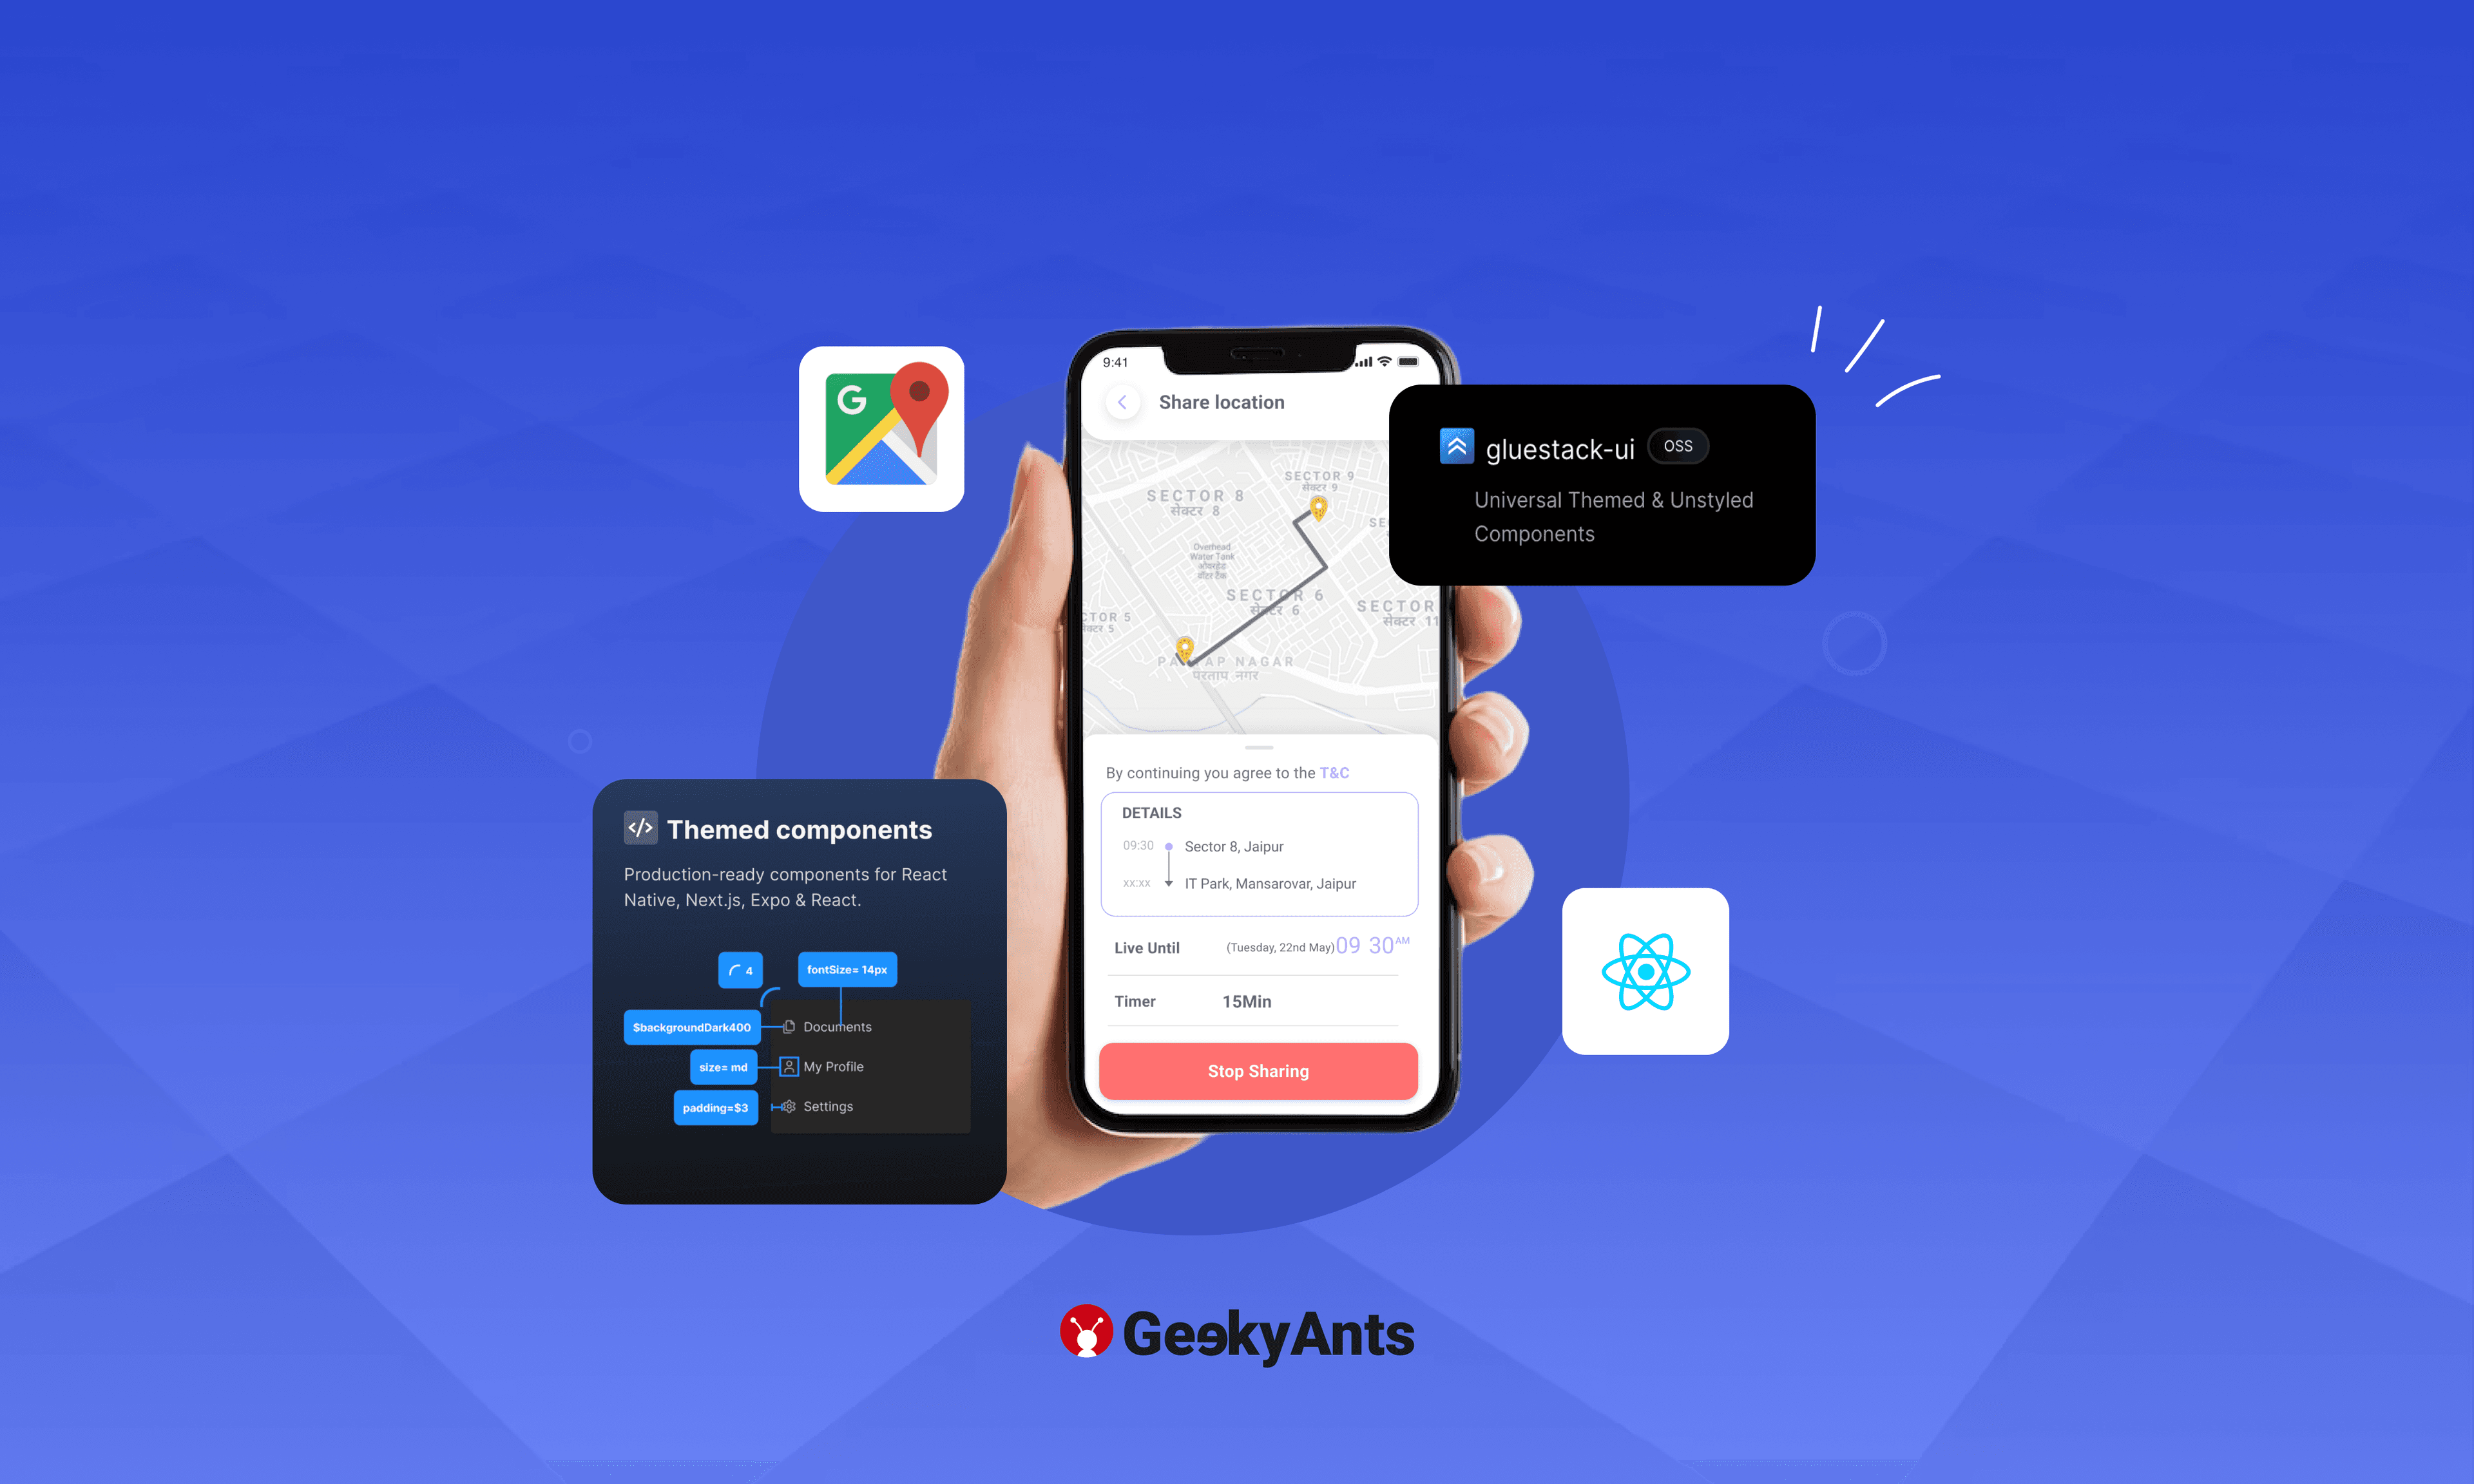
Building a Live Location Sharing and Tracking App Using gluestack-ui with Expo React Native and Google Maps API
This guide with code examples shows how to build a live location sharing & tracking app using gluestack-ui with expo React Native and Google Maps API.
In this era of technology, location-based applications have become increasingly popular. From ride-sharing services to tracking the whereabouts of your loved ones, location-sharing and tracking apps have become an indispensable part of our lives.
In this tutorial, we will walk you through the process of building a live location-sharing and tracking app using gluestack-ui with Expo React Native and Google Maps API.
Prerequisites
Before we get started, make sure you have the following prerequisites:
Node.js and npm are installed on your system.
React Native development environment set up. You can follow the official React Native documentation to set it up.
Setting up the Project
Let us start by creating a new React Native project and installing the necessary dependencies.
npm create gluestack
Select the name for the app; for this tutorial, I am going with the liveLocationApp.
cd liveLocationApp
Next, we will install the required libraries for our project. As we are using Expo, we are going to need
- Expo MapView - For more installation info, please go to docs
npx expo install react-native-maps
- Expo Locations - For more installation info, please go to docs
npx expo install expo-location
For expo-location, we need to do some configuration in your app.json/app.config.js
{
  "expo": {
    "plugins": [
      [
        "expo-location",
        {
          "locationAlwaysAndWhenInUsePermission": "Allow $(PRODUCT_NAME) to use your location."
        }
      ]
    ]
  }
}
Before working on the code, we need the Google API key to use the maps API.
Google Maps API Setup
To use Google Maps in your React Native app, you must set up a Google Cloud project and obtain an API key. Here is how to do it:
Go to the Google Cloud Console.
Create a new project or select an existing one.
Enable the "Maps JavaScript API" and "Places API" for your project.
Create an API Key for your project.
Once you have the API key, restrict it to only work with your app's domain or package name for security.
To use Google Maps on iOS devices, we need to attach the obtained API key in our app.json/app.config.js file.
"ios": {
    ...

    "config": {
        "googleMapsApiKey": "YOUR_GOOGLE_MAPS_API_KEY"
    }
}
Building the Live Location Tracking Feature
We will start by building the live location tracking feature of our app. We will create a simple UI with a map to show the user's location.
import { Box, Button, ButtonText, Text, Center } from '@gluestack-ui/themed';
import MapView, { Marker, PROVIDER_GOOGLE } from 'react-native-maps';
import { SafeAreaView, StyleSheet, TextInput} from 'react-native';
import { useEffect, useState, useContext } from 'react';
import * as Location from 'expo-location';

let foregroundSubscription: { remove: () => void; } | null = null

export default function Home()  {
  const [userLocation, setUserLocation] = useState<any>()
    const [userAddress, setUserAddress] = useState<any>()
    const [locationErrorMsg, setLocationErrorMsg] = useState('')

    // To get the user permission for the foreground location access and fetch the location
    const getUserLocation = async () => {
      const foreground = await Location.requestForegroundPermissionsAsync()
          if(!foreground.granted) {
            setLocationErrorMsg('Permission to access location was denied')
          }
      const { granted } = await Location.getForegroundPermissionsAsync()
      if(!granted) {
        setLocationErrorMsg('Location tracking denied!')
        return
      }
            // Best practice to remove the subscription before fetching it to stop already running location fetching
      foregroundSubscription?.remove()

      foregroundSubscription = await Location.watchPositionAsync(
        {
          accuracy: Location.Accuracy.BestForNavigation,
        },
        async (location) => {
          setUserLocation({
              latitude: location.coords.latitude,
              longitude: location.coords.longitude
          })
                    // To get the user address from the location coordinates
          let address = await Location.reverseGeocodeAsync({
            latitude: location.coords.latitude, longitude: location.coords.longitude
          })
          setUserAddress(address[0])
        }
      )
    }

}
Let us create a UI to display the maps and the marker for the user location.
<SafeAreaView>
      <Box>
        <MapView style={styles.map} region={{...userLocation, latitudeDelta: 0.05,
          longitudeDelta: 0.05,}} provider={PROVIDER_GOOGLE}>

          <Marker coordinate={user.locationCoords} title="You"/>
        </MapView>

          <Box bg="$white" p='$2.5' style={styles.textBox}>
          <Center>
            {userAddress ?
            <Center>
              <Text size='2xl' bold={true}>{userAddress?.name}, {userAddress.district}</Text>
            <Text size='2xl'>{userAddress?.postalCode}</Text>
            </Center> : <Text>Address Not Found</Text>
          }
          </Center>

          </Box>
      </Box>
      </SafeAreaView>
Style for the UI:
const styles = StyleSheet.create({
    container: {
      flex: 1,
      position: 'relative'
    },
    map: {
      width: '100%',
      height: '80%',
    },
    textBox: {
      height: '20%',
      display: 'flex',
      justifyContent: 'space-between',
    },
    buttonsContainer: {
      display: 'flex',
      alignItems: 'center'
    },
    textInput:{
      borderWidth:1,
      borderColor:"black",
      width:"100%",
      padding:16,
      borderRadius:4,
      flex: 1,
    },
    inputWrapper: {
      display: 'flex',
      flexDirection: 'row',
      width: '100%',
    },

  });
Building the Live Location Sharing Feature
We need a back-end for this feature. For this project, we are using the Spring Boot back-end.
We have some APIs from our backend.
Push Location - To push the user updated location to back on a specific interval.
Share Location - To share the user location on a targeted user Email.
Get Locations Shared to User - To fetch all the user lists whose locations are shared with the user (return an array of the object).
Stop Location - To stop the location sharing for the specific user by passing the targeted Email.
Now we have the user's live location when the app is in the foreground we need to pass the location to the back-end service by using the push-location API.
import axios from 'axios'

const baseUrl = 'http://103.252.242.68:3535'

const pushLocation = (token, lat, lan) => {
    const coord = JSON.stringify({
        latitude: lat,
        longitude: lan
    })
    axios.post(`${baseUrl}/live/updateLocation`, coord, {
        headers: {
            Authorization: `Bearer ${token}`,
            'Content-Type': 'application/json'
    }}).then((res) => {
        console.log(res.data, "Location Pushed")
    }).catch((err) => {
        console.log(err)
    })
}
We need to call the function in our app.tsx file inside useEffect.
const timer = null
useEffect(() => {
    timer = setInterval(() => {
      pushLocation(user.idToken, user?.locationCoords?.latitude, user?.locationCoords?.longitude)
  }, 10000)

    return () => {
      clearInterval(timer)
  }
}, [])
We are pushing the user location in every 10-second interval to the back-end.
Sharing the Location to User Email
We need to take input for the targeted user email for the user:
<Box p="$5" style={styles.buttonsContainer}>

              { isReadyToShare ?  <Box style={styles.inputWrapper}><TextInput
              style={styles.textInput}
                placeholder="enter your message here"
                value={targetedEmail}
                onChangeText={(text) => setTargetedEmail(text)}
                onSubmitEditing={handleSubmit}
            >
            </TextInput>
              <Text color="$black" size='lg' bold={true} m="$2"
              onPress={() => {
                setIsReadyToShare(false)
                setTargetedEmail('')
              }}>
                x</Text></Box> : <Button
                w="$full"
                variant="solid"
                action="primary"
                isDisabled={false}
                isFocusVisible={false}
                onPress={() => {
                  setIsReadyToShare(true)
                }}
              >
                <ButtonText>Share Location</ButtonText>
              </Button> }
          </Box>
Now call the Share Location API to start sharing the location from the back-end:
import axios from 'axios'

const baseUrl = 'http://103.252.242.68:3535'

// API CALL FOR THE SHARE LOCATION
const shareLocation = async (token, email) => {
    const targetEmail = JSON.stringify({ targetUserEmail: email });
    const { data } = await axios.post(`${baseUrl}/live/shareLocation`,
            targetEmail,
            {
            headers: {
                Authorization: `Bearer ${token}`,
                'Content-Type': 'application/json'
        }
    })
    return data
}
const handleSubmit = async () => {
      const res = await shareLocation(user.idToken, targetedEmail)
      if(res.status === 'success') {
        const sharedList = await getAllSharedLoctionByUser(user.idToken)
        setAllSharedLocations(sharedList)
      alert(`Your live location is shared with ${targetedEmail}.`)
      setTargetedEmail('')
      setIsShared(true)
      setIsReadyToShare(false)
      }

    }
Now, as we are done with the sharing part, we have to check for any location that is shared with us. We will call the API Get Location shared with the User to get the array of the shared location. To listen to the live location of other users, we need to implement the web-socket for real-time update. For this, we are using sockjs-client and stopmjs. We need to install this package:
npm install sockjs-client
npm install stompjs
Now we have to fetch the list of the shared location to you.
import axios from 'axios'

const baseUrl = 'http://103.252.242.68:3535'

const getAllSharedLoctionToUser = async(token) => {
    let {data} = await axios.get(`${baseUrl}/live/getLocationsSharedToUser`, {
        headers: {
            Authorization: `Bearer ${token}`
        }
    })
    return data
}
After getting the list, we have to start the socket and subscribe for their location.
import SockJs from 'sockjs-client'
import { over } from "stompjs";

const allRecievedLocation = await getAllSharedLoctionToUser(user.idToken)
const socket = new SockJs("http://13.232.18.102:8080/v1")
const stompClient = over(socket)
stompClient.connect({}, onConnected, onError);
    function onConnected() {
        console.log("Connected to WebSocket")
        allRecievedLocation.forEach((element: any) => {
          console.log(element.sourceUser)
          let data = stompClient.subscribe(
            `/socket/${element.sourceUser}`,
            onMessageReceived
            )

        });
      }
      function onError(error:any) {
        console.log("Error while connecting to WebSocket: ", error)
      }
      function onMessageReceived (message: any) {
        console.log("Received message: ", JSON.parse(message.body))
        const obj = JSON.parse(message.body)
        setAllRecievedLocations((prev : Object) => ({
          ...prev,
          [obj.email]: {
            latitude: obj.latitude,
            longitude: obj.longitude
          }
        }))
        console.log(allRecievedLocations)
 }
To display the marker for every user we need to loop through the list allRecievedLocations.
<MapView style={styles.map} region={{...userLocations, latitudeDelta: 0.05,
          longitudeDelta: 0.05,}} provider={PROVIDER_GOOGLE}>

          <Marker coordinate={user.locationCoords} title="You"/>
          {
            allRecievedLocations && Object.keys(allRecievedLocations)?.length > 0 &&  Object.keys(allRecievedLocations)?.map((item: any) => {
              return <Marker coordinate={allRecievedLocations[item]} key={item} title={item}/>
            })
          }
</MapView>
Check out the output for the app here.
For full source code please visit GitHub.
Summing Up
We hope this tutorial equips you with the knowledge and skills to create a powerful live location-sharing and tracking app, opening up possibilities for a wide range of applications in today's technology-driven world.
For more experiments, follow us on Twitter @geekyantslabs.
This article was written by Shivansh Tiwari, Software Engineer - III, for the GeekyAnts blog.