Getting Started With Serverless.com
An introduction to getting started with serverless.com
What is the serverless concept?
Serverless computing is a cloud-native development model that allows developers to build and run applications without having to manage servers. There will still be servers in the serverless model, but they are abstracted away from app development. In short, developers only have to care about application development rather than having to think about the servers and the load management that need to be carried out during high traffic.
Lambda in AWS is a perfect example of the serverless model. It is a computing service that runs code in response to events and automatically manages the computing resources required by that code.
What is serverless.com?
Serverless.com is an all-in-one development and monitoring method of auto-scaling apps on AWS Lambda. It handles everything right from deploying lambda functions in different environments(dev, staging, prod) to completely handling automation of CI/CD pipelines and subsequent monitoring of the deployed functions.
The dashboard it hosts allows you to import existing projects using predefined templates, track performance, troubleshooting, configuring CI/CD and deployment policies to achieve an end-to-end serverless application lifecycle management.
I have written a separate article covering the CI/CD part of the functions which you can refer to later
About this article
This article will help you to get started with serverless.com. We implement basic use cases here:
i) Deploying Lambda functions ii) Basic S3 setup and upload iii) Lambda S3 trigger iii) Http API
After having done this, you will understand the basics of serverless.com using which you cam implement further services.
Prerequisites
Here are the prerequisites you need to work with the serverless model:
- Knowing the basic workaround of AWS
- Basic knowledge of writing Lambda functions
- Knowing the use of S3 and DynamoDB
- A server that has been installed with Node.js
So let us get started.
Setting up of the serverless system and establishing a connection with AWS
- The installation process is fairly simple. Run the following code to proceed:
npm install -g serverless For AWS connection, create an IAM user with the required access (I have provided
AdministratorAccessto avoid the breaking of any flow for this demo). Store theAccessKeyandSecretKeywhich will be used later. Run the following command to proceed:serverless config credentials --provider aws --key <access_key> --secret <secret_key> --profile serverlessThis command created an AWS connection and creates a serverless profile under which further deployment will take place. Enter the following snippet into your console:
✔ Profile "serverless" has been configured
Lambda Function
AWS Lambda is a serverless computing service that runs your code in response to events and automatically manages the underlying compute resources for you. Lambda is the core of AWS infrastructure. Run the following command to go ahead:
serverless create --template aws-nodejs --path serverlessDemoHere is what the output of the success message will look like:
✔ Project sucessfully created in "serverlessDemo" from "aws-nodejs" template (4s)
- Here, we will be using templates provide by serverless.com. It provides a basic
handler.jsfile with the Lambda code and aserverless.ymlfile which will contain the information about the services to be deployed under theserverlessDemo. You can use your own existing project but should have configured theserverless.ymlfile.
- Before proceeding, let us discuss the important parameters of
serverless.yml. A comprehensive guide to writing these can be found here. Run the following code to proceed:
service: serverlessdemo

provider:
  name: aws
  runtime: nodejs12.x
  profile: serverless

functions:
  hello:
    handler: handler.hello
Here, we will define the service name for this serverless demo. We will also mention the provider which is AWS in this scenario. The runtime here is established using Node.js as the template used here was made out of the same. We will also mention the profile that we created earlier under which the development will take place and assign the
ymlfile to point to and use thehellofunction inhandler.js.
To deploy the function serverless, simply run the following code:
sls deployCheck the AWS console after some time as it takes a little time to configure the settings that we have implemented. Serverless uses AWS Cloudforamtion to create the entire stack required for deployment. Here's a depiction of what this will look like:

S3
To carry out the s3 upload, we need to install a package. Run the following snippet to continue:
npm install --save serverless-s3-syncCreate a folder called
localDirwith certain objects inside of it which will be uploaded. Run the following snippet to provide an addition toserverless.yml:
plugins:
  - serverless-s3-sync

custom:
  s3Sync:
    - bucketName:<unique_bucket_name>
      localDir: localDir

resources:
  Resources:
    AssetsBucket:
      Type: AWS::S3::Bucket
      Properties:
        BucketName: <unique_bucket_name>
First, we will mention the resource that we need to create. The only thing that we need to keep in mind is a unique worldwide name for the s3 bucket. Then, we create a package to inform serverless to use the installed package/plugin and finally the path of data to be uploaded is mentioned in the custom field of the
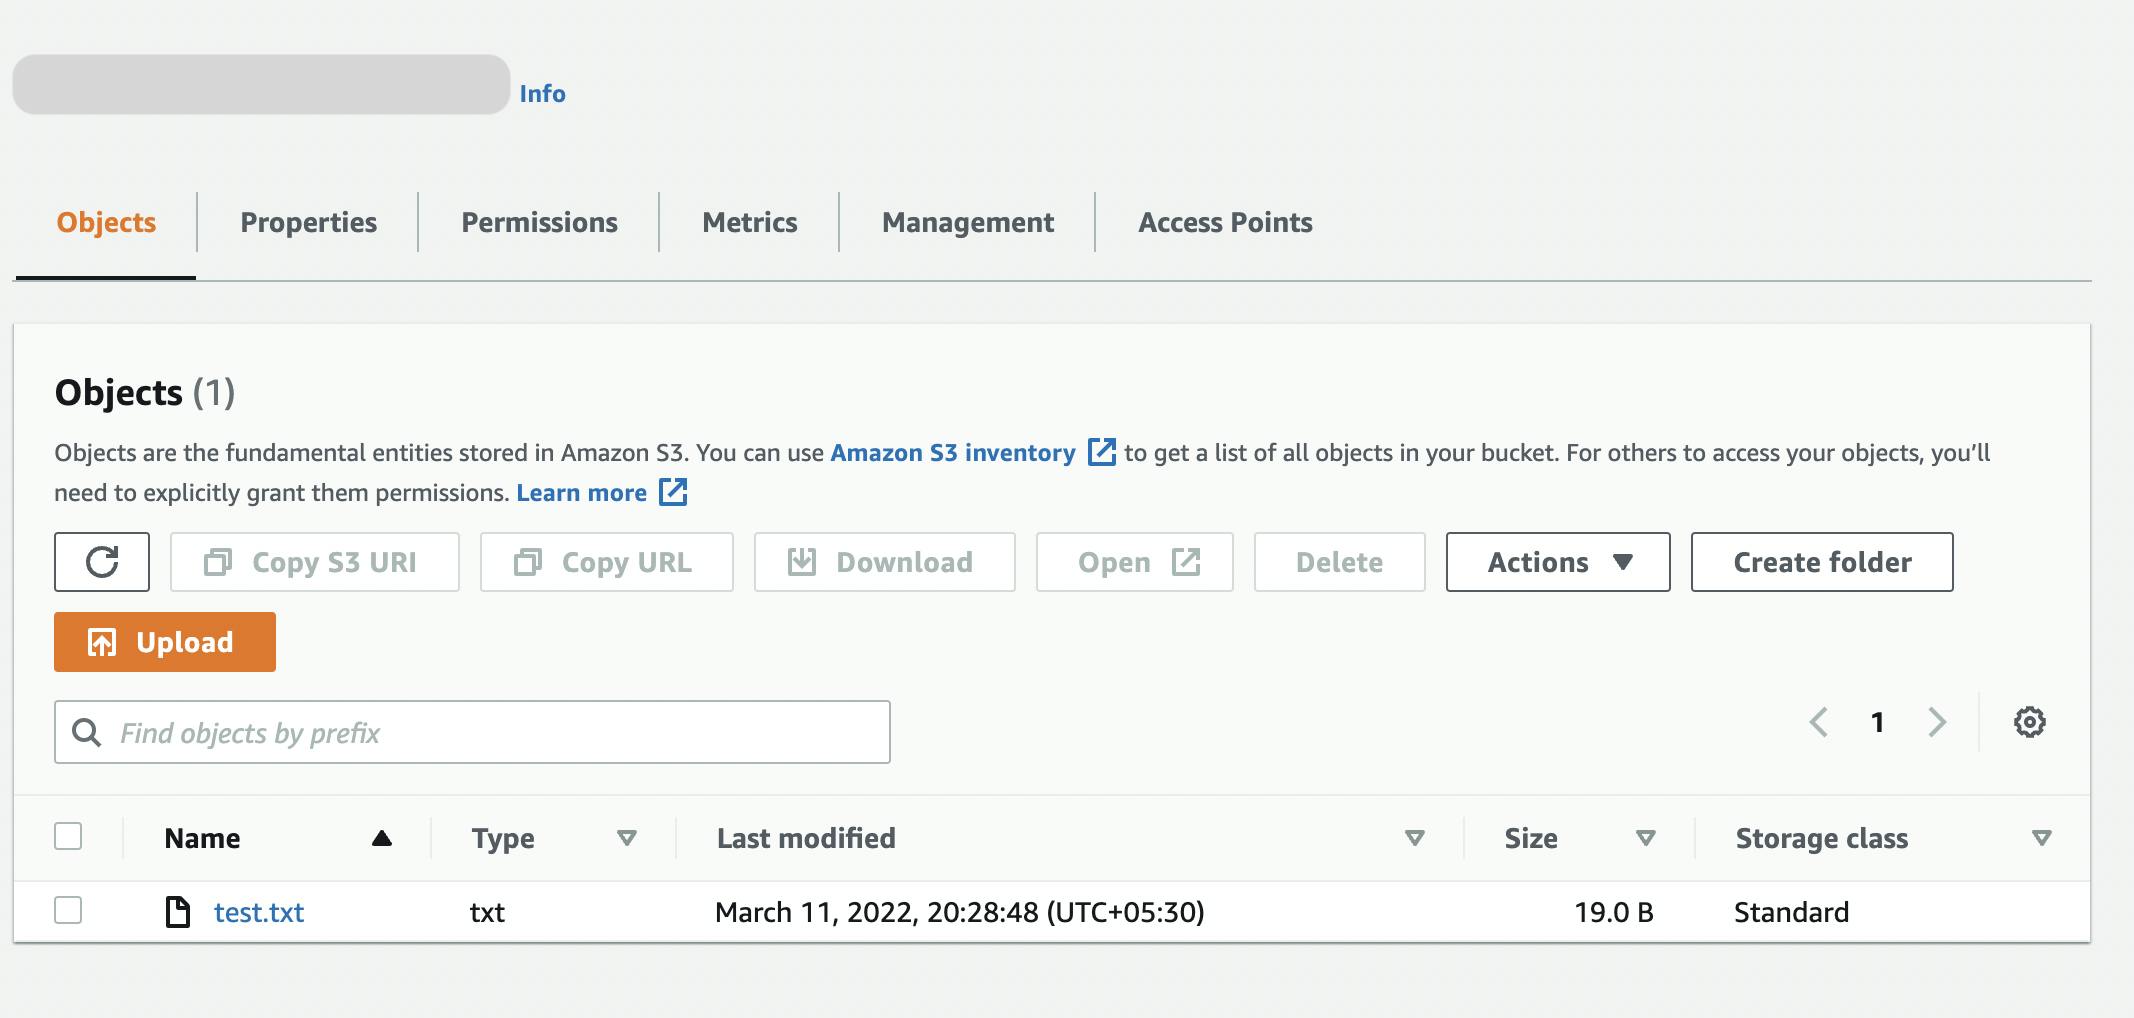
.ymlfile. You can add various fields like ACLs, bucket tags etc. Find the documentation here. Run the following code snippet to go ahead:sls deployHere is a pictorial depiction of the results:

Lambda S3 trigger
- In this segment, we will add the following code snippet to
serverless.ymland trigger any lambda function based on the operations (In this case, the object creation and deletion) carried out on any s3 bucket. Enter the following snippet into your console:
functions:
  users:
    handler: handler.hello
    events:
      - s3:
          bucket: <bucket_name>
          event: s3:ObjectCreated:*
      - s3:
          bucket: <bucket_name>
          event: s3:ObjectRemoved:*
Http API
- In this segment, we will try to deploy a simple HTTP API using serverless.com. Install the following dependencies
npm i serverless-http express
- Install the dependencies for the
HTTP.jsfile using the code given below: ``` const serverless = require("serverless-http"); const express = require("express"); const app = express();
app.get("/", (req, res, next) => { return res.status(200).json({ message: "Hello from root!", }); });
app.get("/blog", (req, res, next) => { return res.status(200).json({ message: "Welcome to the blog!", }); });
app.use((req, res, next) => { return res.status(404).json({ error: "Not Found", }); });
module.exports.api = serverless(app);
- Include an addition to the function field in `serverless.yml` using the following code snippet:
functions: hello: handler: handler.hello api: handler: http.api events:
- httpApi: '*'
- Now run the snippet given below to achieve the desired results:
sls deploy
- You will get an endpoint as an output on following the aforementioned steps. Hit the endpoints to get the required output from the APIs which will look like the images given below:


To destroy all the created sources, run the following snippet:
sls remove ```
Note: Whenever making any changes to
serverless.yml,slsis smart enough to carry out the changes that were made.
Other major services supported by serverless.com are -
- DynamoDB
- API Gateway
- SES, SQS, SNS
- IAM Assume Role
- Application LoadBalancer and many more
Conclusion
What makes the serverless method of computing highly advantageous is because it is very quick and easy to deploy and it covers the deployment many services offered by AWS as well. It can be quite useful for any team, be it development, IT or DevOps being a very handy CLI tool. I would insist that you give it a try and explore its features further. I will also write a follow-up article on the same that will cover the CI/CD and monitoring features of serverless.com
So stay tuned and Happy Learning !! 😊😊✌🏻

