GetX For Flutter Applications: Dependency Injections
A trident package to manage all states, routes and dependencies on Flutter applications
In the previous part of this series, we went through various state management techniques for GetX while exploring the many ways to implementing them. Now, we are going to learn more about implementation of GetX dependency injection for Flutter applications in this short read up. GetX facilitates a simple and an easy-to-implement approach for creating instances by wrapping them up to their respective class. You can refer the previous article here .
What Is Dependency Injection ?
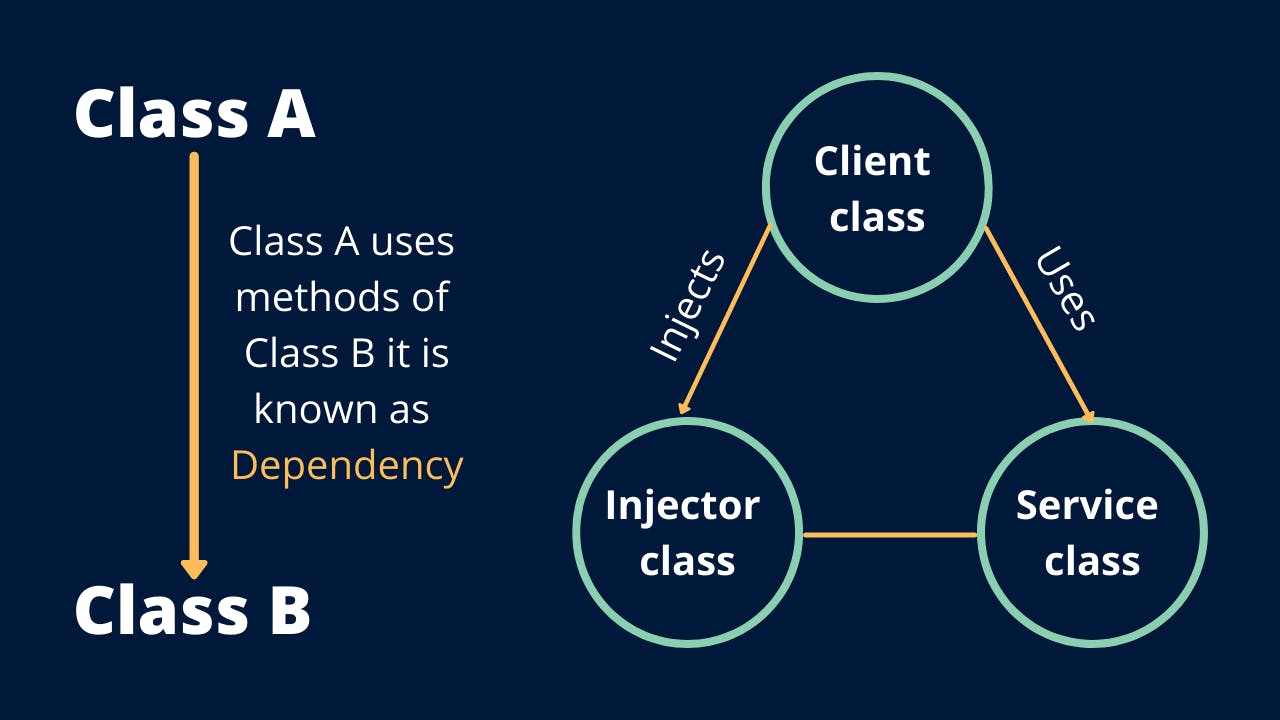
It is imperative to follow the best possible practices when building up a production level application in order to make the application more powerful and stable; dependency injections are one of the techniques which can be used to achieve this. Simply put, a dependency injection is a way to inject an instance of one class into another. It also offers shared instances which are highly helpful in state management by organising the code at a higher level. A pictorial representation is given below for your understanding:

Fallbacks of the constructor injection technique:
It is difficult to pass constructor down the multiple widgets.
Difficult to create shared instances.
Why Dependency Injection ?
- To reduce coupling between classes thus achieving greater reusability of code.
- To create class independent of its dependencies.
- It also reduces the risk that you have to change a class just because one of its dependencies changed.
Some Commonly Used Dependency Injection Technique:
- The basic approach which we follow in order to inject dependencies by using constructors.
- Inherited Injection which is a class that should extend from inherited widgets. (But passing objects without context becomes complex in this technique)
- Use the code given below to see an example of a constructor injection:
Class ScreenA extends StatelessWidget
{
   // Create a variable of controller type
   Controller firstValue;
  // Inject controller dependency
   ScreenA({this.firstValue});
}
Class ScreenB extends StatelessWidget
{
  // Contructor Instance
  Controller secondValue = Controller();
   {
   // Instance of controller passed
   return(ScreenA(controller:secondValue));
   }
}
Dependency Injection Through GetX
Step 1 : Install the get_it package.
Step 2: Next, create a locator.dart file using the code given below:
import 'package:get_it/get_it.dart';
GetIt locator = GetIt();
void setupLocator()
{
 // your code goes here
}
Step 3: To proceed, import the locator in the main.dart file using the code given below:
void main()
{
setupLocator();
runApp(MyApp());
}
Step 4: Using get_it class types can be registered in two ways for creating locators. This are explained in depth below:
Factory: When you request an instance of from this class type from the service provider, you will get a new instance every time that the request is processed. This method is good for registering view models that need to run the same logic on start or the models which have to be new when the view is opened.
Singleton: This method can further be be registered in two ways: Provide an implementation upon registration or provide a lama that will be invoked the very first time your instance is requested. The locator keeps a single instance of your registered type and will always return that instance when this method is called.
Step 5: Next, add a locator.dart file or register your classes using the code given below:
import 'package:get_it/get_it.dart'
// Create instance for get_it
GetIt locator = GetIt();
void setupLocator()
{
// register or add your class
locator.registerFactory(()=>AppInfo());
}
}
Step 6: Next, add injectors or locators to the application screens using the code given below:
var appInfo = locator<AppInfo>();
Additional Methods
1. Get.put
When this method is used, the dependency will load immediately and can be used directly by implementing the code given below:
class FirstScreen extends StatelessWidget
{
  // Controller dependency injected
  Controller controller = Get.put(Controller());

  @override
  Widget build(BuildContext context)
  {
    // It can be used directly
    return Text(controller.name);
  }
}
2. Get.find
We can also use the Get.find tag property in case of multiple shared instances which need to be updated individually. Use the code mentioned below to achieve this:
class ScreenOne extends StatelessWidget {

  Controller controllerOne = Get.put(Controller(), tag: 'tagOne');
  Controller controllerTwo = Get.put(Controller(), tag: 'tagTwo');

}

class ScreenTwo extends StatelessWidget {

  Controller controllerOne = Get.find(tag: 'tagOne');
  Controller controllerTwo = Get.find(tag: 'tagTwo');

}
The dependencies will be deleted if the route using Get.put is removed from the navigation stack. Hence, we need to prevent this and keep the dependencies in the internal memory for the entire app session using permanent properties as shown below:
Get.put(Controller(), permanent: true);
Advantages Of GetX Dependency Injection Techniques:
- Injection is available globally.
- Instance tracking is automatic in this technique.
- It is possible to register against interfaces.
- We can implement the compact setup code.
Disadvantages Of GetX Dependency Injection Techniques:
- Disposing is not a top priority of dependency injection techniques.
- It follows loose coding guidelines which make development difficult.
- It is a global object which makes things a bit complicated.
Conclusion
In this article, we have gone through the implementation of GetX dependency injection techniques. This technique offers an efficient and steady way for managing dependency injection. Hope this article has made the topic more comprehensive for you.
Thank you so much for reading! You can read more about the topic in the links given below:

