

Give Your React-Native App a dynamic App Icon
Setting up a dynamic app icon for react native application using react-native-change-icon

Search for a command to run...
Setting up a dynamic app icon for react native application using react-native-change-icon
awesome
Thanks :) Abhinav Patel
Discover how neo-brutalism is shaping 2026 design trends. See how anti-design principles can create distinct, usable, and memorable product experiences.

When code breaks a pipeline, developers have to stop working and figure out why. This blog shows how an AI agent reads the error, finds the fix, and submits it for review all on its own.

GeekyAnts built a 5-agent fraud detection pipeline that makes decisions in under 200ms — 15x cheaper than single-model systems, with full explainability built in.

A deep dive into how GeekyAnts built a real-time AI fraud detection system that evaluates transactions in milliseconds using a hybrid multi-agent approach.

A deep dive into how GeekyAnts built an AI-powered Code Healer that analyzes CI/CD failures, summarizes logs, and generates code-level fixes to keep development moving.

GeekyAnts Tech Blog
347 posts
GeekyAnts is an AI-powered digital product engineering and consulting company helping startups, enterprises, and Fortune 500 brands build scalable, future-ready digital solutions. Since 2006, we have delivered 800+ successful projects for 550+ global clients across healthcare, BFSI, retail, logistics, education, and enterprise technology. We help businesses accelerate digital transformation through strategy, design, engineering, and AI-led innovation.
Today, many apps change their app icons programmatically from within the app. This adds to their interactive UI and helps enhance user experience.

In this blog, we'll try to change the app icon on the fly easily using this awesome npm package - react-native-change-icon.
You don't need to worry about the native code for changing the app icon as react-native-change-icon handles all of that for you.
Run this command in your CLI inside your project directory : npm i react-native-change-icon or yarn add react-native-change-icon
Go to appicon.co to generate your app icons by uploading a 1024x1024 resolution image.

Just like above, you can create your other app icons as well.
Note: icon names must contain only lowercase a-z*.*
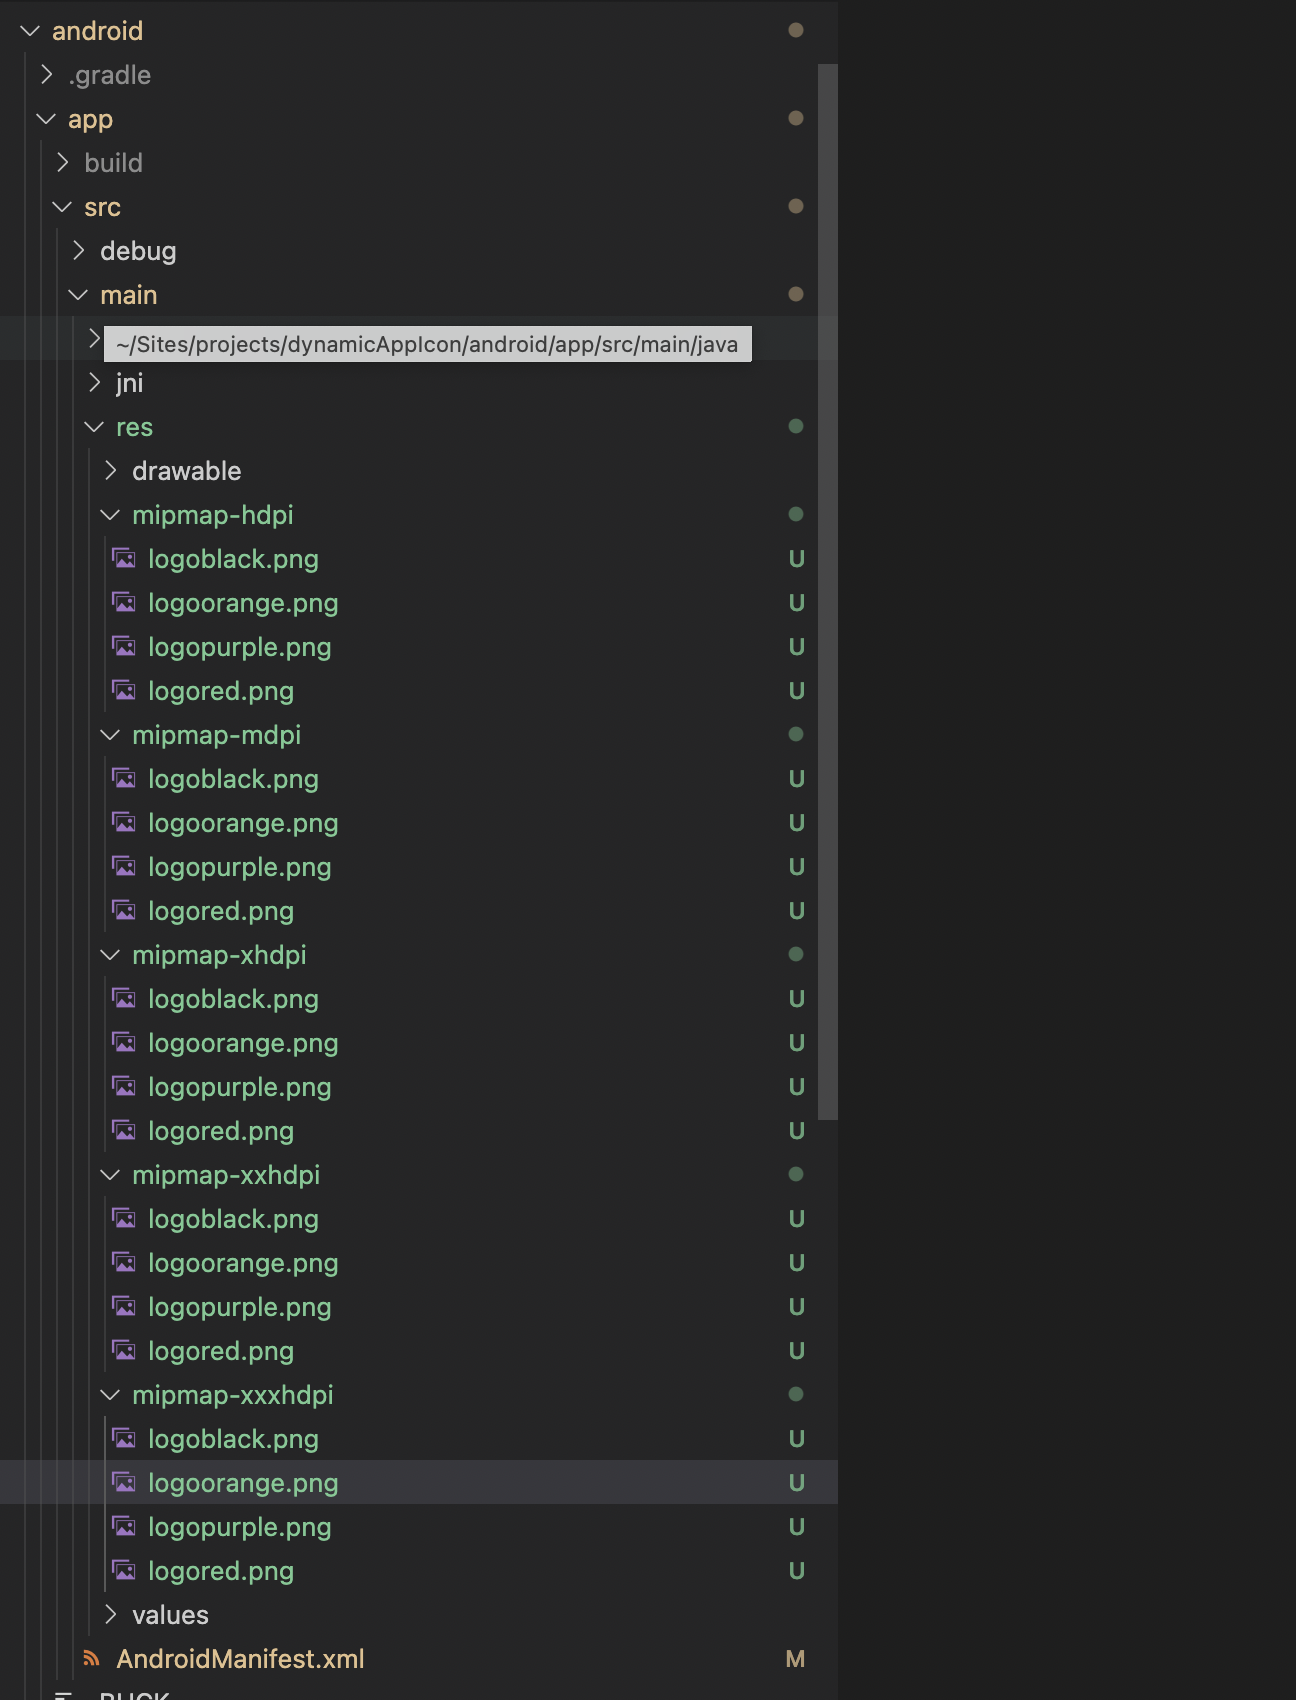
android ->app -> src -> main -> res -> mipmap-* directories: and add all the icons you need.Once you are done adding the icons, your folder will look similar to this.
AndroidManifest.xml fileFor each of your app icon, you'll be adding an activity-alias like this.
<activity-alias
            android:name="com.dynamicappicon.MainActivitylogored"
            android:enabled="true"
            android:exported="true"
            android:icon="@mipmap/logored"
            android:targetActivity=".MainActivity">
            <intent-filter>
                <action android:name="android.intent.action.MAIN" />
                <category android:name="android.intent.category.LAUNCHER" />
            </intent-filter>
        </activity-alias>
name in this should be the package + MainActivity + {icon name}.
In the end, your AndroidManifest.xml file will look like this:
<manifest xmlns:android="http://schemas.android.com/apk/res/android"
    package="com.dynamicappicon">

    <uses-permission android:name="android.permission.INTERNET" />

    <application
        android:name=".MainApplication"
        android:label="@string/app_name"
        android:icon="@mipmap/logored"
        android:allowBackup="false"
        android:theme="@style/AppTheme">
        <activity
    android:name=".MainActivity" />
        <activity-alias
            android:name="com.dynamicappicon.MainActivitylogored"
            android:enabled="true"
            android:exported="true"
            android:icon="@mipmap/logored"
            android:targetActivity=".MainActivity">
            <intent-filter>
                <action android:name="android.intent.action.MAIN" />
                <category android:name="android.intent.category.LAUNCHER" />
            </intent-filter>
        </activity-alias>
        <activity-alias
            android:name="com.dynamicappicon.MainActivitylogoblack"
            android:enabled="false"
            android:exported="true"
            android:icon="@mipmap/logoblack"
            android:targetActivity=".MainActivity">
            <intent-filter>
                <action android:name="android.intent.action.MAIN" />
                <category android:name="android.intent.category.LAUNCHER" />
            </intent-filter>
        </activity-alias>
    </application>
</manifest>
You can create more <activity-alias> tags to make more alternate icons.
First, go to the ios/ folder and do pod install.
Open your app in Xcode and add an AppIcons group to your app.
Add all your 120x120 resolution image as image@2x.png and 180x180 resolution image as image@3x.png.
Open the Info.plist file.
Add Icon files (iOS 5) to the Information Property List.
Add CFBundleAlternateIcons as a dictionary to the Icon files (iOS 5) as it is used for the alternative icons.
Add dictionaries under CFBundleAlternateIcons named as your icon names in the AppIcons group.
For each dictionary, these two properties UIPrerenderedIcon and CFBundleIconFiles need to be configured.
Set the type of UIPrerenderedIcon to String and its value to NO.
Set the type of CFBundleIconFiles to Arrayand set its first key,Item 0toString` with the value of the icon name.
set the default icon name in Primary Icon and Newsstand Icon -> Icon files -> Item 0.
Here's how:
In the end, your Info.plist icon changes will look like this:
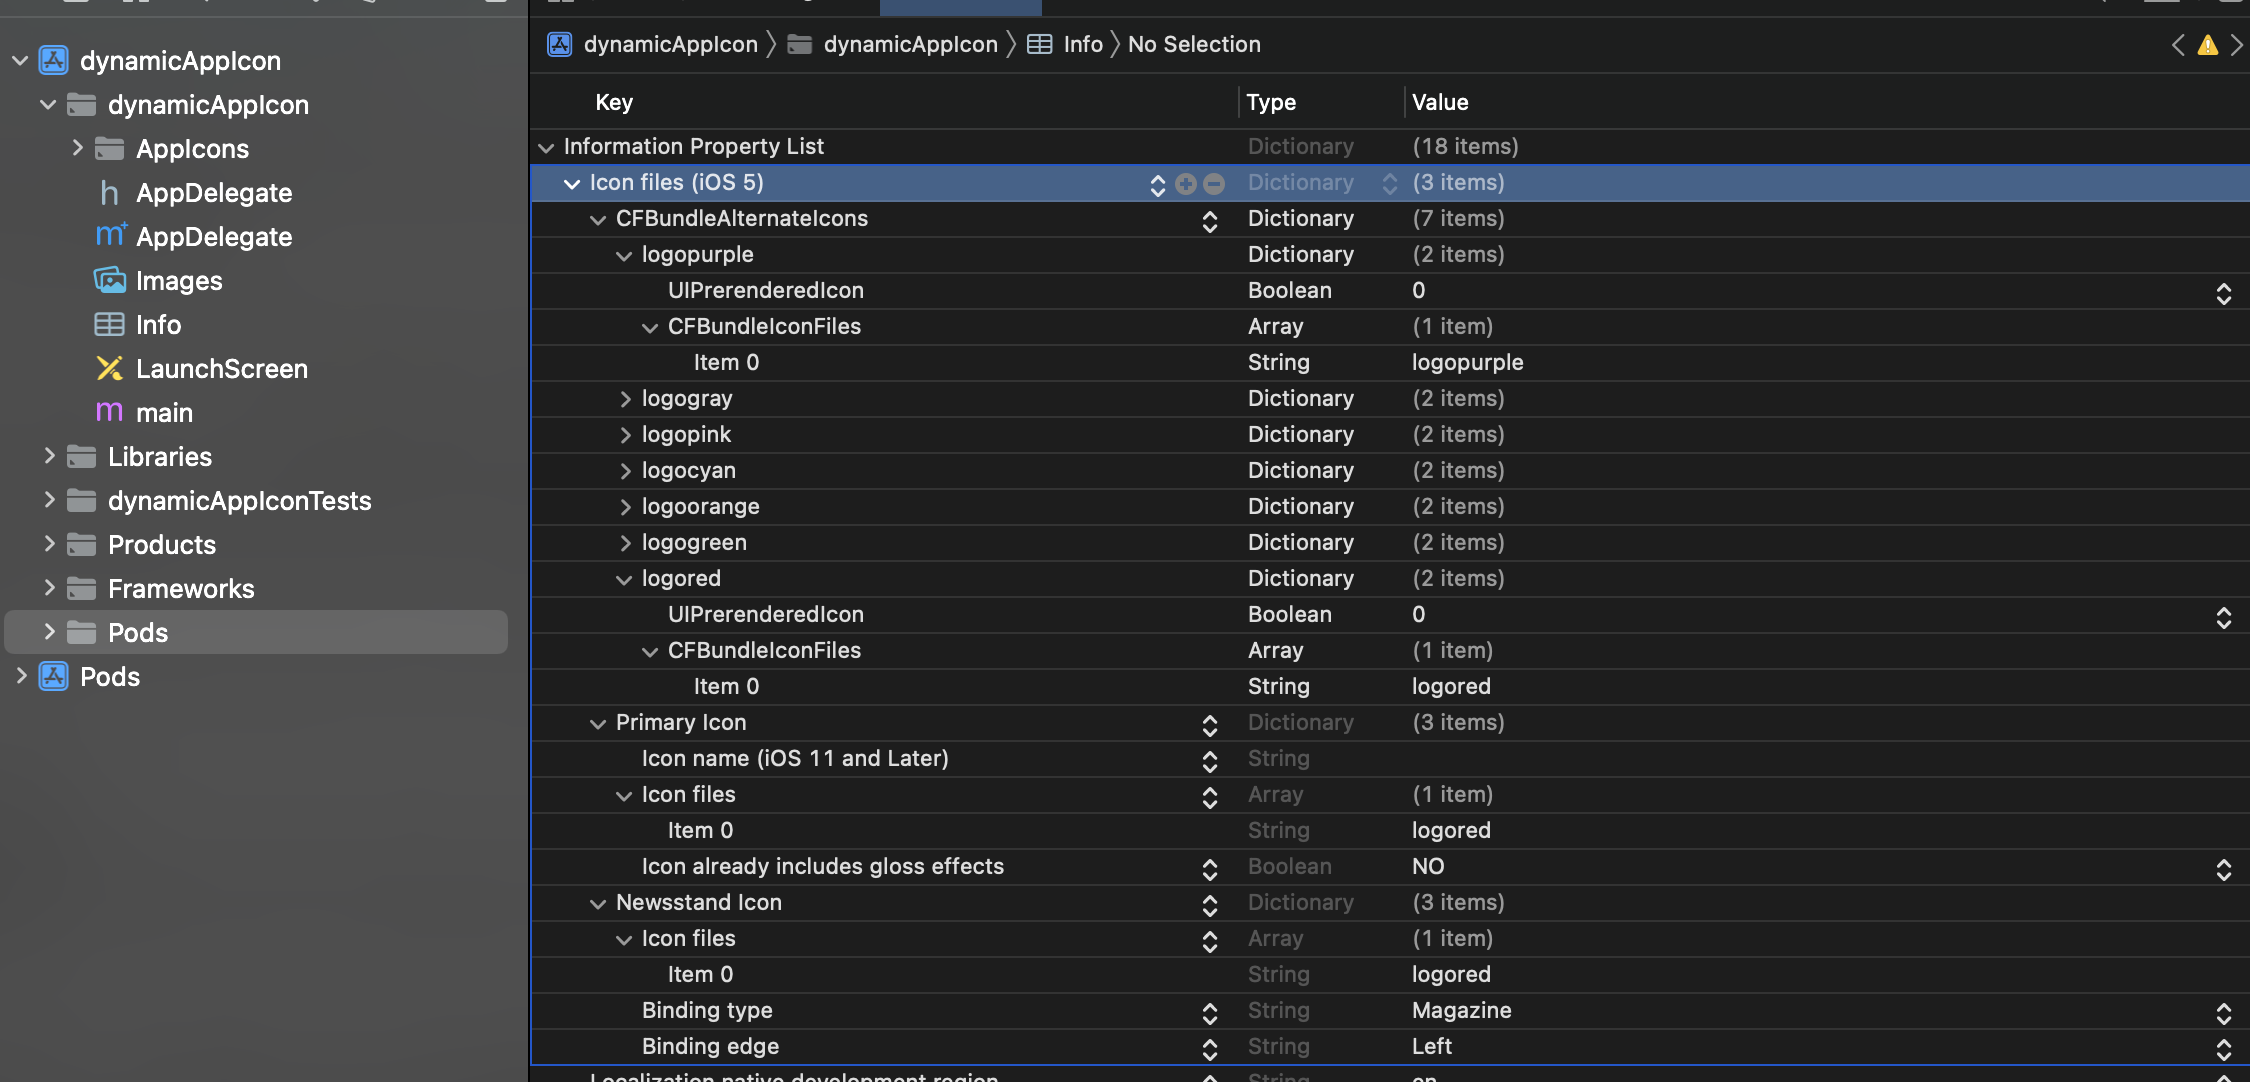
Use the following code:
import { changeIcon, getIcon } from 'react-native-change-icon';

changeIcon('iconname');        // pass the icon name to change the icon

getIcon();                     // to get the currently active icon
We discussed how to change app icons dynamically in react-native without worrying about native code implementation.

Feel free to check out the working example.
I hope this article helped you to learn something new! Please share your thoughts in the comment box.
Happy Learning!! 🙂