Integrating Riverpod For State Management In Flutter
Learn how to integrate Riverpod, a superior state management tool into your Flutter applications
Introduction
In this article we are going to learn the basics of using Riverpod as a tool for state management. Riverpod is a package written by the same author who wrote the providers package. This article will give you an understanding of the advantages of using Riverpod over providers.
What is Riverpod?
Essentially, Riverpod is an upgraded version of a provider. It has the following advantages over its predecessor:
- It catches programming errors at compile time as opposed to the runtime.
- Makes sure that listening/combining objects do not require nesting.
- It ensures that the code is testable
- The code becomes less nested in a Provider's package. This is because we had to create an object for every Provider when wrapping with
MultiProvidersin the main app itself. This is eradicated when using Riverpod.
Prerequisites
This article requires the reader to have a basic knowledge of Providers
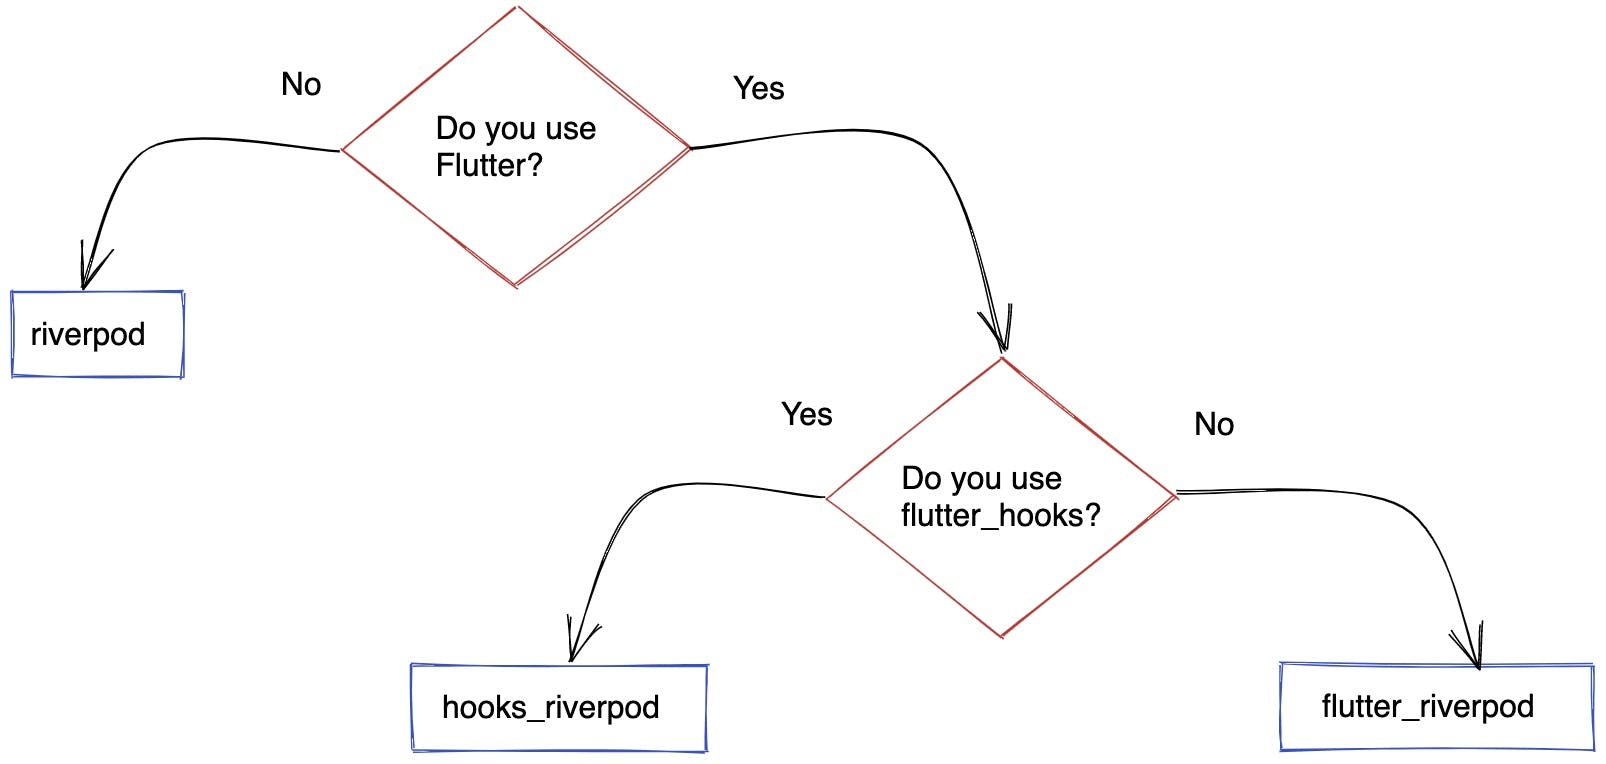
How to choose Riverpod?

Since I am using Flutter instead of Hooks, we would be addressing flutter_riverpod in this segment.
Integrating Riverpod on a movie review app
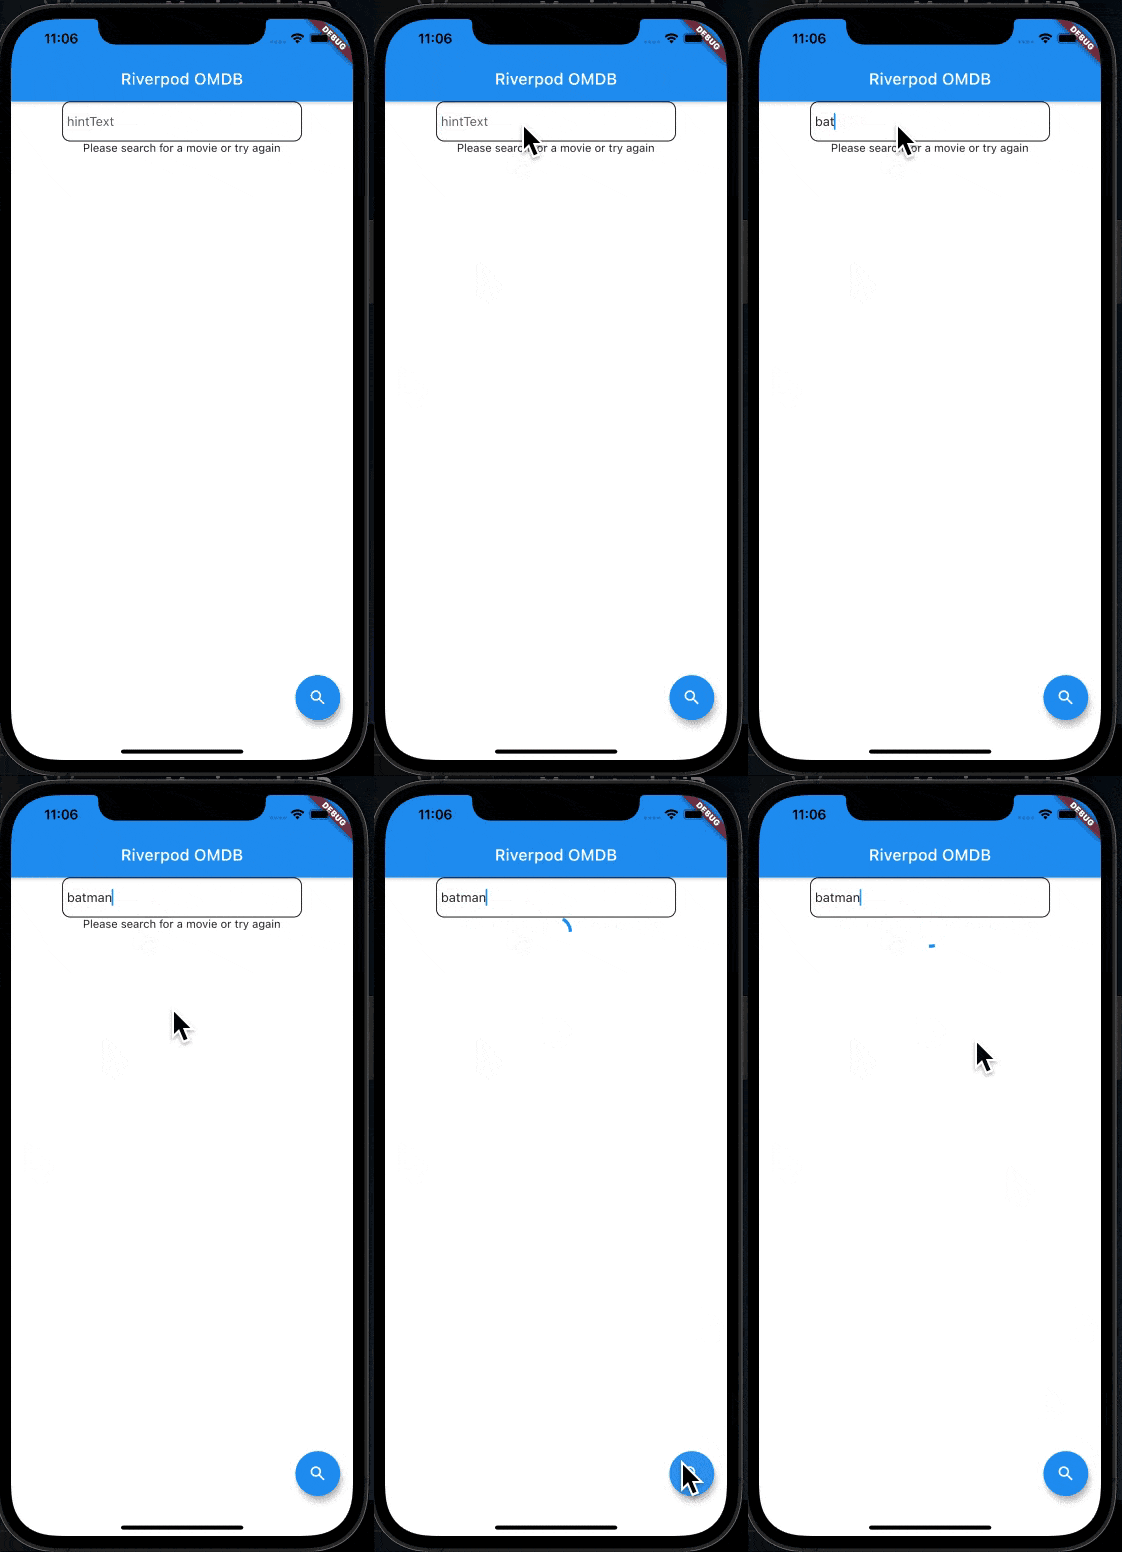
We are building a simple app to fetch movie details from OMDb.

- This is how the dependencies will look like:
dependencies:
  flutter:
    sdk: flutter
  carousel_slider: ^3.0.0
  cupertino_icons: ^1.0.2
  dio: ^4.0.0
  flutter_riverpod: ^0.14.0
- Getting started, we will create view models to communicate between the API and the UI using
movie_provider.dart.
- We have to extend our VM class with
StateNotifier<AsyncValue<Movie>>class as to notify the UI whenever the state changes and to notify the VM when state of type for Movie changes. Since this is an API dependent state, we have to useAsyncValueto perform async tasks and retrieve data from them.
- Initially the state is set to null whenever an API call is made for state changes to load. Once the API returns the data, the UPI is updated and the state is set as data. The code for this is given below:
class MovieProvider extends StateNotifier<AsyncValue<Movie>> {
  MovieProvider() : super(AsyncData(null));
  Movie movie;

  fetchMovie(String movieName) async {
    try {
      state = AsyncLoading();
      var result = await ApiService().getMovieData(movieName);

      if (result['Response'] == 'True') {
        movie = Movie.fromJson(result);
      } else {
        movie = null;
      }
      state = AsyncData(movie);
    } catch (e) {
      print('ERROR in fetching movie ');
    }
  }
}
- Moving forward, we have to create a provider to read the VMs mentioned above using
provider.dart. The code for this is given below:
final movieProvider =
    StateNotifierProvider.autoDispose<MovieProvider, AsyncValue<Movie>>(
        (ref) => MovieProvider());
- The final step is to wrap the main app with
ProviderScope. During this process, we don't have to explicitly create provider objects as in the case of a basic providers package. We can do this by simply extending the main app usingConsumerWidget.
- At this point, we can view an option called
autoDisposewhich takes care of automatically disposing the provider when not in use. The code for this is given below:
void main() async {

  runApp(ProviderScope(child: MyApp()));
}

class MyApp extends ConsumerWidget {
  @override
  Widget build(BuildContext context, ScopedReader watch) {
    return MaterialApp(
      title: 'Flutter Demo',
      theme: ThemeData(
        primarySwatch: Colors.blue,
      ),
      home: HomeScreen(),
    );
  }
}
- Coming to the UI part, Riverpod has made handling state changes easy as compared to Providers with the provision of predefined options analogous to
StreamBuilder. Here's the code snippet for the UI in case if an error :
Consumer(builder: (context, watch, _) {
              return watch(movieProvider).when(
                  data: (movie) {
                    return movie == null
                        ? Center(
                            child:
                                Text('Please search for a movie or try again'),
                          )
                        : Column(
                            children: [
                              Padding(
                                padding: EdgeInsets.all(8.0),
                                child: Container(
                                    color: Colors.black,
                                    height: 700,
                                    child: MovieDetails(movie: movie)),
                              )
                            ],
                          );
                  },
                  loading: () {
                    return CircularProgressIndicator();
                  },
                  error: (error, r) => AlertDialog(
                        content: Text('Something went wrong'),
                        actions: [
                          Row(
                            crossAxisAlignment: CrossAxisAlignment.center,
                            children: [
                              ElevatedButton(
                                  onPressed: () {
                                    Navigator.pop(context);
                                  },
                                  child: Text('Ok')),
                            ],
                          )
                        ],
                      ));
            }),
Consumertakes in abuildContextand awatchtype ofScopedReaderwhich is used to keep track of the given provider for all state changes. Thiswatchmethod is further extended with thewhenmethod which helps in rendering the loading at different states with the help of predefined arguments. For example, loading state is handled by theloadingargument whereas errors can be handled with the help of anerrorargument. Once the data is fetched, we can reuse thedataargument.
context.read(movieProvider.notifier).fetchMovie(movieController.text);is used to handle User driven actions on providers.
Conclusion
To summarise the article, we just saw a classic example of how Riverpod can make the process of updating the UI much simpler. It provides the advantage of reduced inbuilt boilerplate code owing to Riverpod's global presence because of which we won't be required to create objects separately for each screen. Hope this article has made the topic of integrating Riverpod on Flutter apps much easier!
The source code for this segment can be found here.

