NFT Project Series Part 4: Building Our Frontend Through Angular
Learn how to create a frontend for Web 2.0 app using Angular
In the previous part, we build the traditional backend of our Web 2.0 case in the project. In this article of the NFT Project series, we are going to focus on building the frontend for the traditional backend we created last time using Angular. The prerequisite here is to have basic knowledge of Angular, however, I will try to explain as much as possible in the parts we are going to be using. Let's start.
The first thing is installing Angular. For that we need to have Node installed and then run two commands back to back:
npm install -g @angular/cli # this will help us create a new angular project

ng new angular # for creating angular app in the folder named "angular"

cd angular # to go inside our root angular app
So, how will our app look at the end of this tutorial? Here's how:
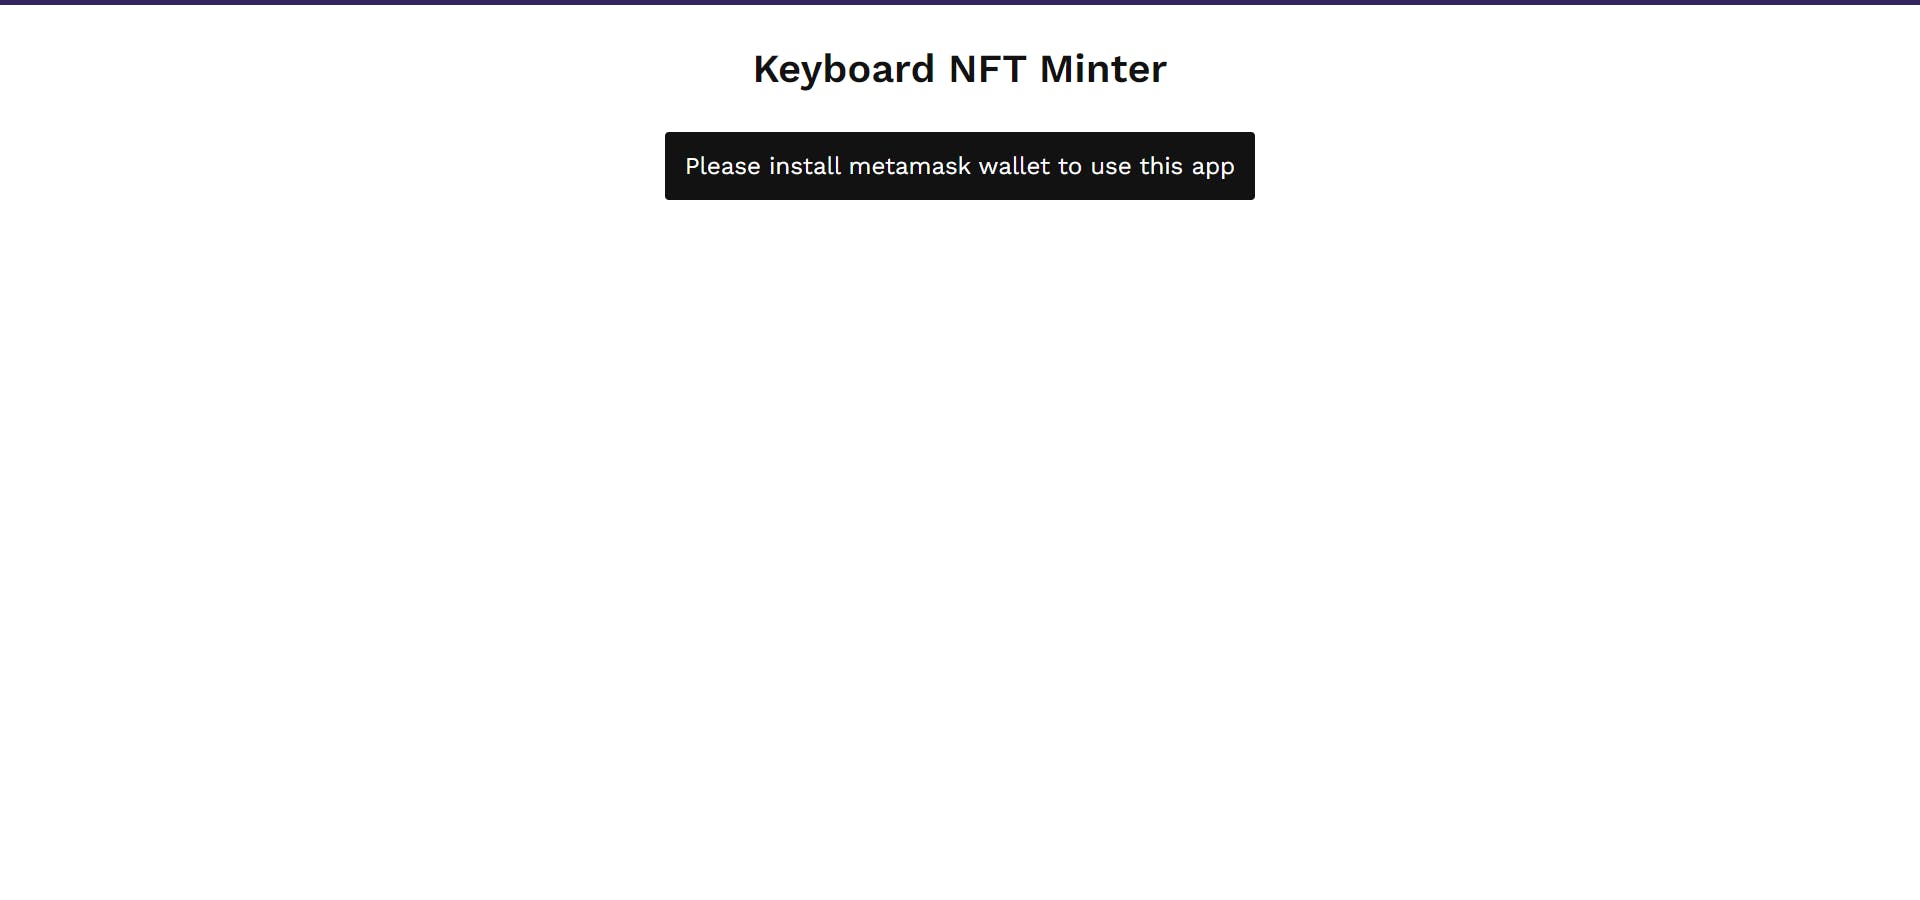
When the required wallet is not installed
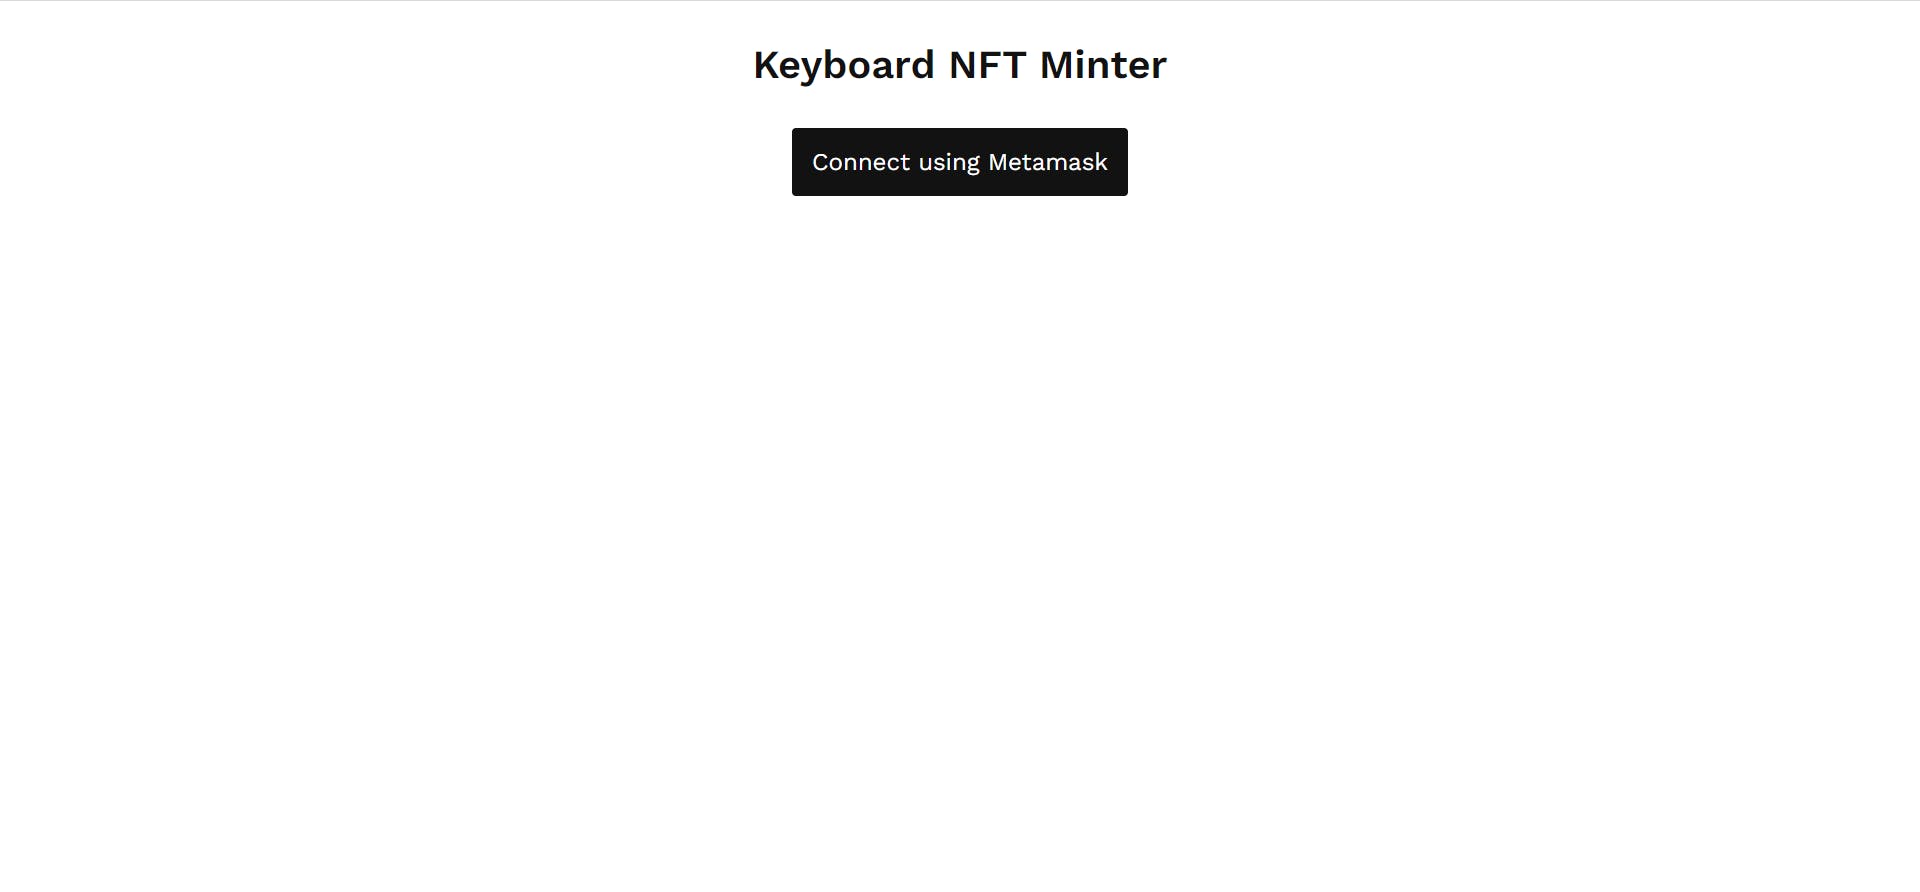
When the required wallet is installed and not connected
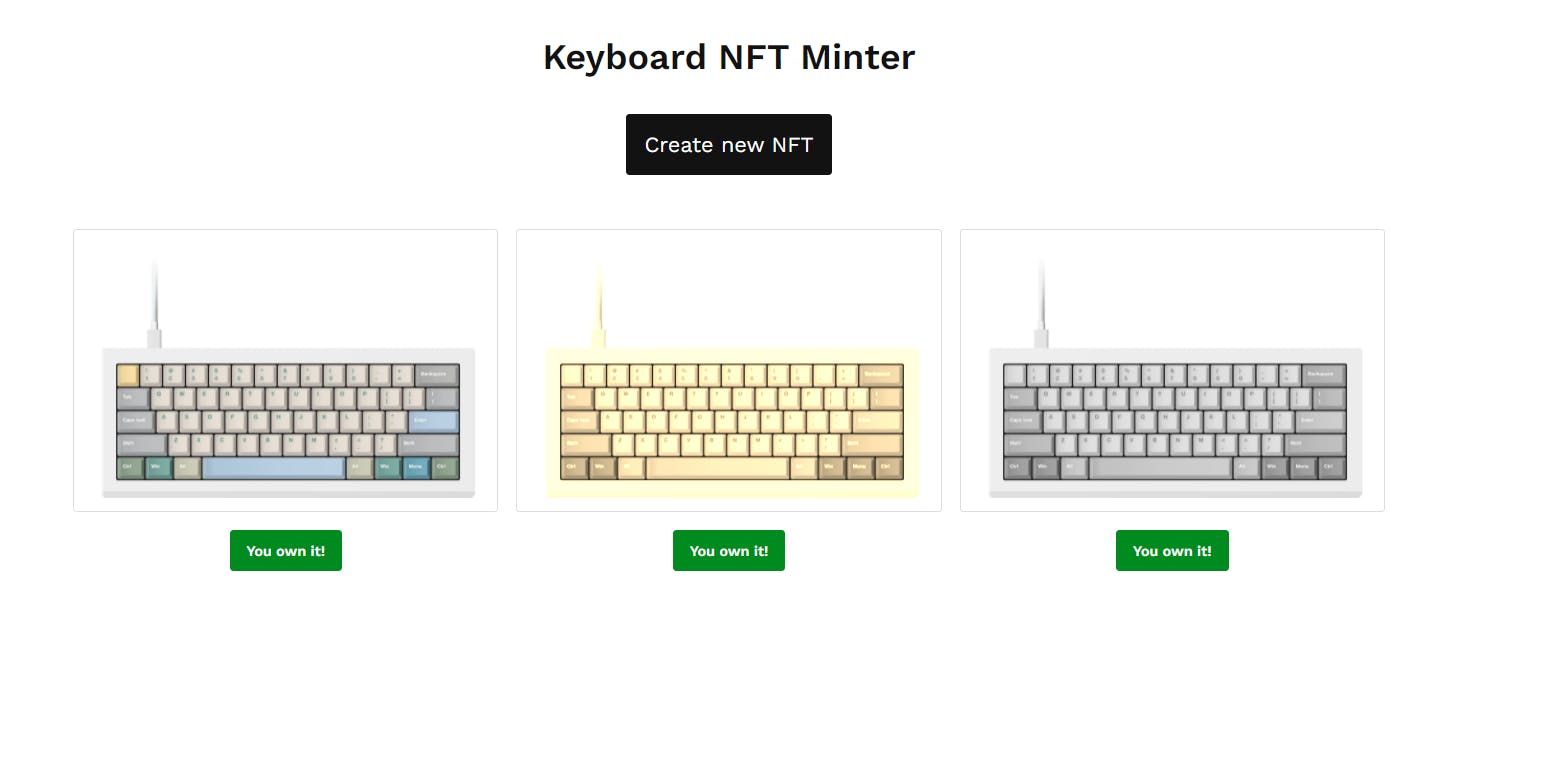
When the required wallet is installed and connected
Keyboard Form Page
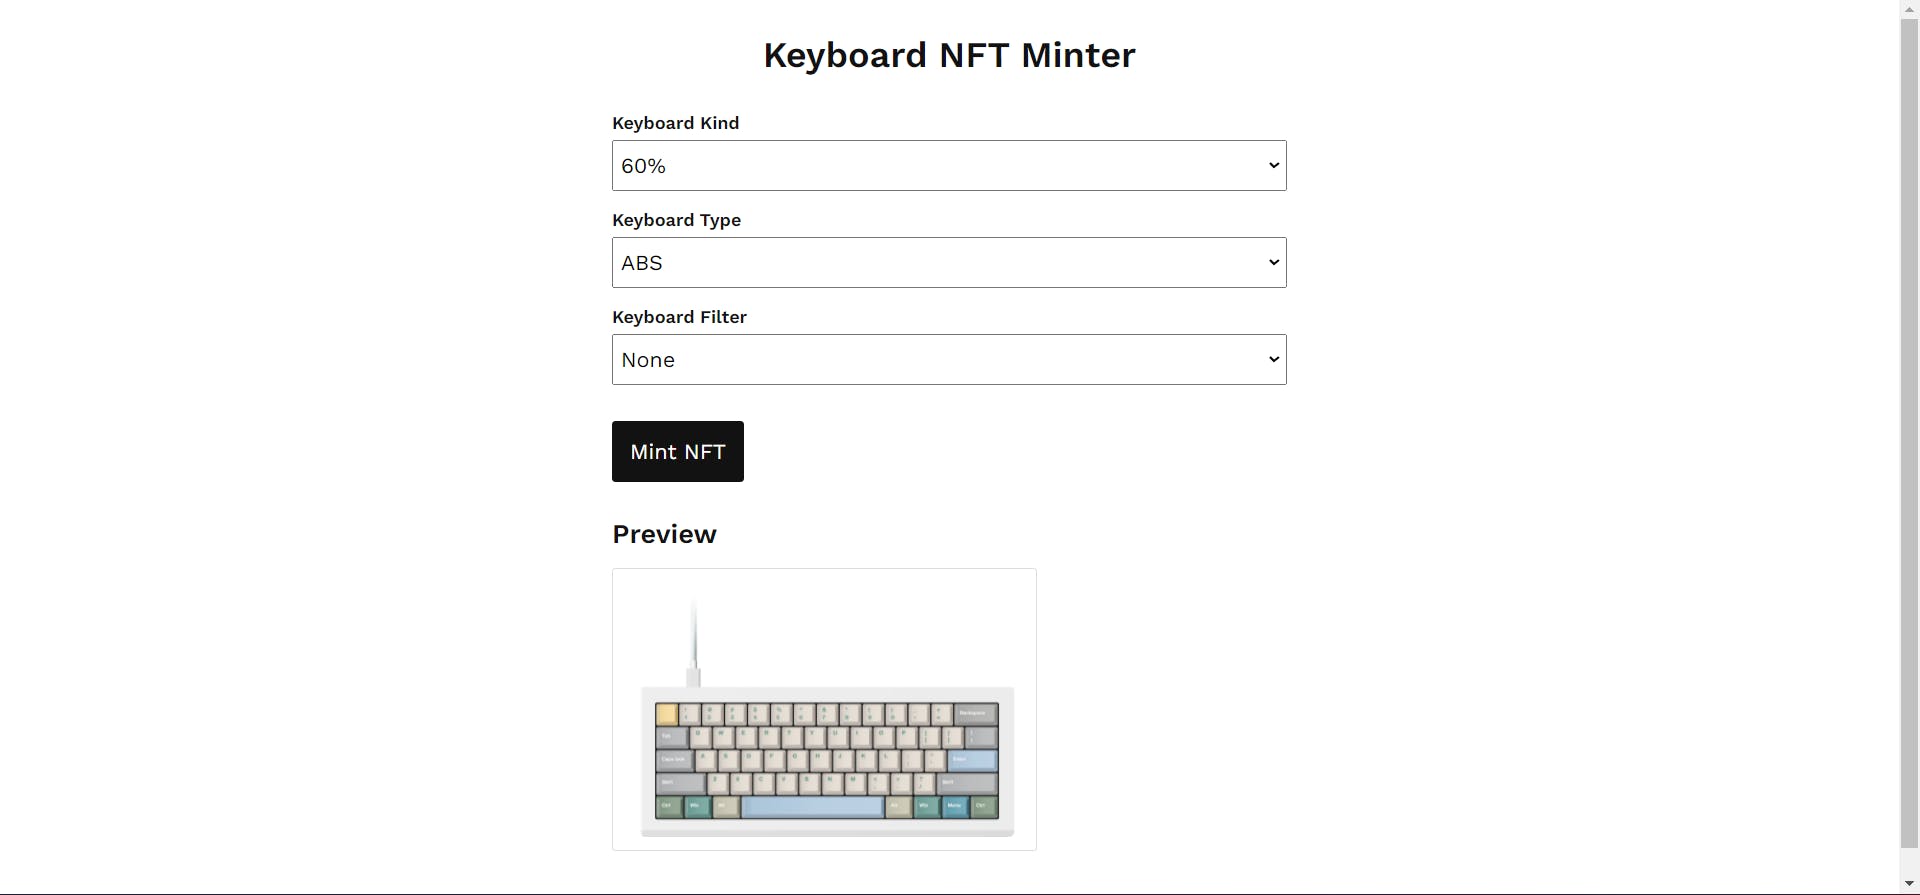
Let me brief you on some important part of the folder structure in angular app:
angular.json: This is where all the important settings in the
Angularapp go. In case of any third party usage forstylesorjs, we can add it in this file.src/index.html: This is the entry
htmlpage of our app. We do head related stuff here.src/styles.css: This is for global styling. We are going to use this for this project as its small.
src/app-routing.module.ts: This is where we do our route pages path setting. We are going to have 2 pages, so we will use this.
src/app.component.ts: This is the entry point of our app where we write
UI business logic JS/TScode.src/app.component.html: This is the file where we write
htmlfor the component.
Now, look at the image below for quick internal explanation:
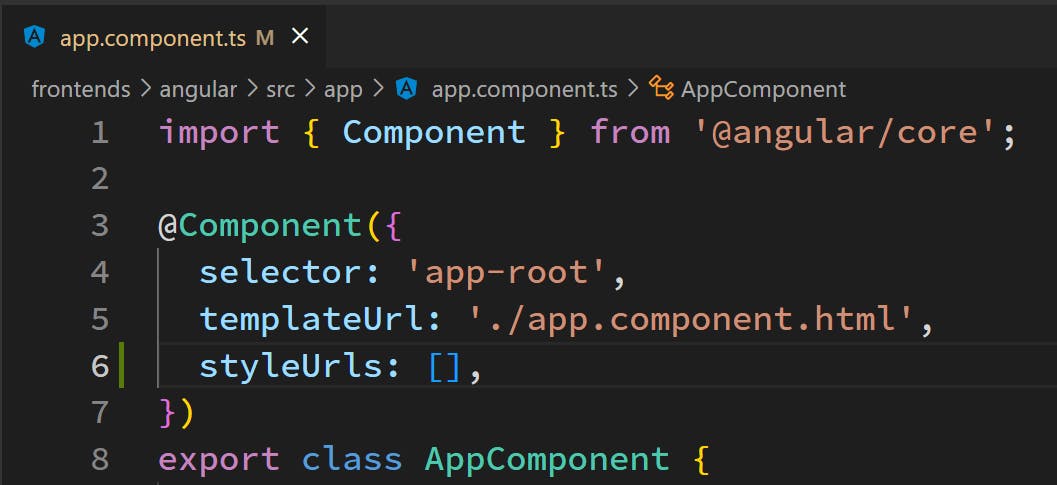
Here, we see three main keywords within the @Component directive:
selector: In angular, we can name our own html element. Here,
selectoris that name. If we go back to ourindex.html, we will find that it has only one root selector element that is present here. It's becauseapp-componentis theroot componentof our app. We render everything within this.templateUrl: This is the path to the
htmlcomponent file which acts like a view template for the current component. It could also be a simple template string html if one wants to write html within thecomponent.tsfile itself. However, that's not scalable.styleUrls: This is an array that takes string values which are path to the stylesheets which are only applied to the
templateUrl html.
Clean Starting Our App
Let's start by cleaning our app. The first thing we will do is go inside our src/app/app.component.ts file and delete everything in it. Then, we will write the following code in it:
import { Component } from '@angular/core';

@Component({
  selector: 'app-root',
  templateUrl: './app.component.html',
  styleUrls: [],
})
export class AppComponent {
  public appName: string = 'Keyboard NFT Minter';
}
Here, we are importing Component from @angular/core and setting up our root selector app-root. Anytime we use <app-root></app-root> anywhere in our app, it will render whatever is present inside the templateUrl path html component page. We don't have any styles associated with specific pages in our project but one general style.css. The name of our app is Keyboard NFT Minter.
We now go inside our app.component.html file and put the following code in it:
<main class="home">
  <h1 class="heading">{{ appName }}</h1>
  <router-outlet></router-outlet>
</main>
The {{ appName }} in Angular renders the value of the same variable which is defined inside the class component file associated with this template. It should be public to be accessible here in this file. The <router-outlet></router-outlet> is a cool way to display the element based on route path. Basically, based on the path, it renders different component in its place. We'll look into it later.
Finally, we go to our styles.css file present in the root src folder and put this design code:
@import url("https://fonts.googleapis.com/css2?family=Work+Sans:wght@400;600&display=swap");

*,
::after,
::before {
  margin: 0;
  padding: 0;
  box-sizing: border-box;
  font-family: "Work Sans", sans-serif;
}

html {
  font-size: 100%;
}

body {
  color: #121212;
  background-color: #ffffff;
  padding: 2rem;
}

.home {
  display: flex;
  align-items: center;
  justify-content: center;
  flex-direction: column;
  margin: 0;
  padding: 0;
}

.btn {
  outline: none;
  border: none;
  padding: 1rem;
  font-size: 1.2rem;
  border-radius: 0.2rem;
  cursor: pointer;
}

.btn-tip {
  padding: 0.7rem;
  font-size: 0.8rem;
  font-weight: 600;
  background: #0077ff;
  color: white;
  margin-top: 1rem;
  width: 100px;
}

.btn-no-tip {
  padding: 0.7rem;
  font-size: 0.8rem;
  font-weight: 600;
  background: #008b1f;
  color: white;
  margin-top: 1rem;
  width: 100px;
}

.btn-black {
  background: #121212;
  color: white;
}

.btn-black:hover,
.btn-black:active,
.btn-black:focus {
  background: #121212de;
}

.btn-link {
  text-decoration: none;
  display: inline-block;
}

.heading {
  margin-bottom: 2rem;
}

.nfts {
  margin-top: 2rem;
  display: grid;
  grid-template-columns: auto;
}

@media (min-width: 760px) {
  .nfts {
    grid-template-columns: auto auto auto;
    gap: 1rem;
  }
}

.preview {
  margin-top: 2rem;
  display: flex;
  align-items: center;
  width: 80%;
  margin: 2rem auto;
  max-width: 600px;
}

.borders {
  border: 1px solid #ddd;
  margin-top: 1rem;
  border-radius: 0.2rem;
  padding: 0.5rem;
}

.none {
  filter: none;
}

.sepia {
  filter: sepia(100%);
}

.grayscale {
  filter: grayscale(100%);
}

.invert {
  filter: invert(100%);
}

.hue-rotate-90 {
  filter: hue-rotate(90deg);
}

.hue-rotate-180deg {
  filter: hue-rotate(180deg);
}

.form {
  width: 80%;
  margin: auto;
  max-width: 600px;
}

.form-group {
  display: flex;
  flex-direction: column;
  margin-bottom: 1rem;
  gap: 0.4rem;
}

.form-group label {
  font-weight: bold;
}

.form-group select {
  font-size: 1.2rem;
  padding: 0.6rem 0.2rem;
  cursor: pointer;
}
At this point, our initial app setup is done. If we run it now, we will see the page with our app name printed in it like so:

Creating Our Routing Components
Now, to create our components in Angular, we will leverage the ng cli-tool that our angular comes up with. So, we need two pages level components at this stage, namely: HomeComponent and CreateNftComponent. So, let's run the commands in our terminal like:
npm run ng g c home
and then
npm run ng g c create-nft
This will result in two new folders within the app folder:
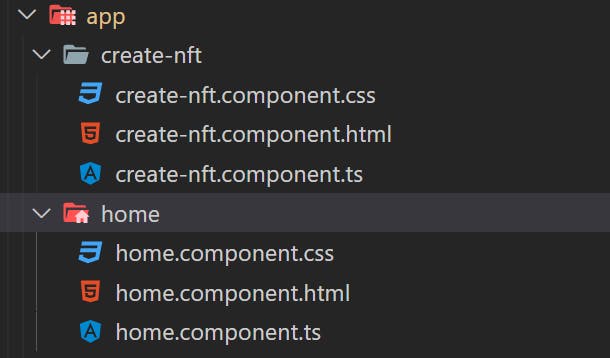
I have deleted the spec.ts files from both the folders which is a test file. We don't need it here.
Now let's go inside our app-routing.module.ts file to tell our app as to which path renders what component.
import { NgModule } from '@angular/core';
import { RouterModule, Routes } from '@angular/router';
import { CreateNftComponent } from './create-nft/create-nft.component';
import { HomeComponent } from './home/home.component';

const routes: Routes = [
  {
    path: '',
    component: HomeComponent,
  },
  {
    path: 'create-nft',
    component: CreateNftComponent,
  },
];

@NgModule({
  imports: [RouterModule.forRoot(routes)],
  exports: [RouterModule],
})
export class AppRoutingModule {}
Let's break the code. The Routes array is where we define our path and the components to render when you visit that path. So, when on empty path, meaning our root path of '', we render HomeComponent. Similarly, on create-nft path, we render CreateNftComponent. This array is all we will need to edit. The rest is configured out of the box for us if during the Angular Project creation, we have allowed routing out of the box. However, if not, then we also need to go to our app.module.ts file and import the routing module:
import { AppRoutingModule } from './app-routing.module';
and then we put it inside imports array:
@NgModule({
  declarations: [AppComponent, CreateNftComponent, HomeComponent],
  imports: [
    BrowserModule,
    AppRoutingModule
  ],
  providers: [],
  bootstrap: [AppComponent],
})
export class AppModule {}
This will allow our routing module to now work perfectly. Anytime we need to use a module anywhere in our app, we must declare it inside imports array in our main app-module file. All the components we want to use inside our module, must be put inside declarations array of our module.
Now try going back to our app and at the root we will see something like home works! printed as well. Manually going to /create-nft route will show create-nft works! printed now along with our app title. The respective route components are being rendered in place of <router-outlet></router-outlet> as intended.
Now, let's start modifying our page components as we need it to be. We'll start with our home.component.html file:
<a
  *ngIf="!isIdentified"
  href="https://metamask.io"
  class="btn btn-black btn-link"
  target="_blank"
>
  Please install metamask wallet to use this app
</a>
<button
  *ngIf="isIdentified && !isConnected"
  class="btn btn-black"
  (click)="connectMetamask()"
>
  Connect using Metamask
</button>
<ng-container *ngIf="isConnected">
  <a class="btn btn-black btn-link" routerLink="/create-nft"> Create new NFT </a>
  <app-show-nfts></app-show-nfts>
</ng-container>
If we notice the plain texts here, we will see it resembles our pages at the start of this article. Basically, we have the following three conditions:
If users don't have
metamask walletinstalled, we will tell them to please install it. We will provide them a link to visit theofficial metamask wallet siteto setup their metamask.If users have
metamask walletbut it is not connected with our app, we will show them the button to connect their wallet.If users
have metamask walletinstalled and they are also connected, we will show them a link to take them to ourcreate-nftpage and also display all our already present minted NFTs by them and other users.
We now go to our home.component.ts file and populate it with following code:
import { Component, OnInit } from '@angular/core';

@Component({
  selector: 'app-home',
  templateUrl: './home.component.html',
  styleUrls: ['./home.component.css'],
})
export class HomeComponent implements OnInit {
  readonly METAMASK_KEY: string = 'metamask';

  public isIdentified: boolean = false;
  public isConnected: boolean = false;
  public ownerAddress: string = '';
  constructor() {}

  ngOnInit() {
    if (this.checkIfMetamaskInstalled()) {
      this.isIdentified = true;

      if (this.checkIfMetamaskConnected()) {
        this.connected();
      }
    }
  }
  private checkIfMetamaskInstalled(): boolean {
    if (typeof (window as any).ethereum !== 'undefined') {
      return true;
    }
    return false;
  }

  private checkIfMetamaskConnected(): boolean {
    if (localStorage.getItem(this.METAMASK_KEY)) {
      return true;
    }
    return false;
  }

  private storeMetamask() {
    localStorage.setItem(this.METAMASK_KEY, this.ownerAddress);
  }

  private connected() {
    this.isConnected = true;
  }

  public async connectMetamask() {
    const accounts = await (window as any).ethereum.request({
      method: 'eth_requestAccounts',
    });
    const account = accounts[0];
    this.ownerAddress = account;
    this.storeMetamask();
    this.connected();
  }
}
Let's break it down again. We are defining two boolean variables to distinguish our three UI state. These booleans are: isIdentified and isConnected. We also define a read-only METAMASK_KEY which is a key we use to store our ownerAddress inside our localStorage. As discussed in part-2 of our series, we are not interested in login system.
On our app init, we are checking if we detect the metamask installation in the user's browser through (typeof (window as any).ethereum !== 'undefined') logic. We are using TypeScript so we must use (window as any).ethereum rather than just window.ethereum in our code. If it exists, we make isIdentified = true.
Once we are sure that metamask exists, we immediately check if the metamask key is present inside our localStorage or not, in case the user has already logged in previously. If it is present, we make isConnected = true.
Apart from this initialization code, we have a connectMetamask() function which requests the sign-in from metamask wallet by requesting all the accounts from it, and then stores the address of the first account inside our localStorage. It also sets isConnected = true.
Finally, we go to our home.component.css file and put:
:host {
  text-align: center;
}
This means that this style applies directly to <app-home></app-home> element. This takes care of our home page component. We will see the error on the line where we are using <app-show-nfts></app-show-nfts> in our home.component.html file. That's because that component doesn't exists yet. So, we can quickly run the command in our terminal to fix this error:
npm run ng g c show-nfts
For now, leave it as its default and let's move to the next page component, create-nft.component.html file. Inside this file, we define our form:
<form class="form" [formGroup]="form" (submit)="onSubmit()">
  <div class="form-group">
    <label for="kind">Keyboard Kind</label>
    <select id="kind" formControlName="keyboardKind">
      <option value="0">60%</option>
      <option value="1">75%</option>
      <option value="2">80%</option>
      <option value="3">ISO-105</option>
    </select>
  </div>
  <div class="form-group">
    <label for="type">Keyboard Type</label>
    <select id="type" formControlName="keyboardType">
      <option value="abs">ABS</option>
      <option value="pbt">PBT</option>
    </select>
  </div>
  <div class="form-group">
    <label for="filter">Keyboard Filter</label>
    <select id="filter" formControlName="keyboardFilter">
      <option value="none">None</option>
      <option value="sepia">Sepia</option>
      <option value="grayscale">Grayscale</option>
      <option value="invert">Invert</option>
      <option value="hue-rotate-90">Hue Rotate (90°)</option>
      <option value="hue-rotate-180">Hue Rotate (180°)</option>
    </select>
  </div>
  <button type="submit" class="btn btn-black">Mint NFT</button>
</form>

<section class="preview">
  <app-keyboard
    [kind]="form.get('keyboardKind').value"
    [type]="form.get('keyboardType').value | uppercase"
    [filter]="form.get('keyboardFilter').value"
    [owner]="form.get('ownerAddress').value"
    [preview]="true"
  ></app-keyboard>
</section>
This is a simple Angular ReactiveForm. This whole thing will give errors. So, let's fix it one by one:
- We don't have
<app-keyboard>with us yet so we create it:
npm run ng g c keyboard
Inside the newly created keyboard component, we make sure to write @Input() declarations to stop the prop-drilling errors (yes! I learnt React first!). So, inside keyboard.component.ts file, write:
// rest of the above default code present
export class KeyboardComponent implements OnInit {
  @Input() kind: number = 0;
  @Input() type: string = '';
  @Input() filter: string = '';
  @Input() owner: string = '';
  @Input() preview: boolean = false;

  // rest of default code is here

}
This, for now, will stop the <app-keyboard> errors. But what about the form errors? For that we need to go to create-nft.component.ts file and write following code:
import { HttpClient } from '@angular/common/http';
import { Component, Input, OnInit } from '@angular/core';
import { FormBuilder, FormGroup, Validators } from '@angular/forms';
import { Router } from '@angular/router';

const API_URL = 'http://localhost:5000';

@Component({
  selector: 'app-create-nft',
  templateUrl: './create-nft.component.html',
  styleUrls: ['./create-nft.component.css'],
})
export class CreateNftComponent implements OnInit {
  public form: FormGroup | any;
  public success: boolean = false;
  public error: boolean = false;

  public owner: string = <string>localStorage.getItem('metamask');

  constructor(
    private _fb: FormBuilder,
    private _httpClient: HttpClient,
    private _router: Router
  ) {
    this.initializeForm();
  }

  ngOnInit(): void {}

  private initializeForm() {
    this.form = this._fb.group({
      keyboardKind: ['0', Validators.required],
      keyboardType: ['abs', Validators.required],
      keyboardFilter: ['none', Validators.required],
      ownerAddress: [this.owner, Validators.required],
    });
  }

  onSubmit() {
    const nftObj = {
      kind: this.form.get('keyboardKind').value,
      type: this.form.get('keyboardType').value,
      filter: this.form.get('keyboardFilter').value,
      owner: this.form.get('ownerAddress').value,
    };
    this._httpClient.post(`${API_URL}/nft`, nftObj).subscribe(
      (result: any) => {
        console.log('Result:::', result);
        if (result.success) {
          this._router.navigate(['']);
        }
      },
      (error: any) => {
        console.error('Error in Creation:::', error.error);
        if (!error.error.success) {
          alert(error.error.message);
        }
      }
    );
  }
}
So, we are importing a couple of FormBuilder, FormGroup, Validators, HttpClient, and Router components from our core Angular. Then, we initialize the form in ngOnInit(). We then also code onSubmit() function which sends a post request to our API Backend. If it's a success, we navigate to our home page, otherwise we show the error notification.
Now we go back to our app.module.ts file and add the following imports in array:
// rest of the above code
 imports: [
    BrowserModule,
    AppRoutingModule,
    HttpClientModule,
    ReactiveFormsModule,
  ],
// rest of the below code
And finally, one thing we add in create-nft.component.css file:
:host {
  width: 100%;
}

.btn {
  margin-top: 1rem;
}
This effectively, takes care of our pages component. Now, we move to what I call functional components in this (basically not pages).
Creating Our Functional Components
We have following components to tackle now to complete the whole thing:
- keyboard
- show-nfts
Let's start with keyboard.component.html file:
<h2 *ngIf="preview">Preview</h2>
<div class="borders">
  <img
    [height]="230"
    [width]="360"
    [class]="filter"
    [src]="imagePath"
    [alt]="alt"
  />
</div>
<span *ngIf="!preview">
  <button
    *ngIf="!(owner | addressesEqual: connectedAccount)"
    class="btn btn-tip"
  >
    Tip
  </button>
  <button
    *ngIf="owner | addressesEqual: connectedAccount"
    class="btn btn-no-tip"
  >
    You own it!
  </button>
</span>
Here, we are displaying the preview heading based on the preview flag. This will be visible in the create-nft form page. It won't be present in the keyboards listed in the home page. In the home page, we have Tip or You own it! buttons after the keyboard.
Here, we also are using addressesEqual pipe which we create to equate the owner address present in the already existing keyboards and our current user's address.
Let's edit keyboard.component.ts file now:
import { Component, Input, OnInit, SimpleChanges } from '@angular/core';

@Component({
  selector: 'app-keyboard',
  templateUrl: './keyboard.component.html',
  styleUrls: [],
})
export class KeyboardComponent implements OnInit {
  @Input() kind: number = 0;
  @Input() type: string = '';
  @Input() filter: string = '';
  @Input() owner: string = '';
  @Input() preview: boolean = false;

  public alt: string = '';
  public imagePath: string = '';
  public style: string = '';
  public connectedAccount: string = <string>localStorage.getItem('metamask');

  constructor() {}

  ngOnInit(): void {
    this.displayImage();
  }

  displayImage() {
    const kindDir = this.getKindDir(this.kind);
    const filename = this.type;
    this.imagePath = `assets/keyboards/${kindDir}/${filename}.png`;
    this.alt = `${kindDir} keyboard with ${filename} keys ${
      this.filter
        ? `with
${this.filter}`
        : ''
    }`;
    this.style = this.filter;
  }

  ngOnChanges(changes: SimpleChanges) {
    if (changes['kind']) {
      this.kind = changes['kind'].currentValue;
    }
    if (changes['type']) {
      this.type = changes['type'].currentValue;
    }
    if (changes['filter']) {
      this.filter = changes['filter'].currentValue;
    }
    this.displayImage();
  }

  getKindDir(kind: number) {
    return {
      0: 'sixty-percent',
      1: 'seventy-five-percent',
      2: 'eighty-percent',
      3: 'iso-105',
    }[kind];
  }
For this code to work, we also need to have assets containing some images of keyboards inside src folder. So, you can go to this link to download the assets.
Now, in this file above, we are first getting the metamask wallet address of current user stored inside the localStorage inside connectedAccount. We are then using displayImage() function inside our ngOnInit() to display the image immediately on this component's load.
The getKindDir(kind: number) function takes the value 0, 1, 2, and 3, from the keyboard form and then returns the directory name associated with it. This directory name is present inside the assets folder.
We take the filename from type and we set style using filter value coming from the form. We also track the live changes using SimpleChanges inside ngOnChanges() for these values to live update the keyboard preview.
And this component is done. Now let's quickly make our custom addressesEqual pipe inside keyboard.pipe.ts present inside keyboard folder:
import { Pipe, PipeTransform } from '@angular/core';

@Pipe({
  name: 'addressesEqual',
})
export class KeyboardPipe implements PipeTransform {
  transform(owner: string, connectedAccount: string): boolean {
    if (!owner || !connectedAccount) return false;
    return owner.toUpperCase() === connectedAccount.toUpperCase();
  }
}
Here, we are taking owner's and current connected account addresses and returning either true or false based on their equality.
For this to work, we need to include this inside our app.module.ts file:
// rest of the code
import { KeyboardPipe } from './keyboard/keyboard.pipe';
// rest of the code
declarations: [
    AppComponent,
    CreateNftComponent,
    ShowNftsComponent,
    HomeComponent,
    KeyboardComponent,
    **KeyboardPipe**,
  ],
And that should effectively make our keyboard pipe complete.
Next, we tackle show-nfts component in show-nfts.component.html file:
<section class="nfts">
  <div class="nft" *ngFor="let nft of (nfts$ | async)?.data">
    <app-keyboard
      [kind]="nft.keyboardKind"
      [type]="nft.keyboardType | uppercase"
      [filter]="nft.keyboardFilter"
      [owner]="nft.ownerAddress"
    ></app-keyboard>
  </div>
</section>
Here, we are using the same keyboard component inside section and we are effectively looping through the keyboards we are getting from the database in line ngFor="let nft of (nfts$ | async)?.data". This is how you stream an async data from backend in Angular when you make an http request and don't want to take care of subscription and unsubscription headache.
The nft.keyboardType | uppercase is basically piping Angular uppercase pipe with the type string. Meaning, you are making it capital.
Inside the show-nfts.component.ts, we write:
import { HttpClient } from '@angular/common/http';
import { Component, OnInit } from '@angular/core';
import { Observable } from 'rxjs';

const API_URL = 'http://localhost:5000';

@Component({
  selector: 'app-show-nfts',
  templateUrl: './show-nfts.component.html',
})
export class ShowNftsComponent implements OnInit {
  readonly METAMASK_KEY: string = 'metamask';
  public nfts$: Observable<any>;

  constructor(private _httpClient: HttpClient) {
    this.nfts$ = this.fetchNFTs();
  }

  ngOnInit(): void {
    const owner = <string>localStorage.getItem(this.METAMASK_KEY);
  }

  private fetchNFTs(): any {
    return this._httpClient.get(`${API_URL}/nft`);
  }
}
Here, we define an Observable nfts$ and then in constructor, we write the function fetchNFTs(). This function makes a call to the API_POINT and returns an observable which we use with async pipe in our html file as previously shown.
And that's it! Our app is done.
Testing Out Our App
Let's now test our app, shall we? If anything doesn't work, comment and I'll try to help. For now, we need to first go back to our backend we build in our last part and start it. Then, we start this app using:
npm start
We then go to our localhost URL shown in the terminal and play with our app. The app will be as shown in the beginning of this article. So play around with it, try to create keyboards in two different wallets in two browsers (as we are storing localStorage), to check the tip vs you own it! difference.
Final Words
This was one big read! Congratulations! You made it till the end in this short-attention-span modern world. Tell me if you liked it or not. In the next article, we will build the same frontend in React. See you then. Bye!

